I’ve alluded to it, you’ve waited for it, it’s time for the great dining room floor stenciling reveal. And in true Angie fashion, I’m going to make you wait until the end of the post for the big, BIG reveal. Until then, I’m going to take you back to your seventh grade dissecting days and dissect on down my thought process and steps to the finished project. Let’s take it back here for a refresher on the inspiration for the dining room and back here when I initially stained our dining room sub-floor (old pine boards found under layers of linoleum). Ok…so now that you’re all caught up, I dove right into floor stenciling with my inspiration picture:
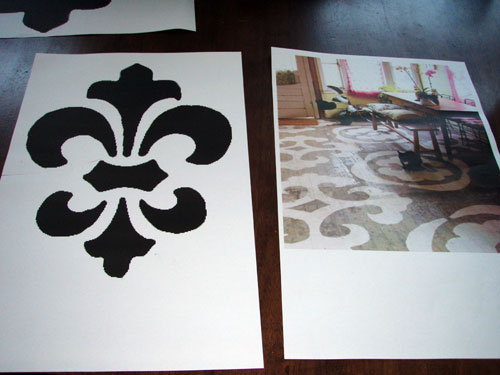
So I absolutely adored the stencil pattern in the inspiration photo. I searched and I searched and I searched for a pattern via Google images but couldn’t find it. I didn’t really want to draw my own stencil pattern so I settled on the fleur de lis as my stencil. I envisioned some kind of circular design with maybe four fleur de lis rotating around an axis point. So as I started cutting out the fleur de lis pieces, it dawned on me that the stencil pattern in my inspiration picture actually was a fleur de lis rearranged. Total “aha” moment.

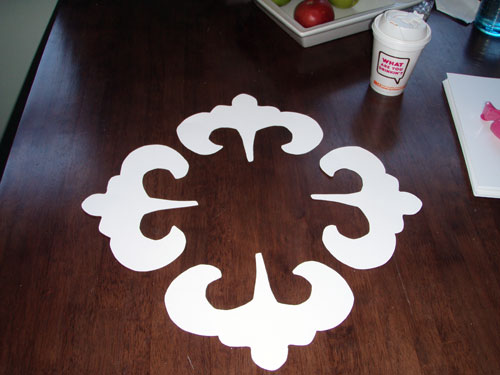
I made four of these out of card stock (totally powered by Dunkin…mmmmm…pumpkin spice coffee):
And then laid a piece of card stock over my four laid out end pieces, free-handed the innards, cut it out of the card stock, and taped the whole thing together, to get this:
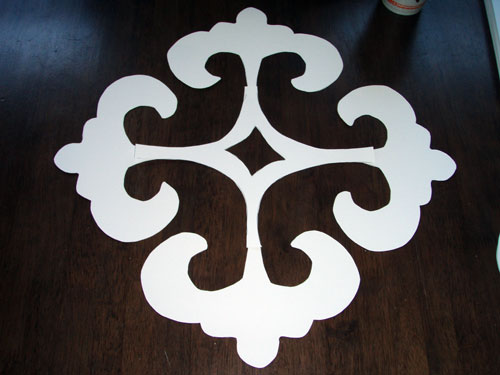
Most perfectly awesome prototype ever! I laid it on the floor to make sure it was the appropriate size and started to think about how I wanted to arrange my stencils on the floor. I decided on a border pattern since there would eventually be a rug in the middle of the floor anyway. So fifteen more stencils later (yes…this perfectionist had the obsessive need to make sixteen total stencils so I could lay them out on the floor simultaneously to make sure everything lined up perfectly) and six hours later, I had the plan all laid out on the floor:

My next step was to start tracing the stencils and filling them in with paint. I really wanted the hand painted look, which is why I went for this type of stencil and not one that you sponge on. Thus, it was hands and knees time (my back is still not forgiving me…man I’m getting old) to start tracing.
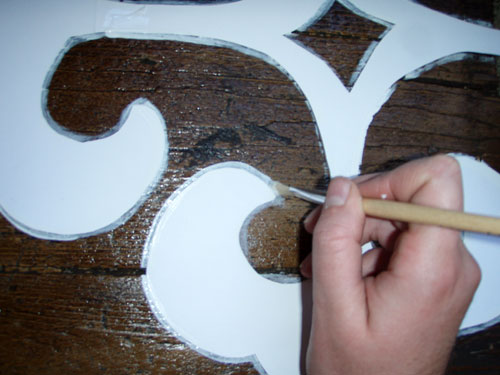
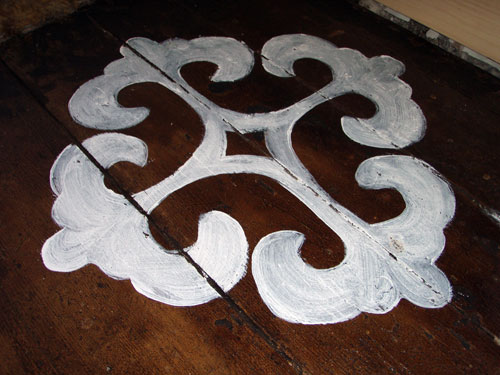
After the pattern was completely traced, I removed the stencil to reveal this:

I decided to just use plain old primer to trace and fill in the design. I was going to use my usual, Valspar glossy white paint but I didn’t think I would get the best coverage. I wanted the paint to look a little rustic but I wanted it to still be white, without the stain bleeding through. Thus, I chose primer over glossy paint. After filling in the design, I realized the primer was the perfect choice and was completely happy with my decision.
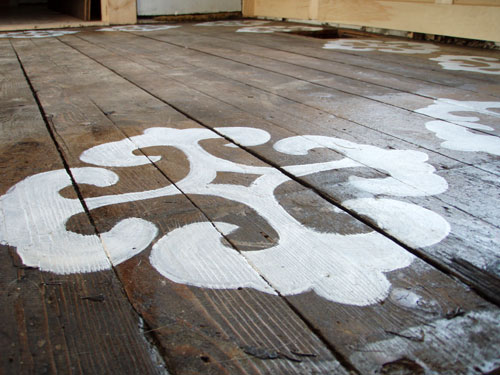
One down…fifteen more to go. Oh and I counted them…all of them…especially since they took me about 45 minutes to an hour to trace and fill in each one of these. Don’t let them fool you, yeah they’re cute, but they are time consuming! But I loved the effect and the rustic charm that was going on.
So…without further ado…the big reveal:

Didn’t it turn out awesome?! That’s with three coats of polyurethane over the stain and stencils. I used the Zinsser Ultimate water based polyurethane. That stuff is awesome! It dries fast making poly projects quick, finishes durable, and is water based for exceptionally easy cleanup. Ok, so another shot of the dining room:

See the parlor floor in the foreground of the photo? That baby is next. If I can work such wonders on an ancient pine board sub floor imagine what I can do to oak flooring!
Ok…so now that things are looking good, real good, in the dining room, here’s my remaining to-do list (which keeps getting longer for some strange reason?!):
- Find a round rug
- Set up the dining room furniture/rug appropriately
- Spray paint and reinstall the heating registers
- Do something with the old closet (I’ve got a super secret project in mind)
- Make some curtains (I’m thinking yellow and stripe-ie since we need to start adding some color)
- Oh yeah…paint the trim
- While I’m at it…paint the cellar door
- Refinish the wine racks and put them in place
- Add some hardware to the window (yeah…it’s still missing hardware…slackers)
- Make a giant chalkboard
- Refinish the dining room table
- Remove the caning on the chairs and figure out how to upholster them
- And I’m sure I’ll think of ten more things for every item I check off the list
So with that…Angie is officially tired and down for the count. Have a great weekend everyone!
Pssst…Anyone else recently stencil their floors? I’m always so amazed how well floor stenciling looks but always so scared to try it! I figured no harm could possibly come from stenciling our “temporary” sub floor.

OMG! Looks terrific!
Good Heavens, that is fabulous! I can’t begin to imagine the time involved but it was SO worth it!
Dropping by from TipJunkie!
Awww…thanks so much! Definitely a time consuming project, not for the weak or faint of heart, but it was so worth it in the end! And the cheapness factor, essentially free, was a plus too!
Fabulous! So I had to subscribe to your blog so I can keep up with your progress! Thanks for all the great ideas!
Yay! Thanks for the comment and for subscribing! Here’s to blogger domination one subscriber at a time….I kid I kid! Thanks again for the sweet comment!