If there was a tagline to this post in addition to the title it would definitely be “How To Install Balusters…The Angie & Colby Way”. By no means are we experts or even pretend to be. We just do what works for us at the time, usually after a little research, hope for the best and blog about it in the end. We adore how our baluster project turned out (read more about it and check out more finished pics back here) and as promised, here’s the skinny on how we installed them.
First off, let me preface that Colby is the carpenter of the house. I’m usually just the annoying photographer cute accessory off to the side as he’s doing the work. Unfortunately, he’s still at work as I’m writing this so this could be interesting! No promises what kind of random, not at all technical jargon comes out tonight. So let’s get right to it. First up, we had to determine the center points for where the baluster would attach to the stair tread and the banister.
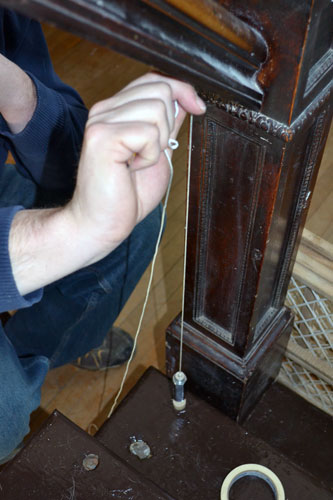
A plumb bob was extremely helpful for this task since it ensured vertical levelness. Then Colby marked his center point on the stair tread, where the point of the plumb bob hit the tread.
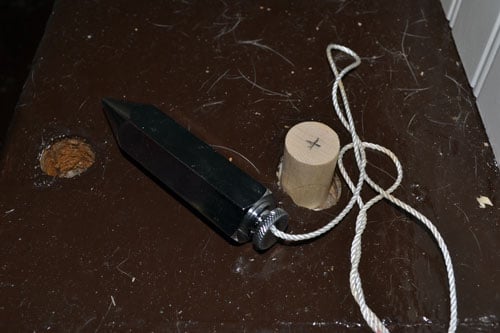
See the “X” on the dowel? That’s the center point. And I forgot to mention, we used 7/8″ wooden dowels to attach the baluster to the tread. Then he also marked the center point on a piece of tape attached to the underside of the banister. That was the point there the end of the string hung from.
The masking tape was just there so he wouldn’t draw all over the banister with a permanent marker. With his marks in place, Colby was then able to take all the measurements for baluster cuts. He would later re-measure, you know the old saying “measure twice cut once”. We definitely went by the books with that rule! We were scared to death to cut the balusters since one wrong cut would essentially ruin our project and the tight turn around/completion time for Pinterest Challenge reveal day. But thankful all cuts were perfect…enter huge sigh of relief. Next step, was double checking the levelness of the two points and determining the angle of the banister.
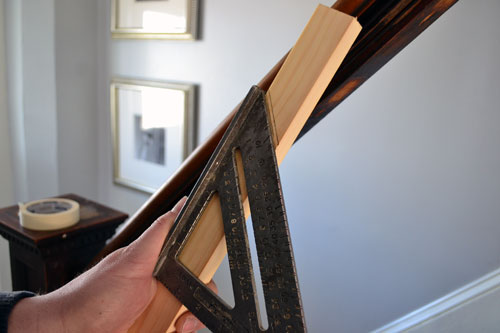
Colby determined the angle by first drawing it on his test baluster (a scrap piece of wood) and then he brought out the square. Thankfully the banister was a perfect 45 degrees making cuts simpler.
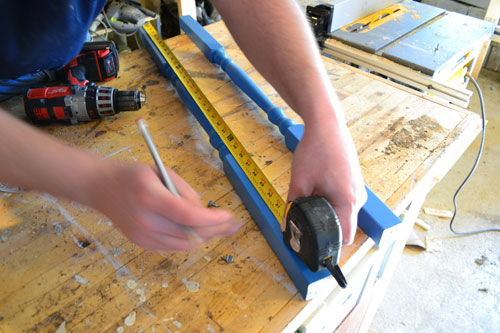
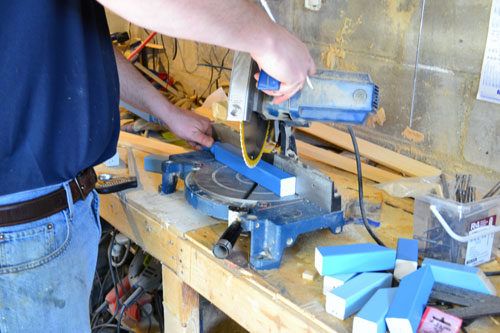
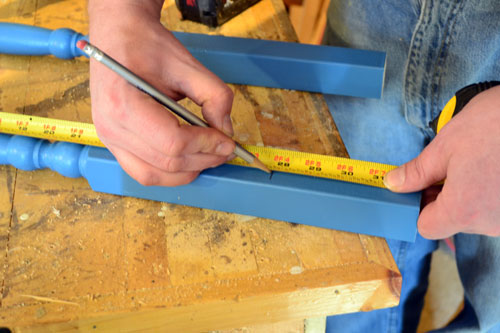
Then it was down to the basement workshop to measure and cut the banisters (here’s where I get a little confused so bear with me as I attempt to pass on my confusion to you in a clear manner). Colby worked on one pair at a time, since each stair tread had two balusters of the same color. First, he measured the baluster closest to the riser. He measured a consistent distance from the top of the baluster down and marked the cut point.
And word of caution…not all balusters are the same on the top and on the bottom so make sure you define which is the top and which is the bottom for all of them before making cuts! Then, using the miter saw set at 45 degrees, he made the angled cut.
Only one cut needed to be made for the first (the taller) baluster. Then for the second baluster, the shorter one, Colby measured the same consistent distance from the top down to make his angled cut. Then he chopped off the excess length from the bottom to make the baluster the correct height to fit the shorter span. This made the detailing of the balusters look like they were ascending parallel to the banister.
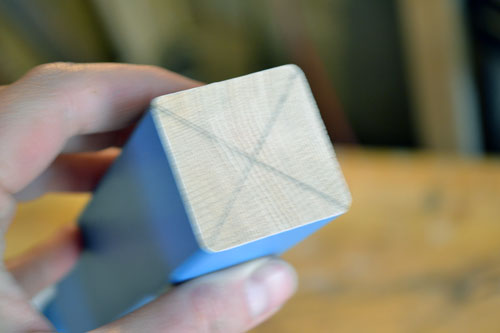
The next step was drilling a hole in the bottom of each of the balusters to attach to the wooden dowel, which would essentially join the baluster to the tread. Colby started by using his square to draw an “X” on the bottom of each baluster. Where the lines intersect is the center point.
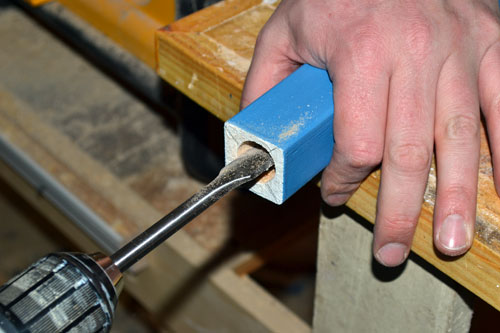
Then using a 7/8″ spade bit, he drilled a hole in the bottom of each baluster. Word of advice, use a quality spade bit. Spend a few extra dollars for one that will make easy, smooth cuts. Believe me…it’s worth it!
Back upstairs we went to begin installing the properly cut to length balusters. Before attaching anything, Colby wanted to double check…actually I think it’s more like triple check, the alignment and levelness of each baluster. Thankfully, things were looking almost perfect. And almost perfect is good enough in our nothing is square or level old home.
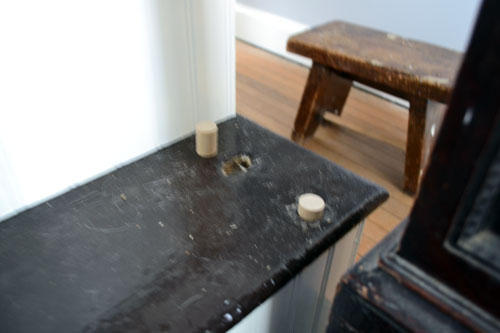
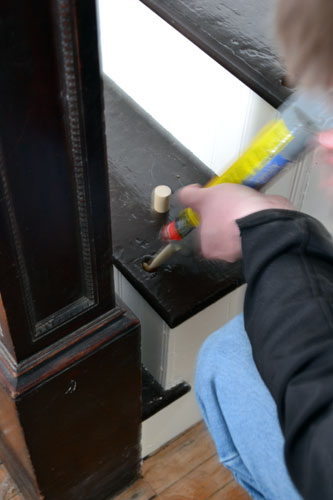
Using construction adhesive, Colby glued each dowel into the old hole in the treads from the old balusters.
Sorry for the fuzzyness of most of these pictures. Apparently I was too busy holding my breath to take quality pictures. Sheesh!
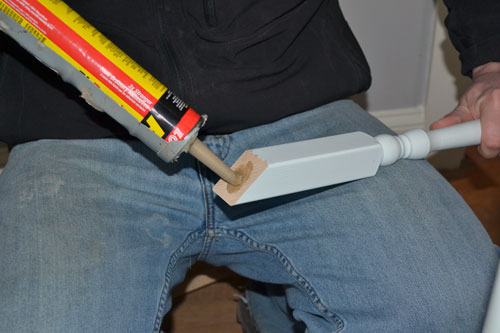
Then he applied construction adhesive to the angled part of the baluster that would attach to the underside of the banister.
And finally attached the baluster in there.
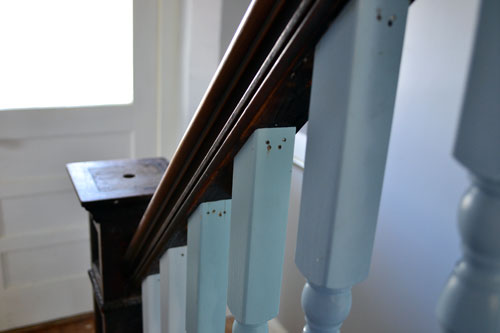
To secure the top and prevent the baluster from twisting, he tacked the top of it with a pair of nails using our Paslode finish nailer.
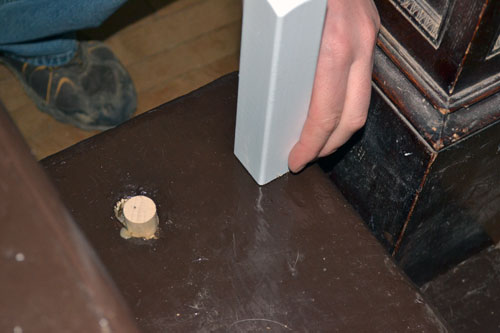
So Colby continued to install the balusters, two at a time until he hit about the sixth one in. That’s when trouble reared its ugly head. Remember when I told you nothing about our house is square or level? Well, apparently we weren’t lucky enough to have squareness when it came to our balusters. Here’s the problem. See in the picture below, the one with Colby is sporting his worried face? The baluster Colby is holding is vertically level. Now see how far away from the banister it is? Uh-oh!
The first couple of balusters were just a little off in vertical levelness, but then they started getting progressively worse. Turns out, the newel post at the base of the staircase is not aligned with the post at the top of the staircase and none of the old baluster holes in the treads (the ones we were using) were aligned between the two posts.
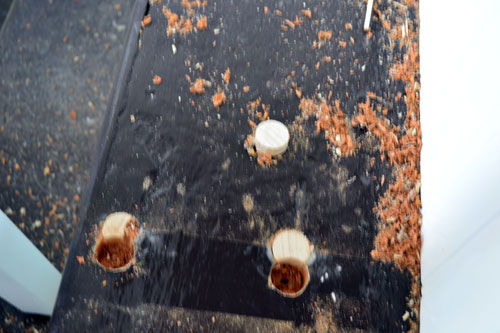
Because things like this drive Colby absolutely nuts, he had to fix it. So out came the first six or so balusters he installed. He filled the old holes with dowels, patched and sanded the treads down, and drilled new holes making sure everything was aligned.
Thankfully, this didn’t mess up any of the already cut balusters. Phew! Once the treads were fixed and new holes were drilled, it was smooth sailing installing all 16 of our new balusters. Once it was all said and done, we were left with a little finish work to tackle.
A little bit of nail hole puttying, sanding, and painting. And we also had to touch up the tread paint/poly where Colby moved the dowel holes. But the whole touch up process didn’t take much longer than an hour. In the end we were left with an amazing staircase that I couldn’t be happier about.
There’s still a little bit of work to do in the hallway/staircase area but things are looking mighty finished these days! So what’s left you ask? We want to refinish the hallway floor. Its years left uncared for under old shag carpeting left it looking dingy and damaged. It’s not in great shape and we have intentions of replacing it eventually but that’s still a long way down the road. We also want to sand down the banister and newel posts and give them a new finish. We still need to reattach the cap from the bottom post which is MIA in these pictures. The darn thing keeps falling off! Maybe it’s telling us we should stop grabbing it as we come swinging around the stairs. My bad!
Pssst…Phew! That was a long one! How’d I do?! I’m so grateful we can check that project off the list. I think this weekend we’ll tackle some smaller projects to give us a bit of a break from the great baluster installation project of 2012. What are your plans for weekend projects? Anything big and super exciting? Or are you going to be like us and putter around the house for a couple of days?






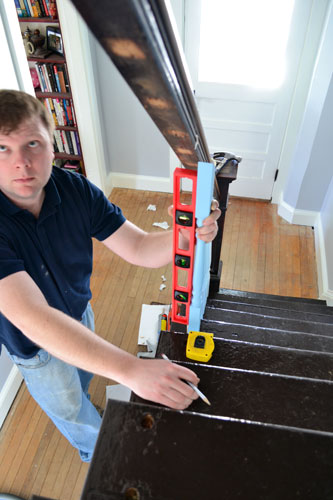


Just to warn Colby, Anthony has already read through this blog and noticed the torpedo level that Colby was using in one of your photos, specifically the color!! I think he plans on using this information at a future time when he needs a favor or a little ammunition. Wonderful job, Colby!!
Hahaha! Yes Colby was using my pink tools (said as he hangs his head in shame). They’re just easier to get to! My tools live under the kitchen sink while his are ALL THE WAY down in the basement!
I feel your pain, nothing in our house is square or level either. We are attempting to install So Simple Crown (a special kind of crown molding thats made from styrofoam and hung using caulk…because our walls are solid stone under plaster and so a nail gun and regular MDF won’t work! hooray) and am crossing my fingers it works because our walls are…wavy.
The balusters look awesome! What did you do with the old ones? Also, can you ask Colby how to fix a loose baluster? We have a railing thats fine structurally but one of the balusters is a little loose. Do I have to take them all out just to fix the one?
Neat! That So Simple Crown product sounds so interesting! I’ll have to check it out. Okay…as for balusters, I’ll send you an email with more details but here’s the low down. The old ones we took to the dump. Three of them were broken when we moved in and two more snapped shortly after. They were the really thin ones, so thin that our 50 lb dog broke one running up the stairs.
And to fix your loose baluster (the Colby way) you have two options…a quick fix and a more solid fix. The solid fix includes removing the baluster (just the one…you can fasten it from the sides too), applying construction adhesive to the top and bottom of the baluster, putting it back in place, then drill two small pilot holes into the top, and nail a pair of finish nails into the pilot holes (you know…from the baluster into the banister). For extra security you could also drill pilot holes and pound in nails to the bottom, where the baluster attaches to the tread. The quick fix, skip the removal/adhesive step and just drill pilot holes/nail in finish nails at either the top or the bottom (or both) where the baluster is loose. Hope that helps! And more importantly makes sense! If not, email me! We can chat it out!