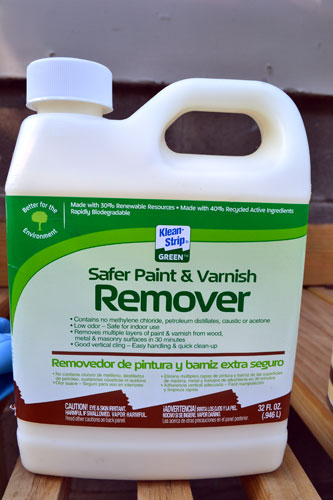
When we last left off in the dining room door refinishing project, we had finished priming and painting the door. Meaning we still had to fix the door casing, prime and paint the casing, and refinish the door hardware. Originally, I had planned to spray paint the hardware oil rubbed bronze. But when I told Colby my game plan he cringed his face up like a pug…and not one of those cute ones. He was right. I definitely felt guilty spray painting original hardware in the house. But it needed help because the multitude of paint layers on the hardware wasn’t cute either. Enter The Klean-Strip Safer Paint & Varnish Remover that I picked up from Lowes for $10.
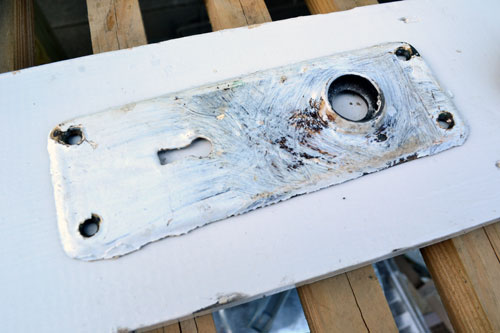
The game plan…remove the layers of paint off the hardware for a restored look…I call it Operation Hardware Restoration. I wasn’t sold that this was going to work but I was willing to give it a try. I tested out the product first on one of the escutcheon plates. I know…big word, right?! I learned it from my millwork salesman boyfriend. It’s basically the general term for a decorative plate used to conceal a functioning, non-architectural item.
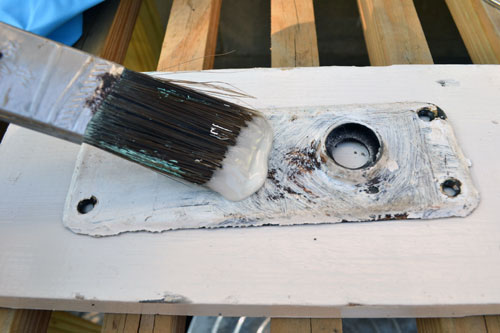
Per the bottles directions, I poured a small amount of the goo (highly technical term) into a metal can (a coffee can worked wonders) and brushed it onto the plate pretty liberally.
The bottle then recommended waiting at least 30 minutes before test paint scraping. I waited nearly an hour and when I came back to my project, it looked all crazy town with paint peeling right up off the plate.
Using an old toothbrush, I brushed the paint off the strange, angular areas.
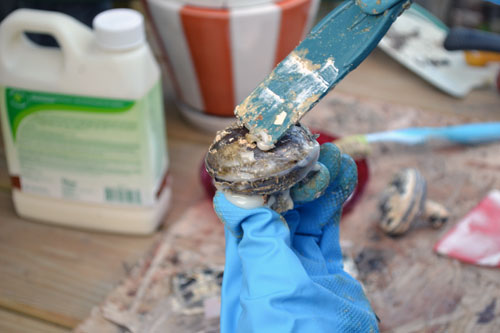
And just scraped the flat areas using a putty knife, which came up super easy.
I kept scraping and scraping and scraping until the whole first layer of paint came right up. Even after the first round of paint remover/scraping, I could already see the original finish below the paint in some areas.
At this point I was pretty confident that this method would work so I retrieved all the other door hardware pieces and started removing the paint on those too.
I used the same process: brush on the paint remover goo, let it sit for about an hour, and then scrape/brush it off. I found the putty knife scraper worked much better than the toothbrush. It just peeled off all the old paint.
The toothbrush technique worked well too, but I wish the brush was just a little stiffer. It did a good job in those strange nooks and crannies, but it just wasn’t strong enough to REALLY remove all that old paint.
After the first round of paint removing, there was still alot of paint left to remove. There was a ridiculously amount of paint layered on all that hardware. In the end, I went through three rounds of goo applying/scraping. Then, on the final round, I used an old rag to remove all the paint remover goo and residue.
By the time I hit this point of my project, mother nature just wasn’t cooperating. With the rain coming down, I moved from outside to the basement workshop…aka…the man cave. Typically, girls aren’t allowed. But I was allowed a working with chemicals exemption. But anyway…I quickly discovered that just wiping off all the goo and residue just wasn’t going to work. Some of the paint/goo would smear around and wouldn’t come off the hardware.
You can see the goo/paint residue really well in the pic above. Some pieces of hardware, such as the hinges, cleaned up much nicer.
To remove the last of the paint removing goo, I broke out the mineral spirits to REALLY clean up the hardware before installing it. I poured some of the mineral spirits into a plastic container to use like a tub. Then, using a dish scrubber from the kitchen, I washed and scrubbed the hardware in the mineral spirits, kind of like doing dishes. It even involved dish pan gloves. Please, if you try this project at home, wear gloves! Their life hand savers!
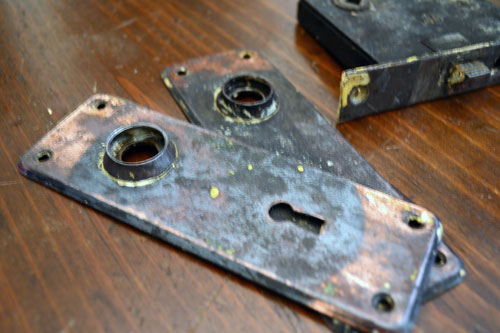
In the end I was quite happy with the removing-paint-from-hardware results.
The hardware pieces are by no means perfect, but I love them for that. Some of the pieces still have some stubborn flecks of paint. These plates are sporting some copper tones and black tones simultaneously, but I totally dig.
Colby and I have a theory going that the reason why the plates above are funky colored is because they had been through a fire waaaaaayyy back when. But who knows because the doorknobs seem to be fine.
I’m completely thrilled with the results of this project. Not only did we get a great finish on some great, old hardware that is original to our 1910 home. We’re assuming it’s original since it’s SOLID and is really, really old. But we also did it on the cheap. The total cost for this project was the $10 I spent for the paint remover, which I only used a fraction of it. I may whip the stuff out in the near future to work on the front door hardware as well.
I hope you enjoyed our little how to restore old hardware post and can find it useful in your old home renovation. Old home owners and do-it-yourself-ers unite! And I 100% stand behind the Klean-Strip Safer Paint & Varnish Remover. That stuff rocks! And it’s relatively odor free, although kind of messy but that comes with the territory, and it’s a greener product than other similar paint removes. Angie and Colby (not to be confused with Siskel and Ebert) give it two thumbs up. And no I was not paid or perked to rave abut their product, I just really liked it.
Pssst…Stay tuned for more from the great dining room door refinishing project. I’m hoping to have the door installed by the end of the week…fingers crossed!

