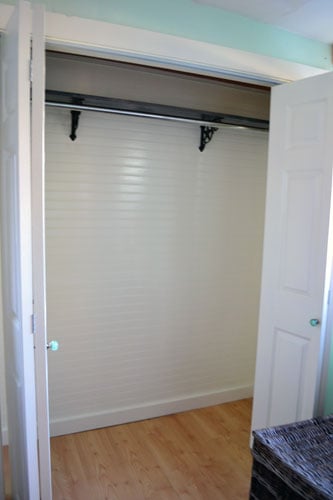
Is it stuck in your head too? You know…the nineties pop song?! Let me help you remember. I introduce to you the musical stylings of Ms. CeCe Peniston circa 1991. It’s coming back to you now, isn’t it. Welcome to my head where that song has been on perma repeat for the last 48 hours as we’ve FINALLY finished our closet remodel…booyah:
And now for a little closet project timeline for those of you who weren’t around when we started this project back in May (things got in our way…you know…like a wedding and what not):
- May 6th: We revealed our nasty ass kitchen coat closet and started to demo it.
- May 7th: We installed some bead board and the trim, leveling out our un-square closet as much as possible.
- May 13th: Sidetrack time…we started laying the kitchen floor.
- May 14th: And then finished it.
- June 5th: Finally got around to painting the bead board and trim, and polying the ceiling.
- August 10th: Then we got married.
- September 23rd: Installed the baseboard, shelf brackets and closet rod
Which brings us to today’s post where we finally got around to all that finish work in the closet, including staining the closet shelf. The closet shelf that Colby installed was a super easy shelf to make. It was essentially one full 1″ x 8″ and one full 1″ x 4″ laid side by side to make one super shelf of 1″ x 12″. It’s a total Captain Planet, when our powers combine situation.
Since the shelf is up high, and no one is going to be staring at it…ever…and ridiculing our shelf (okay…so now you will because I told you), we opted to just use the boards we had and piece the shelf together instead of buying a new piece of 1″ x 12″. You can’t even tell the shelf is two separate boards unless you look at it real close like.
So now that we have all the pieces of the closet put together…like our $25 closet doors from a salvage bin at a local lumber yard, a closet shelf, and some baseboards…it was time for the mean, green, finish working machine (aka Angie…me) to take over.
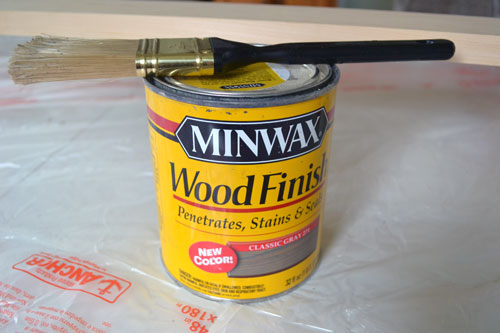
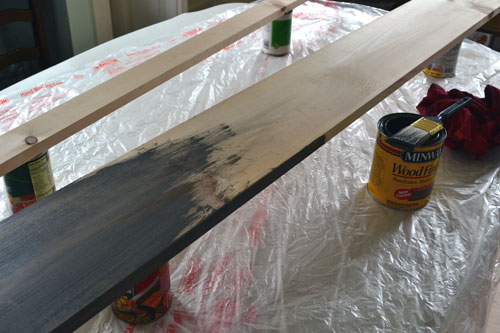
I attacked the shelf like a fiend using some leftover Minwax gray stain that we used on our CD crate project and wine rack.
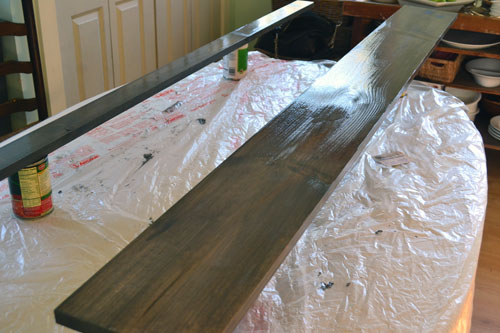
And since it’s starting to get chilly out and leaves are falling and such, I opted to stain the boards inside our house instead of out in the back yard. I at least opened the door and windows for some fresh air. AND I made sure to protect our kitchen table by laying down some plastic. Then I propped up the shelf boards on soup cans to make it easier to stain the sides. Ingenious…ingenious I tell you!
And then it was time for stain on…wipe off…stain on…wipe off.
Followed by a couple coats of polyurethane to protect the shelves from imminent danger scratching, since they’ll be holding some bamboo baskets that have the potential to scratch the shelves.
For painting the doors, I opted to use the already messy, disaster zone of a front porch as a space to tackle that task. I swear someday I’ll make the front porch all cute and usable…just not today…I’ve got a closet to finish…and more porch dreaming/scheming (aka Pinteresting) to do.
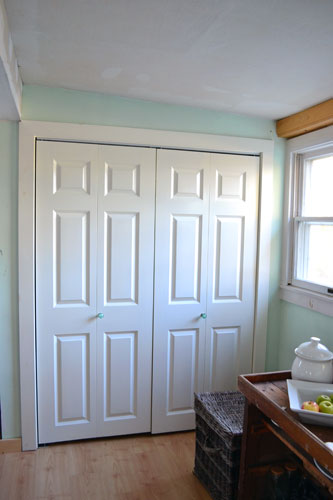
The closet doors were pre-primed so they didn’t necessarily need another coat of primer. However, they were also about 7 years old (hence their extremely cheap purchase price) so I cleaned them up and slathered on another coat of primer followed by two coats of glossy white paint (it’s Valspar’s Betsy’s Linen in case you were wondering). Then my handyman, boy toy otherwise known as Colby installed the suckers.
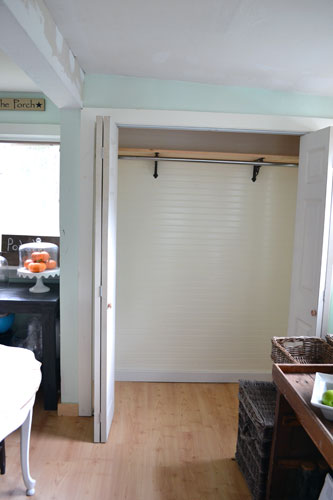
Folks…we have a closet…I repeat…we have a closet.
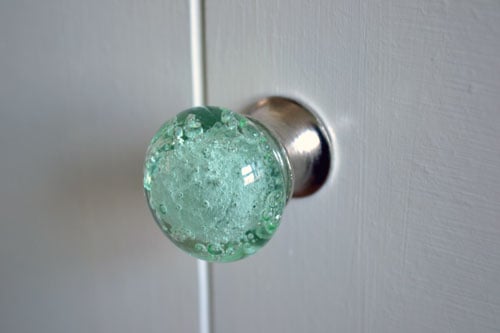
Colby even installed the new hardware on the doors. We upgraded from the basic, wooden door pulls that came with the closet doors to these gorgeous, aqua lookers.
Recognize them? They’re from my inaugural Anthropologie shopping experience in Boston. Side note…I’m pretty sure this post has now surpassed any other blog post for the greatest number of links within the post. Where’s my ticker tape parade? Or Ed McMahon with my check?
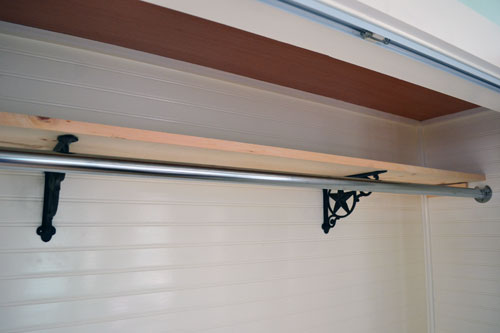
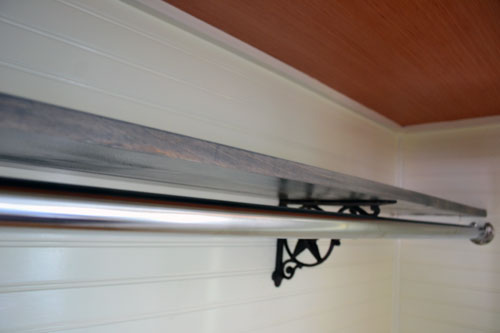
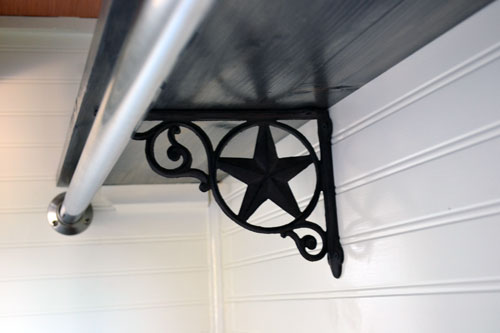
As for the closet shelf, once the poly was all solidly dried up, hardened, and cured, Colby simply screwed the shelf to the flea market brackets. Easy as pie.
I’m seriously digging how awesome the cast iron brackets look up against the gray stained shelf. I was on the fence whether I wanted to go with leftover gray stain or leftover dark walnut stain. In the end, I’m so glad I chose gray. It looks so great in the closet especially against the white trim/bead board and dark brackets.
So that’s our little what we did to finally finish up the finish work to this big ol’ closet makeover that’s taken us WAY too long to complete. I swear I will finish projects I start from now on…I swear, I swear! Yeah right. Once a house project procrastinator, always a house project procrastinator. But anyway, if you want to see what I filled our beloved, refinished closet with, you’ll have to stop by tomorrow for another riveting post. See what I’m doing there…keeping you all on your toes and wanting more. Haha. Anyway…this is Angie…signing off. Sayonara!
Pssst…Please, someone tell me I’m not the only one that takes five months to finish a project?! Please?! Why is it that some projects we finish so quickly and easily, and stay on task. But then there’s others that take FOR-EV-ER (picture the Sandlot kid as you’re saying forever)?! Some things the world may never know!






Randomly roaming the web at midnight, and landed on your page! I was searching for a way to cover an existing beam in our back room addition that was already here when we bought the house. The end of the beam where it meets the wall is a disaster. I got quite a few great tips and ideas from your page! Humbly, I thank you for sharing your projects with the world..! People out here are watching! Seriously though, I have so many power tools and don’t have a clue how to use them. Sizing and measuring the right moldings, boards etc. is kind of difficult for me and then of course cutting them on an angle confuses me too. Wish they had a course for women, teaching the basics of remodeling or working with wood! Anyway, I had fun reading your blog and am subscribing tonight.
Keep up the good work so I can follow along.. Good luck!
Wendy D.
San Antonio, TX