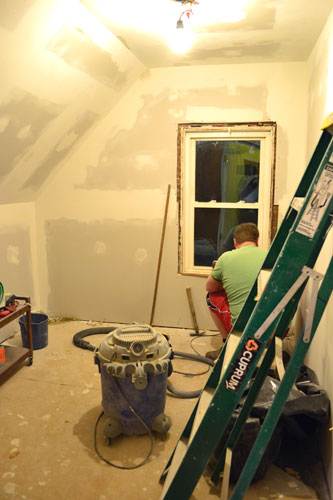
This weekend was a whirlwind…wait…uh…no…not really. We got snowed in this past weekend thanks to winter storm Nemo. Neither Colby or myself left the house the entire day on Saturday, but we stocked up and prepared for the storm Friday night. And by stocked up I mean we came home with a case of beer (Long Trail’s winter classics variety pack…mmmm mmmm good) and a couple gallons of paint. We got our DIY on this weekend…our guest bedroom DIY on, which when we last left off looked a little something like this.
We got some serious work done in the guest bedroom this weekend. It’s starting to really come together and I can’t wait to share all the details with you all. But as much as I would like to jump right to the painting part of this story, we gotta back it up a bit and go down undah…undah the floor. There’s still a little demolition to be had in this room when it comes to the flooring. We still had to take up the sub floor.
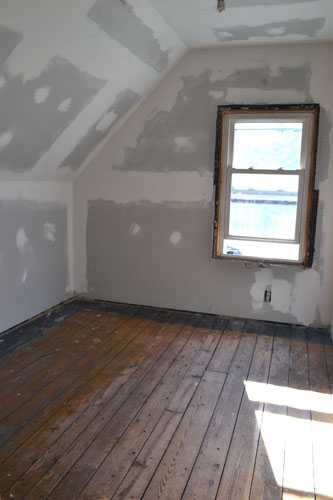
We had originally left the sub floor in this room since it was void of cracks and was nice and smooth, meaning it would make demolition debris and sheet rock compound dust much easier to cleanup off the floor. So we left it there for now knowing perfectly well that it would eventually need to be removed before laying down the wide pine planks for flooring. It was just one layer too many for this space. And this weekend was the ideal time for removal…just after drywall sanding and before painting, since you don’t really want to make a demolition mess after you’ve cleaned up and painted a room.

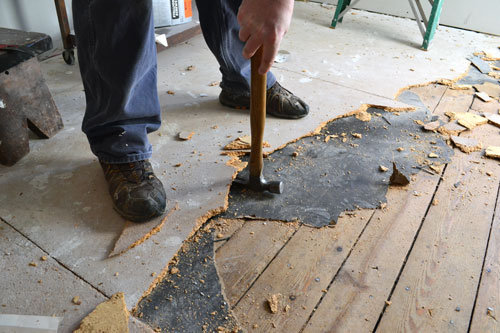
And the sub floor removal went pretty smooth and relatively quickly. It was as simple as using the claw end of a hammer (or even a pry bar) to hook underneath the sub floor:

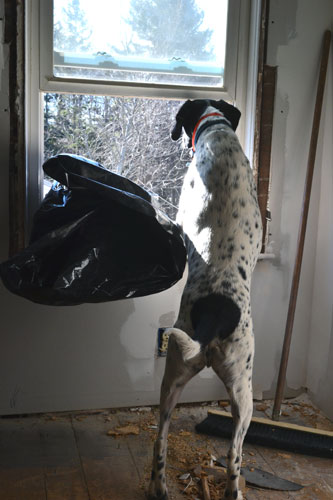
And then pry up the pieces (while Goose relentlessly photo bombs):

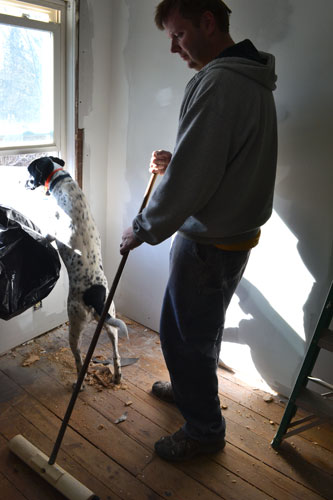
This was my best action shot of Colby’s demo work:
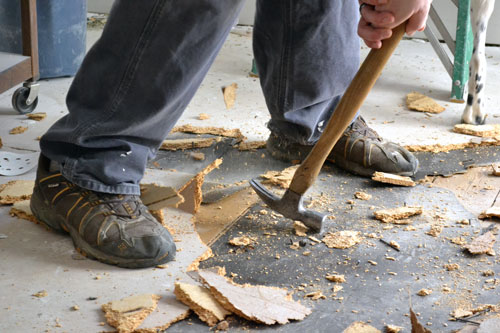
I love how I captured some of the pieces flinging up into the air while Colby pried the floor apart. #photogeniussaywhat
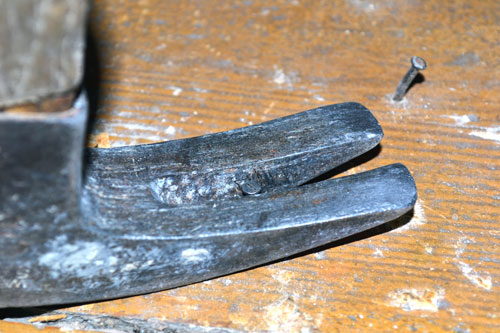
After prying up all the sub floor pieces and tossing them into a heavy duty trash bag to take to the dump, the next step was nail removal. In our DIY relationship, Colby loves to make the messes (demolition, wood working, heavy construction) and I like to make things pretty (painting, trim staining, decorating). The other hat I also wear…nail removal.

And boy were there ALOT of nails in that floor to remove. Lucky for me I enjoy a good ol’ tedious task such as this (I’m totally serious…I’m not sarcastic at all…ask Colby…I could remove nails all day long…you should have seen me in nail removal heaven after we removed all the plaster and lathe from this room). And nail removal is easy using the claw end of the hammer to gently pry up the nails.
After the floor was removed and all the nails were pulled, we cleaned and swept up our mess while Goose protected us from the dangers of squirrel attacks.
Goose is good like that…he’s always protecting us from squirrels…and the men in brown (UPS guys…and their trucks). And no, we don’t normally keep our window open during freezing February temperatures. We just find it easier to remove construction debris through the window rather than drag it through our pseudo clean house. Don’t believe us? Just check out this video of yore when we made a game out of throwing construction debris out the window. Told ya!
After cleanup was all done, we were left with a ready-to-be-put-back-together room. FINALLY!
And because I love a good to-do list, here’s what remains on the “Operation Finish The Guest Bedroom” list:
- Prime the walls and ceiling
- Paint the ceiling a bright white (Benjamin Moore’s ceiling paint is my all time favorite)
- Paint the walls a taupe/gray color
- Install new flooring and poly the crap out of it
- Install, stain and finish baseboards, window trim, door trim and even the new door
- Since the attic entrance is in this room, install a pull down staircase and finish the opening (paint or stain, still haven’t decided)
- Add some sort of flair to the window wall (maybe a stencil, maybe a pallet wall, maybe some wallpaper…still deciding)
- Add bead board to the slanted party of the ceiling, painting it bright white
- Decide on and install a new light fixture for the space
- Make some curtains (I’m thinking white with some fringe or pom poms)
- Build a custom daybed for the space
- Turn a little dumpster diving find into a sweet little night stand
- Add some storage and shelving
- Art, art and more art
Whew….that’s quite the list! I heart lists! There’s nothing better than a list to keep up the DIY motivation and also keep me on track so I don’t stray. Although I did stray a little bit already and worked in the master bedroom and entry this weekend. Whoops! But it’s just because we ran out of materials for the guest bedroom, I swear! Excuses excuses. Tell it to the judge. What if I just start crying? I heard that gets you out of tickets.
Pssst…Any other New Englanders out there who chose to bunker down and DIY their way out of the storm? And holy crazy amounts of snow! How much did you guys get?! We’re guessing we got about 24″ which was light compared to most places!
