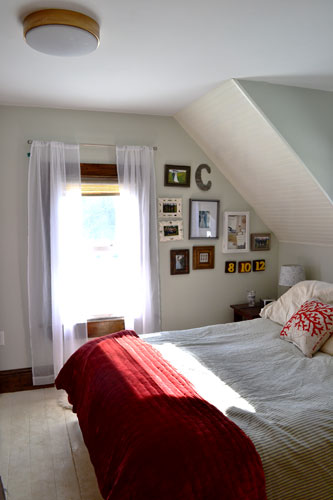
We finally did it…we bit the bullet and invested in a real light fixture in our master bedroom. Not gonna lie…we haven’t had an overhead light fixture in this room since we moved in nearly three years ago thanks to a little Colby breaking it while trying to get into the attic incident. Anyway…meet our new light fixture…Glinda…the gilded flush mount…aka the good light fixture of the North.
Glinda didn’t always sport a golden hue. In fact, she started off in a dull, cheap looking, brushed nickel finish.

The finish wasn’t 100% my jam, nor is it my dream light fixture (I REALLY want to install an antler chandelier in our bedroom but I haven’t found one yet at the right price). But for a $6 light, it will do for now.

It was originally $8.75 at Lowes, still a great deal but I scored a extra sweet deal on it since it was the display model and our local store was no longer stocking this guy. Hot tip…if you see a light fixture you like on display at a big box store but can’t find any in stock, ask a salesperson about it. Often, they’ll take the display down for you and chop the price down for you too.
Once we got our cheap-o light fixture home, I wanted to give it a little glam makeover and add a little extra flare since it’s original finish was kind of bleh. You know…kind of like what Cher did for Tai in Clueless. As if! So out came the leftover Martha Stewart liquid gilding paint (we originally used it for our Christmas treat boxes) for a little gilding gala.

I just used an angled craft brush and layered on two coats of the paint.
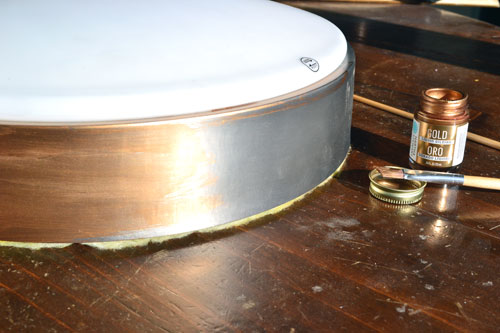
The gilding paint goes on super thin and watery but still has great coverage. A little goes a LONG way. Even after painting the light fixture, I still hadn’t even used 1/4 of the paint pot. I sense more gilding in our future.

The only downfall to using the gilding paint is the cleanup. The label on the paint pot claims that you can wash your brushes in nail polish remover, but that was a total fail. I tried it…but my brush was still gunky and gross, and since it was a cheap craft brush (we’re talking less than five bucks for about 20 brushes) I just chucked it. But I’m wondering if maybe mineral spirits would aid in brush cleanup?! Perhaps.

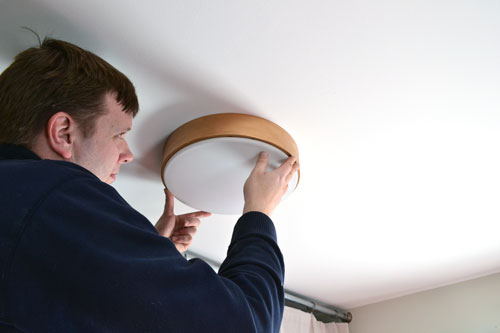
After a couple hours of dry time, I called in the marines my electrical guy, who happens to be my husband Colby, to help with installation.
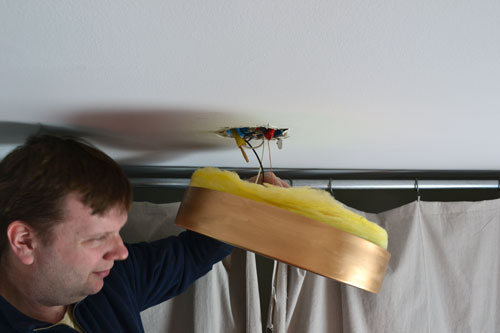
He’s a good sport and a saint for putting up with my DIY antics and impromptu projects like this one. So up the light went…we added a energy efficient light bulb…
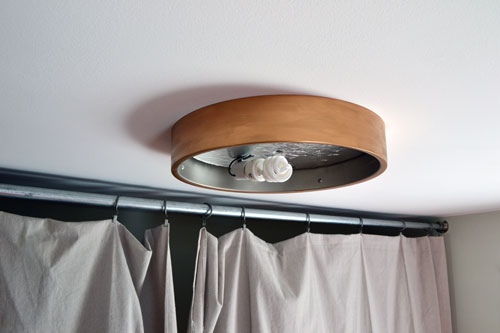
Reattached the glass…
And oooohed and ahhhhed over the new light fixture (and it’s impeccable finish) for the next twenty minutes. Apparently we don’t have lives…or a demanding schedule.
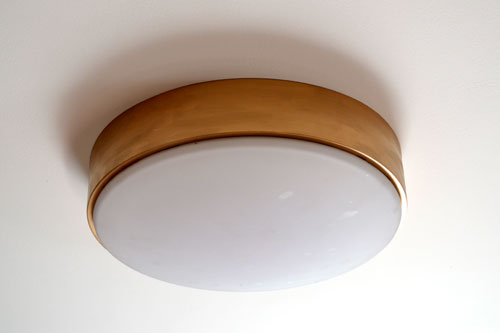
I’m not 100% happy with the golden color on the light fixture. I was hoping it would be a little closer in tone to the finish on the mirror. It was close, just not quite there.
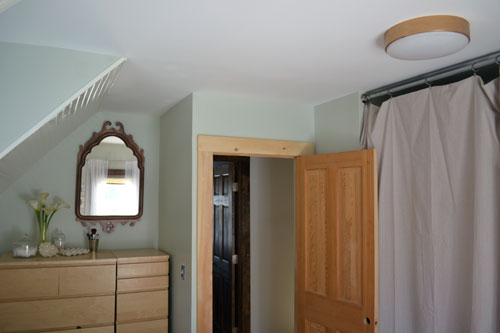
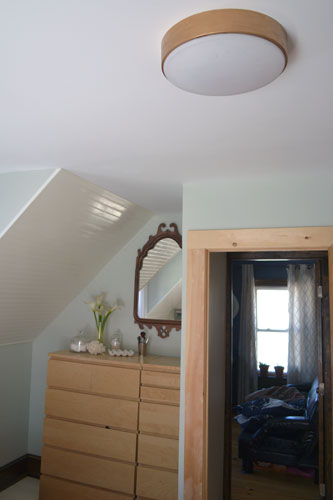
But we’re still in that “the middle makes no sense” part of finishing up our master bedroom. You know…when projects and designs are about half finished so everything kind of looks like a mess. So I think once we finish staining the door/trim, replace the drop cloth curtain closet with a real one (something more cabinet style), and add a little accent wall stenciling behind the mirror, that Gilda will fit in better with the room.
I’m trying to not make any quick “oh my goodness I made a bad choice” judgement calls (or rip out the light fixture and repaint it) until I finish up a few other projects first. But I’m thinking the accent wall stenciling project will help tie in the light fixture the most since I’m thinking of using the same paint color for that project. As always, you know we’ll keep you posted on the progress and any changes we make. Until next time…Angie…out.
Pssst…I’m linking this post up to the painting party going on over on Carmel’s blog, Our Fifth House tomorrow. Be sure to hop on over and check out all the painting project inspiration.

Love the gold on the light fixture. Makes it look so much better.
(coming over from Carmel’s)
Oooooh…thanks! And I’m loving your use of gold on your painting project too! Pretty! Thanks for stopping by!
This is seriously beautiful! A few years ago I don’t think I’d feel that way about a light fixture but as a homeowner, I’m totally there now!
Have you thought about making your own antler chandelier? I’ve seen some cool ones made with Christmas tree lights.
Ooooh…that’s a thought…DIYing the light fixture! I’ll have to look into that. How do they do the antler part? Paper mache? Thanks for the tip!
Wow, I love that brass look 🙂
But if you were wanting a more antiqued look you can hit your brass paint with a can of black, or rustic black spray paint – just the sputters from a can held far away and with the button barely pressed as you move fast. I know it sounds like a disaster *grin* but it works great, adds depth and character.