Long time no kitchen talk! What gives?! It’s like we’ve been busy celebrating Christmas and New Year’s and an anniversary (Colby and I recently hit the five year mark…dating wise…we haven’t made it that far yet in the marriage department yet…fingers crossed!). When we last left off in our kitchen remodel, which I’m coining “Operation Lipstick On That Pig”, we had exposed the old wood sheathing underneath the sheetrock. We also talked about the kitchen remodel plan. Remember that plan?! Well…just scratch that. We’ve thrown the plan out the window and we’re onto a new plan called “winging it”. It’s a fabulous plan. In “winging it”, we’ve decided that the next step in our kitchen remodel process would be to build in a bit of a pantry situation around the fridge. Here’s the plan:
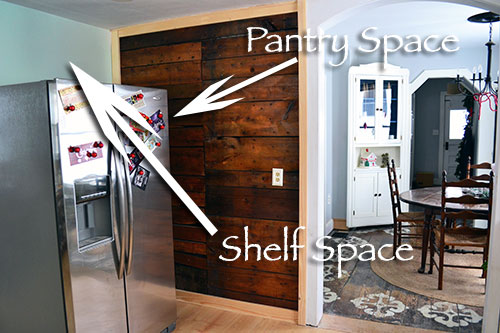
Mind…blown! I know, everyone and their brother has a pantry around their refrigerator. But we’re not going the cookie cutter, built in pantry cabinet beside the refrigerator route. Oh no. That’s way too boring for us. We’re opting to go with pull out slabs of wood with drawer slides that we’re going to call shelves. Trust us. It’s going to be legend…wait for it…dary. I tried to draw you guys a pic of the pantry plan, you know, to let you into my head a bit (be warned…it’s a scary place), but alas I am no artist. Just envision five pull out drawers between the refrigerator and the wall. First step in the pantry plan, framing.
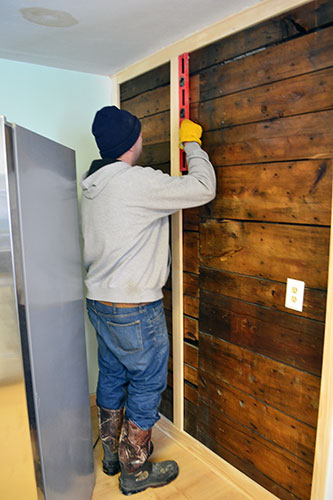
Random side note…that’s Colby’s weekend “uniform”. I married Grizzly Adams! And don’t you love that he’s wearing leather mittens while installing the shelf framing?! It’s averaging about -20 degrees outside here in Maine so I can’t blame him. Anyway, since the old wooden wall was nothing close to straight, level or even, we couldn’t affix our pantry drawer slides directly onto the wall. It needed some spacers and framing. We wanted 13″ wide x 26″ deep shelves in the 30″ depth refrigerator cavity. So Colby nailed in a vertical piece of 1″ x 3″ pine with the outside edge of the board 30″ out from the wall (which lines up with the edge of the refrigerator), to define the pantry space.
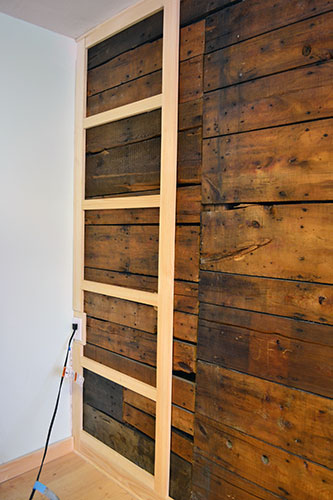
Next, we installed the horizontal pieces of pine that would be the wood the drawer slides would be screwed directly into. These wood pieces essentially will serve as spacers for the drawers to sit a bit off the wall. It was imperative that these be perfectly level and even to ensure proper drawer slide-age. Nobody needs a crooked shelf. Out came the level and we marked each of the five shelves, an equidistant 15.5″ apart from each other, with the bottom spacer sitting above the baseboard.
As per usual in our old, not level and not square home, the old wood wall was a bit wavy and uneven. Meaning, to properly even out the spacers for the drawer slides, each piece of pine needed to be shimmed (see…this is why we couldn’t attach the drawer slides directly to the wall). Drawer slides just don’t work if the back width is an inch narrower than the front width. To shim the spacer, Colby just slid a pair of shims (or sometimes a single shim) behind the pine, adjusting them as necessary for a level fit.
Once the spacers were at the correct depth, we just used the nail gun to nail through the spacer, into the shim and into the wall behind it. Kind of like so.
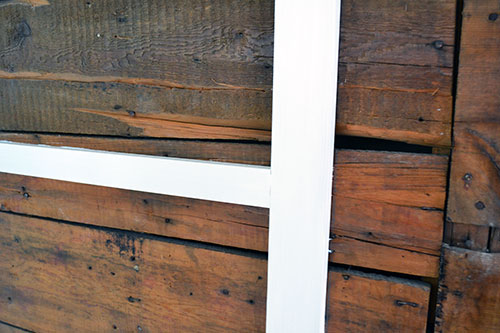
Afterwards, we just cut the excess shim off with a utility knife and we were left with the finished drawer framing that looked something like this:
And the extended warranty view (please ignore the nasty-a$$ ceiling…it’s gotta go):
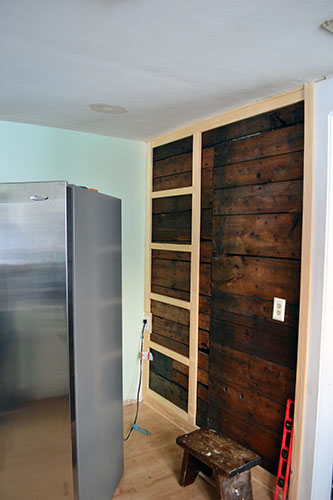
Since the next step in the building process was to build in the refrigerator, which leaves about a 13″ gap between it and the wall, I opted to prime and paint all the framing before proceeding to the next step. It just took one coat of primer (after punching in all the nails, filling the nail holes, and sanding down the putty) and two coats of glossy paint in Valspar’s Betsy’s Linen (it’s our go-to white trim paint throughout our home).
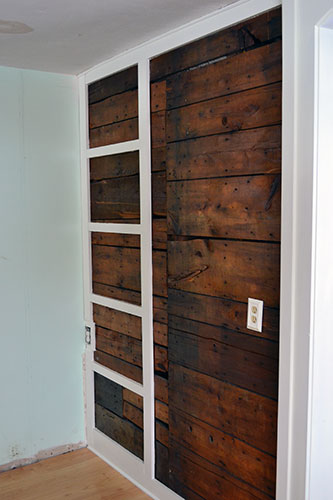
I’m really loving how the bright white trim and framing is popping off that old wood wall. It’s such a fabulous contrast and I can’t wait to have the rest of the built in pantry painted too.
And that’s where I’m going to leave the framing post/tutorial for today. I could keep going, but this post has the potential to include over 40 pictures and be 5,000 words long so I’ll spare you. But I will spoil the surprise and share the built in pantry progress so far in real time. Actually it’s not really real time because we just installed the drawers a few minutes ago.
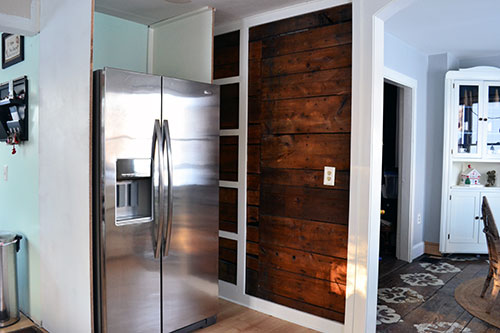
Does it make sense now? So you can see how we’re inserting five drawers between the refrigerator and the wall, with the drawers attaching to the white framing and the particle board box around the fridge, and eventually we’ll have some shelves above the fridge too. But one step at a time. We’re taking baby steps here with game plan “winging it”. Next up…refrigerator boxing.
Pssst…Stay tuned for more on the kitchen front, but enough about us. What have you guys been up to lately? Do share!