So yesterday we revealed our pantry finishing touches and also gave you a bit of a sneak peek on how we organized it. But today we’re going to get down to the nitty-gritty of how we organized it! Yee-haw! It was such a fun time organizing the pantry. Just picture me perched on a kitchen chair maniacally drumming my fingers against each other and muttering “Some of you will get organized and some of you must go” while peering over my overabundant collection of baking supplies spewed all over the kitchen counter. Such fun, such fun!
The whole pantry ended up turning into a baking pantry of sorts. We keep most of our food in the two cupboards between the sink and the oven and it all fits quite nicely. What we did need help organizing was baking tools/supplies. They were thrown everywhere…more specifically thrown haphazardly everywhere…and I longed for a super sleek, organized storage solution for often-used items like flour, sugar, and my Kitchen Aid mixer. I don’t bake nearly as often as I used to which I attributed to having to take everything but the kitchen sink out of the old baking cabinet just to find the brown sugar. It wasn’t ideal. But now?! So much easier to access all my supplies!

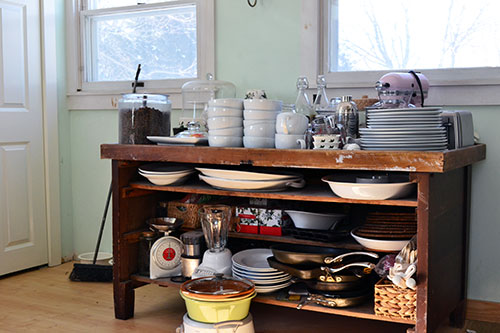
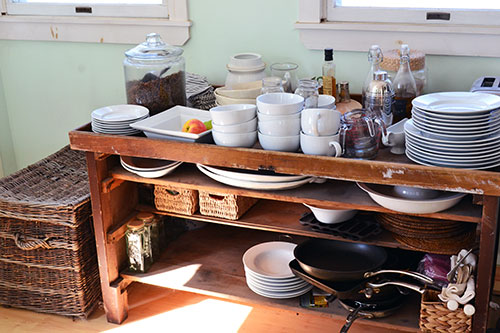
Just so you get an idea of what I’m talking about, here is our overstuffed kitchen buffet (it’s an old hardware store cabinet we picked up at a yard sale for $50 two summers ago) which we store dishes, electrics, pots and pans, linens, miscellaneous baking supplies, and Goose food on.
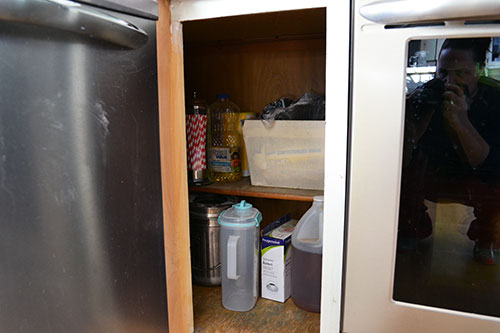
And here is the baking storage cabinet in all its unorganized glory. I’ll pause while you pin it.
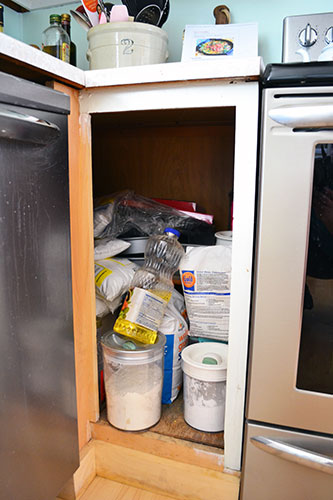
Got it? Good! Like any good organizing project, I started by pulling EVERYTHING out of the cabinet. I’m talking everything, everything out of the cabinet. I found things deep in that cabinet that I hadn’t seen since I stuffed them in there when we first moved in four years ago. It was ugly.
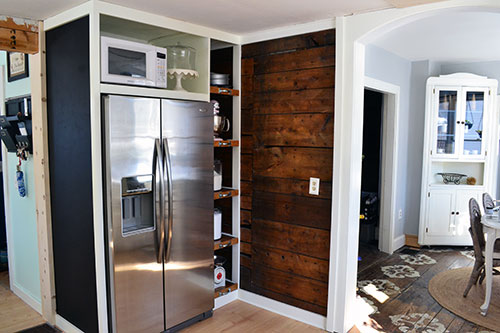
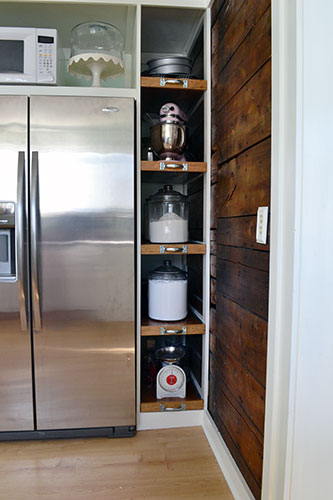
I purged, I donated, I threw out the six-year-old rice, may have snacked on a few chocolate chips along the way, and slowly put things into the pantry in an organized fashion. Let’s take a tour of the organized afters, shall we?! Starting with the top and the microwave nook.
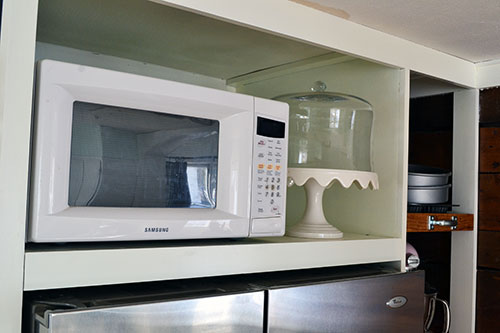
The space fit our microwave perfectly. Maybe it’s because we built it that way?! Custom build for the win! There was even enough space beside it to fit my beloved Martha Stewart cake dome with enough room behind it to expand the collection (hint hint Colby…add mini cake domes from the Martha Stewart for Macy’s line to the list of gift ideas for your wife). We do intend to upgrade our microwave in the not-so-distant future to a stainless steel one to match the rest of our appliances. We’ve found one and it’s just a waiting/stalking game until it goes on sale.
Next up…the top pantry pull-out drawer:
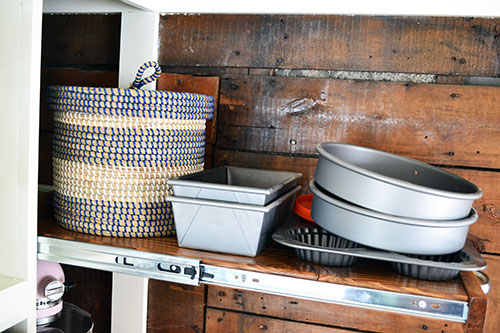
Since this shelf is the hardest of the five for me to access, I opted to include items that I don’t use as often. This includes bread pans, cake pans, and a mini pie pan. The basket was an organizing purchase from Home Goods (a whopping $16) and holds all my cookie cutters. While in Home Goods I briefly debated (as in couldn’t decide so I called Colby and made him decide) getting an open weave, wicker-ish trash basket but opted for concealed and dust-free.
Moving down…the second pantry shelf:
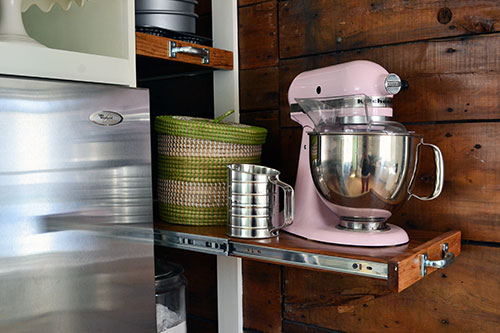
These items I use these slightly more often than the top-shelf items and pretty much include all my Kitchen Aid goods. That’s another one of those Home Goods baskets…I got two…and this one holds the Kitchen Aid attachments like my saving grace of attachments…the shredder! This shelf was also an appropriate spot for the flour sifter since I often use it in conjunction with the mixer.
Moving even further down…shelf number three:
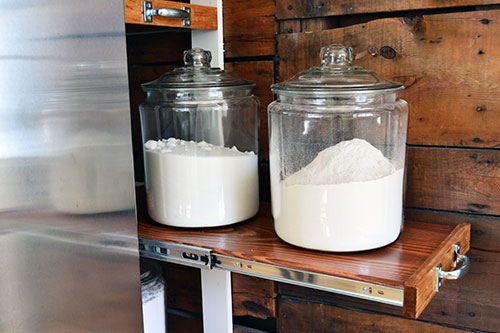
This shelf features the first of two baking supplies shelves. Remember back in October when I was working with Coupons.com on a sponsored post? When I had to buy something for fall (using one of their coupon codes) that could transition into every day? And I bought glass jars? And turned those glass jars into a gory Halloween specimens display? And said I would re-purpose those jars in a pantry? Could I ask you any more questions? Well, folks….THIS is what I was referring to. I decided to dedicate this shelf solely to flour and granular sugar…the two most used baking supplies, appropriately stored in the two largest jars.
And shelf number four:
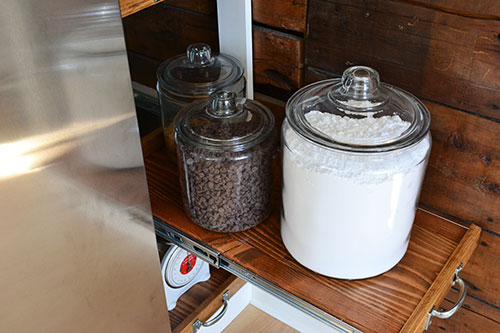
This shelf was organized similarly except integrated a few of the smaller jars. The large jar is for confectioners’ sugar (for Christmas mint making), with the two smaller jars housing chocolate chips and brown sugar. The beauty of these two glass jar storage shelves is that when I’m baking, I just mosey on over to the shelves, pull them out, scoop my measuring cup/spoons into the jars, and dump the ingredients into my mixing bowl. So super easy with no digging through the cabinet underbelly for that long-lost flour!
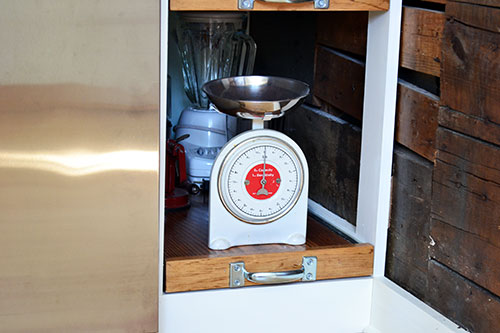
And finally the bottom shelf:
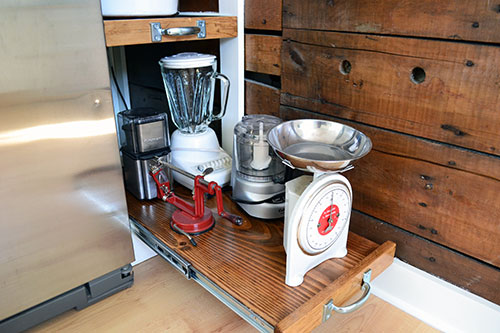
The kitchen electrics (and errant apple peeler shelf). Which reminds me, our poor blender which I’ve had since college is on its deathbed (hint hint number two Colby…hint hint number two). The shelf also houses our kitchen scale, which is honestly about one of two kitchen things Colby moved in with that I didn’t get rid of. When I obligatory razzed him about it, he admitted that it wasn’t his and he wasn’t responsible for picking it out. He inherited it from a friend’s wife when they moved across the pond. Should have known. It was too cute for him to have picked out.
Now with the pantry organized, the buffet is looking a smidge better:
And the kitchen cabinet, former baking storage cabinet, is looking TONS better.
Both spaces still need a bit of work. Both are just haphazardly put back together. But I have a few more organizing tricks up my sleeve. So let me divert your attention back here to the organized baking pantry for a bit while I work my magic on the remaining mess.
Mad love over here for the new pantry…crazy mad love! I’ve already baked a crap ton (official measurement, conversion to metric unknown) of cookies with about eight more dessert recipes pulled and ready for testing out. I can feel my pants getting tighter as I type that.
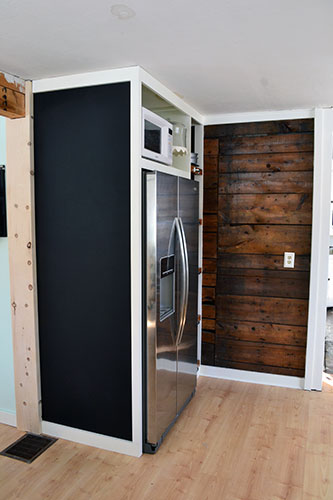
We still have a few more items on the kitchen to-do list, like finishing up that chalkboard wall, boxing out the kitchen beam, and painting/installing all the baseboards and toe kicks around the kitchen but it’s much improved. The kitchen is a place I want to spend time in these days. And just because I can’t resist good before shots…like move-in day before shots…without further ado:
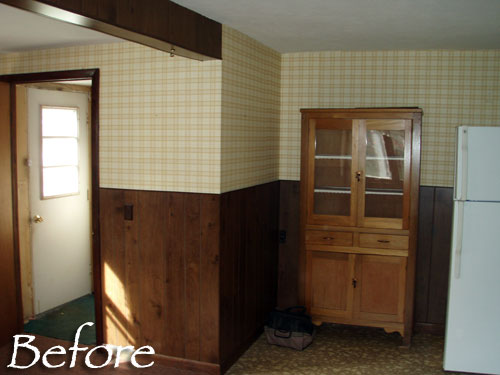
Bahahahaha! Now that’s some serious ugly! That space with the old cabinet and white fridge is where our new fridge and pantry live. And since our pantry project has pretty much come to a close, here’s the final budget breakdown:
- Particle board for pantry sides and microwave shelf: $42
- Drawer slides for pull-out shelves: $100
- Kiln-dried spruce for chunky pull-out shelves: $30
- Pull-out drawer hardware and screws: $19
- Various pine trim pieces: $15
- Primer, paint, stain, and poly: FREE (already had on hand)
- Chalkboard paint: FREE (already had on hand)
- Two baskets for pantry organizing: $32
- TOTAL: $238
Not too shabby if I do say so myself. Especially since it’s a custom-built piece that transformed our kitchen both functionally and aesthetically. The beauty of this pantry project is that it all stemmed from a bit of kitchen “what’s behind the walls” exploration gearing up for a big kitchen reno. When we first started this project we thought it would just be temporary until we get around to completely renovating our kitchen. But now that it’s done…we’re designing the new kitchen around this since we love it so much!
Pssst…Have you guys finished any lingering projects around your neck of the woods? Any organizing projects? Dish!
Psssssst….Catch up on this entire project with posts on exposing the wood wall, framing the pantry part 1 and part 2, installing pull-out shelves, and adding finishing touches like hardware and a microwave shelf.

Awesome! I love it. OK, and I also covet that buffet…but I digress. Your pantry is perfect.
I love it!!! The pull-out drawers are genius! I also found some scary things in my recent pantry purge… and snacked on some semi-sweet baking morsels while I worked 😉