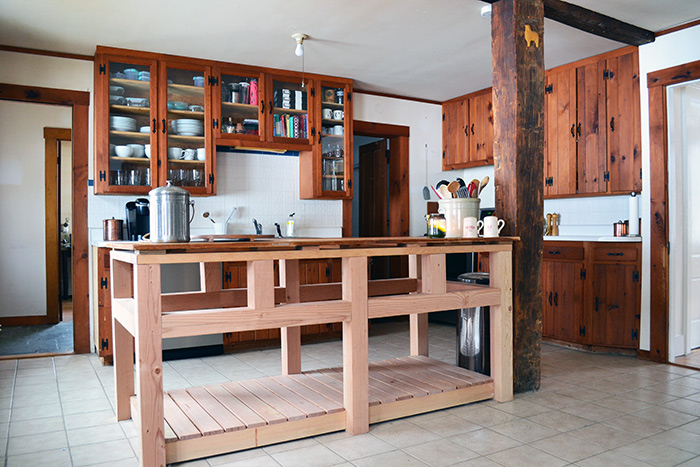
First of all, major thanks to everyone who showed us love on our newly completed kitchen island. We’re absolutely in love with it and have even noticed a significant shift in the amount of cooking we do with such a large, open surface to work on. We even keep the kitchen cleaner! Who knew?! A pretty new island = a cleaner kitchen. It’s like magic!
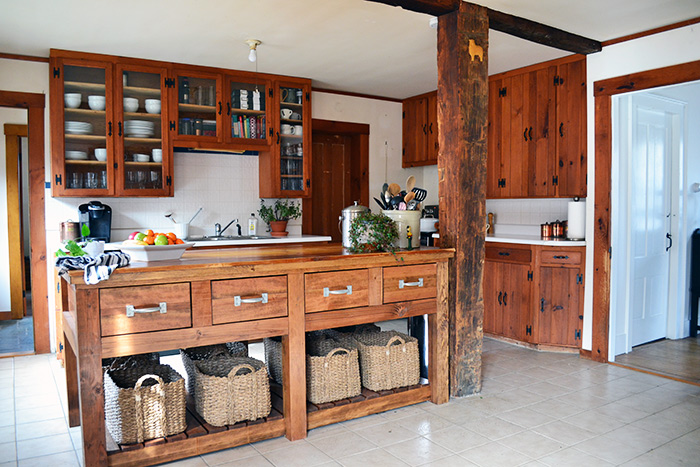
But enough on the love fest because today is a big day. It’s how-to day. Disclaimer #1, this post is long, full of in-progress pictures, and only goes through the building process. Finishing, hardware, and a complete budget breakdown are coming up in part 2 of this post. Disclaimer #2, this build took us FOR-EVVVV-ERRRR! Channel your inner Sandlot kid as you say a long drawn-out “forever” over and over in your head. We started this project somewhere around late October or early November and we only recently finished it. Sure, if we buckled down and worked on it relentlessly, we could have finished it in the span of three or so weekends. But when we bought this house, we vowed family and fun would always take precedence over house projects. Hence the slowness. So let’s get going, shall we?!
We started with a pretty simple frame, all made out of fir. We normally would choose pine since it’s cheaper and readily available, but we chose fir for a couple of reasons. One, it is way more solid and rugged than pine. This is a forever kitchen island for us so we wanted something for the long haul that wouldn’t ding up quite so easily. Two, our local lumber yard didn’t have any 4 x 4 pine posts but they did have fir. So we powered through with fir.
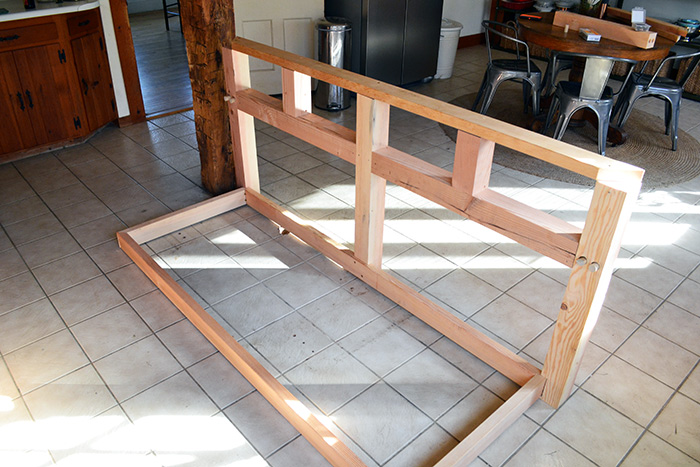
The frame base is 6′ long by 30″ wide and is built with a combo of 4 x 4 fir posts and 2 x 4 fir boards. To give you an idea of size, the framing was built to be 33″ tall (36″ tall once you add the island top), there’s a 17″ opening between the bottom of the drawer openings and the top of the island bottom, and the drawer openings are framed to 8″ x 15″. Colby sketched the whole thing up, made all his cuts, and then began assembling the island in place. If you look closely, you can see that the bottom of the 4 x 4 posts were each notched out to encase the bottom framing. This was done with a combination of a chop saw and a chisel.
The whole island is assembled with a combination of screws, nails, wood glue, and dowels. Colby is notorious for building things rugged. When he built the deck at our old house (more like overbuilt the deck at our old house), the building inspector (who signed off on the final build) said something like “Well, this thing isn’t going anywhere anytime soon!”. #buildtough
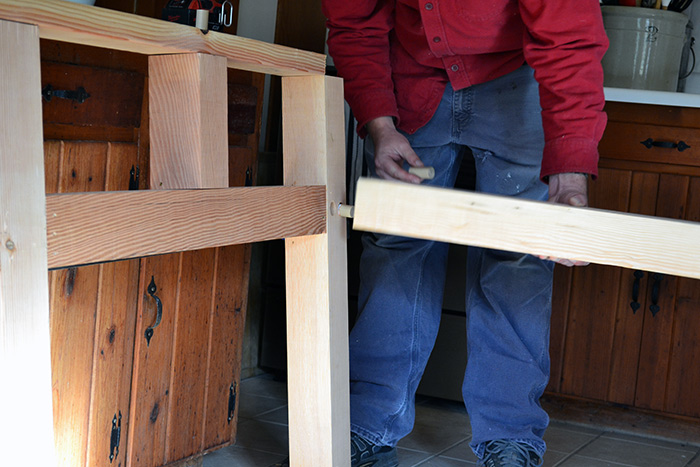
Anytime a post ran horizontally, we added extra security with some 3/4″ dowels. All the horizontal 4 x 4 posts are attached this way.
To do this, just cut your dowels down to size (about 4″ in our case), drill holes into the posts using a wood boring drill bit slightly larger than the dowel diameter (we went about 2″ deep on each post), wood glue the dowels, attach the posts, and then for extra security, screw the posts together using a couple of 2-1/2″ finish screws at an angle.

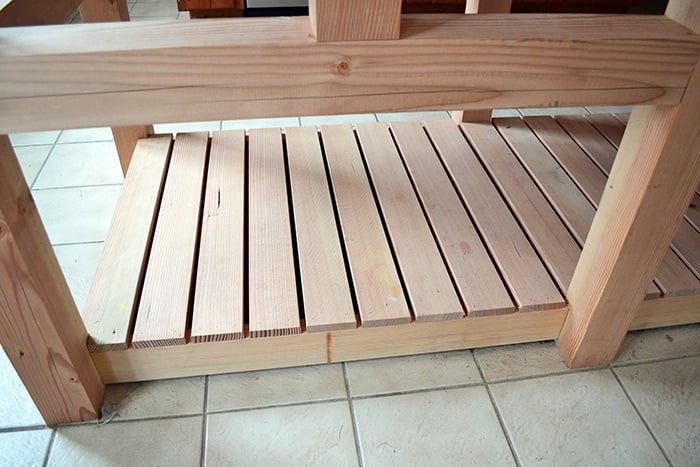
After the posts and framing were assembled, we started working on the base surface, going with a lathe-like look. We used 1 x 4 fir which we cut down to 30″ lengths so they lined up flush with the base framing. We played around with the spacing until we found something we liked, which ended up being 3/8″ spacing. Colby made a couple of shims for us to use as we installed the boards, nailing each one down using a finish nail gun.

We started on each end, working towards the middle of the island. We knew that our spacing wouldn’t work out perfectly if we stuck with it for every board. It would end up leaving a decent-sized gap in the middle, a gap not quite big enough for a final board. We ended up nailing one piece of fir directly in the middle, then adjusting our board spacing leading up to the middle board. So all the boards aren’t quite spaced the same, but honestly, nobody would ever know (until I just told you…doh!).
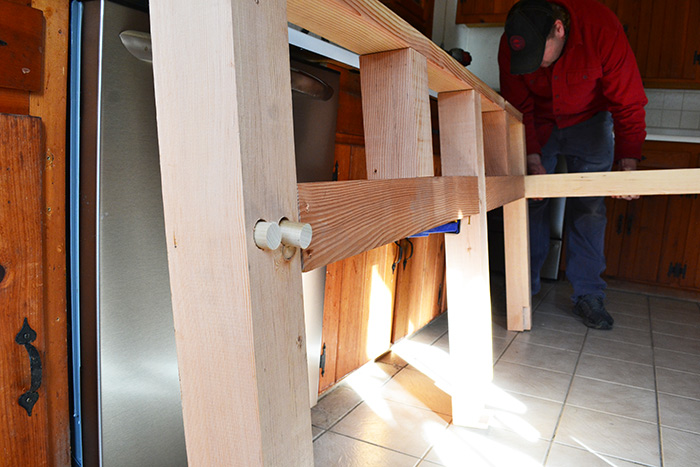
The last piece of framing was adding 1 x 4 framing lumber between the posts. These were placed just so we would have something to attach each drawer slide to. They also help keep the whole island, and the drawer openings, square for easier drawer installation later.
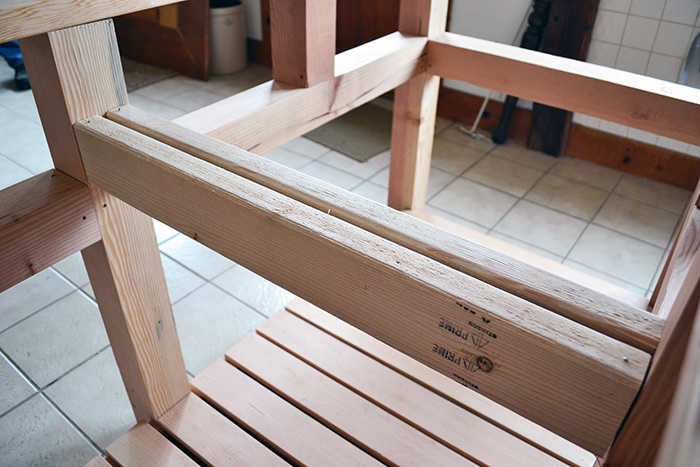
We later beefed up the drawer slide framing with a short piece of framing lumber, cut at 45-degree angles, and screwed into both the framing lumber and island posts. See a few pictures down. But this is how our island lived for a few months until we got to the drawer-building part.
Onto the drawers! If you ask Colby, drawer building is the bane of his existence. They’re often complicated, require tons of adjusting, and never come out the way you want them. This is one reason why it took us so long to finish the island. Colby was waiting until he got the shop set up really nice like in the old library on our property. It took a while to take down all the old library shelves, find his tools, build some workbenches, and get a really good shop space set up ideal for finish work and drawer building.
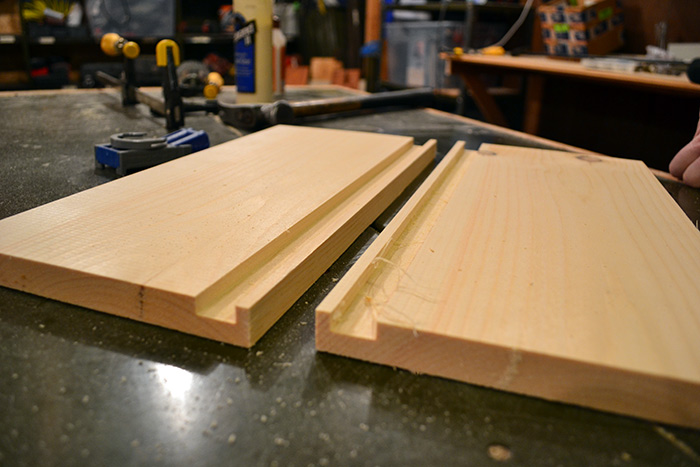
For the drawer boxes, we decided to use pine boards since we couldn’t find appropriately sized fir boards locally. We ended up adding a fir drawer face later so the whole island looked like it was made out of fir, but alas, pieces of it are pine. To build the box sides, Colby started with 1 x 8 pine boards cut down to 16″ lengths, which fit perfectly in our drawer openings since an 8″ wide board is 7-3/8″. Then routed a 3/4″ gap (1 x 8 pine is 3/4″ thick) about a 1/4″ from the bottom of each drawer side. Our router promptly died right after this project. So Mom, when you start your Christmas shopping, a router is on our list! Hi Mom! Colby’s request is of the Porter Cable variety.
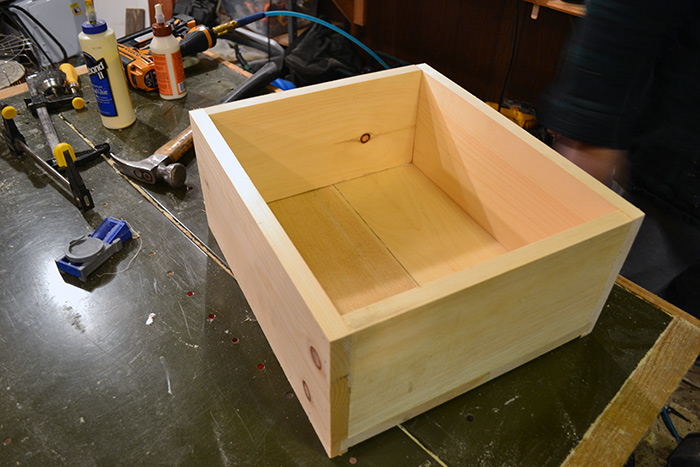
The drawer bottoms are made out of the same pine boards just Kreg Jigged together, at a 13″ width (the overall outside dimensions of the drawer box are 16″ x 14″).
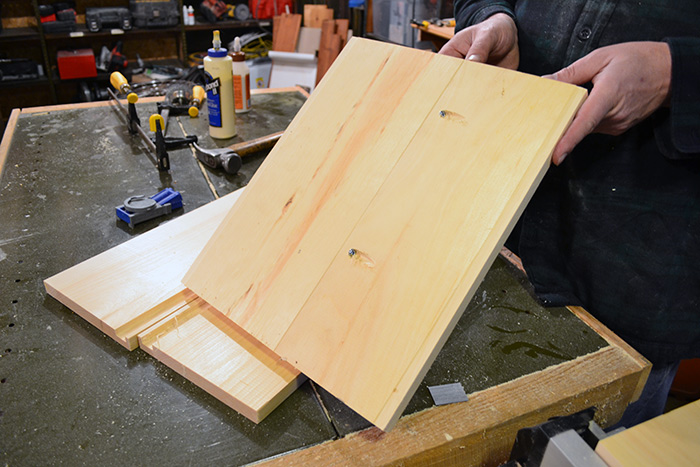
Then the routed sides were wood glued:

And nailed together, making sure the uglier Kreg Jigged side faced down:
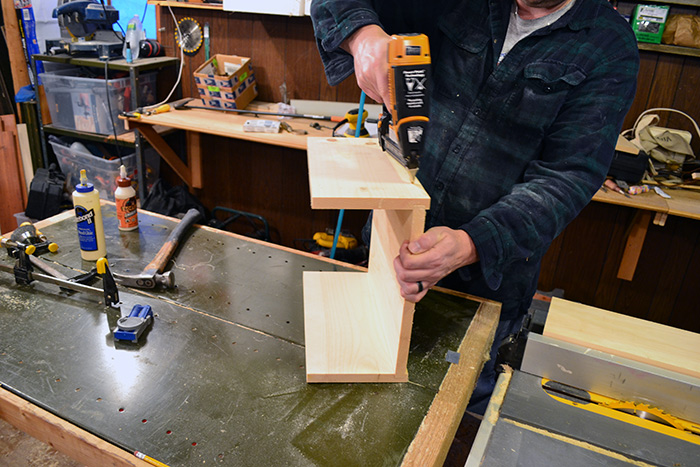
Then a 12-1/2″ long piece of pine was glued and nailed into place as the back of the drawer:

And also to the front of the drawer:
Colby asked me to point out his beautiful, dovetail joints (note the sarcasm)! We weren’t worried about how the drawer front looked as we later made a fir face for the drawer that we attached when staining.
Onto drawer installation. Here’s that pic I mentioned earlier that shows the drawer framing supports screwed into the island framing. The drawer framing needed some extra support to help with the drawer weight and these fit the bill.
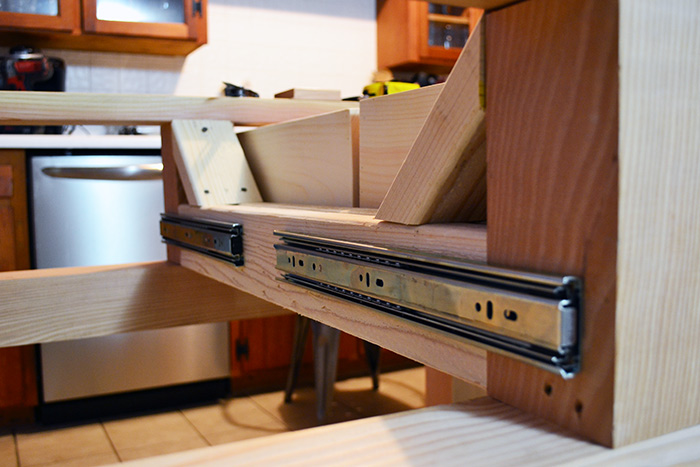
We used 14″ drawer slides from Home Depot and first installed them to the framing, making sure that they were level, and attached in the same spot. We wanted the box of the drawer to sit back 3/4″ to accommodate the later attached face plate, hence why the drawer slide is set back on the framing but flush on the drawer box. After the drawer slides were attached to the framing, Colby took out the piece that was meant to be attached to the drawer box, measured and marked where the second piece needed to be installed, and attached it.

Once they were all installed, Colby threw up his arms in a hallelujah because every…single…one…worked. The island was square and not a single drawer needed to be shimmed or adjusted for smooth opening and closing.

We’re going to cut off the kitchen island building post here for today but we’ll be back soon with a “how we finished it and how much it cost us” post, including adding the drawer faces.
Pssst…Hopefully, y’all are still with us?! I know it’s boring stuff but before you know it we’ll be moving along to something pretty. Also, as a New England gal, am I allowed to say “y’all”? I’ve apparently been watching too much Southern DIY TV.