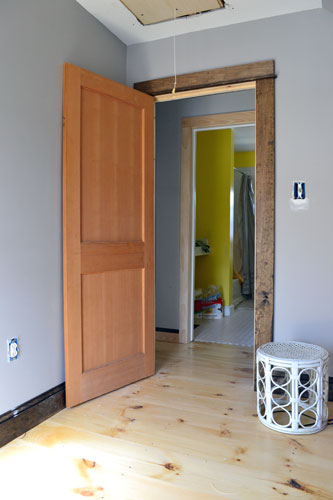
Today we’re unleashing upon you all our secrets. Well…no…not ALL our secrets, otherwise what kind of incentive do you have to keep reading?! Today, I’m revealing to you our “secrets of a stainer”. Did anybody get the Emily Henderson Secrets of a Stylist spoof in there? I’m sure a few of you die hard Design Star fans out there caught on. Anyway, Colby and I were staining and polying monsters this weekend. And we took our hallway to places it’s never been before…check out the hallway before/progress going on right now.

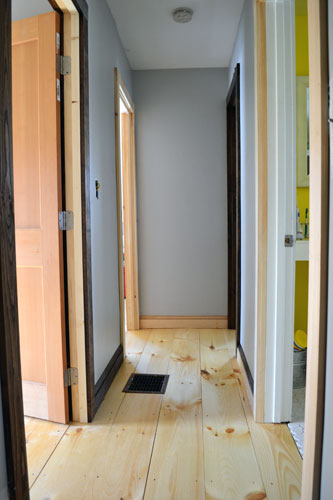
The pic on the left was taken a few weeks ago before we laid down the new floor and the pic on the left was taken after the last coat of poly went down on the trim and door. Beautiful, no?!
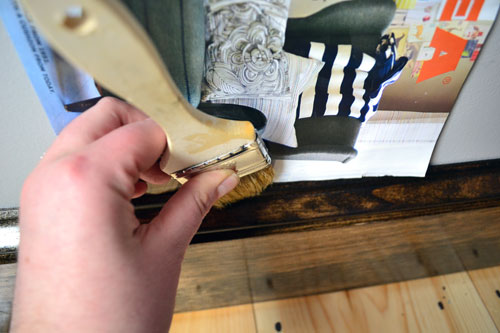
Anyway…let’s get to the secrets part because everybody loves a good secret. And we’re going to let you in on how we make the staining and polying process SOOOOO much easier. Our biggest secret to tackling stain and poly…Secret Number 1…pre-stain as much as possible! Staining is a stinky job. Seriously. And toxic. So we took our staining down to the basement where we pre stained a majority of the trim for the second floor. Staining, although stinky, is an easy process. You just slap it on:
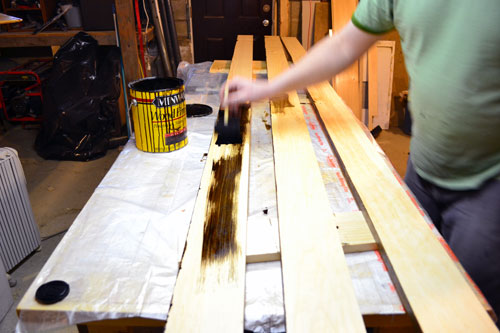
We’re staining here using a gallon of Minwax’s Dark Walnut stain using a foam brush. We tend to use foam brushes alot for trim staining as long as the trim is nice and smooth, since the foam tends to catch on rougher wood. The foam brushes drip less and have a more even coverage (for more efficient staining) than their bristle brush counterparts. After swiping on some stain and letting it sit for about 30 seconds, wipe off any excess.
If you want your wood a darker shade, let the stain sit longer before wiping it off. And as always, use a clean cloth. It took us all of an hour to stain all the baseboards, window trim and door trim for the guest room and the hallway…if that. Then we just let it sit, dry out, and off-gas (detoxify) before installing it upstairs.

Confession time…we didn’t pre-stain all of our trim for the upstairs.
Actually, only about half of the trim/door surfaces were actually stained before installing.
And, in retrospect, boy did we wish we had stained everything before installing, especially the doors.
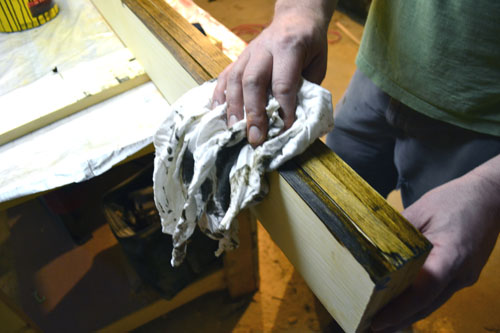
It can sometimes be really difficult to get stain, especially a darker stain, to penetrate the strange gaps going on around hinges, but it still can be done with a foam brush if you just smoosh it in there and rub off any stain that gets on the hinges afterwards. It cleans up quite nicely actually.

So why didn’t we pre-stain all the doors and the trim? I would normally say sheer laziness, but that isn’t true. More like, we didn’t know any better at the time. It had been so long since the last time we stained a door or some trim so we kind of forgot how much a pain in the butt it is to stain after everything is in place. Stain tends to get on the floor, on the walls, on the dog (totally not kidding here). And the last thing we need is Goose covered in stain. Although he would look quite dapper in a weathered gray stain. And with a smoking jacket! Hmmmm….
Even though we installed alot of the trim before staining, there’s still a secret that I’ve learned, which works just as well in the poly stages as it does the stain stages. To protect your walls, use a magazine cover (I used the Ikea 2013 catalog) or a cereal box to slide into that small gap (or just resting up against the wall) behind the top of the trim. Then stain or poly away.
It completely protects the walls and you don’t worry too much about cutting in. I suppose you could also tape everything off too, with painters tape. But I’m not much for taping. I find it too labor intensive and prefer cutting in. But stain is messy and doesn’t always easily wipe up, hence the magazine cover tip.
And as I’m revealing our staining secrets, I bet you’re wondering, “Angie, just how do you fill in those nails holes after the board is stained and installed? You can’t just use plain old, natural colored wood putty, can you?! I just HAVE to know?!” To answer your burning question, the solution is colored putty.
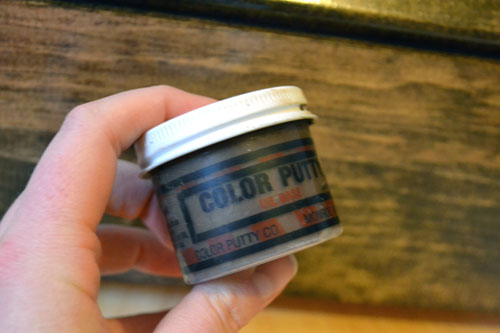
The stuff is the bomb dot com, the peanut butter to my jelly, my jam Stan! And you use it an awful lot like the usual wood filler except not really. You just take a tiny smidge of the stuff on your finger, rub it into the nail hole, and keep rubbing your finger over the board and across the filled in nail hole until the putty is well blended in with the wood and the nail hole is no longer visible.
After all the staining is done, we usually like to let it set for a day or two. This ensures that the stain is thoroughly soaked in so the poly can seal everything up. Thus, polying was our next step in the second floor trim progress.

All I have to say is “meow”…in a “doesn’t our hallway look sexy” kind of way. I love how a couple coats of poly is all it takes to really make the stain and wood tones pop. It brightens the color and makes for an eye catching finish.
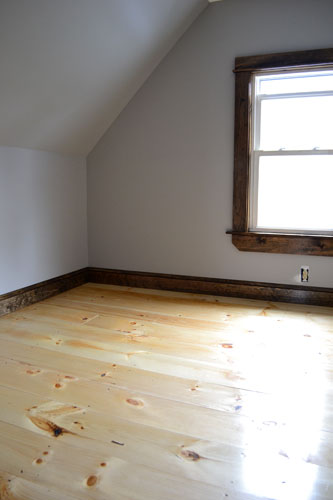
We spent a decent amount of time polying all the trim and the doors, in the guest bedroom, hallway and the door/trim of the master bedroom. In total, it took us about three hours to slather the trim and the doors with two coats of polyurethane.

Why two coats? And not a billion and a half coats like we do on the floors? Man…you guys are a curious bunch this evening! Because the trim isn’t necessarily going to bear the same level of abuse that the floor will. You don’t walk on doors or walls or trim, unless you’re Pippy Longstocking trying to escape Ms. Bannister. Two coats is more than enough to seal the trim and protect it.

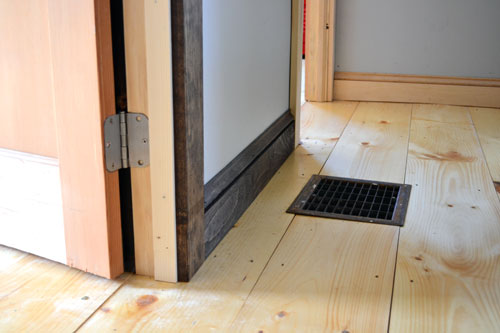
Oooooh…shiny. Not only did we stain and poly all the hallway and guest bedroom trim, but also the door and trim for our master bedroom.

Let’s just say, this project was LONG overdue by maybe about six months, which is not a good thing. Wood doors and trim really need to be finished ASAP. If they don’t get finished shortly after installation, they tend to warp and do crazy things. So finish those doors people! I repeat…finish those doors! We were lucky that our door was fine and survived the lack of finishing, but Colby has told me horror stories about some contractors not finishing their doors right away and running into big problems. It also technically voids your warranty on the door by not finishing them. There…that’s my spiel for tonight. My wordy, 1200 words post.
Pssst…What about you guys? Do you have any deep dark secrets staining secrets? Or other DIY tricks that you swear by? Like using magazine covers to protect a wall while baseboard staining?

Looks great! Staining is one of those things I’m still learning the trick of. I actually just stained something this weekend (using the same stain as you) and forgot to pre-treat! Doh!
Oh…you and me both! The part I don’t quite understand yet is how to stain different woods. And don’t worry about the pre-treat….we never do it and everything turns out just fine! Except for harder woods…I’ve heard pre-treating is great for that. Can’t wait to see your project!
Hi, I keep referring to your blog because I am in the midst of updating my hallway with a new bath door and wood beadboard. I want to install pine flooring to replace the hallway carpet and love what you did with your hallway. Thanks for sharing all the tips!