This weekend was an absolute whirlwind of house project goodness. Sawdust was blowing, paint was flying, there’s sheet rock dust in my hair, and we made a super mess of our house. Big mess typically equals major house project progress. So this week we’ll be spending some time cleaning up our messes and blogging about all the progress. And speaking of progress, I officially declare this the week of the bathroom…maybe two weeks of the bathroom since we made so much progress in our little loo makeover.
Anyway…first up on the project docket, how we hacked up our Craigslist buffet find and turned it into a bathroom vanity. Warning…this post is loooooong! Before painting the buffet we had to do a little hacking. We opted for the cut first and paint later method since you never know when a saw is going to go rogue and an errant cut will ruin the piece…meaning the hours you spent painting is pointless. So we started hacking away at our vanity first by removing the back piece.
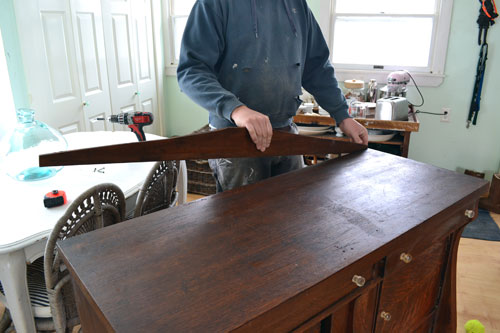
We simply didn’t like the backing that came on the buffet. It wasn’t really our style and it drove my Type A, perfectionist personality crazy that the peak was off center. We may end up putting a back splash of some sort on it later, but we’re waiting until the vanity is in place and we can decide what style/size fits the space best.
Next up was cutting a hole in the top for the sink…more specifically for our $2 display model sink from Lowes. Super score! To do this, Colby made a sink hole template first out of a piece of sheet rock. It was leftover material and something he could trace the sink onto, cutout and tweak without worrying about ruining the vanity. With the template made he measured and centered it on the vanity top.
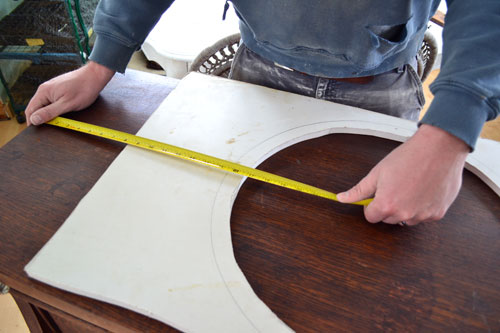
Then traced it with a pencil and later darkened his pencil markings with a Sharpie so he could see it better when cutting intot he wood.

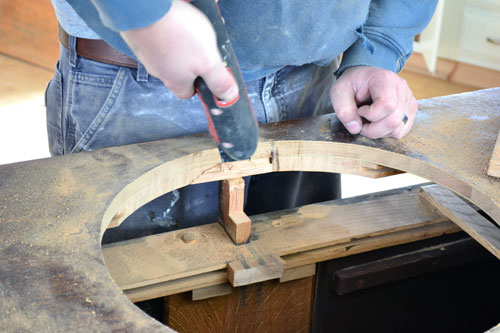
The next step was the cutting. But to get the cutting party started, Colby drilled a hole into the wood using a smaller sized spade bit.

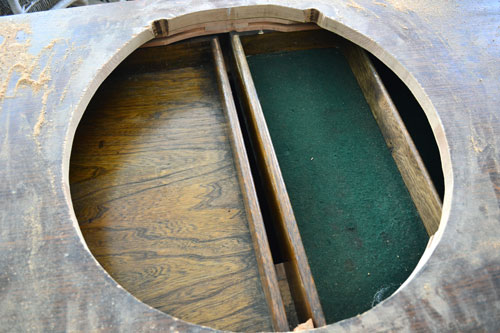
Then whipped out the jig saw to cut out the sink hole in its entirety.

When cutting out a sink hole you really don’t need to worry about being overly perfect or exact with your cuts. Most traditional style sinks, like ours, have a bit of a lip around the outside of it that sits on top of your vanity surface. It needs to rest on some supporting surface but if you mess up a little here or there with your cutting, rest assured, the sink will still stay securely in place and hide the mess up.
After Colby cut out the sink hole, he realized that there was decent sized support piece in the middle of where the sink needs to go. The piece is in the middle of the vanity right between the two upper drawers and isn’t terribly necessary. And kind of just an annoying, pain in the butt piece in the way of our sink operations and it needed to be removed.

So out it came using a combination of a jig saw and multi-tool.
And voila…the sink officially fits perfectly into the top of the vanity. Colby tested…Angie approved.
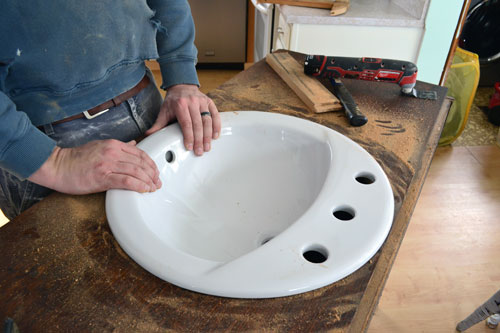
The sink fit into the sink hole like a glove until we put the top drawers back into the vanity. Houston Colby…we have a problem.
We anticipated this problem and already had a game plan…cut down the drawers to fit around the body of the sink. To do this we first had to trace the size and shape of the sink hole of the vanity surface onto the drawers. This was easy thanks to a straight edge and Sharpie to mark a curve onto the drawers.

But before we could start cutting and gluing the drawers, we had another problem child to take care of. And for once it wasn’t Goose, our furry problem child and destroyer of couches! No, this problem child was the really-stuck-on-there felt lined drawer. It was stinky, gross, and essentially not cute. So it needed to be removed.
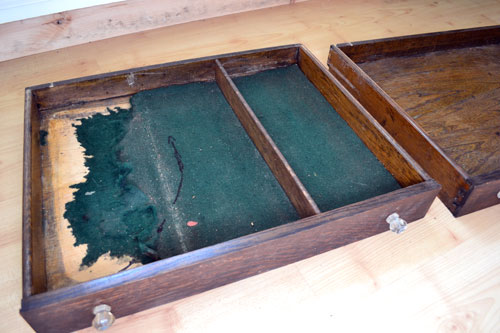
Easier said than done. We first spent a decent amount of time scraping off as much of the felt as we could with a razor blade.

That method got rid of a majority of the felt but we were still left with alot of fuzz that just didn’t want to come off. So out came the orbital sander and 120 grit sand paper.

The sander did the trick. Although the felt did clog up the little vacuum holes on the bottom of the sander but it was a cinch to unclog. So this left us with a pair of drawers ready to be cut down and reassembled in a circular, sink-like fashion.

First, Colby trimmed a piece of scrap wood down to the same size as the drawers sides. Then he nailed it into place, which was at the outermost curve of the sink mark he made on the drawer. This piece would become the new drawer side that rests up against the underbelly of the sink.

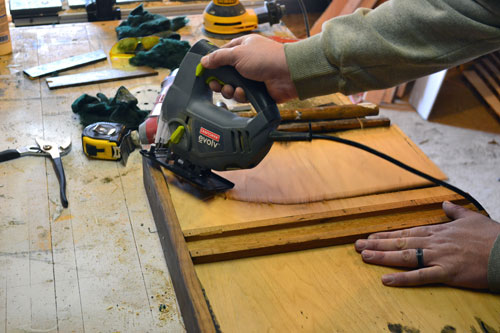
Then, using the miter saw, he cut the straight parts of where the drawer needed to be hacked.

Since chop saws weren’t made for curve cutting, out came the jig saw to connect the two miter saw cuts on a curve, following the marks previously made on the drawer.
And here is what the drawer looked like after cutting out the space where the sink would sit.

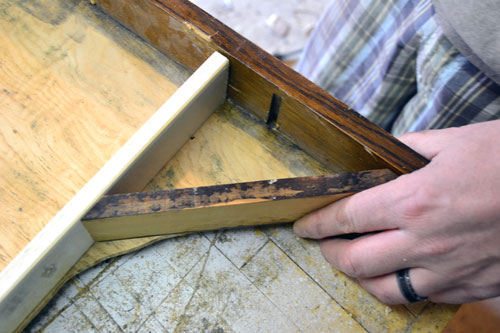
At that point, Colby realized that the little, triangular space beside the new drawer side needed just a little bit of support. A wooden support piece angled between the drawer side and the drawer front would help keep the drawer side from twisting. So we measured:

Cut a piece of scrap wood to size (it was actually the old drawer side that Colby cut off the drawer), wood glued it:

Firmly put it into place:
And, using the Paslode nailer, nailed it into place from the bottom of the drawer into the side of the support piece.

After hacking up the drawers, they looked a little like this.

Can you kind of see where the sink would go? In between the two drawers? After hacking the drawers and adding the little support piece, we were left with a little triangular nook in the drawer.

I can totally see us using that space in the drawer to store small items like floss or lip balm. It’s almost like super secret floss storage for super secret flossing situations.
Even though I had just barely finished painting the vanity body, I couldn’t resist taking the freshly hacked drawers for a test drive. Thankfully, they fit.
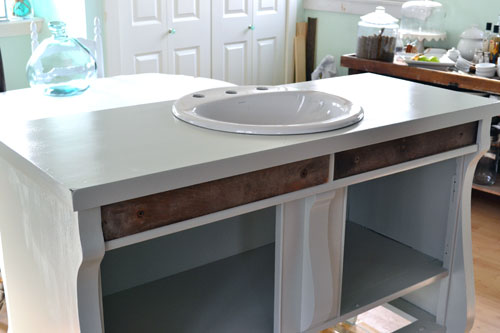
So now that the vanity is all kinds of hacked it up, it’s time for painting (which you can see is just about done…just the two top drawers, two doors, and large bottom drawer left to paint). We’ll have the great painting recap for you tomorrow. All I gotta see is…she sure turned out pretty and I’m loving the paint finish. AND new hardware. Stay tuned!
Pssst…What have you guys been hacking lately? Vanities? Window panes? Ikea furniture? Computers? Dish!

I have a buffet just like the one in this article. I plan on doing the exact same thing. Great idea! I was torn between an old dressing vanity and the old buffet and this won me over with the buffet.
I love that you re-did the drawers so they were still usable, instead of just using the drawer fronts as blanks and adhering them to the buffet. Excellent job!
Thanks so much!! I’m all about keeping things as functional and useful as possible!