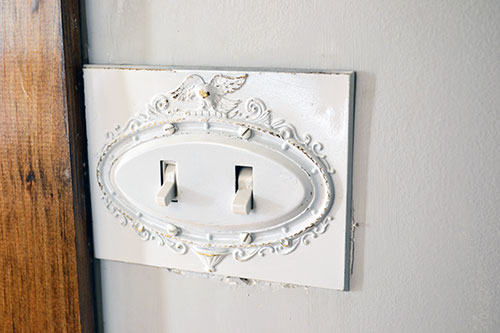
It’s upon us…the last week of the Inspired Design Challenge. Picture me lounging on the couch all ugly face crying because it’s about to come to a close. I’ve been in serious love with this challenge mostly because it has “challenged” me to work on the little projects a little bit more. I’m one to quickly pick up the paint brush to paint a room or a hammer to help Colby lay down a new floor, but when it comes to the little projects like covering a lamp shade or spray painting lamps, I’m not always as motivated. And this week’s project, inspired by World Market, is another one of those little projects that’s been on my to-do list for nearly three years…spray painting and installing an old switch plate:
And of course, my inspiration from World Market looked a little something like this:
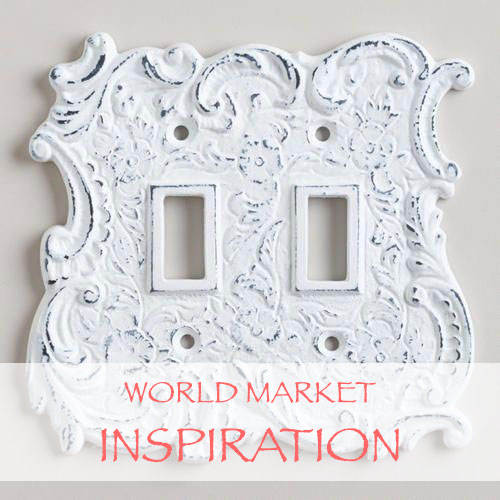
The white, cast iron switch plate cover from World Market isn’t a bad price at $9.99 and it’s definitely something that I would buy. But we’ve had this old switch plate kicking around for the last three years and it just needed a facelift.

The switch plate is (we’re guessing) original to our house. It came from our downstairs hallway and we took it down when we started gutting it out. I had originally tossed it in the “going to the dump” pile but Colby rescued it. At the time, I hated it but Colby kind of liked it so the poor switch plate hung around. Then, about a year ago I came to my senses, asked Colby about the switch plate, resurrected it from the depths of our basement, and put it at the bottom of my long list of to-dos to give it a spray painting makeover. Let’s just say when I saw the distressed switch plate cover on the World Market website, while cruising around for an inspiration project, it all immediately clicked.
Now, I’m sure some of you out there are about to hate me as I spray paint this bad boy, but let’s just say that the switch plate’s former condition was just not my jam. I like bright and white….not dark and dingy. So I painted it and distressed it. Go ahead…hate me…but I’m still cool with my decision. Let’s get painting shall we?! Here are the supplies:
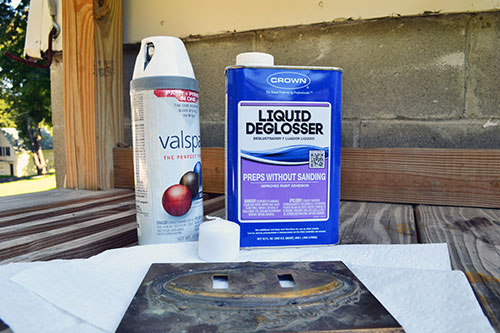
Yes, that is a candle. I’ll get to that in a moment, but first a little deglossing.

Seriously…I should be the face of liquid deglosser. I would make a great poster child doing my best Vanna White impersonation while aptly showcasing a variety of liquid deglossers and flashing my flawless pearly whites. It’s become my go-to product for cleaning/prepping an item for spray painting. I forgo sanding a majority of the time in lieu of the liquid deglosser. It’s like it cleans AND sands all in one step!
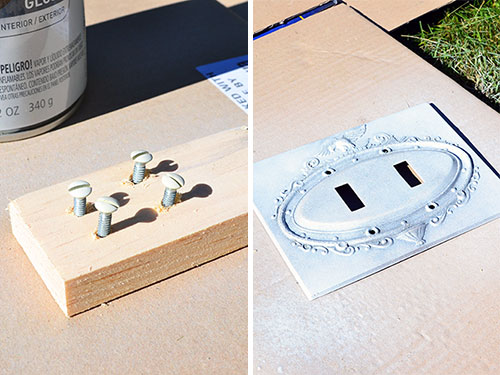
After cleaning up the switch plate, I started waxing it. Yes, you heard correctly…waxing it. This is one of those tricks I learned while at the Haven Conference. When you’re distressing an item, before you paint it, rub wax over the high points in the areas where you want the paint/finish to rub off. The wax prevents the paint from sticking to the item making it so simple to sand off once the paint is dry.

After waxing, it was just a matter of spray painting both the switch plate and the hardware using a trio of thin and even coats of glossy white paint.
I let the switch plate dry for a few hours before breaking out a piece of sand paper. We used a piece of orbital sand paper in 80 grit, mostly because that’s what we have kicking around our house, but any gritty sand paper or blocks would do.

Then, hitting the high points that I previously waxed, gently sanded away the paint to reveal the brassy finish underneath the paint.

Voila…one distressed eagle switch plate ready for installation.
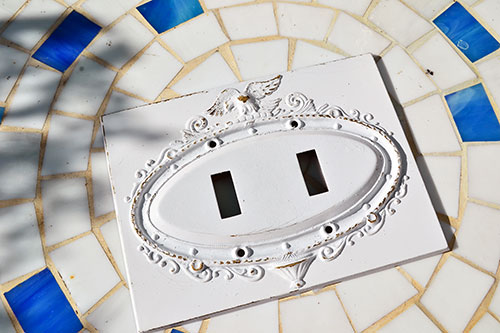
Just to orient you guys, the switch plate has been relocated to the upstairs hallway. It covers the staircase and hall light switches.

And because you can’t truly appreciate the swanky after without a dingy before, thar she blows.
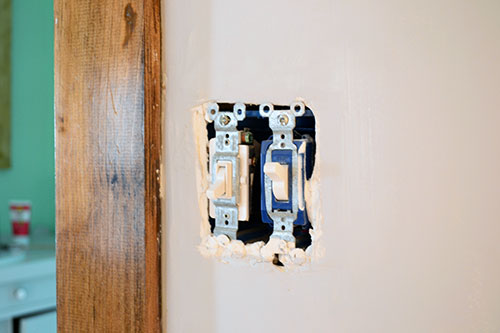
Can you believe we have been sans switch plate for nearly three years?! Well, if you want to get technical about it, it’s been more like 2 years and 11 months since a few weeks ago Colby got sick of the “under construction” look and threw up one of those cheap, plastic, tan switch plates. But I prefer Mr. eagle eye.
Ignore the wonky sheet rock underneath the switch plate. Turns out our mudding job wasn’t quite good enough back in the day and we need to go back over it and fill in the gap some more. Whoops!
But now for the best part of this project…the budget breakdown. This project cost us precisely zero point zero dollars to tackle. Hootie hoo! The switch plate was an old one that came with our house, the spray paint was leftover from one of many spray painting projects, the candle was an extra from our wedding decor, and we already bought the liquid deglosser for the spray painted lamp project. Gotta love a free project!
So now let’s check in with my four fabulous co-hosts of this little challenge.

Oh inspiration goodness! I can’t wait to check in with these ladies and see what they tackled this week. So go check out their projects and show them a little love!
Pssst…So sad the challenge is over…for now. It may come back down the road so keep stopping by!

I love it! I like your style of tackling lots of big projects. I’m the opposite so your blog helps motivate me to tackle some of the bigger projects. I am seriously picking up some deglosser next time I’m at Home Depot! Anything that keeps me from sanding. And thanks for sharing your Haven tip. I rarely distress anything but I’m curious to give it a try. I’m sorta sad our series is over, too, sniff sniff. It was actually a whole lot easier than I thought it would be. My wheels are turning for future series ; ]
Awwww…thanks for the motivation to keep on keeping on with the bigger projects! Next up, complete kitchen overhaul! Keep me posted if you ever want to do another series like this again…I had a blast with all you lovely ladies!
love the federal plate! You made it shine again 😉 xo Kristin
Oooh…”federal” style! I knew there was an official name for it. Thanks!
I love this Angie! Thanks for sharing the wax candle tip! I do a bit of distressing here and there and I’ll have to try this out. Love the switchplate – super cool original detail!
So…much…easier with the candle! Let me know how you like it if you give it a try!