Welcome back ladies and gentlemen (or ladies and my dad and Colby since I’m pretty sure they’re the only “gentlemen” who read this blog), for another exciting rendition of the Inspired Design Challenge. Hootie hoo let’s get this party challenge started! This week’s inspiration store….wait for it…Anthropologie! Man do I love Anthro! I have to admit that until last summer, I was an Anthro virgin. But then on a trip to Boston, I dragged Colby into a store and shopped around for a few minutes. I would have stayed longer but the store was about fifteen minutes shy of closing time. There may also have been a first-timer-in-West-Elm situation as well. But enough chit chat, let’s get to the goods with the Anthro project reveal:
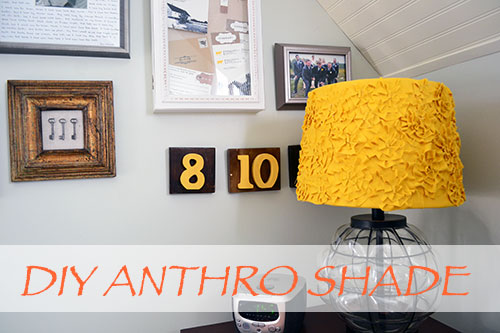
And of course the inspiration was the ranunculus swirl Anthropologie shade. Do you guys remember this image? From back here?
And how I was going to wrap a lamp shade like the rosette shade? I bought the lamps, the shades, the fabric but barely got started. So when the Inspired Design Challenge rolled around it kicked my butt into high-rosette-making gear and I finally tackled the project. Which is totally time consuming….just an FYI for anyone out there wishing to recreate this. It took me three beers and four Red Sox games to finish just one shade!
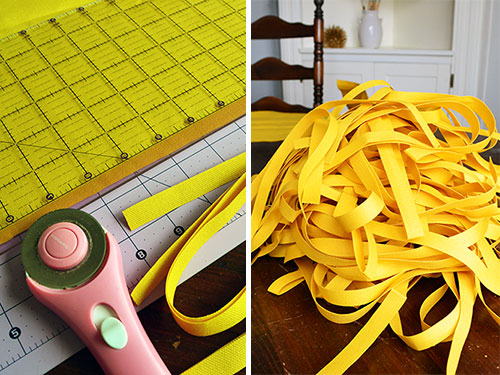
So here’s the how-I-did it, first up the supplies:

I made two lamp shades so I picked up a pair of el-cheap-o shades from Target (I think they were about $10 each) and a couple yards of yellow outdoor fabric for about $10 total thanks to a sale and a coupon. Other supplies included a hot glue gun and a fabric cutting system. Trust me, the fabric rolling cutter thingie (can you tell I’m not a sewer?!) saved my sanity for this project!
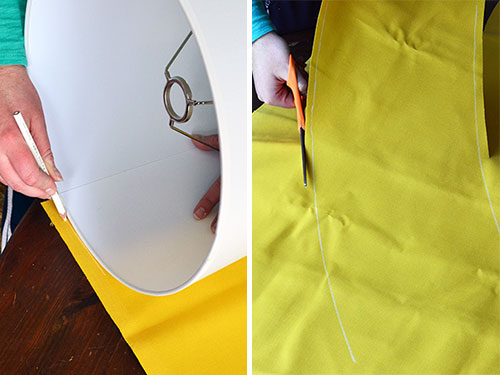
The first step was to cover the shade completely in the yellow fabric. This provides a nice base so if your rosettes don’t 100% cover the shade, no white will poke through. I first traced the lampshade by rolling it along the fabric and tracing the edges with a fabric pencil. Then I just cut it out leaving about 1/8″ to a 1/4″ excess that will later be used to wrap the fabric around the edge of the shade.
And then it was hot glue time. I started with one edge and hot glued all along the straight edge. Once that dried, I rolled the fabric around the shade and hot glued the other seam, folding it over first to make a nice, crisp edge. You don’t really want jagged fabric-ness and fraying to be the seam you show so folding over the fabric prevents this.
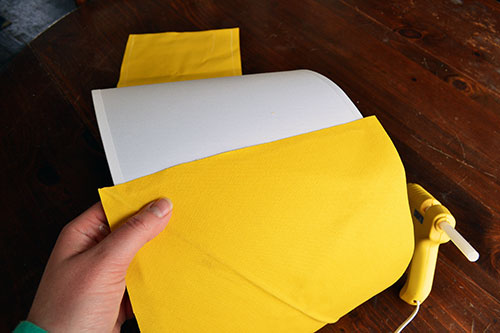
To finish around the edges, I ran a bit of glue just under the inside of the rolled up part of the shade, folded over the fabric, and kind of tucked it into the rolled seam/glue. I worked in about 4″ increments all around the shade so I had time to tuck before the glue dried.

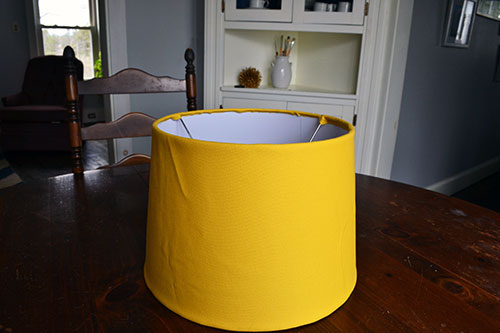
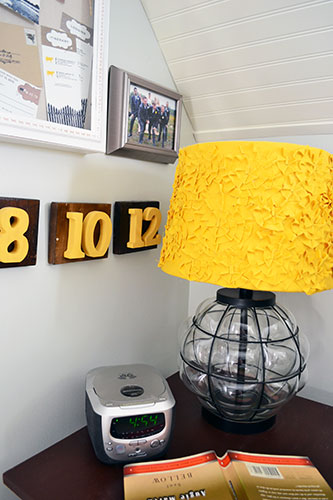
And voila…a fabric covered shade!
Now came the fun part, the rosette part. To make the rosette I used about 1/4″ strips of the leftover yellow outdoor fabric in various lengths. This is the reason why I used outdoor fabric, was for the rosettes. The fabric is somewhat stiffer so it helps hold the floral-ie shape better. So using my rotary cutter, I cut a ridiculous mound of rosette strips.
And then just started making away. I started the process by rolling about an inch of the fabric into a little bead, hot glueing that bead together so it would stay, then glueing it to the shade. Then using that bead as the center point, just wrapped it around in a rosette fashion tucking each layer of the flower behind the first.
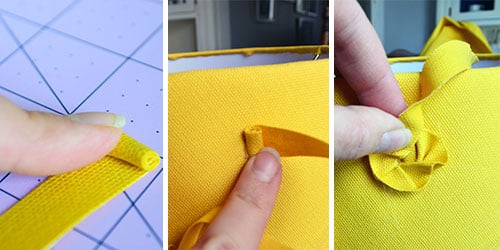
Until I had a rosette that looked something like this:
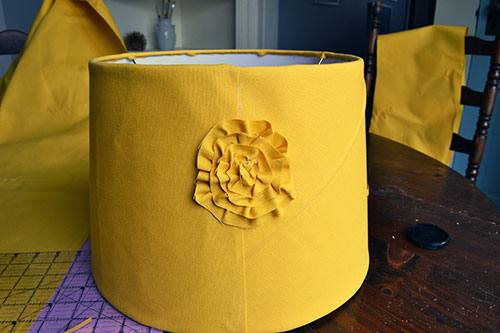
Honestly, that was probably my worst one. I got a little bit better the more I made them. So I just kept wrapping rosettes, gluing them directly to shade as I wrapped, and varying their sizes so they weren’t all exactly the same until I had this:
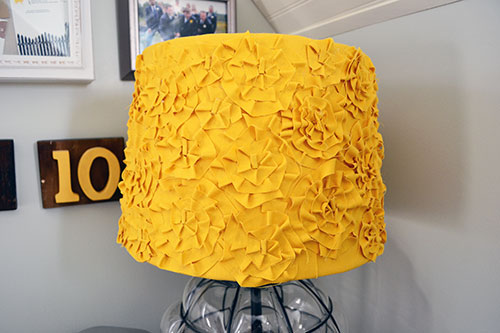
I chose yellow fabric to kind of go with the “8-10-12” wedding table number art hanging beside Colby’s nightstand in our master bedroom. Speaking of…shameless plug…it’s almost our anniversary…eeeeeeek! I can’t believe it’s been a year already! Man it went by fast!
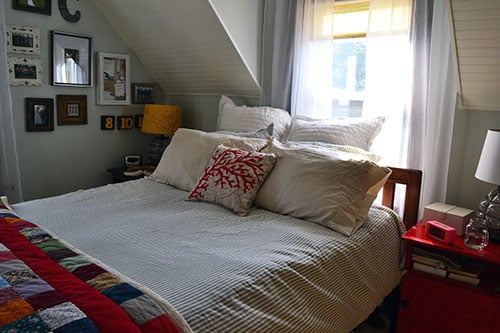
So here’s the full bedroom shot. Excuse the poor photography. It was one of those oh-em-gee my flight for Haven leaves like now and I still haven’t packed and I’m taking pictures of this room anyway because I need to even if it’s bad light kind of situation. I’ll take better pics eventually…maybe after I finish shade numero dose.
Speaking of, in an effort to keep it real, this is what my nightstand/shade looks like:
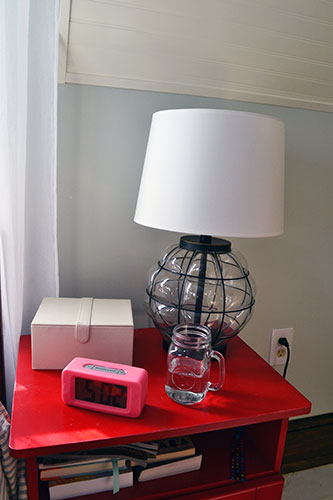
Forehead…desk. I kind of ran out of time. I couldn’t believe how time consuming hot gluing all those rosettes was going to be like. But I’m totally going to blame Haven and our Etsy shop Roostic and not that I may have gotten sucked into HGTV star along with a Duck Dynasty marathon. Those shows just makes me happy, happy, happy. Hopefully I’ll finish the shade soon. Actually, it may have been a good thing that I haven’t yet finished both shades because at the Haven Conference (a DIY blogging conference that I JUST got back from) I learned that I’m basically a styling/staging/home accessorizing nightmare and I want to make a conscious effort to glam up and style some our spaces better, starting with our nightstands. I sense that our digital alarm clocks, especially my hot pink rubber one (seriously?!) will be getting the boot.
So now that I’m done my monologue ala Tina Fey Saturday Night Live style, it’s time to bring in the big guns and my fellow Inspired Design Challenge hosts.

So go check out their amazing projects, show them some love, and tell them I said hi! Next up on the Inspired Design Challenge, our last week of project goodness, World Market. You can get a sneak peak of my project on my Pinterest.
Pssst…So I’ve mentioned this about a gazillion times, but how about one more time for the cheap seats in the back. This past weekend I had the opportunity to attend the Haven Conference in Atlanta, Georgia which was amazing! It was a conference geared toward DIY and design bloggers. I got to meet some blogging superstars, learn a few things, hob nob with some vendors/sponsors, but most importantly, make some new blog friends. In fact, I got to real life meet Kristin from Bliss At Home along with Lindsay from Life of Splendor. But I’ll share more details about the conference later this week.

Looks great, Angie! I love how the pop of yellow ties in with the typography wall art right next door! Glad you had fun at Haven!
Thanks Sara! And oh my goodness Haven was an absolute blast! I learned SOOOOO much and had a great time! Highly recommend the conference! I’ll be spilling all the beans about what I did/learned tomorrow night so stay tuned!
Love that yellow color. Great adaptation!
Thanks Jennifer!
It looks great Angie! Love the color too! xo Kristin
Turned out great!!!
Thank you!