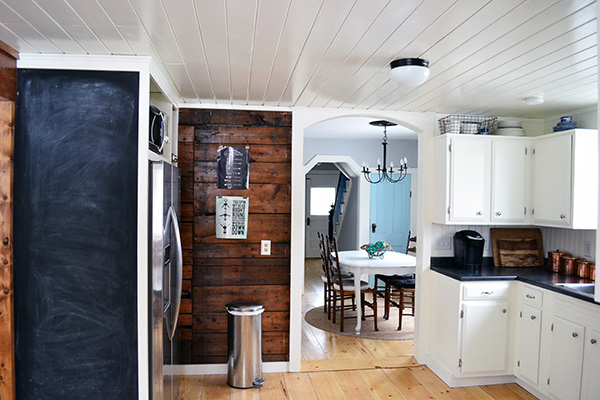
I started writing a post to recap our kitchen renovation before and after at our first house, but after adding 40-ish photos, none of which I felt like I could part with, and 2,000 plus words it needed to be broken up. Kind of like that couple you love to hate in your favorite 90s movie. So we’ll get to the before and after in our next post but today we’re going to talk about the demo, the details, and the what-were-we-thinkings. For reference sake, we did finish our kitchen and it ended up looking like this (obligatory pretty picture to balance out all the ugly reno pics):
But it did start by looking like this:

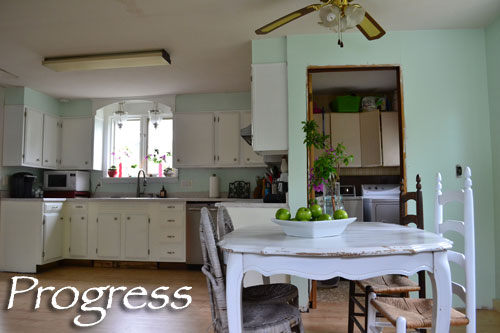
But looked like this for a long time after a mini-makeover:
This whole kitchen renovation started with a conversation like this:
Me: “Colby, do you think you could take down that ceiling fan for me and replace it with this really cool hanging lantern I found at Lowes on clearance?”
Colby: “No problem. And while we’re at it, let’s finally replace the entry door with the display door I picked up for cheap from one of my dealers.”
Me: “Great idea. And we might as well take out part of the wall and floor because the old door always dragged on the floor. Now’s a great opportunity to adjust it to put an entry rug in there.”
Colby: “The ceiling is falling apart too. Maybe I can fix the part by the door. And add some more insulation there since it’s always so drafty.”
Me: “Oh hell, let’s just rip everything apart. I’m not too fond of the kitchen. Let’s start remodeling it and make it our winter project. We can start now (September), chip away at it all winter and spring, and by summer we’ll have a brand new kitchen we love.”
Colby: “Sold”
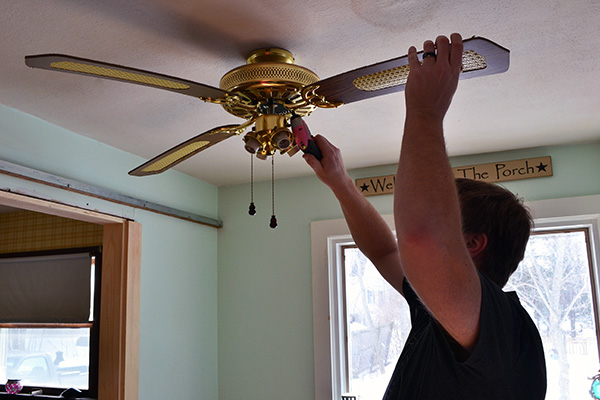
Slippery slope. Sadly, most of our projects start like this. Enter the ceiling fan that got this all started. Poor ceiling fan. He has no idea what he did.
What we didn’t know at the time was that one month from removing this ceiling fan I would be interviewing for my dream job 7-ish hours away in Vermont and about a month after that would be starting work at said job. So much for chipping away at projects all winter long! Looking back, I am so glad we finished the kitchen before selling the house. The house wouldn’t have sold as fast if we had left the nasty painted-over paneling backsplash:

And the warping, damaged, stained, and every other negative adjective that could be used to describe the 70s/80s laminate countertop.

And even the old entry door that barely closed, dragged on the floor and was flanked by two exterior lights with broken glass that had never worked and were packed full of flies.
So we started the demo in the entry area of the kitchen and worked our way out. Oddly, the ceiling in the entry was at a different level than in the rest of the kitchen which turned out to be because of multiple layers of sheetrock. We tore out most of the entry since we wanted to frame out a little coat closet and storage area here to make it more functional.
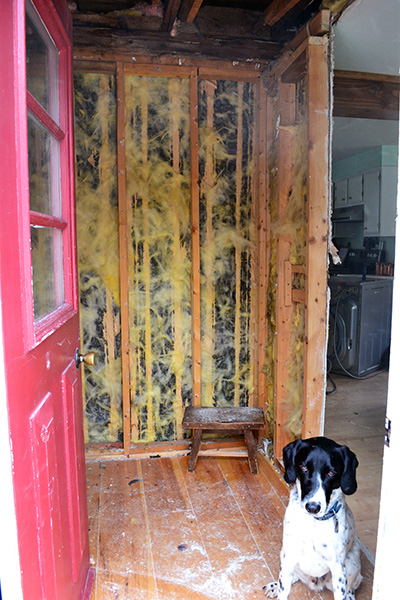
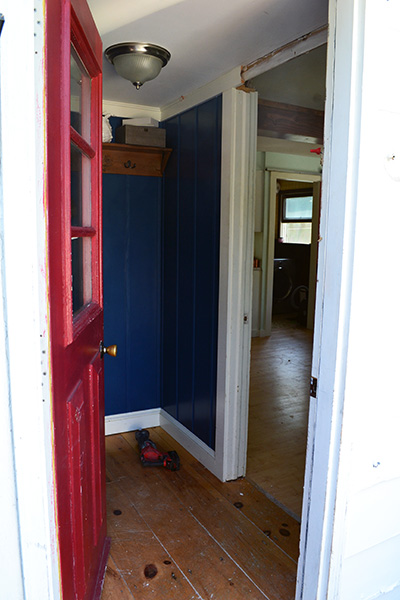
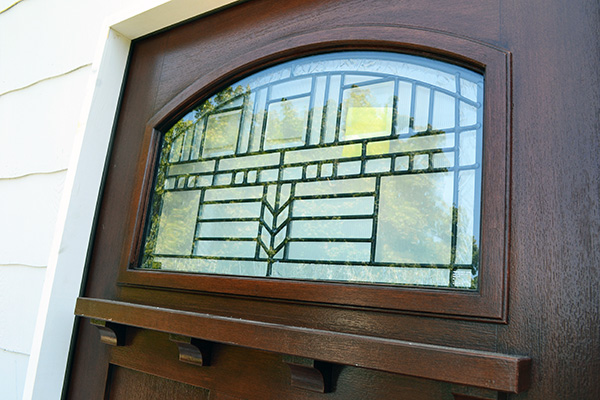
Goose is always so unimpressed with house projects although never one to miss a photo bomb opportunity. The old red door came out too and was replaced with this beauty:

Both Colby and I love the craftsman-style doors so when Colby came across a dealer (a local lumber yard) who was selling off a bunch of display doors at a bargain price, he snatched it up. We’re talking a bargain price of about $50 for a door that normally retails at $600-$700 for just the slab, $1100 if it was all set up in the frame. Good man Colby. The frame situation was easily rectified by purchasing a frame kit which retails for about $50. The hardware was the priciest part at $150 but all in we spent $250 for a new entry door as opposed to its normal retail cost of $1100+. Just check out the detailing on this door. Swoon!
Thankfully, we were having one of those summers that extended into September/October so it never got too cold while we replaced the door, removed the kitchen ceiling, and added as much insulation as we could. After demoing the entry we continued on to the extended entry area into the kitchen:
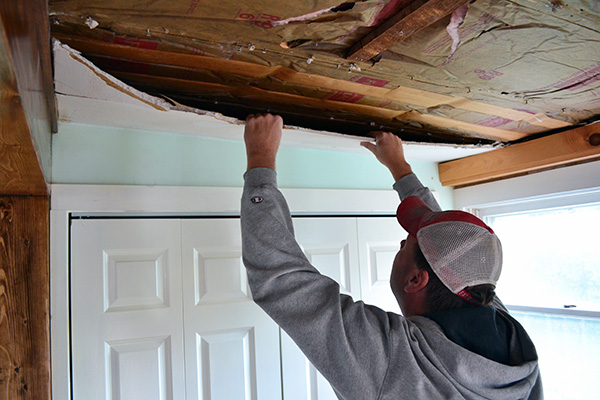
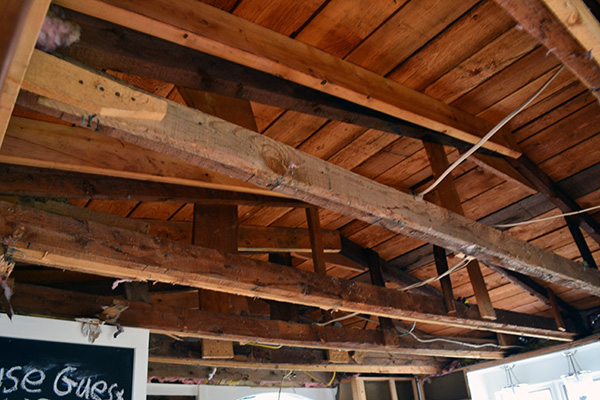
And onto the main kitchen ceiling space. We then understood the cold and draft issues in the kitchen since there was barely enough insulation in the ceiling attic-ish space above the rafters.

We always knew we had some weird electrical going on in the kitchen. We had wires that were live no matter which breaker we shut off and sometimes just opening the microwave door would trip the breaker. But as soon as we took down the ceiling it revealed the electrical mess including hidden junction boxes and no junction boxes with live wires just spliced together. Needless to say, we marched right down to our permitting office to get an electrical permit to rewire the whole mess of a kitchen.
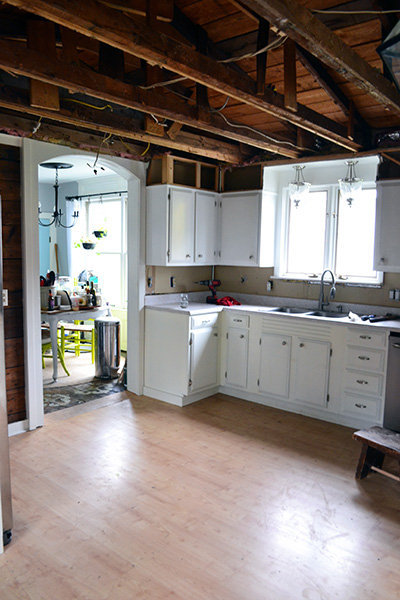
And the other side of our ceiling-less kitchen.

We always dreamed of lofting this ceiling a little bit or exposing some of the rafters, but after taking down the ceiling, it was not worth the hassle especially when it was right around this point that I was interviewing in Vermont.
The rest of the renovation progress pics of the kitchen are few and far between since I was living with in-laws in VT while Colby was in Maine frantically trying to put the kitchen back together again. But they were the unglamorous projects like wiring, electrical inspections, insulating, and mad amounts of ceiling painting. We decided to plank the ceiling in the kitchen like we did in the laundry room. So much pre-priming and painting for the kitchen ceiling compared to the laundry room. It was a matter of 50 or more 12′ planks compared to just 6 planks in the laundry room. We ended up installing the same ceiling planking on the porch so if we never see another ceiling plank again, we’ll be alright. My arm still hurts from all that painting.

While I was in town one weekend we also cut up and removed our old kitchen counter, which we replaced with a new oiled soapstone laminate counter. It made a huge difference for not a huge cost, coming in at $400. If we were staying here forever we would likely have replaced it with real soapstone but we would never have recouped that cost where we were selling.

Other projects included building a little coat closet in the entry area and turning the extra space beside the chalkboard wall into a little pantry. True to form, we built both using framing lumber.
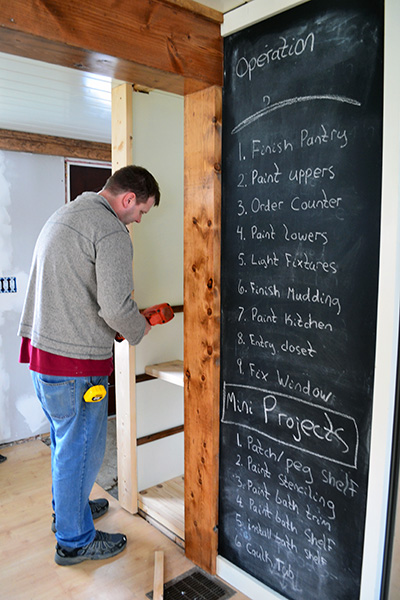
And one last progress shot before revealing the total kitchen makeover, before and after, later this week.

The kitchen is the space we spent the most time fixing up while getting our house ready for sale. We even repainted all the kitchen cabinets inside and out. We never painted the interiors of the cabinets when we first painted them and always wished we had. We also installed wide pine flooring in the kitchen and throughout the whole first floor but that’s another story for another day.
Pssst…I am DYING to tell you guys all about the new house that we closed on last week. DYING! I have just a few more photos to take before spilling all the beans (and carrots and peas and whatever other vegetable is worth spilling). Hopefully later this week I’ll have a “meet our new house” post up. Until then, we have a few sneak peeks on our Instagram feed that surely won’t disappoint.

Hello Angie, I’d like to know the process you did to arch your kitchen doorway. Do you have a write up about that?
I don’t unfortunately. It was one of those projects that Colby did while I was away and then I came home to a “surprise”! It was pretty simple. It’s a regularly old doorway just under the header, we added the arch. The arch was installed after all the vertical trim pieces were in place. The front (and back) of the arch is just a wide pine board with a curve cut out. The “ceiling” of the arch is a thin piece of plywood that’s bent and nailed to the blocking behind it in about a thousand places. I’m sure it’s not the most official way to add an arch to a doorway but it worked for us and has held up for five plus years now. Hope that helps and let me know if you have any questions!
Ya’ll did such an amazing job on this house!! The new owners must be so excited to have such a gorgeous kitchen. I can’t wait to see the pics of the new house…I’m drooling over the IG peeks. 🙂 Have I mentioned? It’s so good to have you back!!
Thanks so much Melinda! It’s definitely great to be back! I’ve missed writing so much and talking with all of you. I’m glad you’re still around!!