Hello friends! How are you all doing tonight (or this morning or afternoon…depending on when you’re reading this)? We’re coming off one of those glorious weekends. You know the kind where you just putter around the house, no crazy long to-do lists, and you just do whatever you want when you want. For me, that apparently means making the hour-and-a-half trek to Target for a steamer so I could spend the rest of the afternoon steaming the wrinkles out of the new dining room curtains. Oh, the things that bring me joy!
One of the things I did tackle this weekend was photographing the dining room progress, including the freshly refinished buffet.
To recap, here’s how she started just a few weeks back:
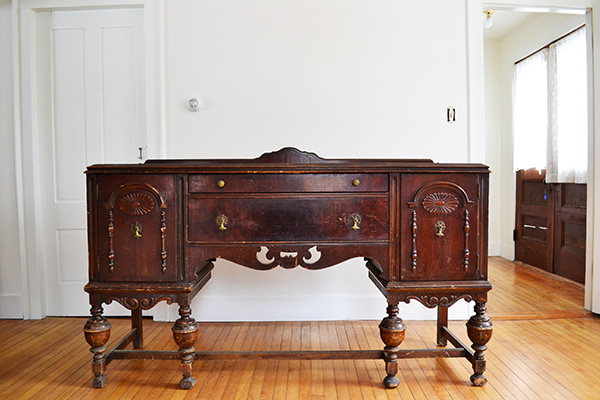
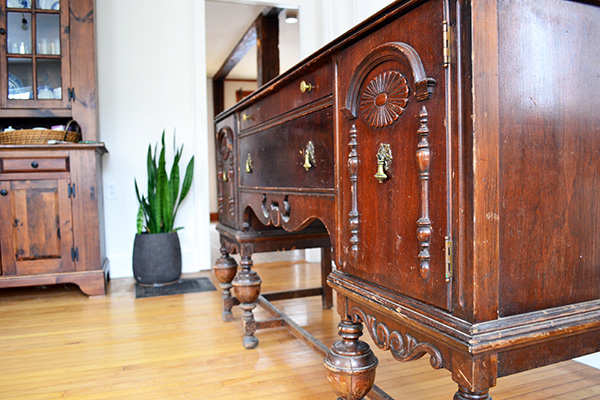
If you remember from our last post about the dining room game plan, the buffet was a $60 score from Habitat for Humanity Restore. The piece wasn’t in the greatest shape. The legs were cracked and broken, some of the decorative pieces were missing chunks, it was scuffed and gouged in places, etc. Between the piece’s state of affairs and the fact that there was so much wood going on in this room (table, chairs, hutch, buffet), we decided to paint the buffet.
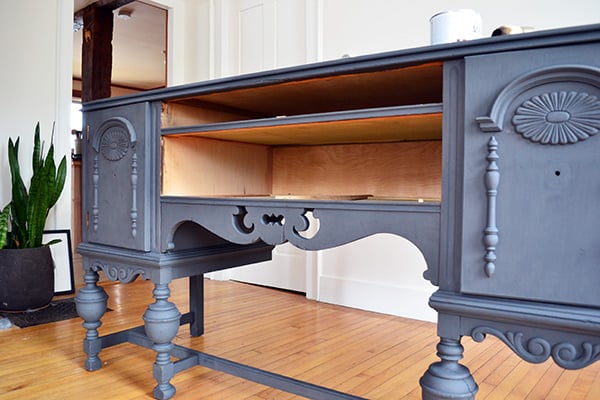
I went with chalk paint, specifically Annie Sloan’s chalk paint in Graphite. I love an old piece finished with chalk paint. It’s just such a perfect combo. The finish is always imperfect and weathered looking, which goes great with the buffet’s already imperfect state. Armed with a 1-1/2″ angled brush, the same one I use when cutting in wall paint and painting windows and trim (no need to go out and buy one of those overly expensive chalk painting brushes), I contorted myself into strange positions to paint every nook and cranny of the buffet. One good, thick coat of chalk paint on the buffet is all it took.
For those of you who have been to the chalk painting rodeo before, you’re familiar with the waxing process. But for those of you who are charting unfamiliar territories, chalk painting is a two-part process. Step one, paint the piece. Usually, you can get away with one coat. Occasionally it takes two coats. And if you’re having a ton of fun on the project, you can layer on multiple coats of different colors.
Step two (if desired), distress the piece. Chalk paint is super easy to distress. It’s chalky and flakes off pretty easily with sandpaper to give a piece that old-world style feel. I chose not to distress this piece and jumped right into the last step.
Step three, waxing. Because the chalk paint is so malleable, it needs a protective coat of wax. There are two main shades of wax, white (more like clear) or dark. My original plan for this piece was to wax it white. But the Graphite shade of chalk paint looked more blue than black when I was done and I had envisioned a black/dark gray piece. Turns out, Annie Sloan Chalk Paint doesn’t include any black pigments, and graphite, albeit the closest thing to black, is a deep blue-ish color. So dark wax it is.
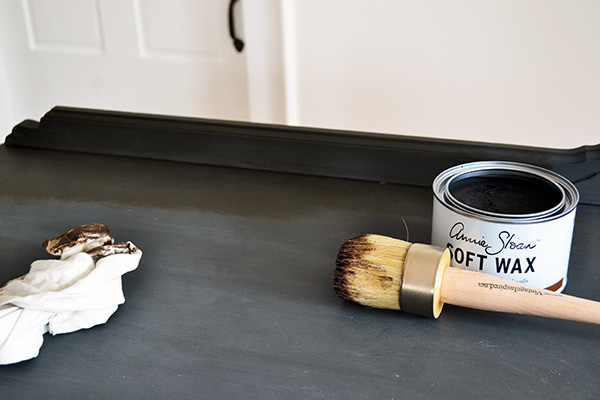
I spent a few more days slowly Karate Kid-ing the buffet…wax on…wax off. This is the sixth furniture piece I’ve chalk-painted and the first time I’ve used dark wax. I also splurged on a wax brush this time around. I usually just dip a rag into the wax to smear it across the piece but I was low on rags and wanted to avoid dark wax all over my hands (and arms) so I used the wax brush and was so glad I did! Waxing was so much easier and cleaner.
To wax, I just swirled the wax brush in the wax tin, brushed it into the chalk-painted piece in small sections, and wiped the wax off using a clean, lint-free rag. All in all, it took me a few weekends of waxing to get through the whole thing…drawers and all.
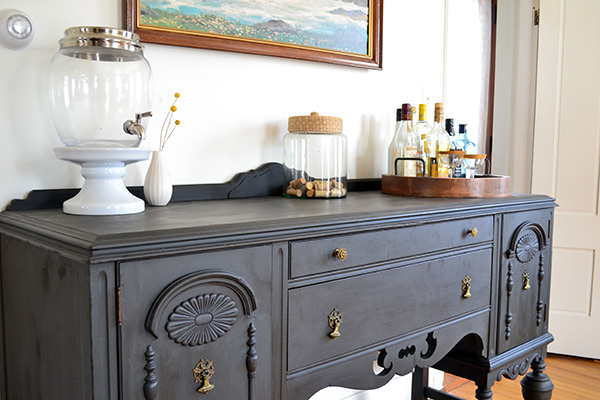
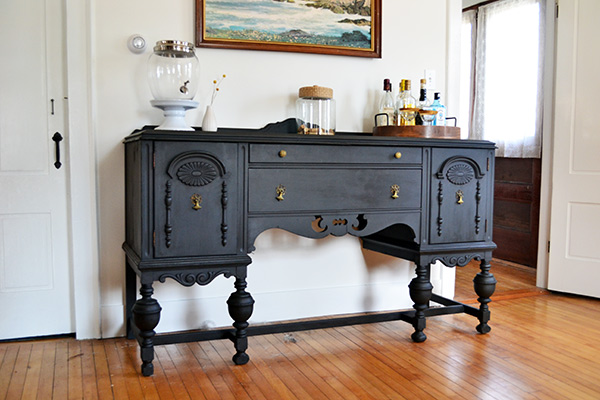
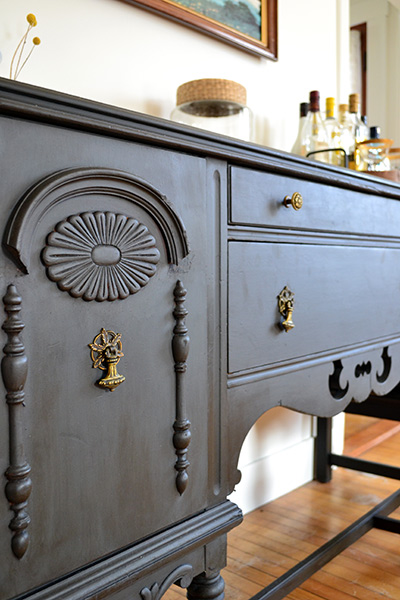
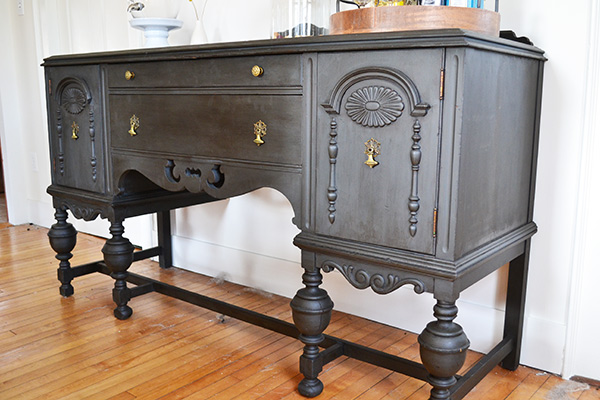
I am so, so, so very happy with how the finish turned out on this piece! It’s exactly how I envisioned it. I love the contrast between the white walls and the dark gray finished piece. And also the inconsistent, almost smudgy-looking wax finish. It gives the piece such great character.
We set up the buffet again as a beverage station in the dining room and hung the same flea market art above it for now. I’m sure the styling and purpose will change as we keep chipping away at the dining room, but for now, we’re enjoying the setup.
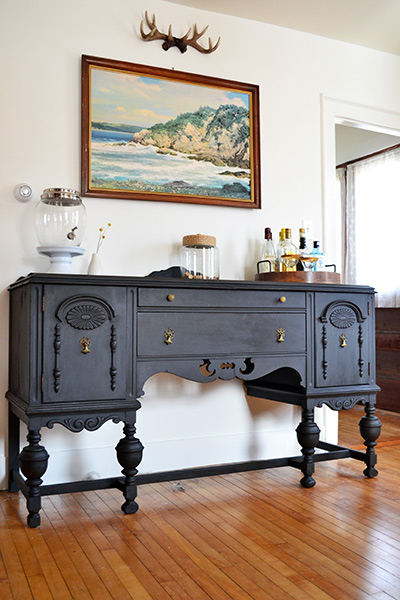
Do you like how I forget to vacuum up the Goose hair tumbleweeds from under the buffet?! Doh! Palm…face. Now you’re staring at the tumbleweeds, aren’t you? But look…shiny hardware…ooooh!
Now that I’ve shared the buffet makeover, it’s back to curtain steaming so I can finish photographing the room wrinkle-free. Although, I’m pretty sure the steaming obsession is more to appease my obsessive-compulsive nature rather than for pretty window pictures.


My gosh that is beautiful! What an awesome find and you did a great job finishing it!
Thank you so much!
Beautiful! I have one similar that I am considering doing exactly like yours. Did you paint the inside of the doors/drawers?
This is gorgeous! I have a question, if I did this finish to a buffet I’m repurposing as a TV stand, would the finish hold up to the weight of it and placing things on top? I love the look of this but want to make sure it will hold up, thanks!!
I think it should hold up as long as you let your wax dry/cure for enough time before putting something heavy on it. And the beauty of chalk paint, if it does ding up the finish, it gives it that worn and aged look that goes so well with chalk paint. And it’s easy to touch up later too.