It’s official…we are completely done roofing our house. A few weeks ago we shared with you our “roofing the main part of the house” story where my brother Anthony, his friend Adam, and Colby managed to hammer out (pun 100% intended) re-shingling the main section of the house. That just left the much smaller porch roof to shingle, which took us precisely one Sunday morning to complete. And by we I really mean Colby since he pretty much did the whole thing while I took a quick trip to Target. Tomorrow I’ll get into the details of “How To Shingle Your Roof” but today I thought I would bring you the “Roofing Tools Of The Trade” as part of our little “Roofing With The Campbells” series.
Roofing tools aren’t something we would necessarily purchase for our own use. They’re not something that we would use often, especially roofing nailers, thus we went the route of borrowing my brother’s equipment, since he shingles roofs for a living. But if you so happen to want to go the extra step and purchase tools to do your roof, I’ve compiled a little list of some the tools and equipment you need. All of the products (and pictures) below come from Lowes, but can be found in pretty much any hardware store.
A roofing nailer is pretty much one of the most important tools you will use. This pneumatic Hitachi nailer costs a whopping $269 but is worth every penny considering the amount of nails you will go through.
You don’t want to be nailing each of those suckers by hand. It sure makes for a LONG day. The Hitachi nailer is one that my brother uses and swears by. Supposedly…it has even survived a few drops from the roof.
2. Air Hose
Air hose is kind of a given considering the nailer is pneumatic and needs to run off compressed air. When looking for air hose, make sure to buy the right diameter so it fits your tool. Also consider the length that you’ll need since your compressor will most likely be on the ground while you’re working on the roof with the nailer. This air hose is another “my brother swears by this” recommendation. In fact, I ran out to Lowes mid-job to pick up another coil for the roofing team. A certain husband of mine just so happened to shoot a nail through the air hose they were using. Whoops. Turns out that air hoses don’t work so well with holes in them. #accidentpronehusbands
3. Compressor
A compressor is also absolutely necessary if you’re going to be running pneumatic nailers. There are non-pneumatic roofing nailers out there like the Paslode system, but they cost some serious coin. And I’ve heard they’re a little less reliable than good ol’ compressed air nailers. But a compressor is versatile in that you can run an entire fleet of air tools off of it. We borrowed one of my brother’s compressors but it is a piece of shop equipment that Colby is jonesing for.
And to go with it you’ll also need utility knife blades.
These blades are specific to roofing. They’re hooked allowing you to cut materials with them such as shingles, linoleum, carpet, fabric and more. These particular blades, which are made by Bostitch, are specifically meant to cut shingles because of the deeper hook. Cutting shingles is one job that occurs often while roofing. You can either go this route (utility knife/hook blades) or you can go the snip route.
6. Snips
Snips are another option for cutting and slicing down shingles to make them fit. This was the method of choice for both my brother and Colby. They used the 10″ snips quite often, so often that Colby developed one serious blister/burn and I swear his hand is going to fall off any day now. It’s so gross. Maybe it’s time to amputate! I kid, I kid. Anyway, the crew chose to use snips mostly because of the amount of utility knife blades they would end up having to use. Blades don’t stay sharp forever and snips seem to last alot longer.
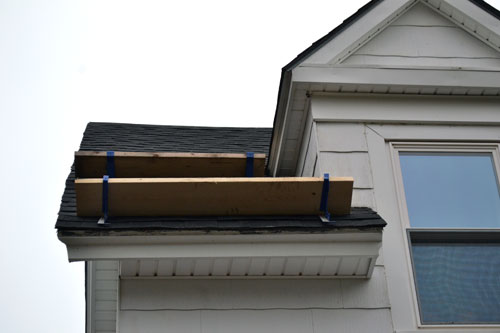
or 8. Adjustable Roof Brackets
Are another necessity. They help the job go alot more smoothly and safely with the addition of a plank. The roof brackets help provide a work surface so you don’t slide off the roof. The only difference between the adjustable brackets and the fixed brackets, is that with the adjustable brackets you can change the angle. So depending on the angle of your roof, you can change the angle of the platform so it’s more parallel with the ground.
No brainer, right?! You gotta get up on that roof somehow. Just make sure that when you’re shopping for a ladder that you get an extension ladder long enough to reach your roof surface. This is one “every homeowner should own” item that we still don’t have. But we have a neighbor with one that has given us free use of the ladder whenever we want. It’s convenient. In fact, we pretty much commandeered that ladder for the majority of the summer. It still might be in our yard but I swear we’re returning it soon!
So these are the basic tools necessary for roofing. It’s by no means an all-inclusive list and you still need some of the basics like a caulking gun for roof tar, a hammer for errant nails, and good gripping work gloves. But these tools should give you an idea of what you might want to beg, borrow, or steal from those you know if you’re trying to tackle your own roof. Scratch that…I by no means encourage anyone to steal from their friends or family but feel free to beg away.
Pssst…I’ll be back tomorrow with a big ol’ roofing how to. I’m warning you now, it’s a doozy! And just to be clear, I was not paid or perked by Lowes to showcase their products. But if Lowes is reading, feel free to hook a blogger up! Haha!


