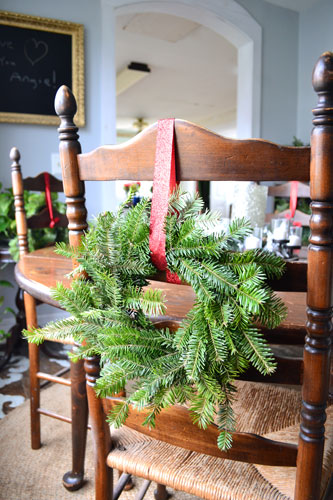
I know this post is WAY late. The dog ate my homework…oldest excuse in the book. By this time of year, you’re probably immersing that turkey in for a good brine-ing and putting those finishing touches on all those Christmas cookies for Santa. But here at The Roost, we’re just putting together our Christmas wreaths and garlands. Doh! Holiday season procrastinators of the world unite! It can’t just be me?! Show of hands…who is still decorating their home for Christmas? Anyway…back to the wreaths and garlands. Here is what I made…wreaths for the dining room chairs:
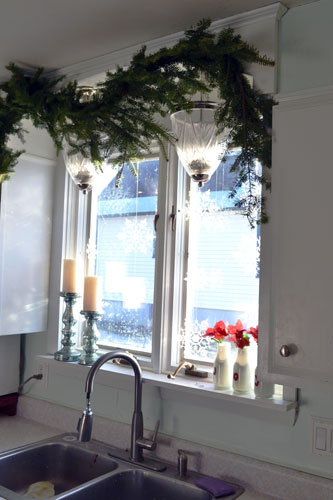
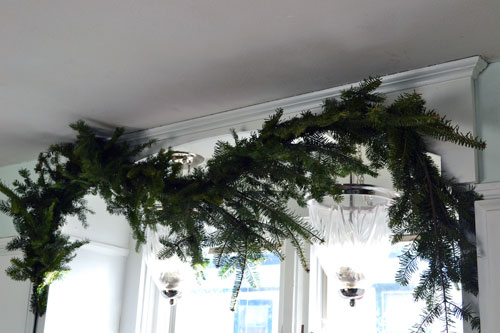
And some garland for above the kitchen sink:
I love how Christmas wreaths and garlands inside a home bring out that rustic, Christmas is here, let’s pack in the sleigh (errr….family mini van) and go sing some Christmas carols at the neighbors’. Poor neighbors. And making your own Christmas wreaths and garlands is not only CHEAP but EASY. Here are your supplies:
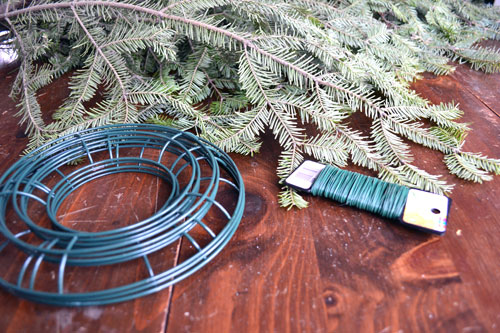
Supplies included four mini wreath forms, which you can get at just about any local craft store for about $1.50 each. They also have various sizes so you can do a full on, monstrous outdoor wreath. You also need some green, floral wire, which also costs just a few bucks. Then, a walk int he woods yielded a few spruce boughs that I sliced up using a pair of snips.

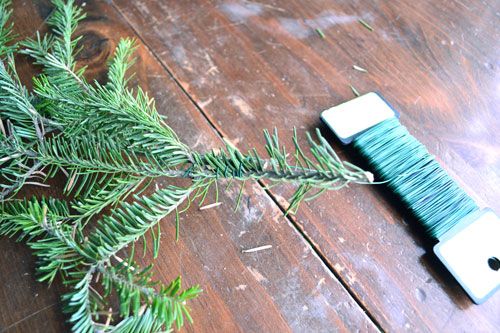
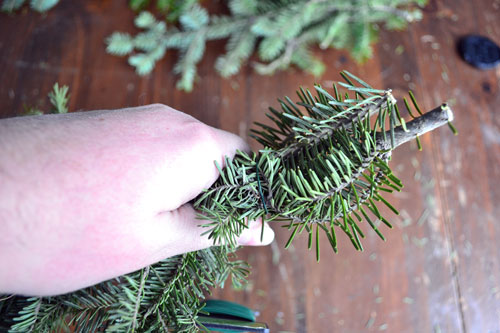
I just took the bough and cut off all the little branches shooting off of it. The smaller branches were saved to make the mini wreaths and the larger branches were used for the garland. Then to make the wreaths, you just grab a couple of small branches:
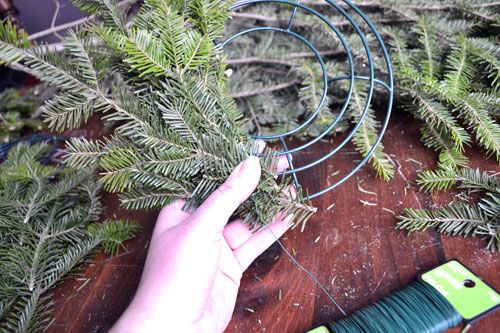
And wind the floral wire around and around and around…..around and around and around….around and around and a….you get the point.
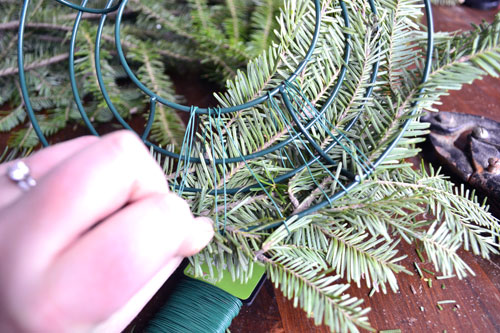
You just keep wrapping the floral wire around the wreath form, adding branches here and there, making sure to completely cover up the wreath form. But if you miss a little spot here and there, don’t sweat it (to the oldies Richard Simmons style). Adorn your mini wreath with your favorite ribbon, my glittery ribbon of choice hailed from Target for $1.98 for an entire roll, and hang.
I made four mini wreaths in total and hung them on the backs of our four dining room chairs. Christmas wreaths done…and just under 30 minutes total time.

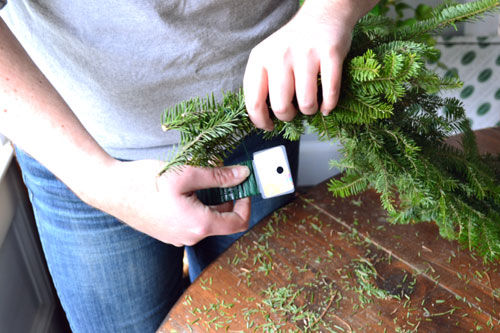
Now stepping up to the plate…Christmas garland. You can make a simple garland pretty much using the same method as wreath making. Grab some branches, add some more branches, and twist the floral wire around them. Start with the tip of the garland and work towards the stem side, making sure all your branches are pointing in the same direction.
I tend to grab a small clump of branches for a fuller garland effect. Mostly because I don’t decorate the garlands after they’re made. But if you plan to cover your garland in twinkle lights, ornaments and bows, adding just a single branch, instead of a clump, would be fine.
As you add branches and twist the floral wire around, slide the new branches slightly further out to the base of your garland, away from the tip. This is how you “grow” the garland. So there’s a good six inches or so of overlapping branches. You can kind of see the overlap of branches in the pic below of the underside of the garland.

And just keep swimming twisting and just keep twisting.
And little drummer boy drum roll please……the finished garland hanging over the kitchen sink window.
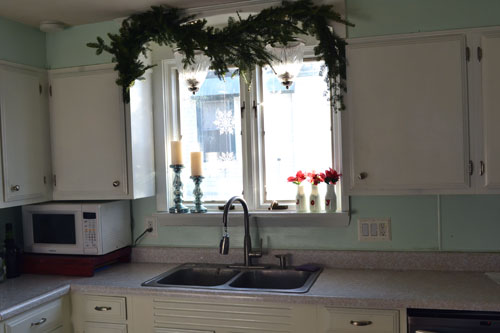
The garland looks extra awesome by night. For comparison’s sake, here’s the garland by day:
And the garland by night:
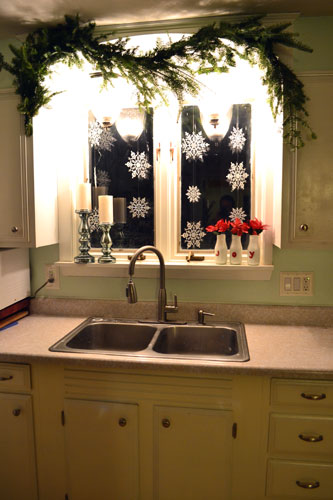
Cue up the oooooooooh! And strike up the awwwwwwww! Festive, no?! Now I just wish I had made these and put them up earlier on in the season so we could enjoy them more. Oh who am I kidding?! It will be July before I finish taking down all the Christmas decor anyway so I guess it doesn’t really matter.
Pssst…Merry Christmas Eve everyone! Hope you have a fantastic round of holiday celebrations with all your friends and family!