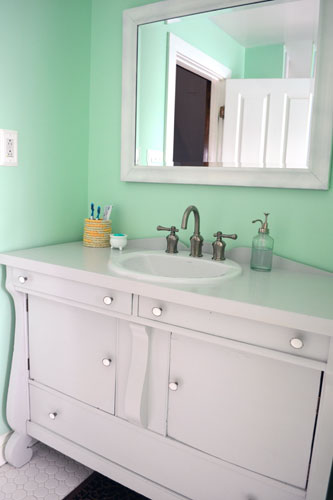
So last night I whipped out my glue gun…and made us a little toothbrush holder for our recently refreshed bathroom (you can check out some of the bathroom posts including painting the bathroom mint, finding an old buffet on Craigslist to turn into a vanity, how we hacked the buffet, and then painted it, and installed it). Anyway…back to the project…wha-bam!
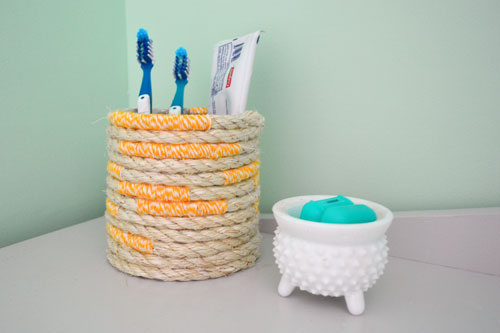
Seriously…there’s nothing I can’t do with a glue. Except maybe create world peace. But that’s a job for Miss America, right?! Bah-dum-tsh….I’m here all night. Anyway…here is the new toothbrush/toothpaste holder on the vanity.
And the beauty of the whole project is that it cost me a whopping $2! The only thing that I had to buy was the glass vase. We already had the 3/16″ sisal rope on hand from various rope obsessed projects (you can even check out my Pinterest board dedicated to rope decor)and the yellow baker’s twine (from the Twinery on Etsy) is leftover from our wedding invitations.

I was a bit sick of our toothbrushes hanging out in the open and the toothpaste always lingering on the vanity top. I like things to have a spot…a put away spot. So the game plan for this project was to take a small, glass vase and wrap it in rope with a little baker’s twine mixed in for some color. But I didn’t want to glue the rope directly to the glass…that way I could remove the glass to clean it of toothpaste residue and put it back. So essentially, I made a rope koozie for the vase.
To do this, I started with the base. I coiled the the rope tightly, hot gluing it as I went along. Lots of hot glue = a tighter more secure coil. Fortunately, I only suffered a handful of hot glue burns…only one pseudo serious. It really helped by coiling the rope while laying it flat on the table to keep the base of the rope koozie even. I continued wrapping and gluing until the rope coaster was one rope round wider than the glass vase.

That’s when I started to take the rope koozie vertical and glued between the vertical rope layers.

After a solid first wrap around with the sisal rope, that’s when I started to wrap the rope with the yellow baker’s twine.
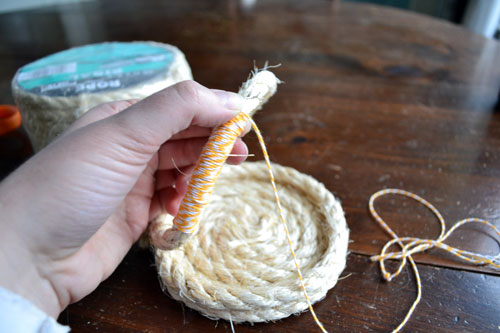
I capitalized on my Type A personality and oh so carefully and evenly wrapped the twine around the rope, gluing each end of the twine to the rope to keep it from unraveling. As for the length of the twine, I used a really precise measuring method and used “two wingspans” length of twine. You know…where one wingspan equals the space between my hands when I stretch them out.
I wrapped the rope with the twine at random intervals. I didn’t really have a pattern or system for wrapping the rope with twine, I just kind of winged it.

I just kept wrapping and gluing and wrapping until the rope had just barely covered the top of the glass. The whole project took about two beers (that’s nearly two hours for those of you unfamiliar with my beer drinking pace) but it would probably take someone who is a little less Type A about an hour (a one beer project).

I love the end result…it’s so much cuter than the old, metal toothbrush holder. AND I made it…AND it has so much character…AND it’s a step in the right color direction (we’re going from a mint/yellow color combo in this space).

One little bathroom accessorizing project done…so many more to go. I’m thinking of adding some art, a little first aid cabinet, some rustic towel hooks, and a snazzy new (and colorful) light fixture. Stay tuned.
Pssst…How about all of you? What have you unleashed your glue gun fury on? Or any bathroom accessorizing going on? Do share! I love hearing from you all!

This turned out lovely and the possibilities are endless! Lately, I’ve been loving wrapping things in rope.
Awwwww…thanks so much! And we can totally be besties! Wrapping things in rope…swoon!