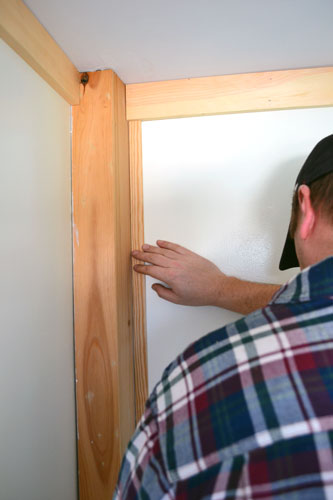
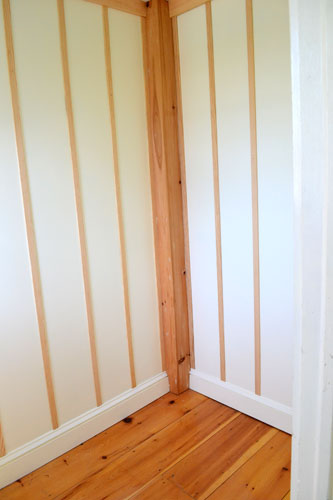
The board and batten is up people…I repeat…the board and batten is up in the entry. After a couple of hours worth of installation thanks to the boy toy husband, we officially have a board and batten-ed up entryway. And I’m not gonna lie, it kind of feels like jail in there…not that I would know what the clink feels like. I feel like I should be taking a coffee cup and clanging it up and down the wood trim while harassing the guards for smokes.
After Colby installed all the trim pieces I started getting the “oh-my-gosh-did-I-make-the-right-decision” sweats (not to be confused with the meat sweats). And ironically enough, later read a post from one of my favorite blogs, Young House Love, called The Middle Makes No Sense. This was one of those moments…you know…in the middle of a project and you fear for your life you made a bad design choice. I’m totally fearful about the entry right now but I’m hanging in there until after we paint up the space before I make my final judgement. But alas, let’s get to the installation how-to portion of the program.
The first step was removing the trim pieces above the doors. We loved the crown in our inspiration pic for the board and batten that we wanted a crown-like trim piece going all around the small entry. We could have just installed the pine in the missing crown spaces but that would be what I affectionately refer to as “half-assing-it”. So down came the trim.
All it took was a razor blade along the seam (where trim meets ceiling) to break the paint seal, and then a nice little pull/tug with Mr. Crowbar to take them down.
With the old trim pieces removed, Colby measured all the spaces in need of crown-like trim and then disappeared to the depths of the man cave to cut the 3″ pine to the right lengths. Then reappeared, man card in tow despite using my pink hammer, to nail in the trim pieces. Hot tip…when you pound in a trim piece and wedge it into place, use a piece of scrap wood placed over your trim and pound on the scraps instead of your trim. You’ll keep from damaging/denting your trim that way.
With all the crown like trim installed the next step was installing the board and batten. We knew we wanted the boards spaced about 8″ apart, which is pretty standard. But to keep spaces even, and from having five 8″ spaces and one 3″ space, we calculated out our exact spacing, which ended up being 7.48″. And then came more measuring and marking batten installation locations.
Colby marked out everything, labeled the wall and labeled each piece of batten just to be sure each piece got cut and installed correctly. We have one serious unsquare, unlevel house and the entry was no different. Each piece of batten Colby cut was just a little different in length.
And speaking of the batten…we chose to use wood trim from the lumber yard called lattice. It was 1/4″ x 1-1/8″ lattice that cost a little over a quarter a foot. Cheap! Traditional board and batten uses thicker pine, usually 3/4″ thick. But in such a small space we opted to use a lower profile wood so it wouldn’t overtake the room.
With all of the lattice cut to size and location coded, the installation part was easy. All it took was dabbing on some construction adhesive, like Liquid Nails, to the back of the lattice.
Then lining it up and gluing the pieces to the wall.
#penbehindearishot #almostashotasplaidflannel And then Colby tacked the trim pieces using a nailer. We used a Paslode finish nailer but a simple hammer and nails would work just fine.
The glue/nail combo is important for this kind of project since there aren’t enough studs to secure all of the lattice to. Using both the glue and nails ensures that the wood will lay flat on the wall for a tight, seamless fit.
But we’ll still have to caulk all the seams to make sure everything is seamless before painting it all white. There’s gonna be some serious caulk flying around this jail cell! Sorry…did I go to far?! I retract that last statement.
With the first couple steps of our entry makeover (take two) checked off the list, here is what the rest of our “operation entryway” project looks like:
Paint over the mint entry with white paint, the same as the trim, Valspar’s Betsy’s LinenInstall new crown-like trim pieces and lattice for a board and batten effect- Punch and fill all the nail holes and caulk all the trim
- Prime and paint the trim glossy white
- Build a shoe-put-er-on-er bench…bonus points for rustic awesomeness
- Stain and poly said rustic awesomeness bench
- Build a coat rack/shelf combo to hang on the wall
- Paint the shelf a navy-ish blue
- Hang the shelf
- Assemble a wet boot tray
- Hang some art
- Fluff the space with accessories and organizational solutions
Two down and ten more to go. Next up…caulking and wood filler time.
Pssst…So it’s been pseudo snowing here in Maine the last 24 hours which has me itching for Christmas to come. We may need to interrupt entry progress for a few Christmas related posts. I see Christmas crafts in the near future! What have you guys been crafting up lately?


