What a wild weekend of greenhouse building we had this weekend. And by wild I don’t mean we made a lot of progress. Well, that too. But weather wild. Who builds a greenhouse in the rain, freezing rain, snow, and fog? All the weather came to help us! But the greenhouse is starting to come together.
Grab a cuppa your favorite hot bevvy and pull up a chair because it’s story time (before we dive into the progress update).
It’s no secret that we started this project two springs ago. The first spring, we had a tiny baby but powered through thinking we could tackle the project in a month or so. Foolish us. Did we learn nothing from the first baby?! But we did work on the greenhouse that whole summer.
Fast forward to last spring and summer, which turned out to be the rainiest spring and summer we’ve ever experienced here in Vermont. Needless to say, very little greenhouse progress happened.
Enter this spring. Colby’s dad has been offering to come up and help us finish this project come hell or high water. Well, he finally did it and came up for an extra long weekend this weekend and progress has been made! Huzzah!
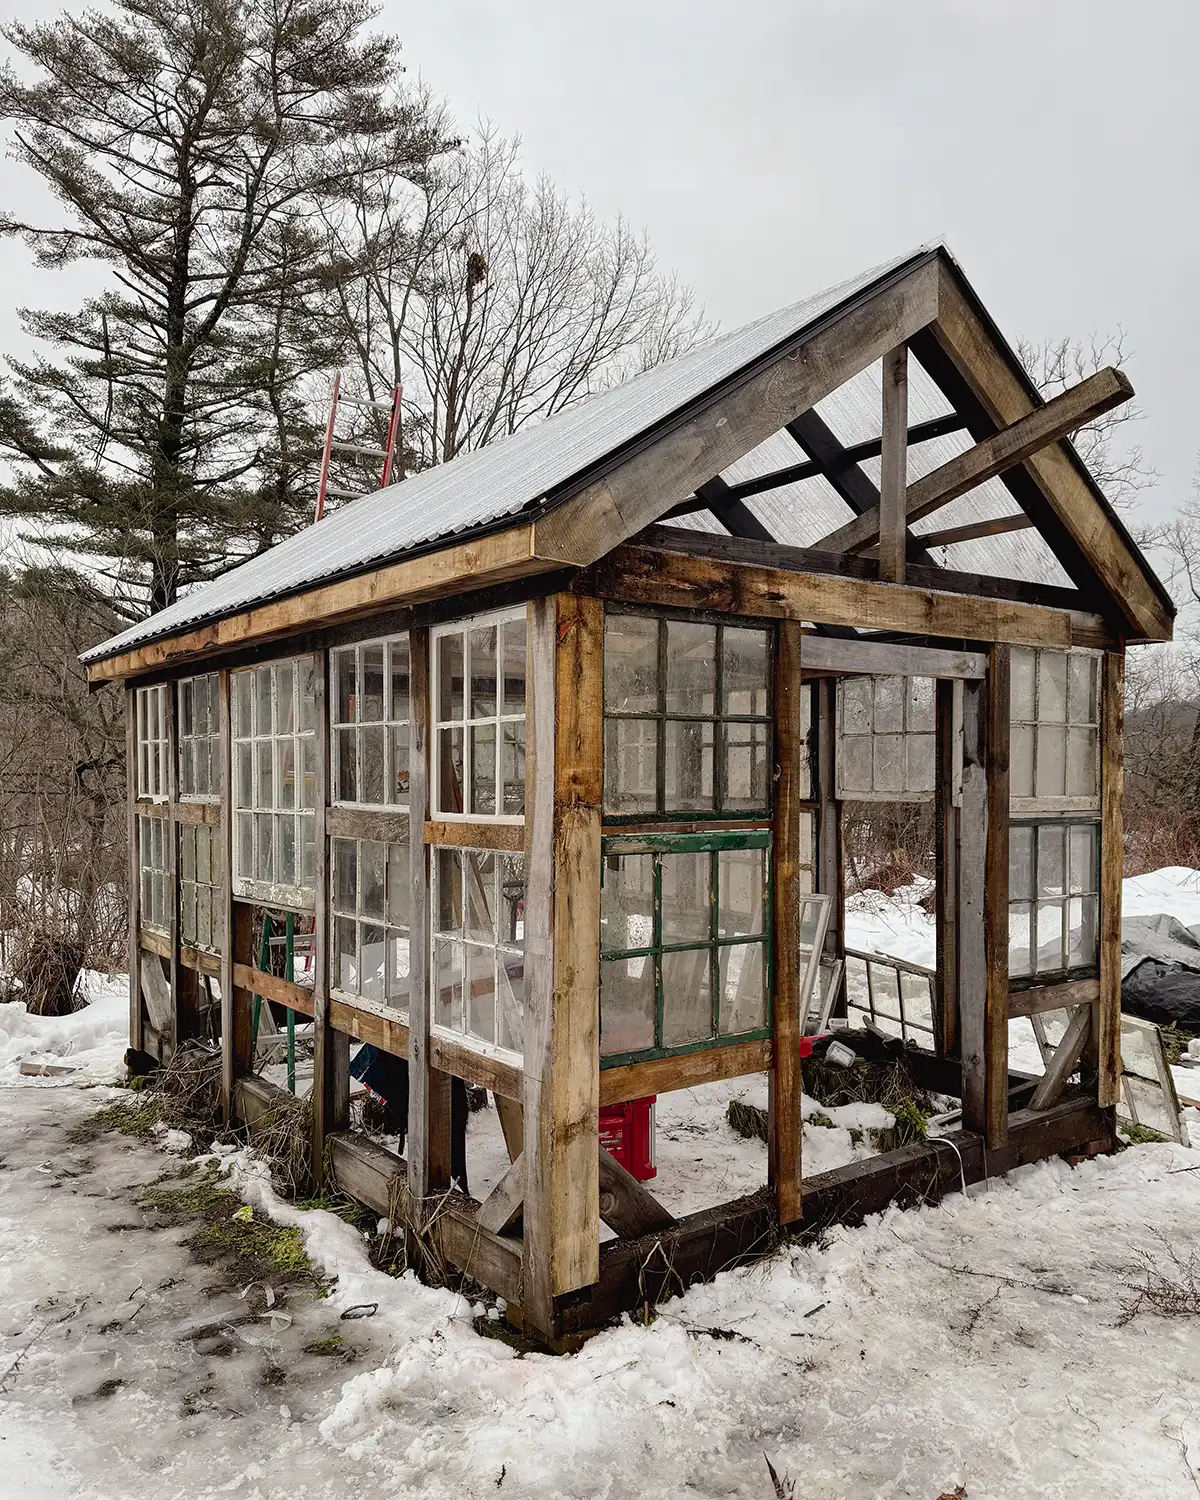
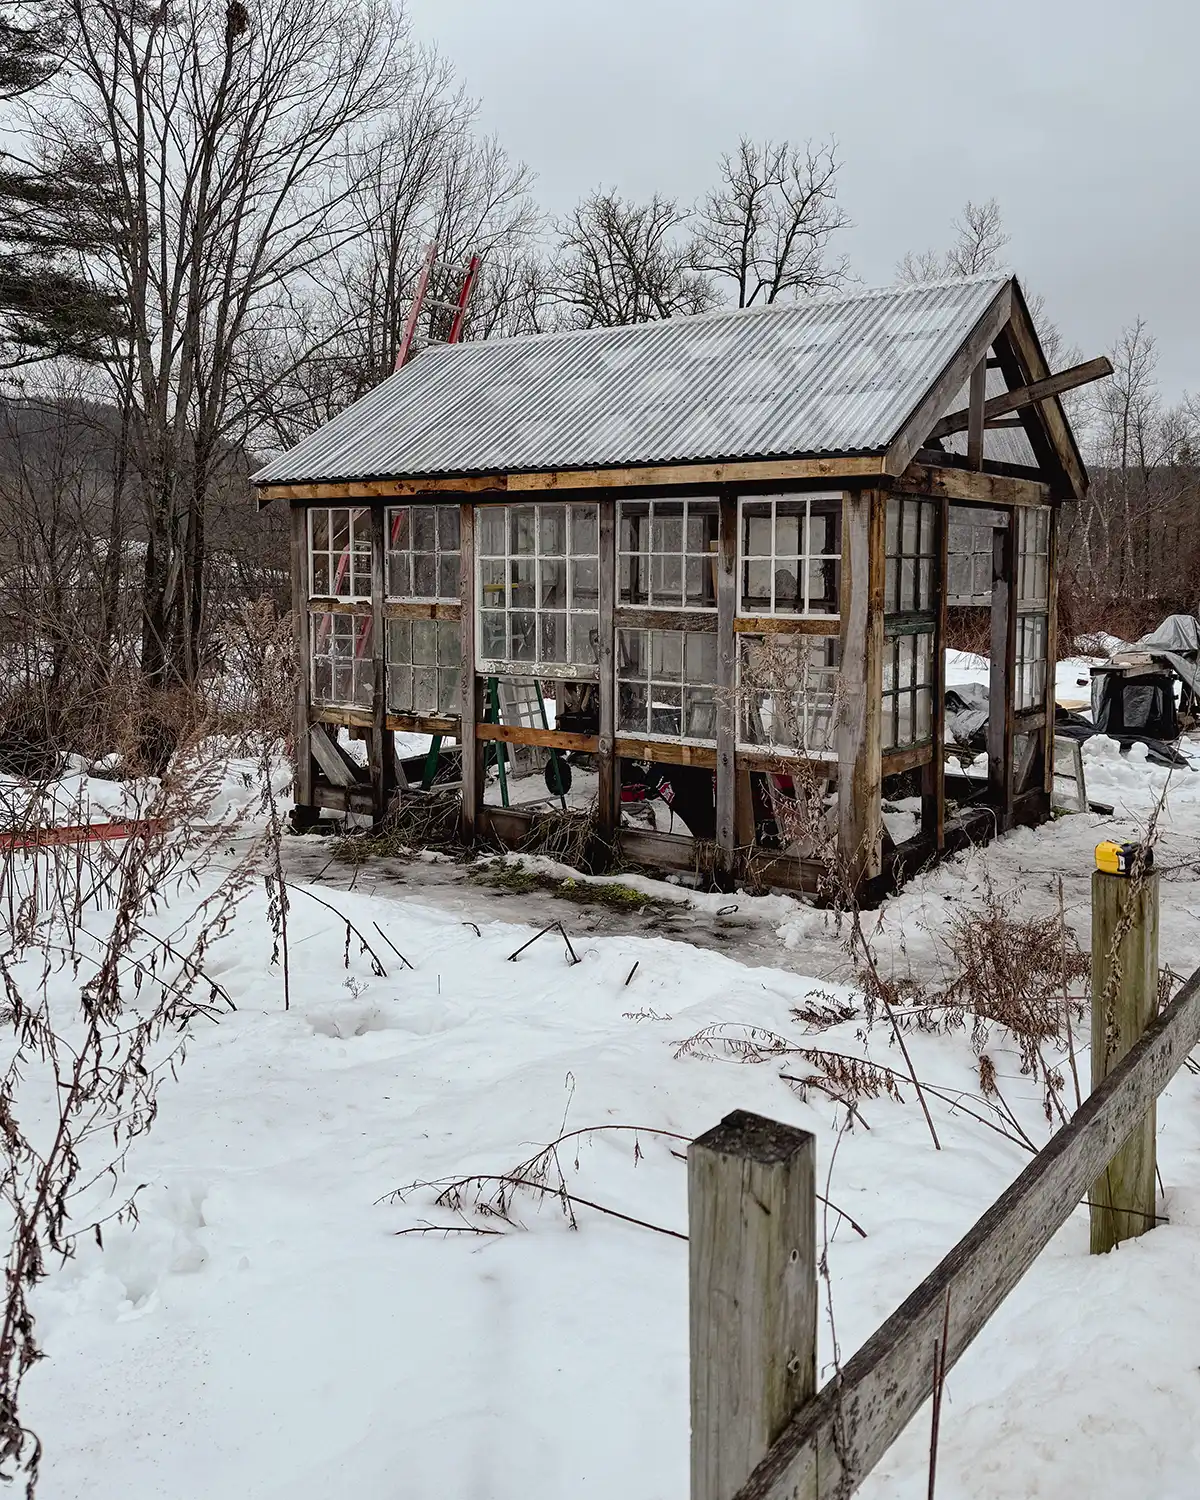
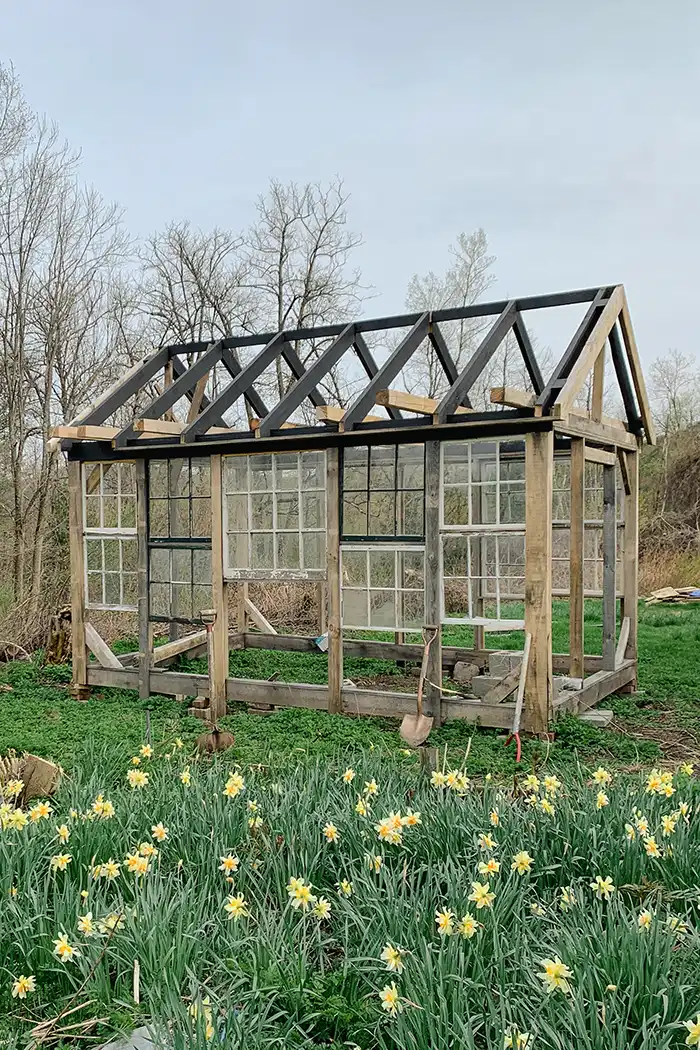
Until we repair the sash and get a couple of coats of paint on the entire greenhouse, she’s not much of a looker, especially in the wet heavy snow, but she will be soon.
Greenhouse Updates
I’ll share so many more details about the greenhouse as we go along. Things like the original plans we’re working with, why we chose the materials we did, how to cut the polycarbonate roofing, and so much more.
But today, I thought it would be fun to share a quick update on how the greenhouse building is going. What’s working, what’s frustrating us (spoiler…the puzzle that is window sash placement), and what bizarre thing Colby can’t let go of.
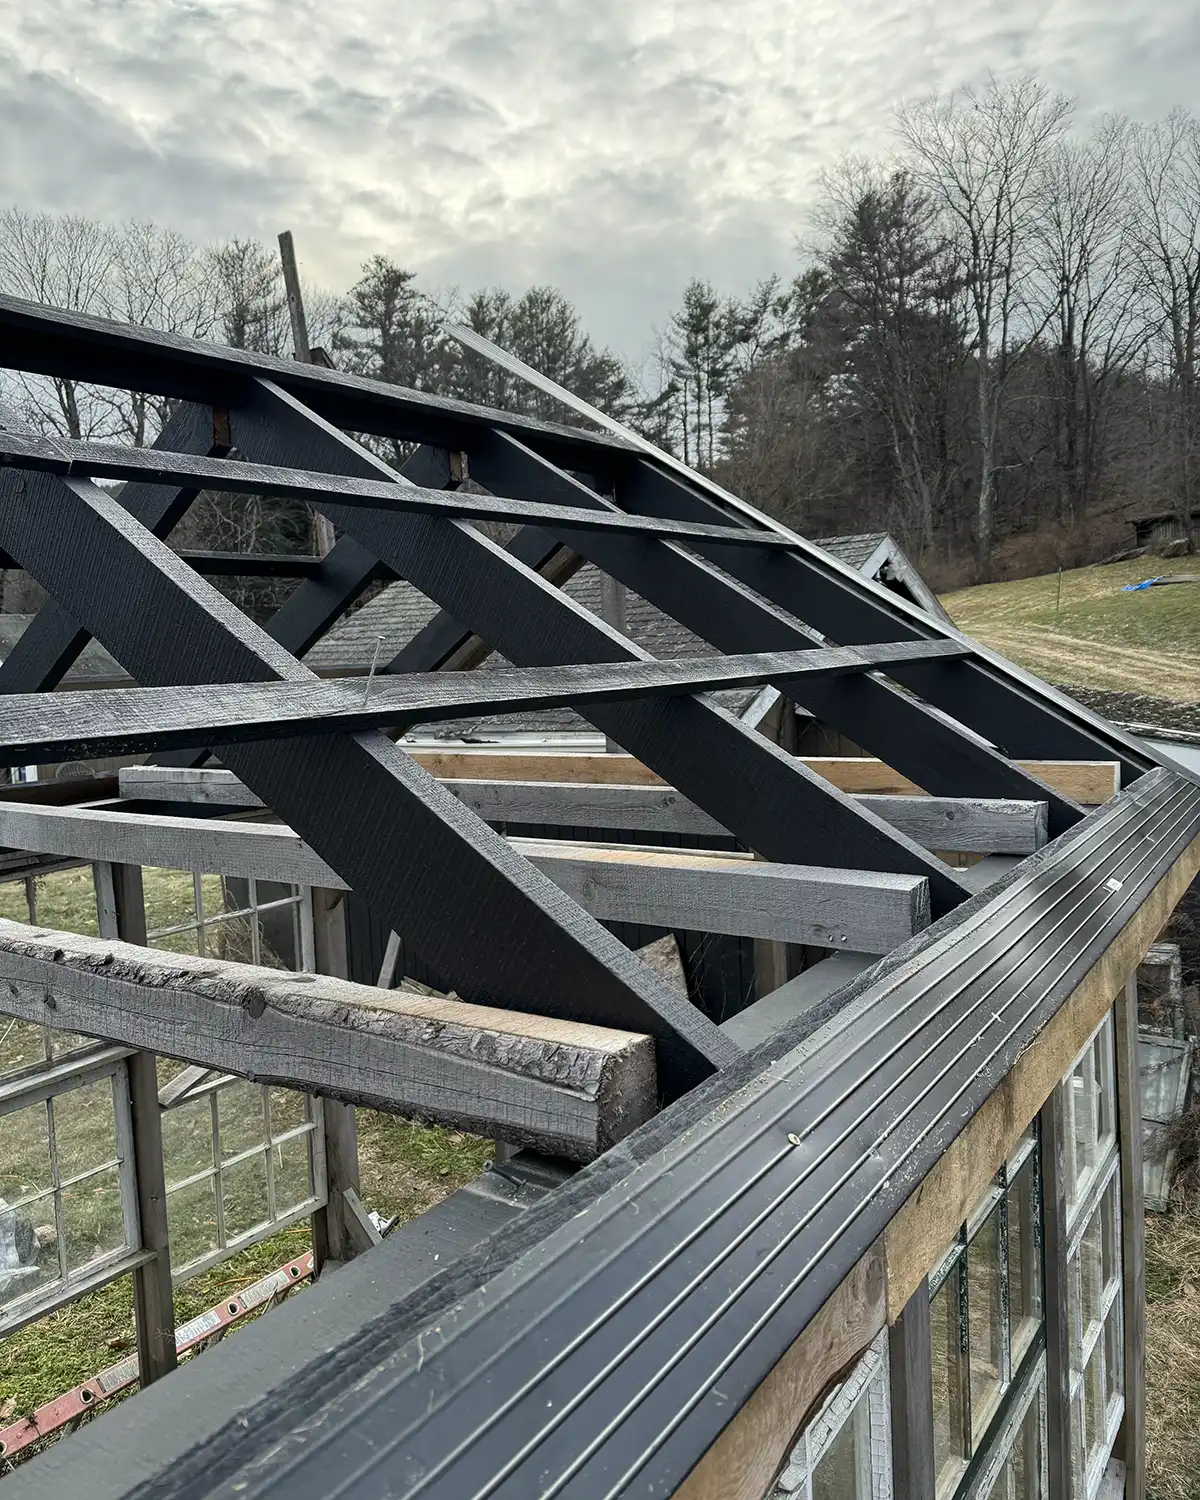
Prepping The Roof
Just after Christmas, we had a big rainstorm that wiped out all the snow at our home. It was perfect timing to do a little work on the greenhouse roof. When in Rome…I mean…a snow-less-Vermont in January, you might as well build a greenhouse.
We pre-painted the strapping in the basement then Colby installed that across the rafters along with the drip edge.
Naturally, right after Colby finished this step it started to snow again and we took another pause.
Cleaning Polycarbonate Roofing
The next step was to install the polycarbonate roofing. This was what Colby and his dad focused on during their Friday work time.
First up was cleaning the poly sheets. We had left them outside all this time, stacked in a pile. Don’t be like us. Don’t leave building materials piled in your yard for months and months and months. It was covered in grass and mud.
There was also a battle with my arch nemesis, product stickers. So many product stickers. Why product manufacturers? Why?! And do all the stickers have to peel off in teeny tiny pieces?!
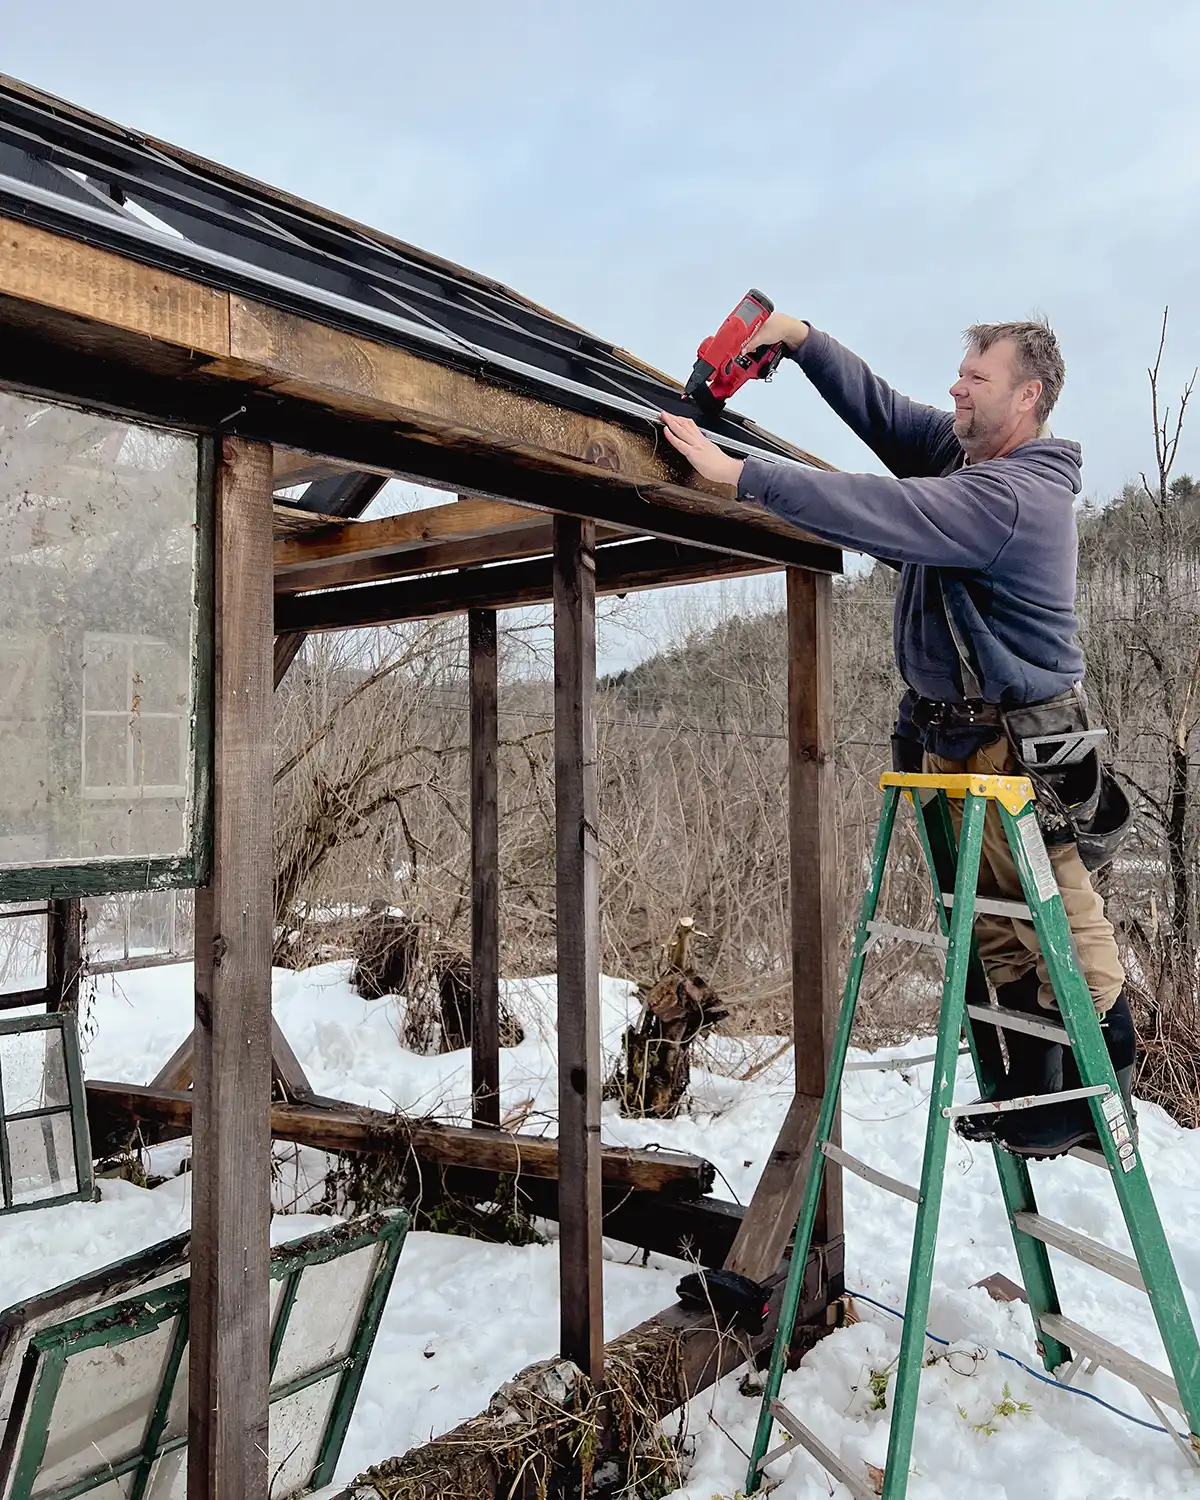
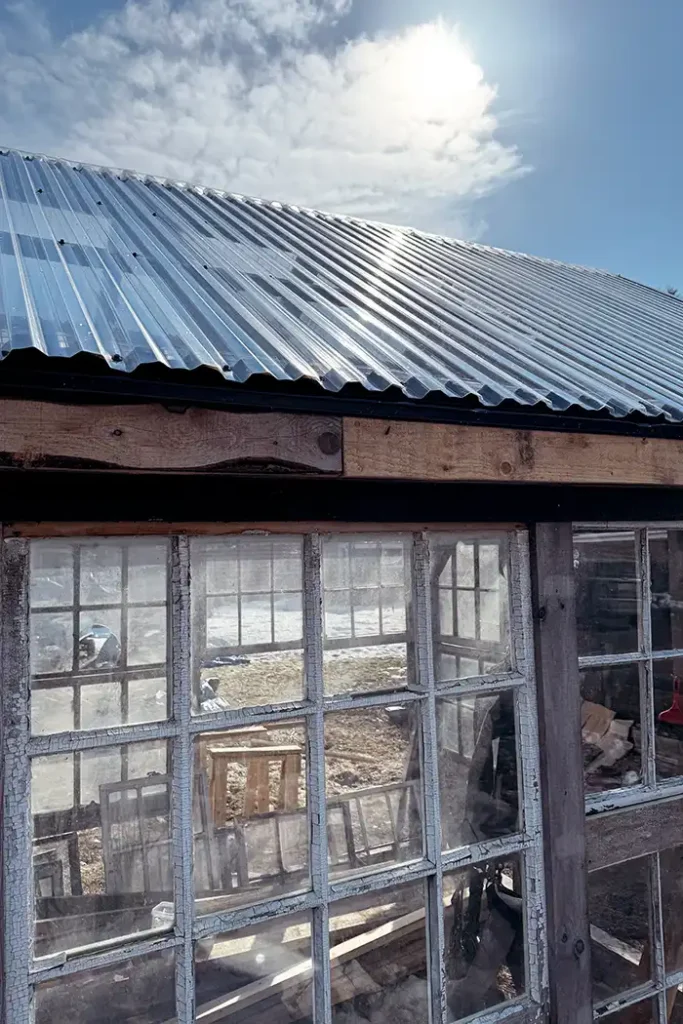
Installing Polycarbonate Roofing
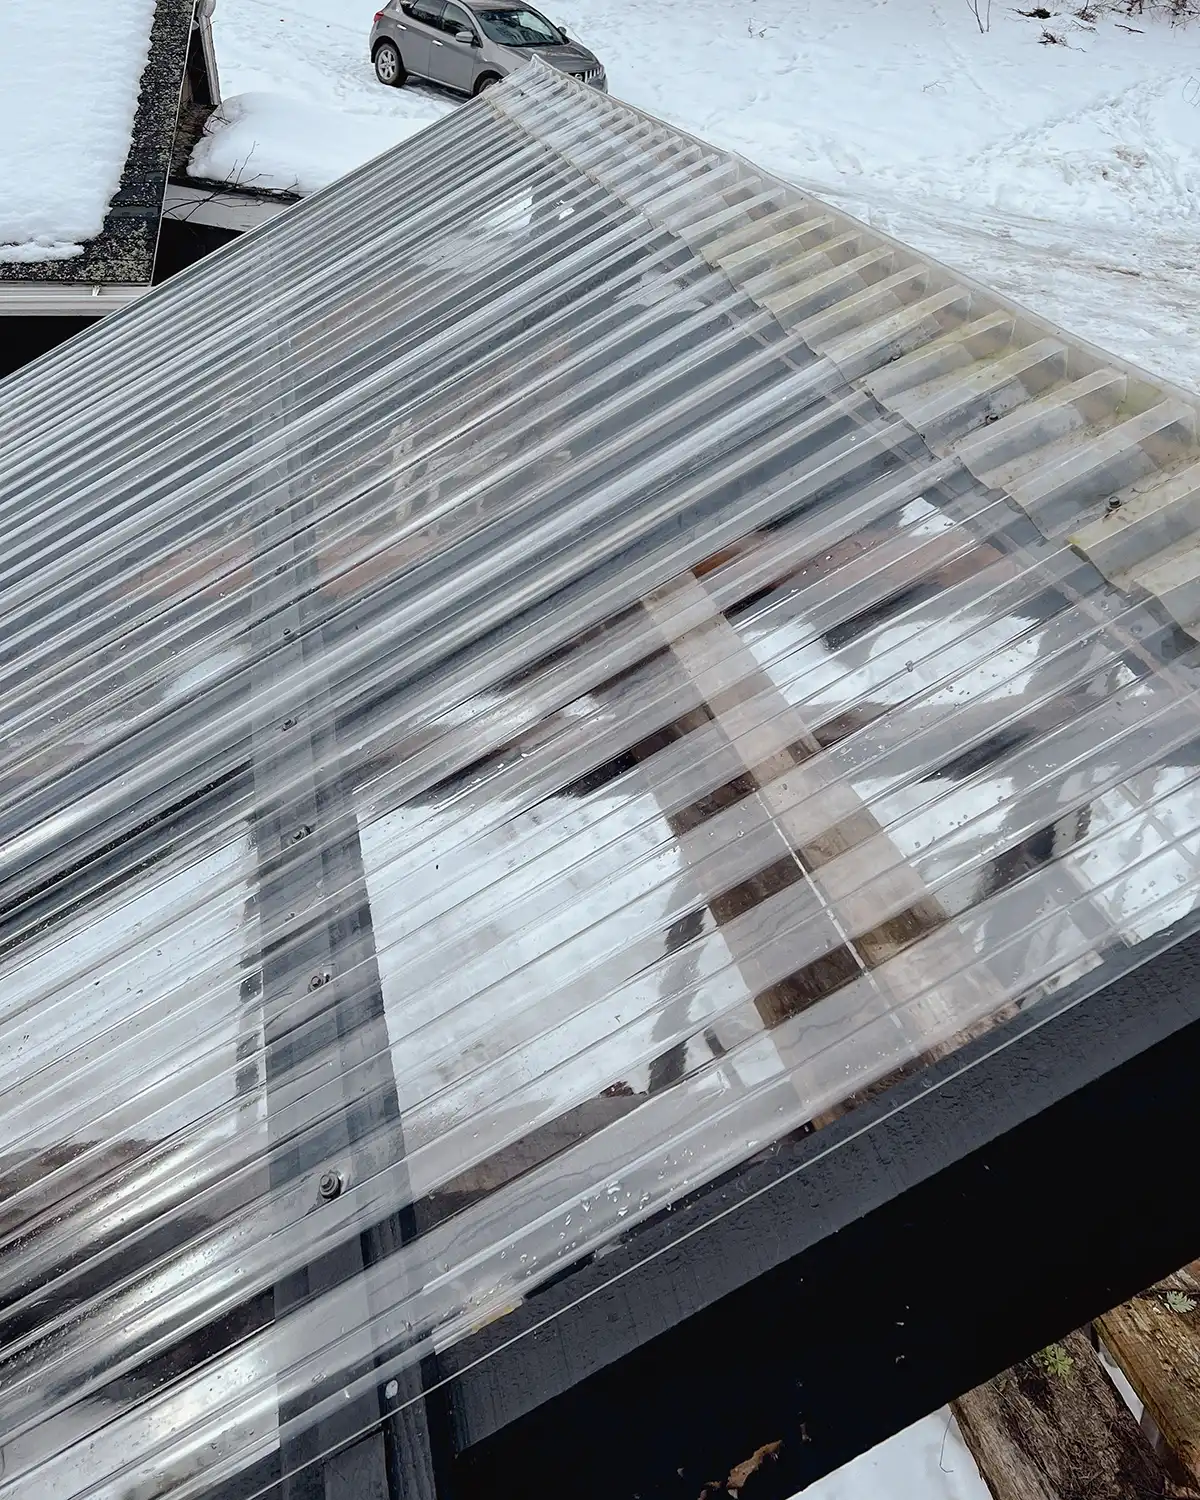
With the roofing materials all shiny and clean, it was time to install it, which took most of Saturday.
It took a while to figure out how to cut the sheets, which all needed a bit of a trim. When in doubt, refer to the manufacturer’s instructions. Two trips to the local hardware store for supplies, and the roofing installation were underway.

Installing the roofing was pretty straightforward. The most difficult part was getting the ridge caps to line up perfectly. The roof ended up not being perfectly square. It may have been square at some point, but come roofing day it wasn’t perfect. This made it hard to line up each side with the ridge cap.
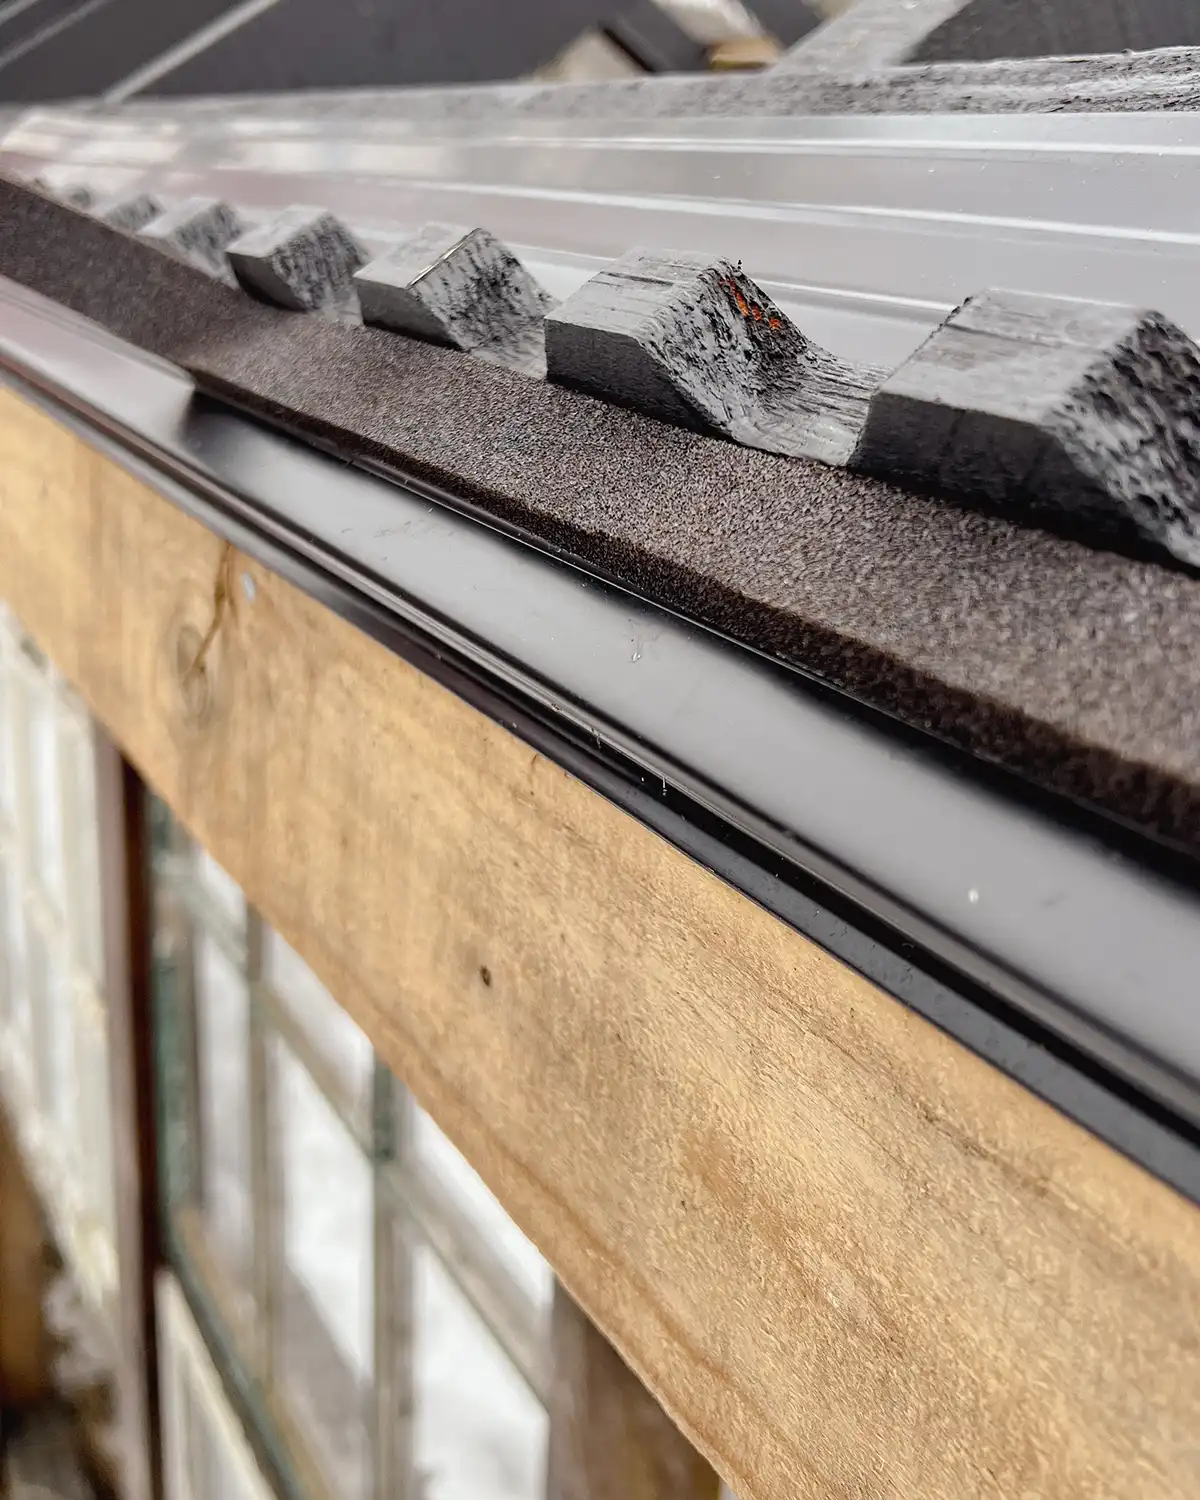
Figuring out how to finish the edge with the weather stripping was another issue. Colby was adamant about finding a way to prevent bugs from getting into the greenhouse between the polycarbonate roofing and the drip edge. Me, I’m like “eh, it’s a garden, gardens have bugs, nbd.” But Colby would not let it go.
But that’s okay. It made me feel less wackadoo about needing all the sash to line up on the bottom. To each their own neuroses.
He found an expanding universal seal product at the Home Depot to try. In theory, it would expand to fill the gaps from the corrugated shape of the roofing. After a few hours, it didn’t quite expand to fill the gaps. We’ll give it another few days and see if it gets any better. Me, I’m camp good enough but we’ll see.
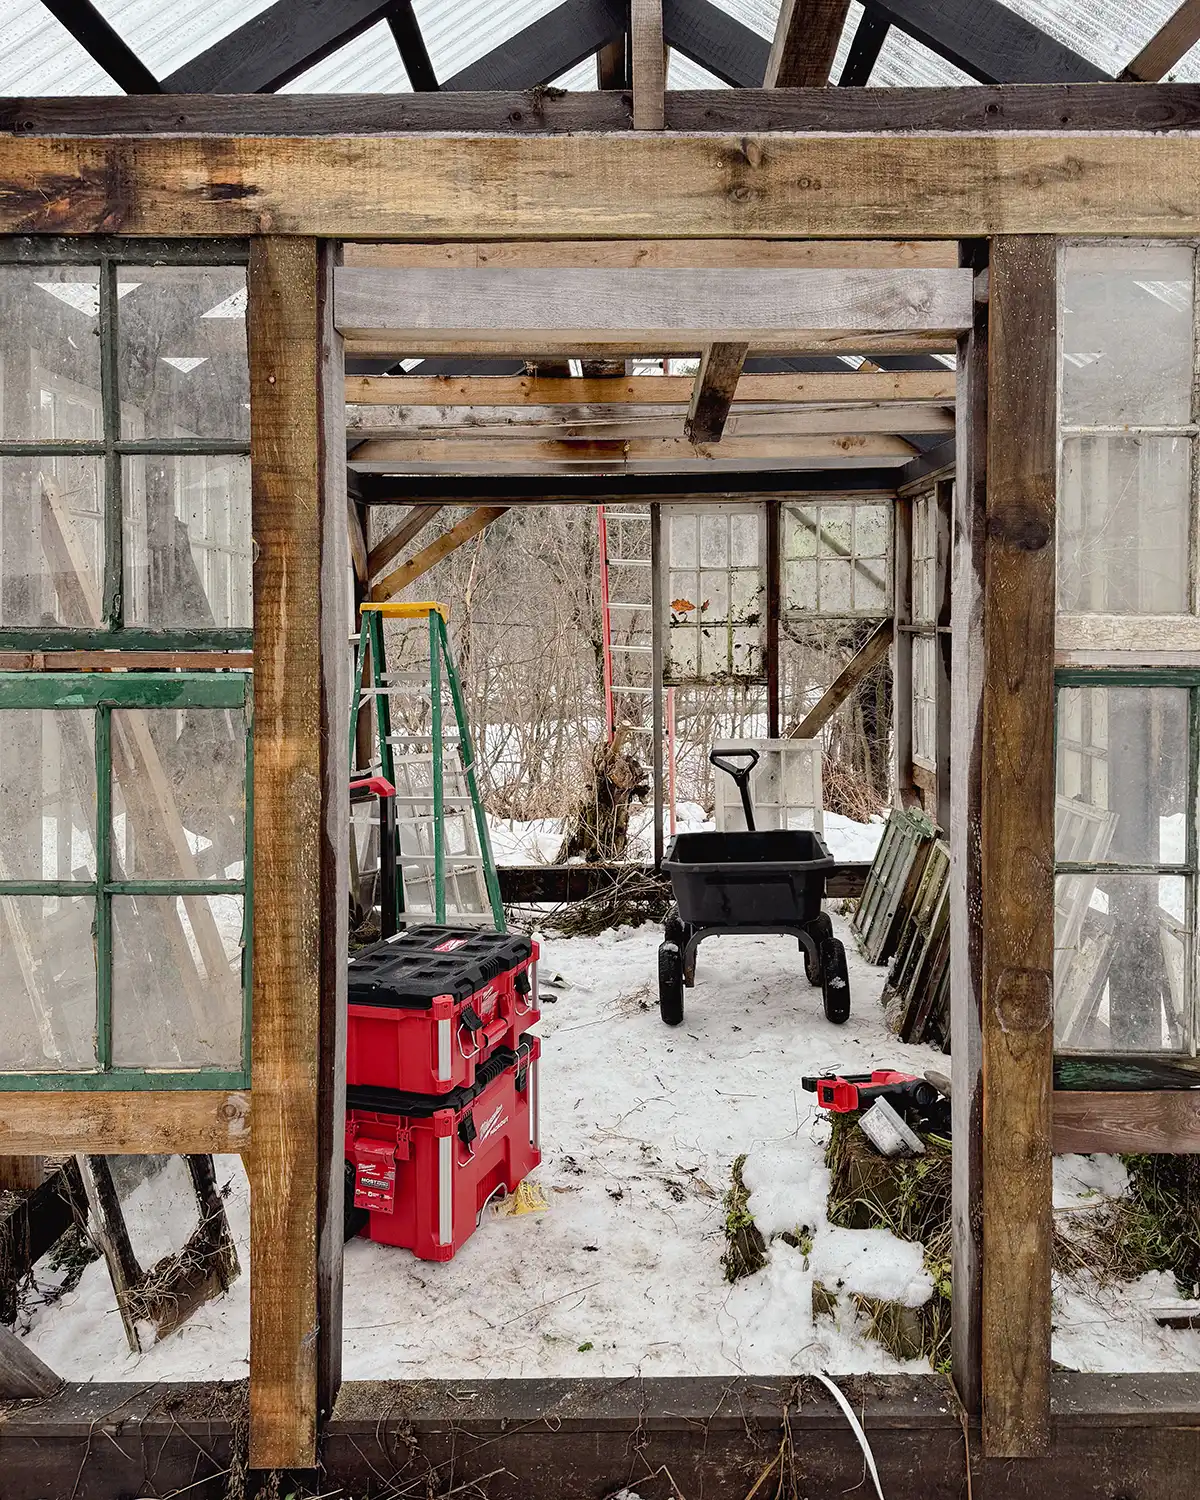
Window Sash Puzzle
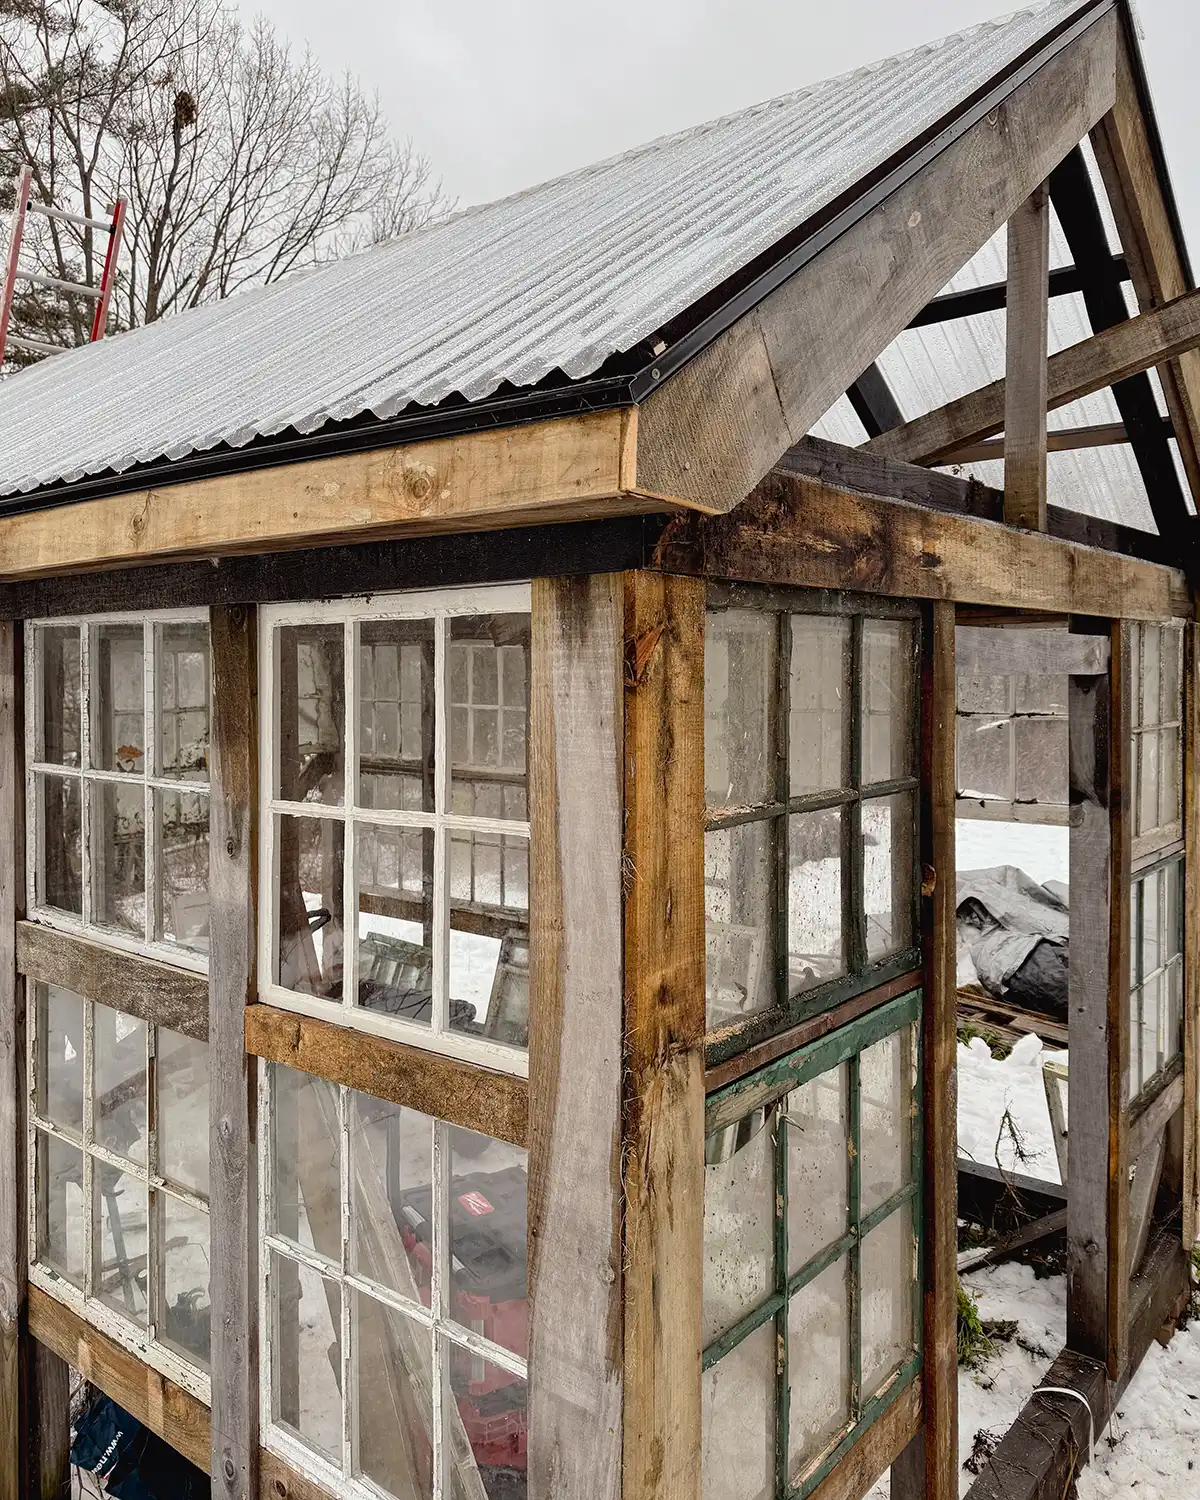
What we’re currently working on is installing all the window sashes which is proving much more difficult than originally anticipated. Hard as in figuring out how to lay them out.
It’s like a giant puzzle. And you know who loves giant, complicated puzzles?! This girl! Challenge accepted!
I want to have the sash layout feel symmetrical and be pretty even around the entire building. Considering our sash collection is varied in sizes and styles, it’s been hard to find a layout I’m happy with. We’re getting closer!
One of Colby’s favorite mantras for renovation projects is to screw everything in for when you need to change it later. No nails. We may have been renovating homes together too long. I change my mind ALL THE TIME!
Using screws instead of nails has proved helpful so many times including this project. So many sashes have gotten shifted or moved to get everything lined up.
The two main sides are looking great right now but we’re still up in the air with how to put together the gable ends. Stay tuned.
What’s Next?
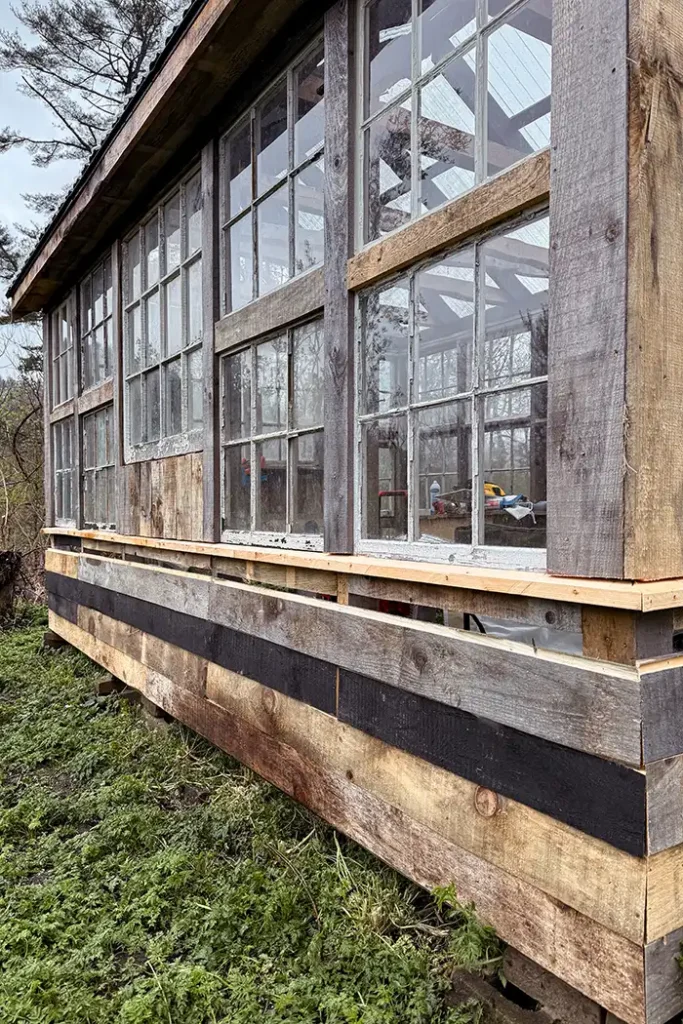
We’re hoping to finish laying out and installing all the window sash this week, weather-dependent.
After that, we’re looking at installing all the siding around the base of the greenhouse, trimming it out, repairing the broken sash (boy are there some broken sash to deal with), figuring out ventilation, and building a door.
Just a handful of things.
Window Sash Musings
I can’t help talking about the condition of the window sash. Working on this project in January with piles of snow everywhere and during snow/ice/rain storms (we had it all this weekend) is not ideal. But we’re also feeling up against the clock with the window sash.
The sash were in pretty terrible condition when we first sent them to storage in one of our sheds. They came from our home as well as salvaged from dumpsters. THEN we left them outside for the last year while we’ve been working on the greenhouse. Big mistake.
They’re all in worse wear than before. A few of them have just fallen apart as we’ve moved them. Many of them need some pretty intense repair. Some have hit the point of no return.
I know it would have been easier, sturdier, and more effective to just buy new materials for the greenhouse, like polycarbonate wall panels. But it just doesn’t have that old-world charm I’m always looking to bring to our home. It’s a labor of love for sure.
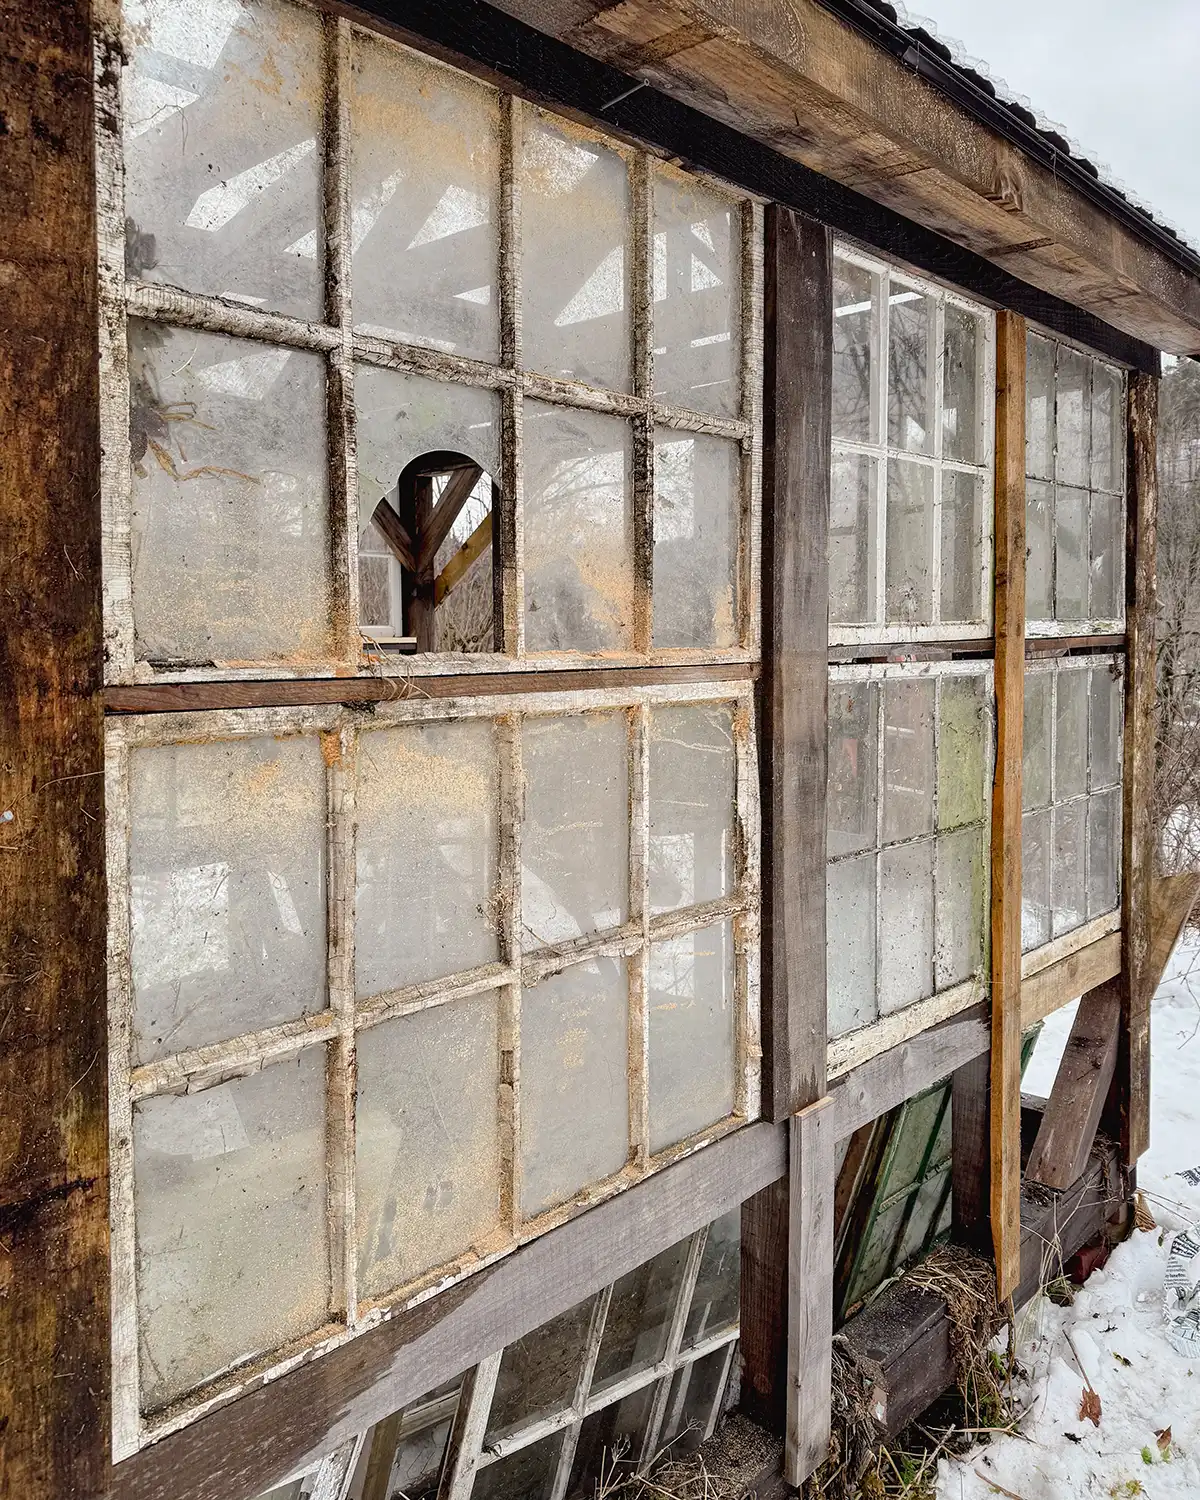
The windows certainly look terrible right now, but just imagine what they could look like. With some new window glazing, cleaned-up glass, and fresh paint. I can see it now!
So back to work we go, trying to get the structure squared away and ready for that first warm, sunshiney weekend this spring when we can finally paint this beauty!
Pssst…Who else considers product stickers their arch-nemesis? I can’t be the only one!

Hi Angie! Product stickers are the worst! A little trick I learned from another blog is to use a hairdryer on the stickers. The heat reactivates the adhesive enough so they peel off easier and usually in bigger pieces. Sometimes there’s still some residue after you get the paper off but rubbing alcohol usually takes that off pretty quickly. I love the salvaged window look too…it will be worth it in the end! Kudos to you guys for all the work making something old fabulous again. I can’t wait to see it!
Ooooh…thank you for the sticker removal tips. I need to try these, stickers are the worst. And thank you for cheering us on with the greenhouse!
What progress. Cannot wait to see it done and in use.
Thank you! Fingers crossed it will be done DONE and ready for spring seedlings.
If you have leftover residue from the product stickers Goo Gone is a big help. They can def be a pain! I’m just starting to research greenhouses made from windows, and came up on your page. Thanks for sharing!
Thank you for the Goo Gone tip. I had someone else recommend it as well, tried it (along with a few other things), and it worked the best! I will never be without Goo Gone now. And good luck with your window greenhouse research/project. I should have the project finished this fall, once it’s not so hot in there!! I love the project but it’s definitely more work than I expected! Thanks for stopping by and for leaving a comment!
Hi Angie, do you have actual plans for this greenhouse? I have old windows and it is exactly what I am looking for.
Thanks
Robin
Yes, we do have plans but they are very loose plans. Here’s the link: https://www.angiesroost.com/greenhouse-construction-plans/ We used the plans for the general size and construction but then it was like a giant puzzle for figuring out the window placement. We ended up needing to move the framing around a little to make it all work. Hope this helps and let me know if you have any other questions.