Channel your inner Montell Jordan circa 1995 (“This Is How We Do It”) because it’s the big DIY bathroom tiling tutorial post. And before any more 90s R&B takes over, let’s dive right into the DIY bathroom wall tile steps.

You don’t need to be a professional tiler to tackle this DIY project. It’s one any DIYer can do as long as you do your research and take your time. It’s not complicated but it does take time and much work.
Also, this is just the tiling tutorial, part one of how to install bathroom tile. Part two is coming up next where we talk about grouting with step-by-step instructions.
Supplies:
- Ceramic Tile (or the tile of your choosing)
- Thinset Mortar
- Grout
- Grout Sealer
Tools:
- Mixer
- Corded Drill (cordless drill works too as long as you mix thin-set adhesive in small batches)
- Spirit Level Level (Bubble Level)
- Laser Level (not necessary but helpful)
- Tape Measure
- Notched Trowel
- Wet Tile Saw (with Diamond Blade) or Snap Tile Cutter
- Tile Spacers
- Small Chisel
- Rubber Grout Float
- Grout Sponge
- Buckets
- Gloves, mask, safety glasses
There is much more detail on the right tools for tiling in our Tools For Tilers post. We even go into detail on how to decide between an electric wet saw and a manual snap tile cutter.

Tiling Prep Work
Before we get too into the fun stuff, laying those wall tiles brick by brick, let’s go over some of the tiling project prep work that needs to be done before beginning to tile.
Install Cement Backer Board
Tiles need a solid, hard surface to be adhered to. While people do tile on sheetrock, it’s not recommended. Tile backer board, most commonly cement board, has reinforcing fibers to make it extremely durable and stiff. This helps prevent cracked tile and grout. It’s also less likely to break down if moisture gets through to it.
We share more details on why cement backer board is important for tiling and how to install it in our Installing Cement Board in the Bathroom post.
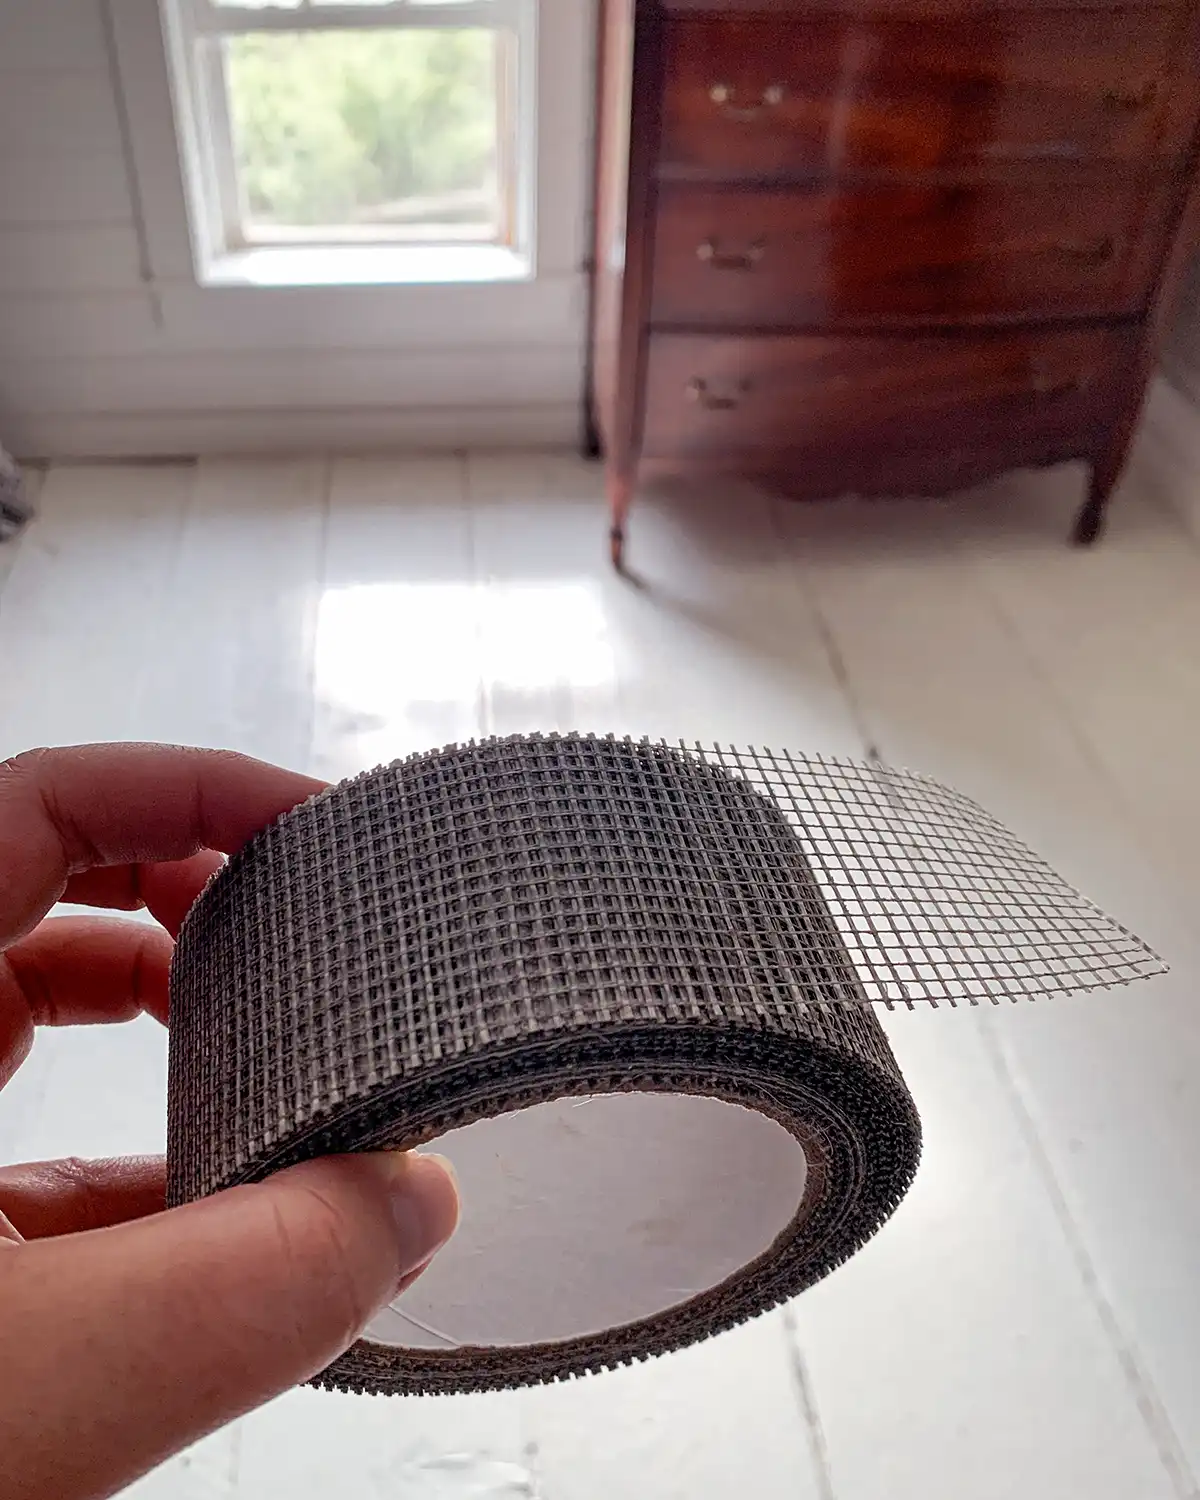
Apply Seam Tape
Do not skip this step! Securing the seams of the cement board is an important tile installation prep step as it can help prevent cracking or a way for water to get into your walls. Not good.
Use a simple 2″ alkali-resistant mesh tape and a layer of thinset troweled over it.
More details on which seam tape to use and how to install it can be found in our How To Waterproof A Shower post.
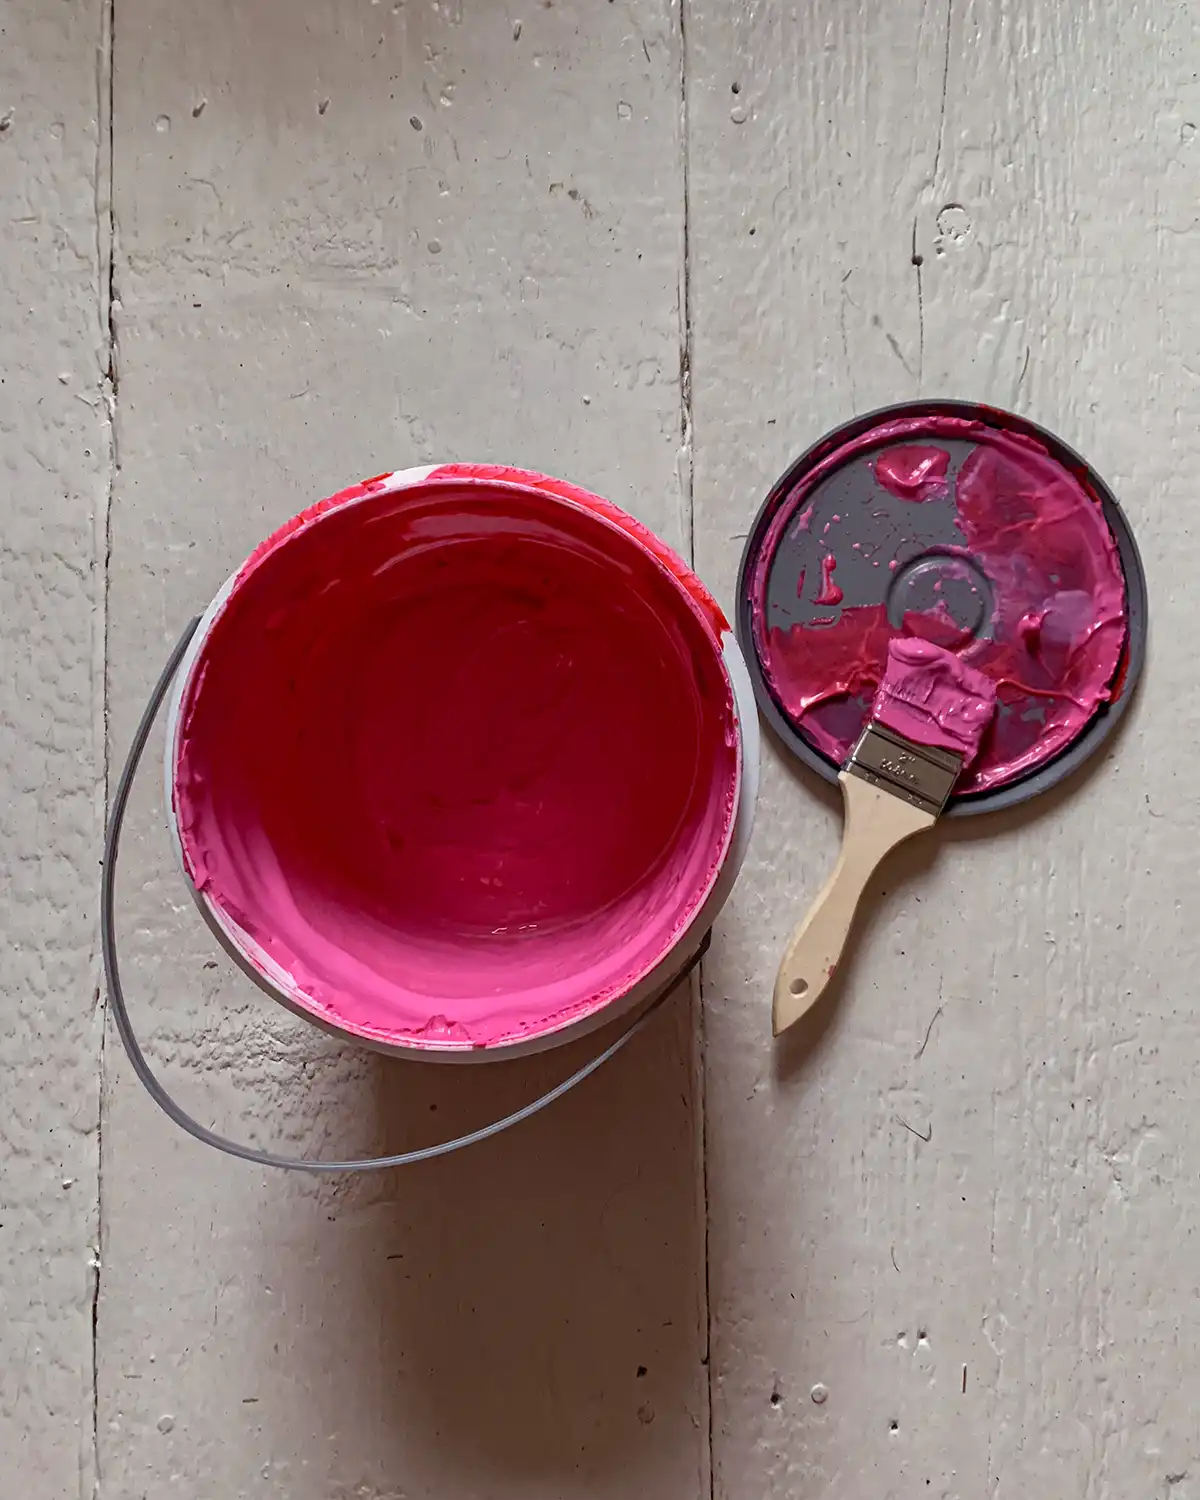
Waterproof Shower Walls
Another important prep work task for installing shower wall tiles is to waterproof the wet area.
One of the most popular ways how to waterproof a tile shower is to use liquid membranes, like RedGard. This waterproofing material is painted on the cement board and provides a moisture barrier between the tiles and the backer board. Any wet area, like a shower area, should be waterproofed before beginning to tile.
Protect Surfaces
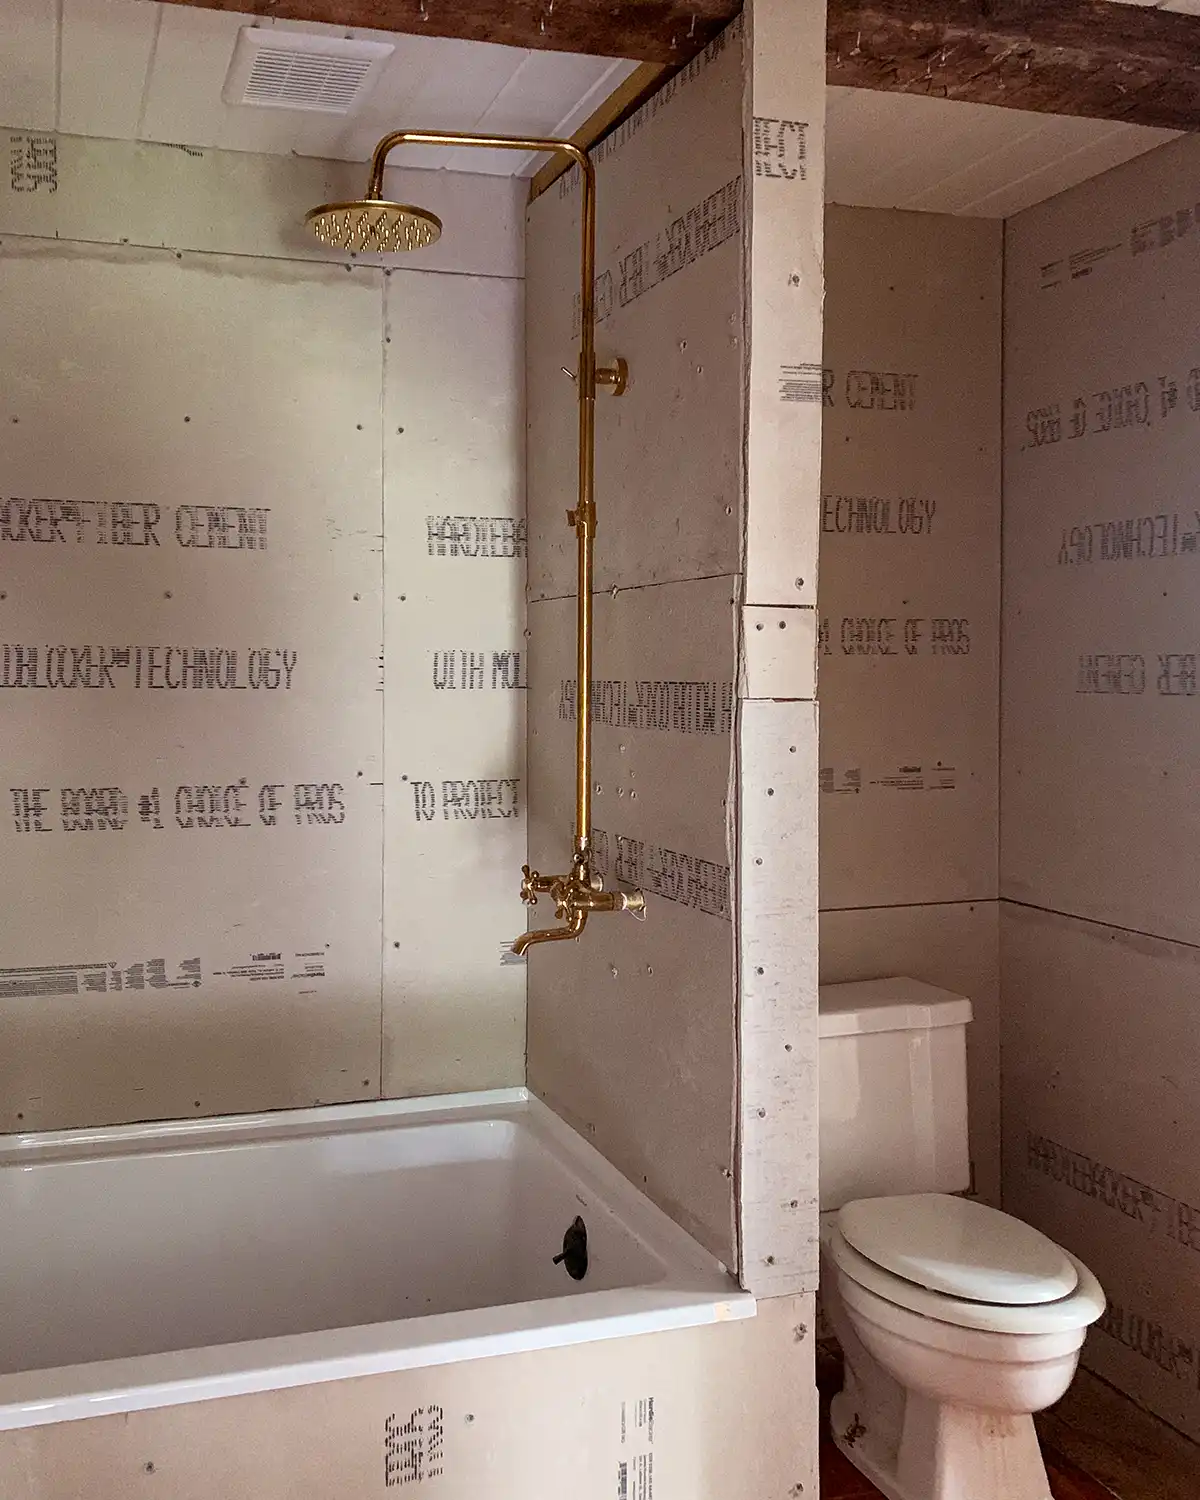
Before you start on your DIY bathroom tiling, you’ll want to take some time to protect any surfaces you don’t want damaged in the process. In general, it’s a good idea to protect them for any bathroom renovation project.
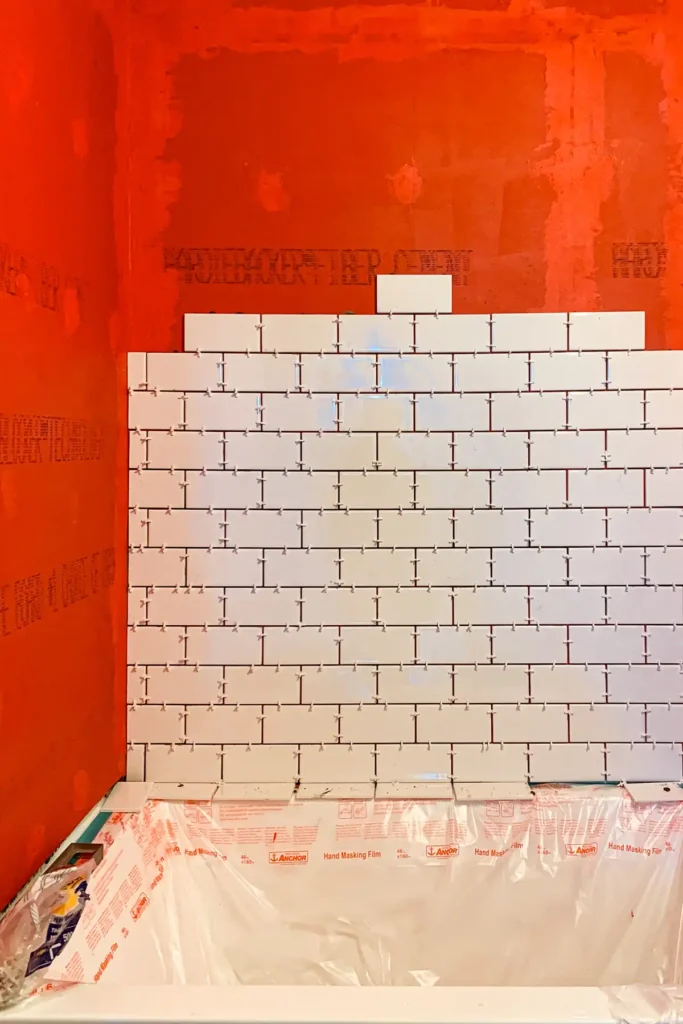
By surfaces I mean the tub, shower pan, wood floors, already installed floor tiles, toilets, etc. For us, that looked like covering our tub with plastic sheeting and securing it in place with masking tape. We also protected the wide pine bathroom floor with cardboard during much of the renovation and later replaced it with plastic sheeting during tiling.
It didn’t take long to protect each surface of our small bathroom, but even with a larger space, I would do the same.
DIY Bathroom Wall Tile Installation
With the prep work behind you, it’s time for the good parts. Tiling!
Tiling is one of my favorite DIY jobs and one I always look forward to. But it can be a little daunting to start. Even after tiling two shower areas with ceramic subway tile, I was still a little apprehensive about starting our third major DIY bathroom tiling project.
Although it might have been because it was the first time we were tiling an entire bathroom, not only the shower walls but the side walls as well.
Starting is the hardest part but once you get going, tiling gets easier.
Master Bathroom Renovation Reveal
Determine Tile Layout
First things first, you have to decide on your tile layout. No need to mix that mortar yet until you have a game plan.
It’s never a bad idea to break out the graph paper and sketch what the tile layout will be, using actual measurements and factoring in grout lines.
No one wants to start at the first row of full tiles only to find out at the top the last row is pencil-thin and looks odd. If you sketch it all out, you can see what the tile cuts will look like and maybe you decide to trim the tile height for the first row.
If you’re doing a pattern with mosaic tiles be sure you lay it out and dry-fit it if you can. Even if you’re using basic white ceramic subway tiles like we did, think about where to start, what the corners will look like, and what are your sight lines.
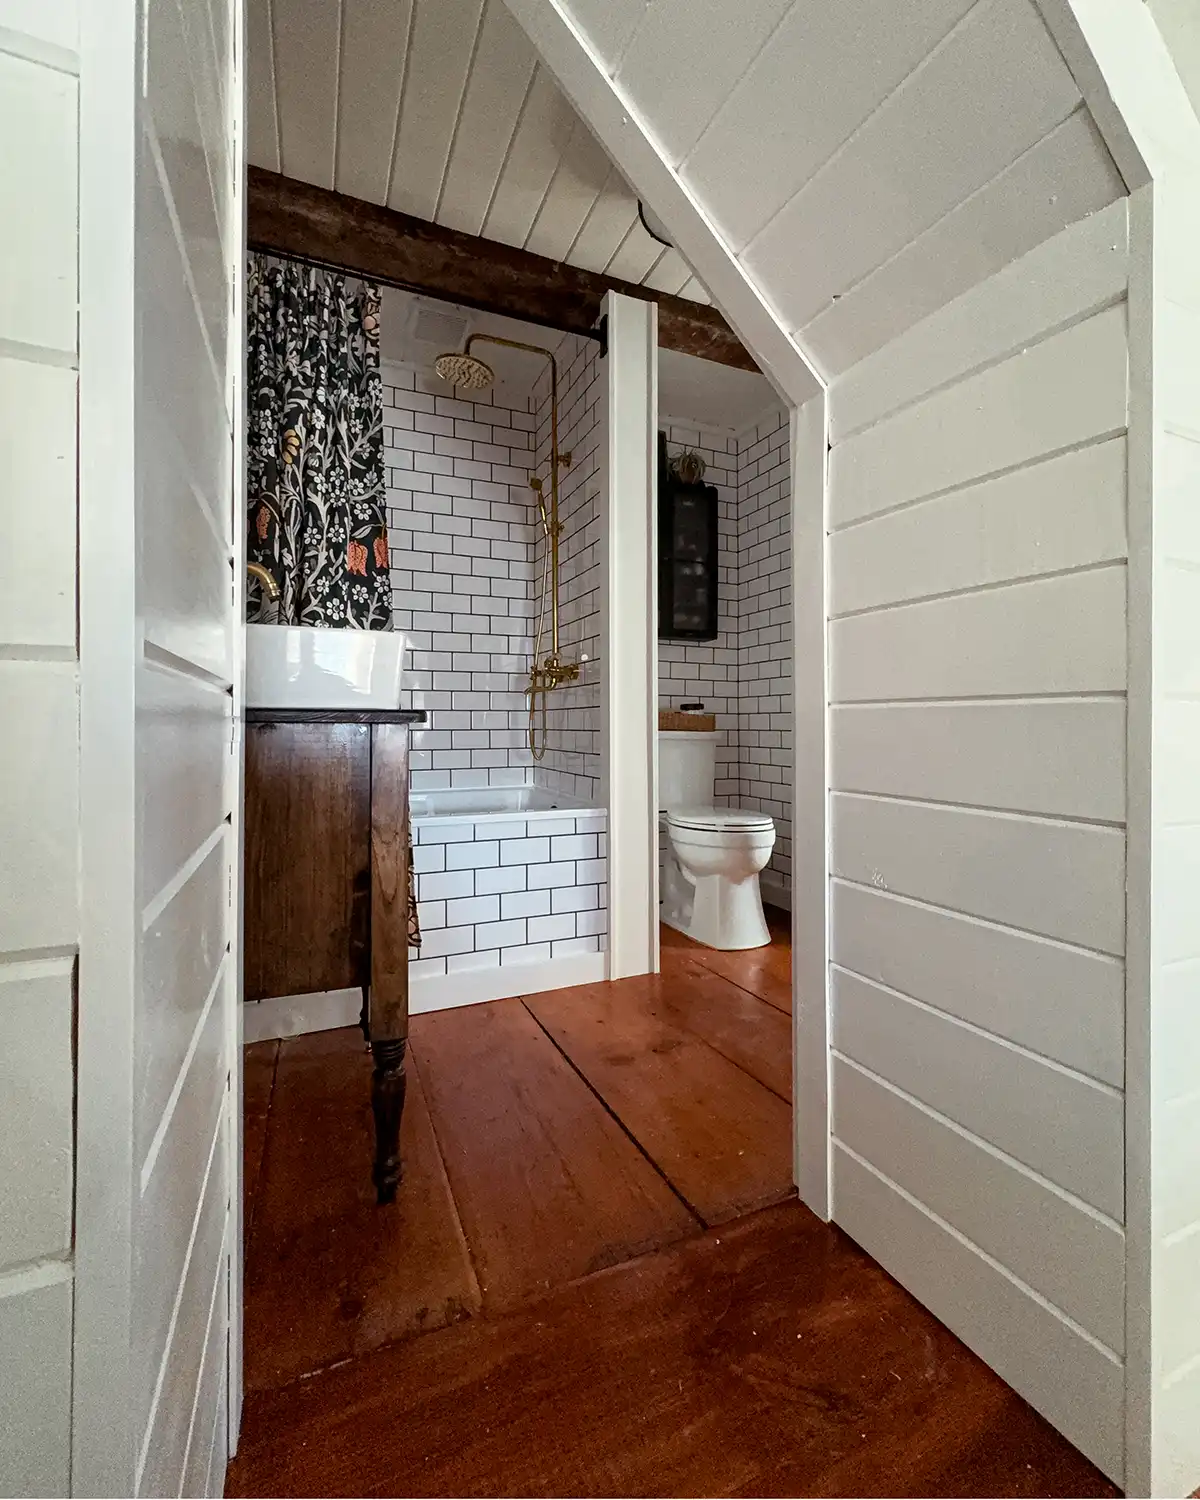
And if you’re extra lucky like us (note the sarcasm) your old 1700s home is not level or square meaning something has to give. We chose for our tile to be level so it means you can see the un-levelness where the tiles meet the floor, ceiling, and beams. Trim scribed in can help with that.
Determine A Starting Point
I always have sight lines on the brain and it’s no exception when it comes to tiling. I like to start where I know it’s the most visible or most important to get right. For this project, it was the back shower wall.
When you have the starting wall picked out, next determine your center point. Break out the laser level and a straight edge, a large bubble level works well too, and draw a straight line up the wall with a pencil. Drawing a vertical line, or a few, is a great visual guide to have when you’re tiling.
Depending on the size and shape of your tile, draw a bunch of guidelines to help you along the way. Even if you’re using a laser level to help keep your vertical and horizontal lines straight, it’s another check and balance for your tiling project.
Typically, you’ll want to start in the middle of the back wall. Sometimes you’ll shift your middle if you don’t like how it looks when you sketch it out or dry fit the tile.
Guest Bathroom Renovation Reveal
Do A Test Run
It never hurts to dry-fit the first row of tiles. Lean them up against the wall where you’re starting, using your tile spacers to space them out as if you were adhering the tiles to the wall and get an idea of how it looks.
Sometimes you discover things that you hadn’t thought of. One of my real-life examples was when tiling this shower and I dry fit the tiles on the shower head wall after the back wall was done. I had planned to start my first subway tile in the middle of the first row. When I laid them out I realized two super small, cut tile pieces would be next to each other, which I didn’t like. I opted to start differently so the corners looked better.

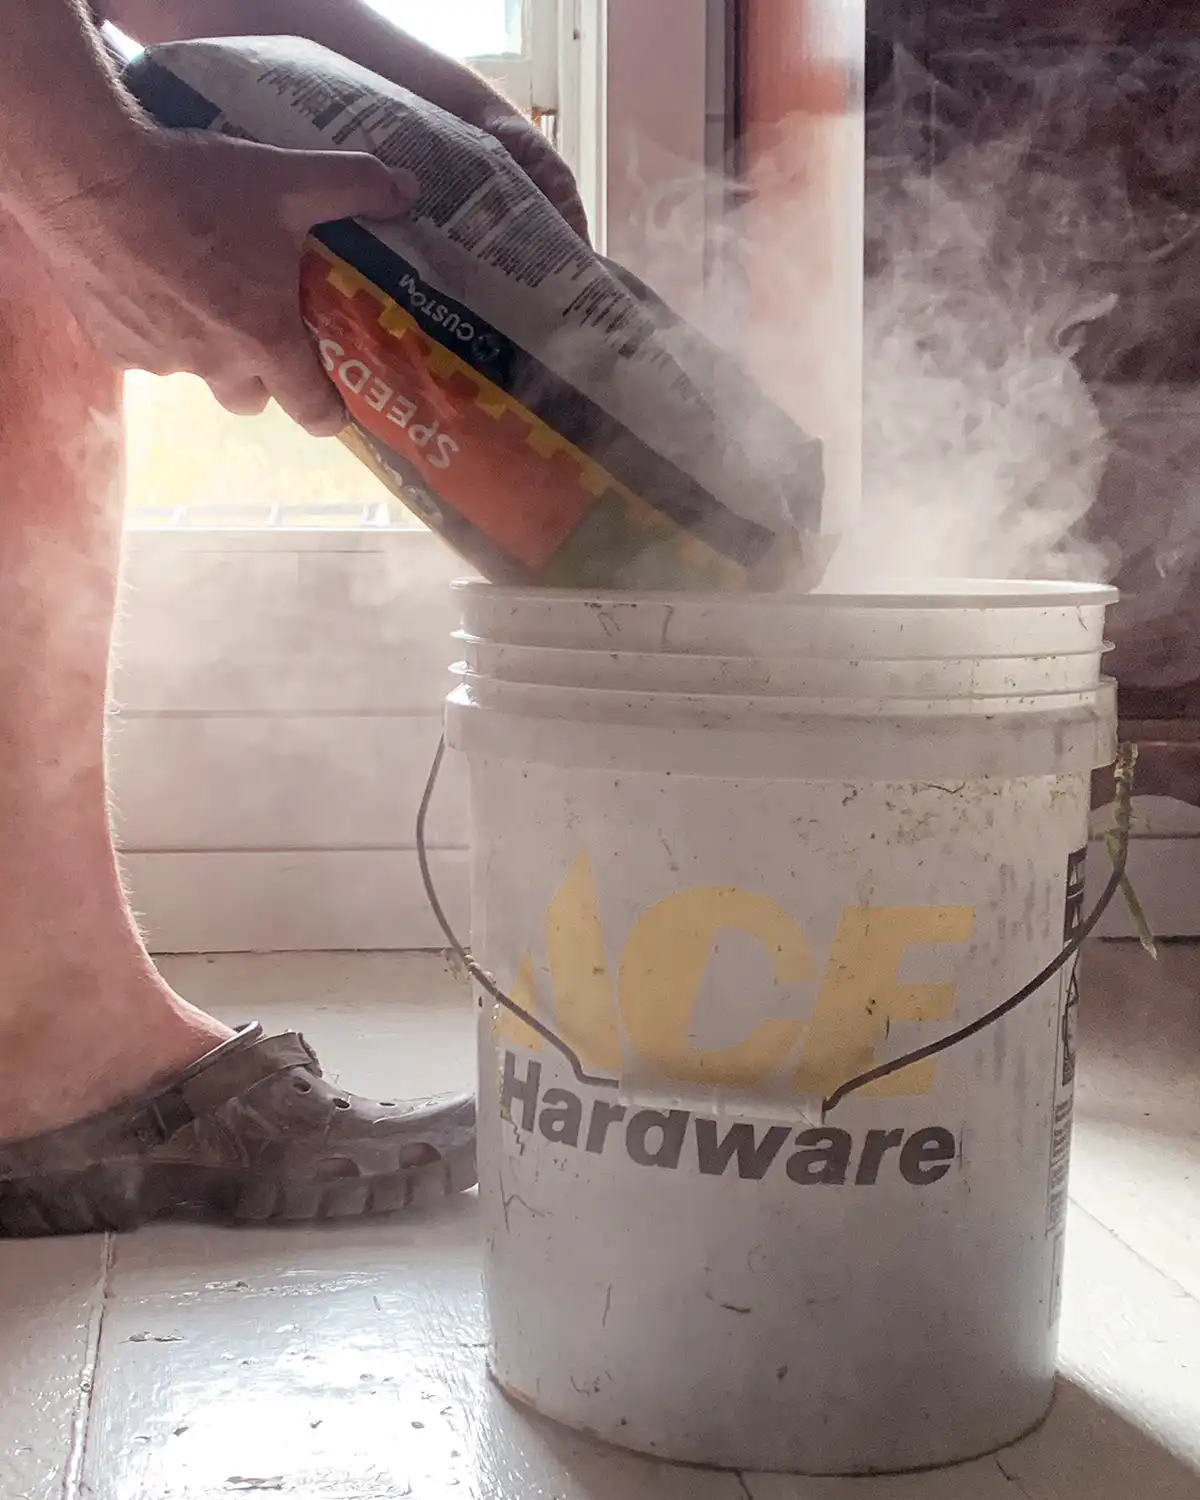
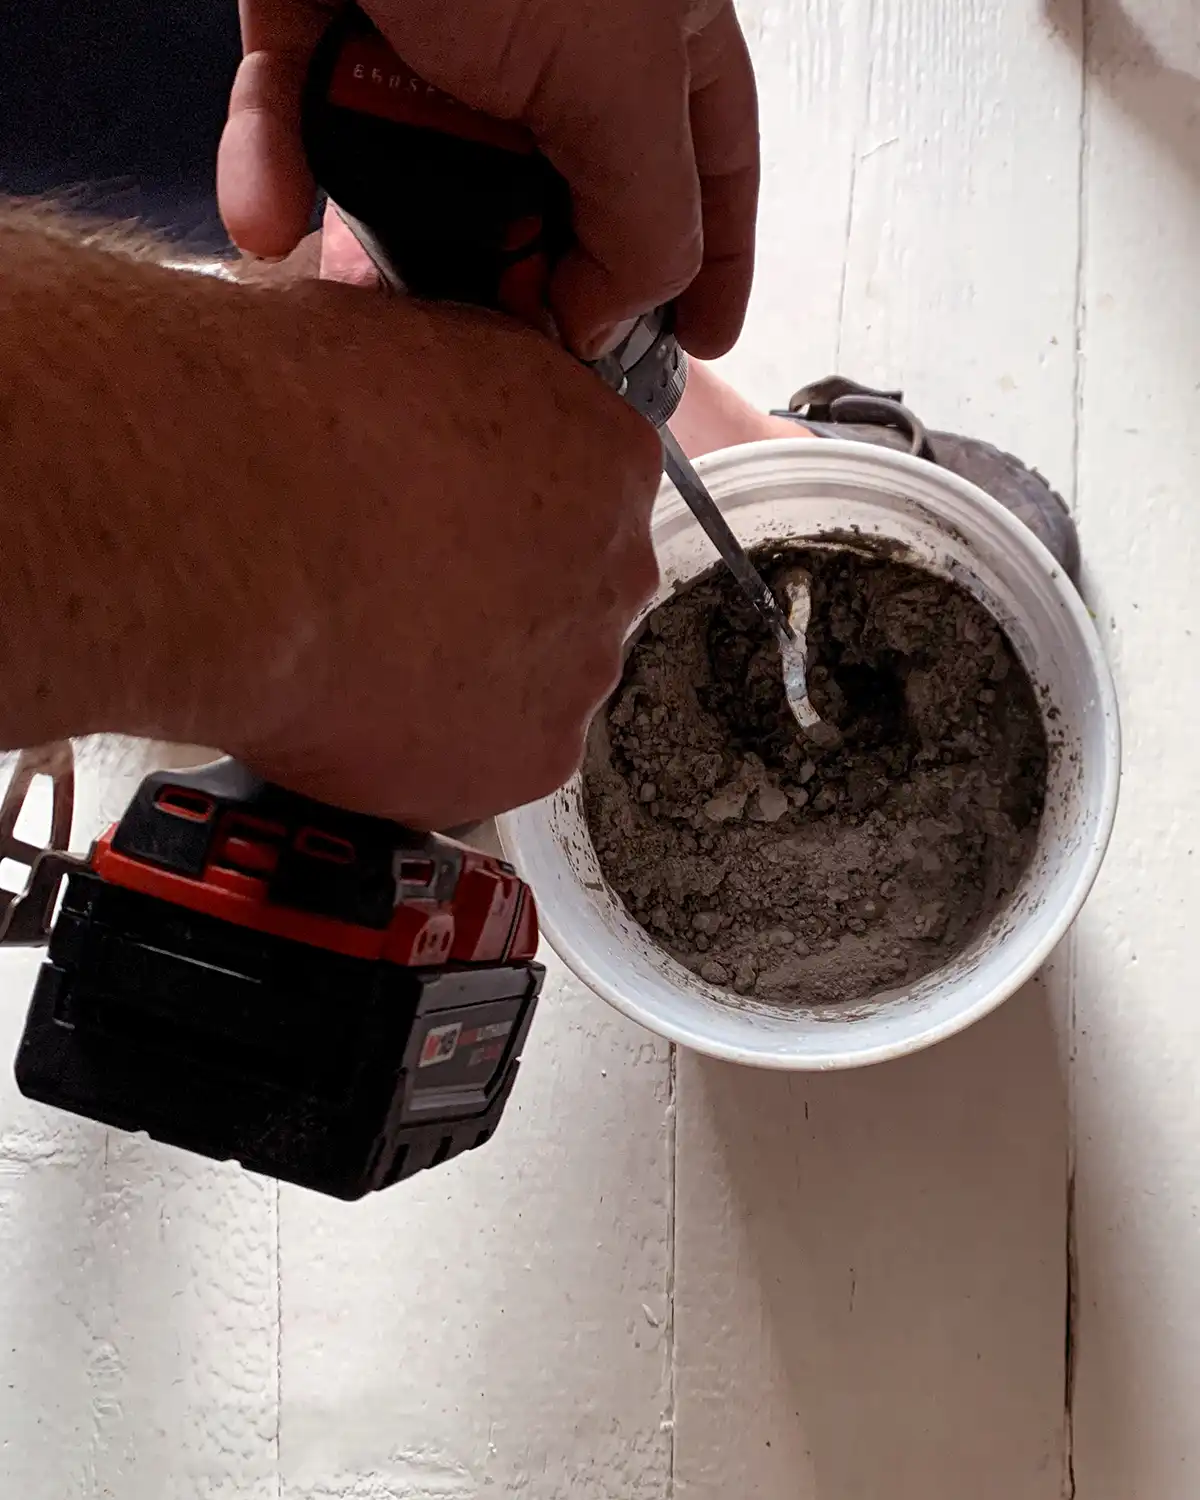
Mix Thinset Mortar
It’s about to get real and you’re about to install that first row of tiles. But to do that, you need your tile adhesive. It’s time to mix your thinset mortar.
Different mortars have different mixing guides. The DIY Tile Guy blog has an excellent mixing guide for small batches of thinset mortar. My biggest tip is to mix small batches of mortar.
Why small batches?
As a DIYer, you don’t work as fast as a pro and you have a predetermined window of opportunity for using your mortar.
Plus, whether you’re using a drill with a mixer attachment or mixing by hand, it’s much easier for you or your drill to mix in small batches.
Follow the mixing directions on your mortar packaging, don’t skip the let the mixture rest step, and then you’re ready to use.
Install The First Row Of Tiles
The first row of tiles is the MOST IMPORTANT row to take your time and install correctly. Even more important? The very first tile you place. Every tile installed after that first row depends on it being installed correctly. Or you’ll have a crooked mess.
I like to let the adhesive on the first row of tiles cure completely before tiling subsequent rows. It isn’t necessary to do this, but I think it’s easier since tiles are strongly adhered to the cement board and serve as support for the rest of the wall.
To do this, scoop some mortar onto the surface of your notched trowel and sweep it across the wall with the notched side at an angle with the wall so it forms grooves. Work in small sections as you don’t want your mortar to dry out.
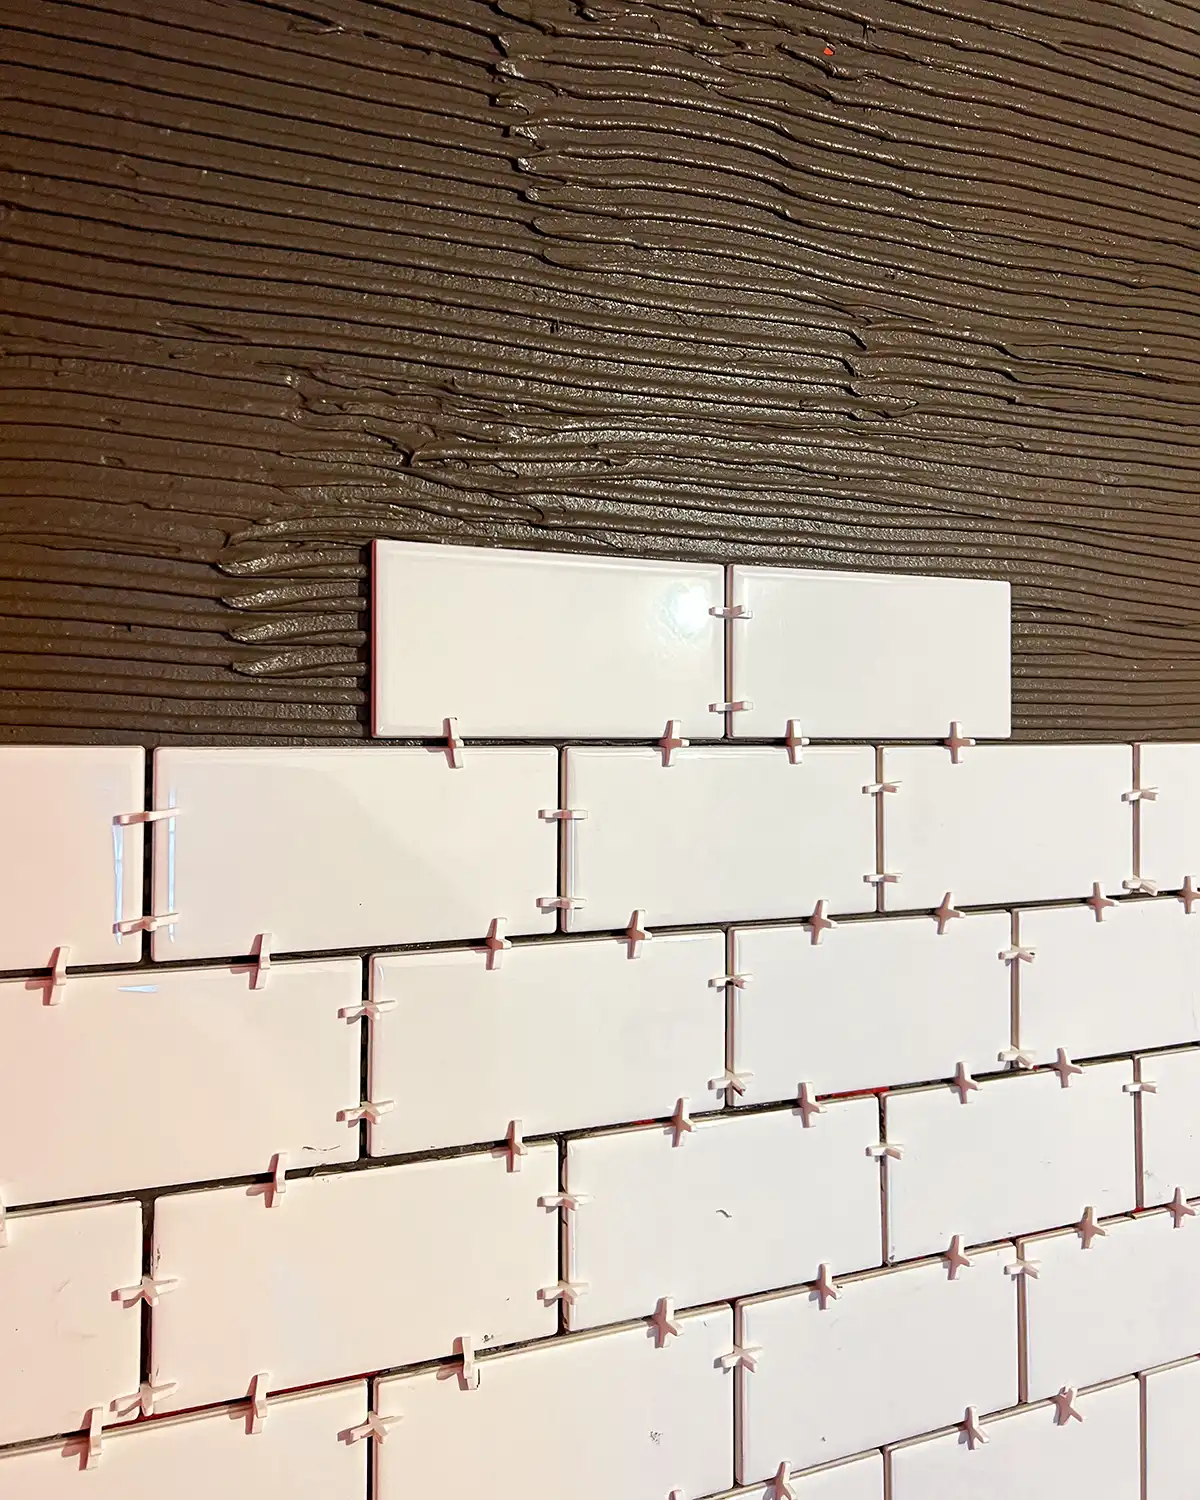
Always spread mortar in straight lines before placing a new tile on top of it. Don’t do a swirl pattern. This trowel technique video from Custom Building Products does an amazing job of showing why you want your mortar lines straight, in one direction.
Place the tile on the wall at your starting point and press it on, wiggling a little back and forth to ensure you get proper mortar coverage and the tile will bond securely to the wall.
Repeat for the second tile. This time place tile spacers between the tiles and gently press the two tiles against each other. Keep going the entire width of the wall until you have all but the two corner tiles to install.
Now get out your trusty tape measure and measure the space between the tile edge and the corner or end wall. Subtract your tile spacer size from that measurement. Measure, mark and cut your tile. Then install it as well to get a completed first row of tile.
If you’re letting the first row cure completely before tiling subsequent rows, wipe off any excess mortar above the first row before it starts to dry.
Applying Shower Tile Mortar
Let’s talk for a minute about applying shower tile mortar because mortar is so important to get right.
Each type of tile and size of tile has manufacturer instructions for what sized notched trowel to use. Look them up.
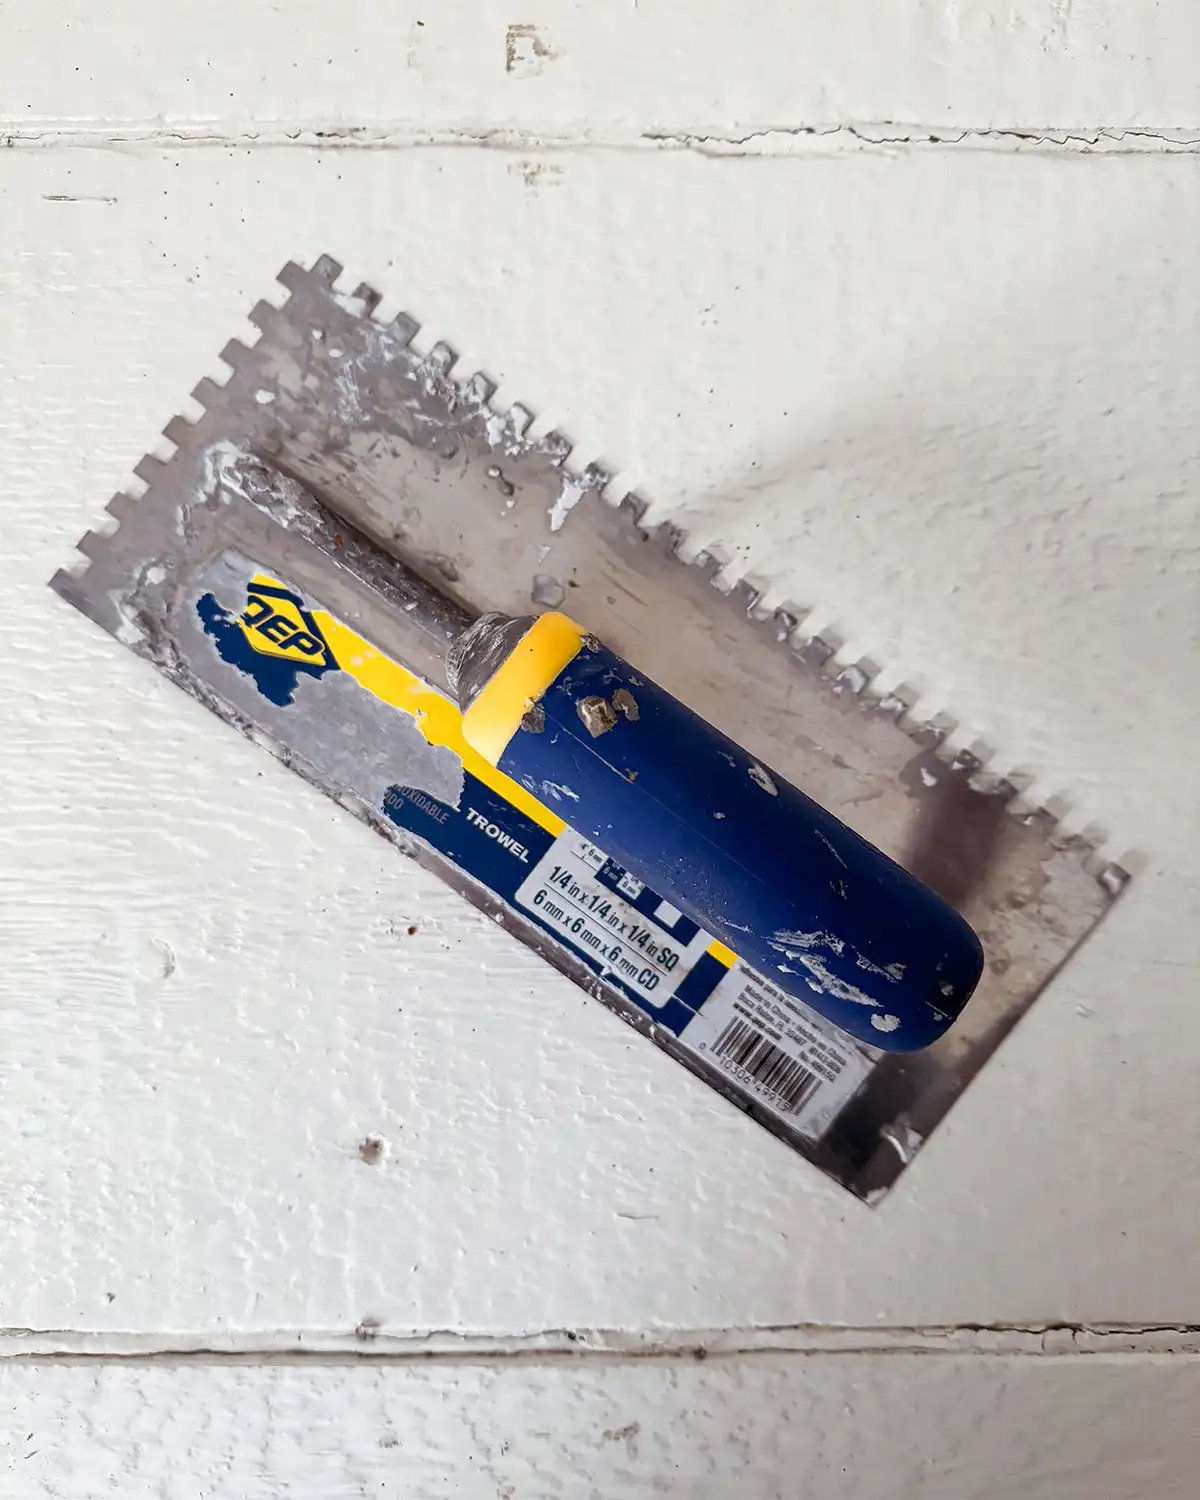
Also, think about mortar coverage. According to the Tile Council of North America (TCNA) Handbook, tile requires a minimum of 80% mortar coverage for interior jobs and 95% mortar coverage for exteriors, wet environments, and natural stone.
Never assume you have the right mortar coverage when you’re tiling and be sure to check tiles as you go by peeling them off the wall. If it’s not enough coverage, adjust your mortar or trowel size.
How To Cut Tiles
It’s inevitable that in any tile project, you’re going to need to cut some tiles. There are two main ways to cut tiles, using an electric wet saw or a manual score and snap tile cutter.
The type of tile you’re using determines the type of tile cutter that is preferable. For example, tile saws are recommended for harder materials. On the other hand, ceramic tiles, especially smaller ones like subway tiles, are easy to cut using a manual cutter. More details on choosing the right tool are in our Tools for Tilers post.

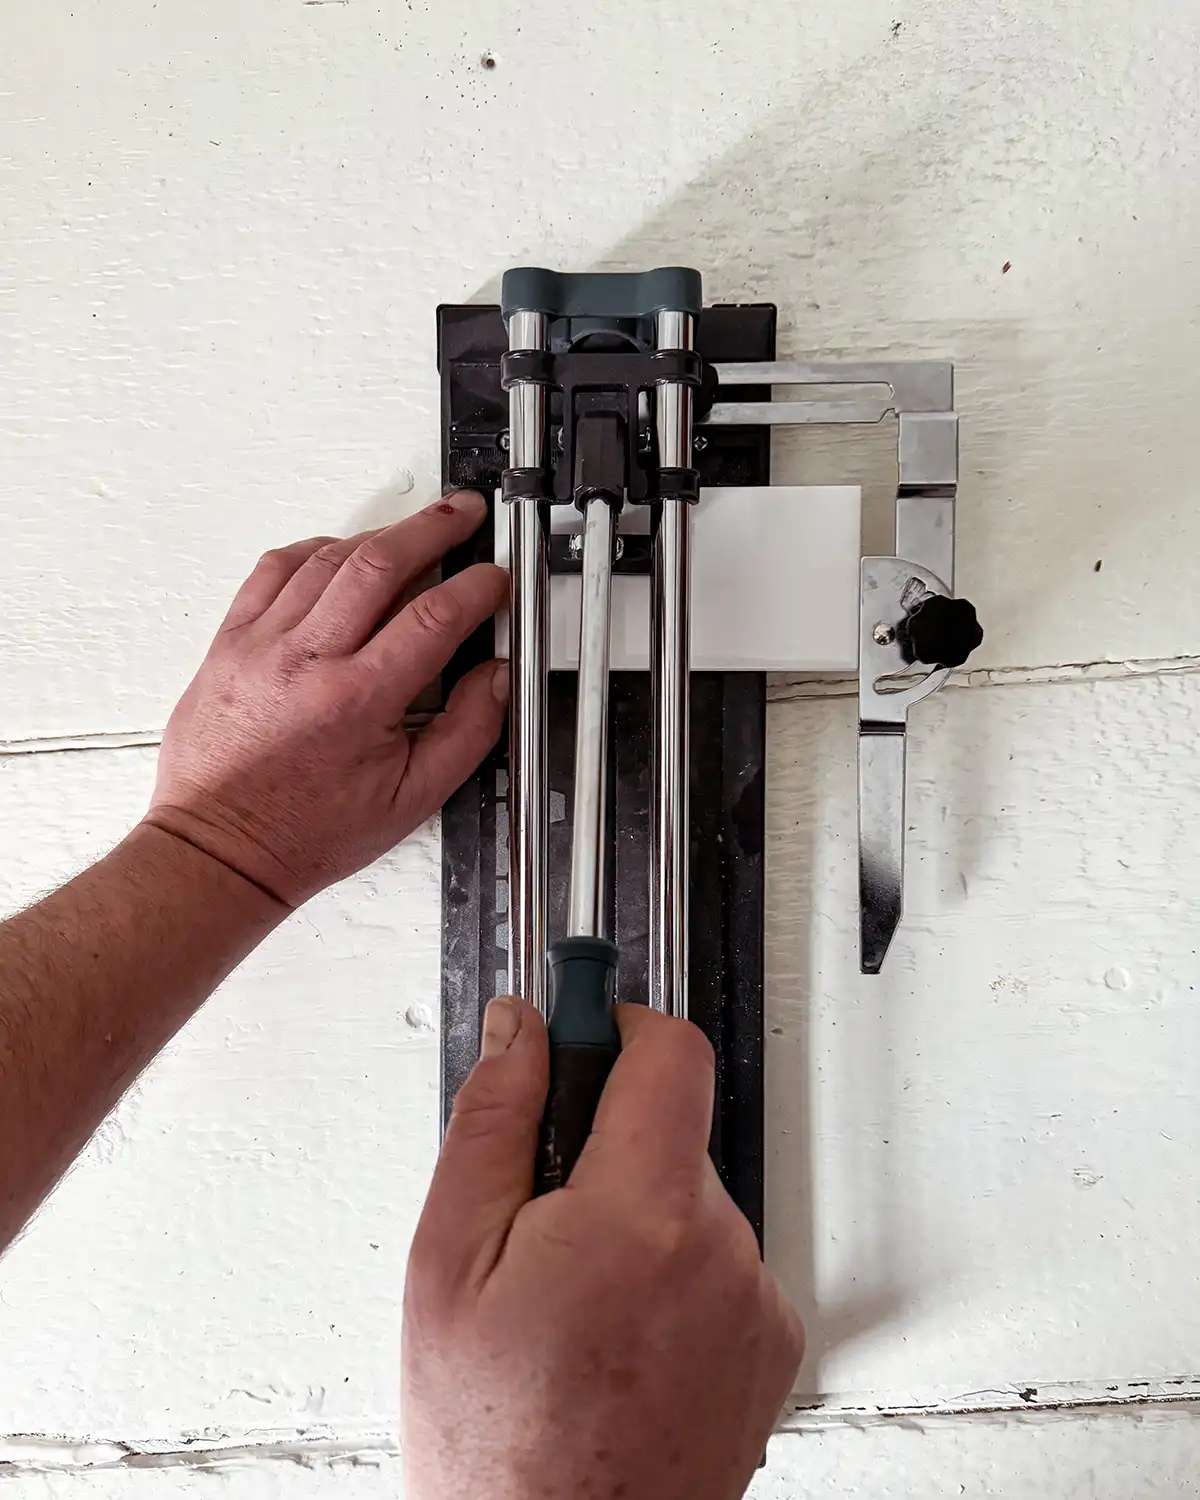
How To Cut Tiles With A Manual Tile Cutter
Using a manual tile cutter is pretty easy once you get the hang of it. After measuring and marking the cut line on your tile, adjust the guide on your cutter, score the tile along the cut line, and push down to snap it. The process takes a little getting used to and the smoother you go, meaning the less you try to power through it, the cleaner the score and cut.
The cut isn’t nearly as smooth as using a wet saw so keep that in mind that the cut edges might be better suited for areas where it will be covered up. It’s also very hard if not impossible to shave a sliver of tile off if you find your cut wasn’t quite right and the tile is too tight for the space.
How To Cut Tiles With An Electric Tile Wet Saw
Using a wet saw is a simple and effective way to quickly cut a wide range of tile materials and sizes including porcelain tiles, ceramic tiles, natural stone tiles, and more. In my opinion, it’s the easiest way to cut tiles although the saw is a little messy and requires more working space than a manual tile cutter.
After donning a pair of safety goggles, ensuring no loose clothing near the saw, and the water reservoir is filled, you’re ready to fire up the saw. Once the water is flowing, keeping your hands away from the blade and the protective rip fence down, slowly push the tile through along your cut line.
Most tile saws have guides. If yours does, set the guide for your cut size before you start the saw. And always keep your fingers as far from the blade as possible to prevent accidents.
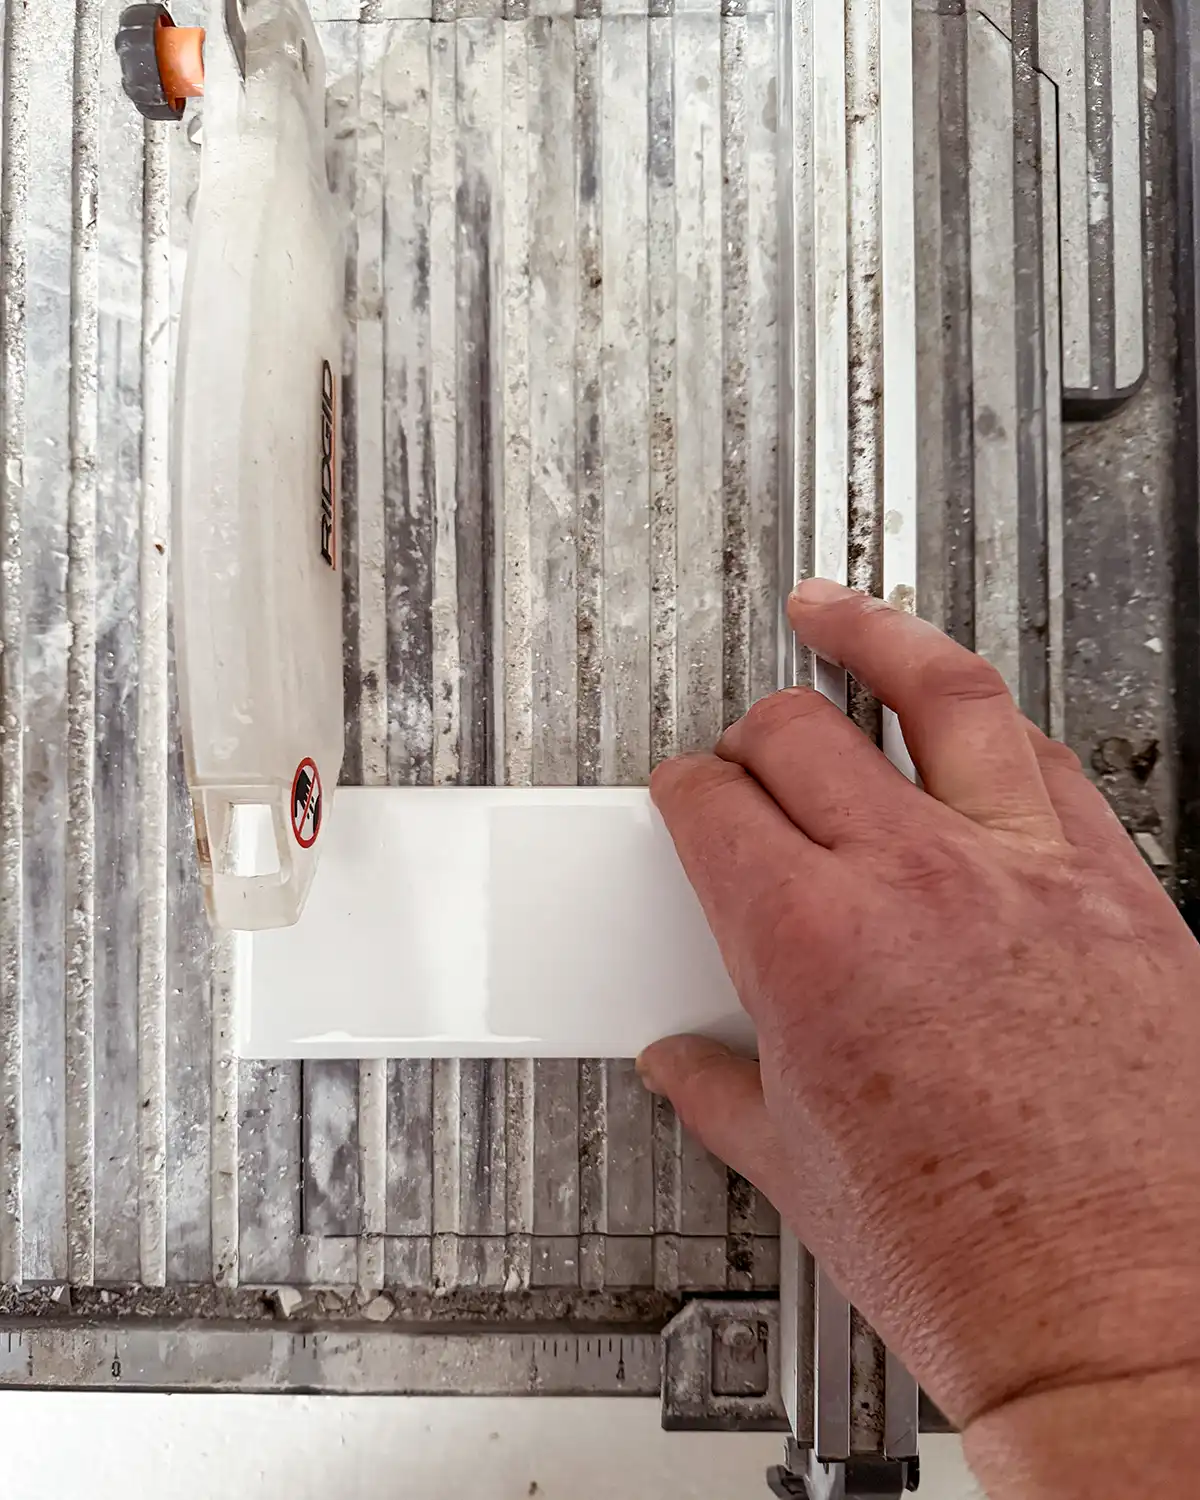
Note…the wet saw is not running here to spare my camera from the spray.
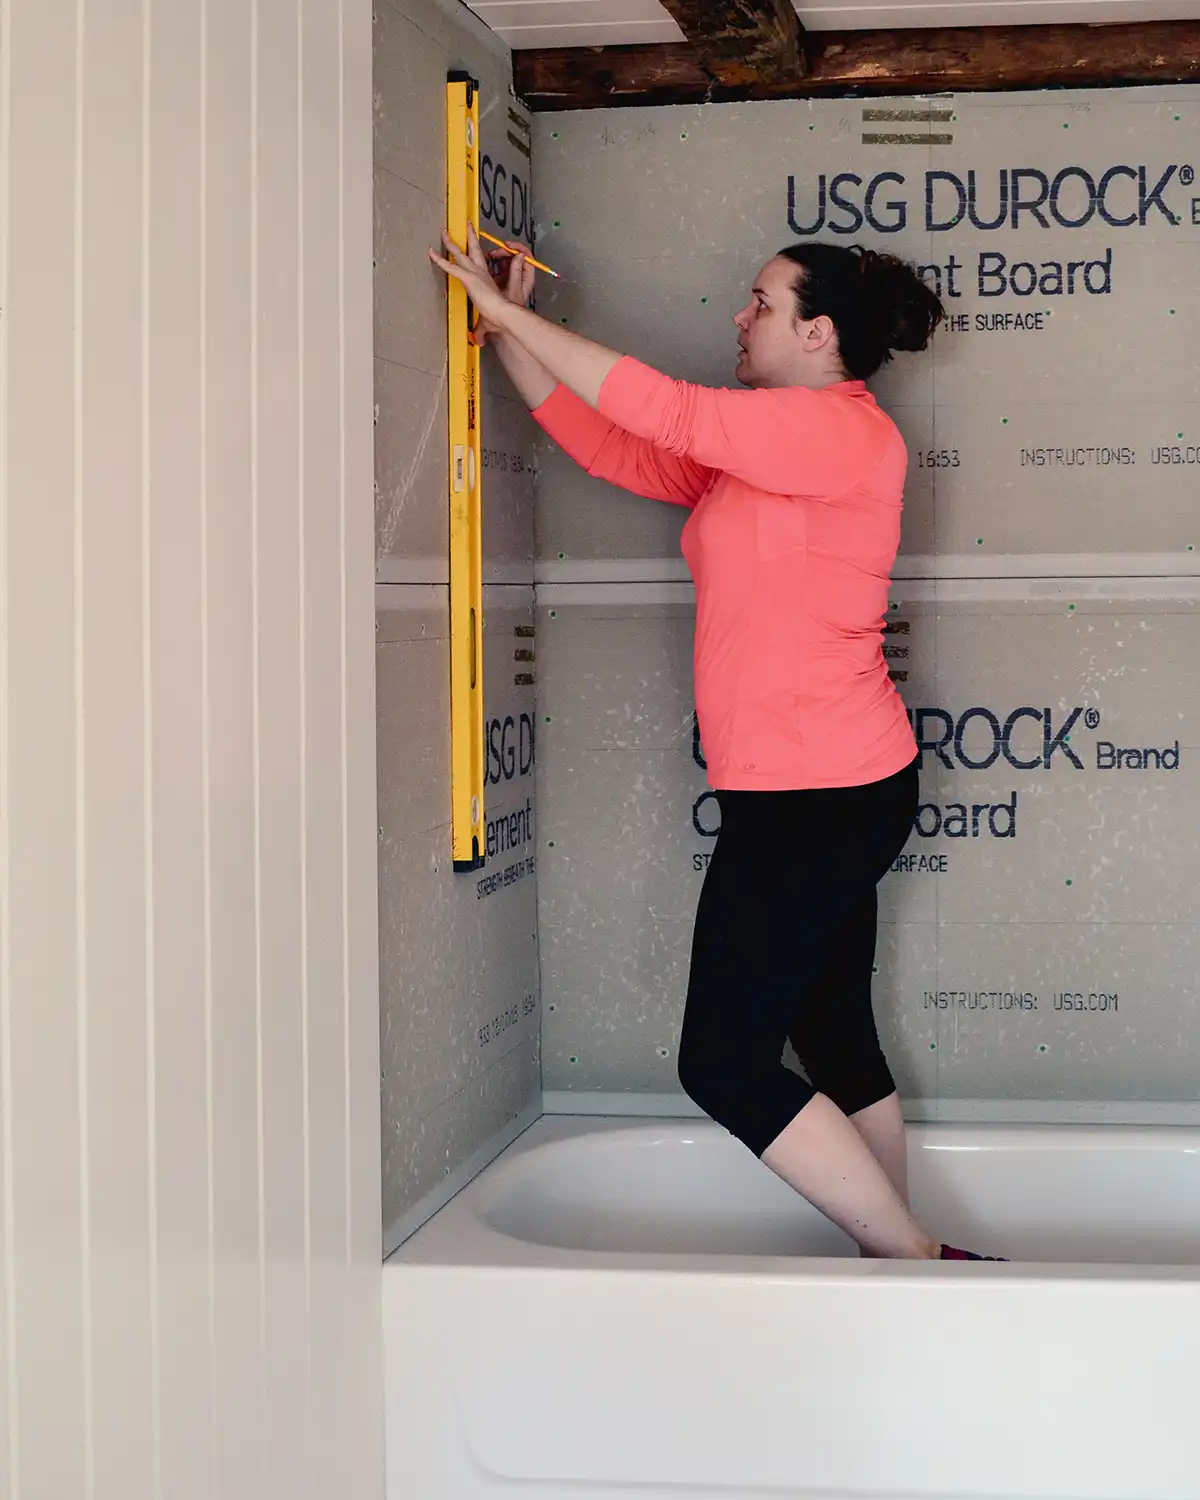
Shim Your First Row Of Tiles
When installing the first row of tiles, you want to make sure it is super level and even. A laser level can be really helpful to determine if your row is level or not. A bubble level sitting on top of the tile row can also be used.
Sometimes tiles don’t have anything to rest on and can slide a little as you work up the wall. Use scrap wood or shims to adjust the tiles as needed. Although I wouldn’t recommend screwing anything into walls prepped with waterproofing membranes as it punctures the barrier.

After the thinset mortar has fully cured, you can remove the shims and supports without worrying about the tiles going anywhere.
We had a case where we were tiling above an angled doorway and had nothing for the tiles to rest on. We used some screws underneath the small tile pieces to secure them until the mortar could cure. Unconventional, but it worked.

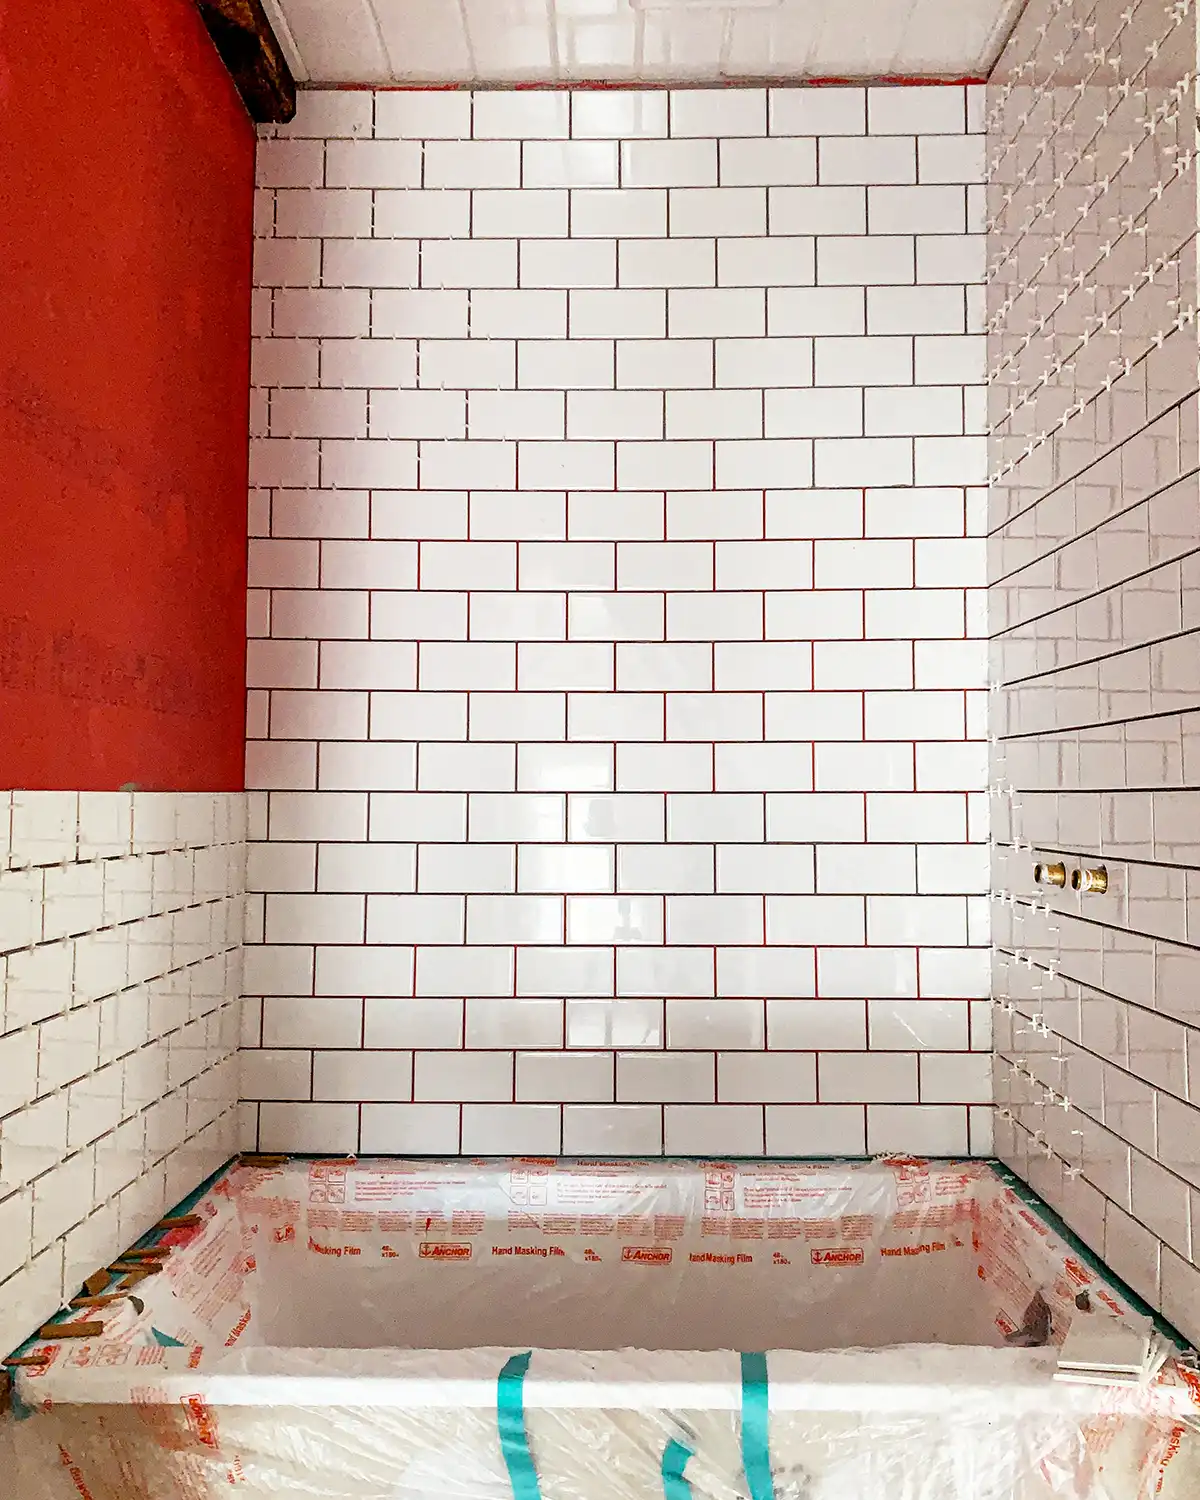
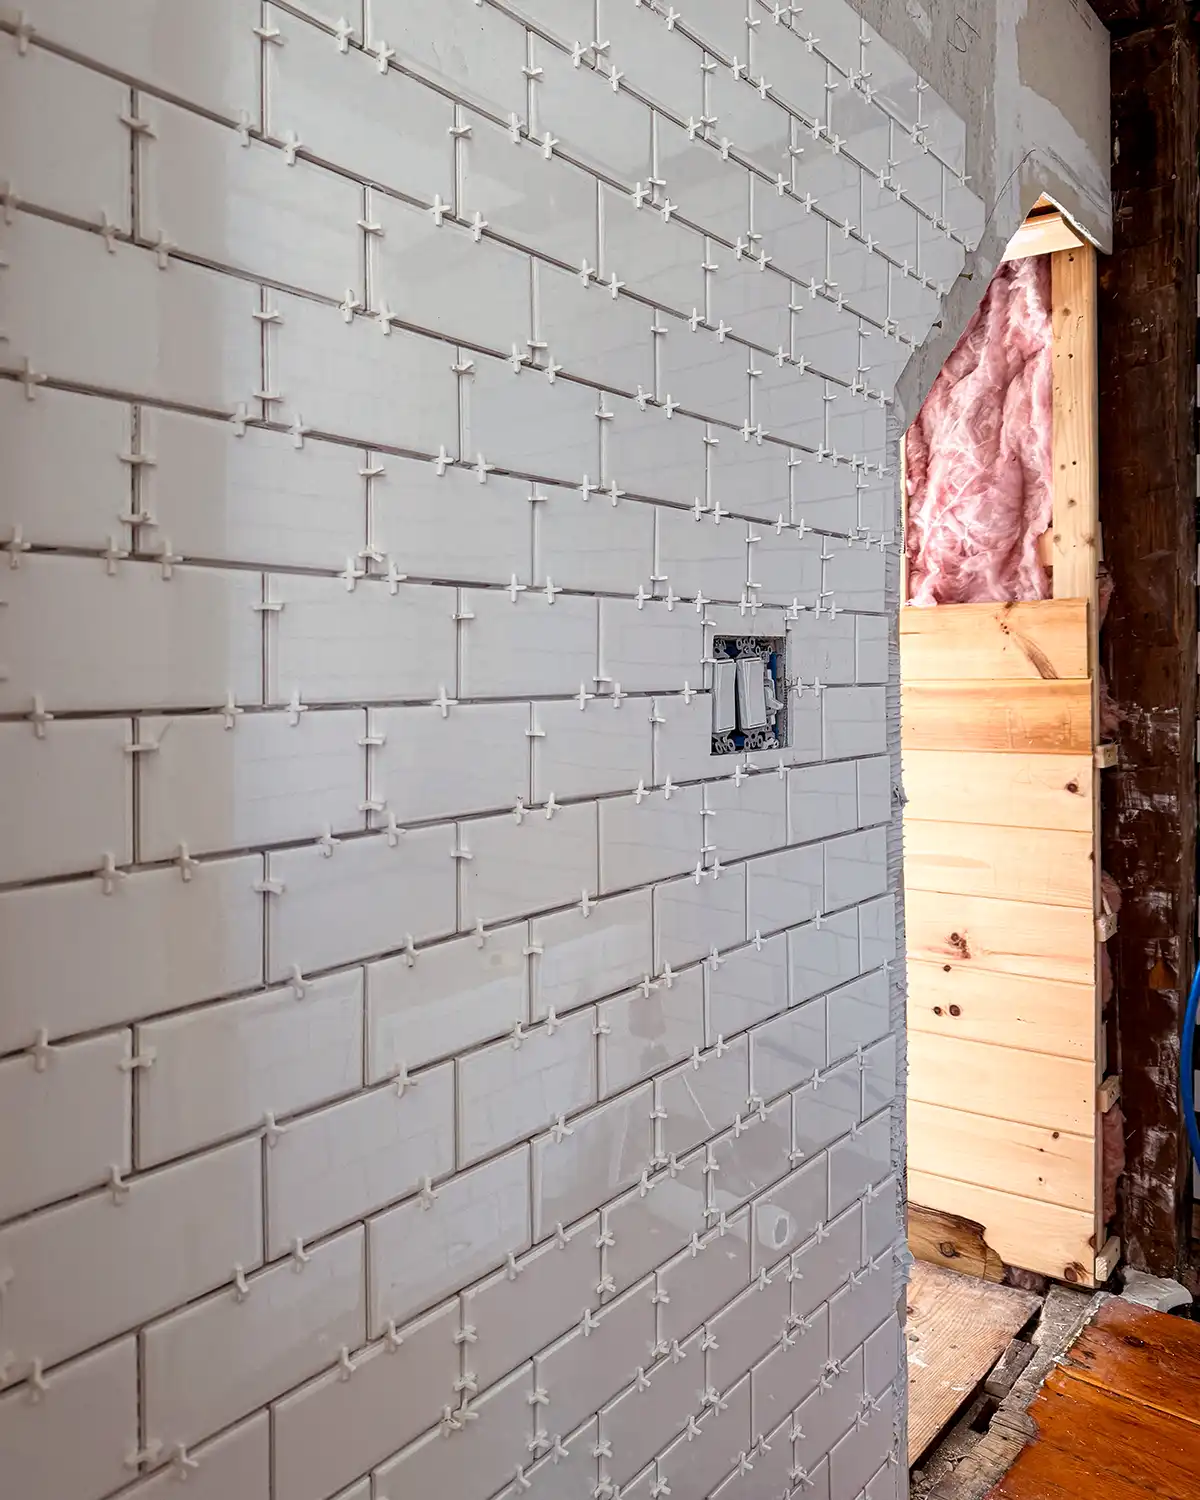
Finishing Tiling The Entire Wall
Work in small sections, mixing fresh batches of mortar as you work up and out from the starting place. Continue to lay tiles one after the other, placing spacers between them as you go.
Spacers are important when tiling a vertical surface since the tiles are apt to slide until the mortar has hardened. Keep them placed, both in the vertical and horizontal gaps until the mortar has cured.
Let The Thinset Mortar Cure
Before moving on to the next step, grouting, the thinset mortar needs to cure. Not all mortars are created equal so be sure to follow the instructions for the mortar you chose.
Some mortars cure in 24 hours and you can move on to grouting the next day. Others can take 48 hours to cure. Just follow the manufacturer’s instructions and let the mortar cure as needed.
Prep Tile Wall For Grout
After the proper amount of curing time, it’s time to prep your bathroom wall tile for grout. This step is pretty simple and straightforward, but depending on the square feet of your tile area could take a while.
The first step, take all those tile spacers out. This is an EXCELLENT step to enlist the help of your small children if you have some. Both our kids (ages 6 and 2) were super into removing all the tile spacers. I worked the high spots and they worked the low spots.
Next, go along and clean up any spots where the tile adhesive squeezed through the grout lines. My personal preference is to use a small wood chisel to help me pop the mortar off. It works well but you do have to be careful not to chip your tile.

For smaller mortar spots, a fingernail works just as well to pop it off.
I also like to make sure every spot we need tile is installed. Sometimes, I’ll even test out a trim piece or two to make sure we tiled far enough. If I missed anything, now is the time to fix it.
Apply Grout To The Tile
The final step is the grouting process. I’ll go into more in a second post but the basics of grouting are mixing the grout (or using a premixed variety), using a grout float to push the grout into the small gaps between the tiles, and wiping off excess grout with a damp sponge.

After the grout dries, there’s typically some grout haze that needs to be cleaned off. Then, depending on the type of grout and whether or not the tile is in a wet area, the grout often needs to be sealed. But this is another post for another day.

So tile on my tiling warriors and join me for DIY bathroom wall tile tutorial part two where we talk all about grout.
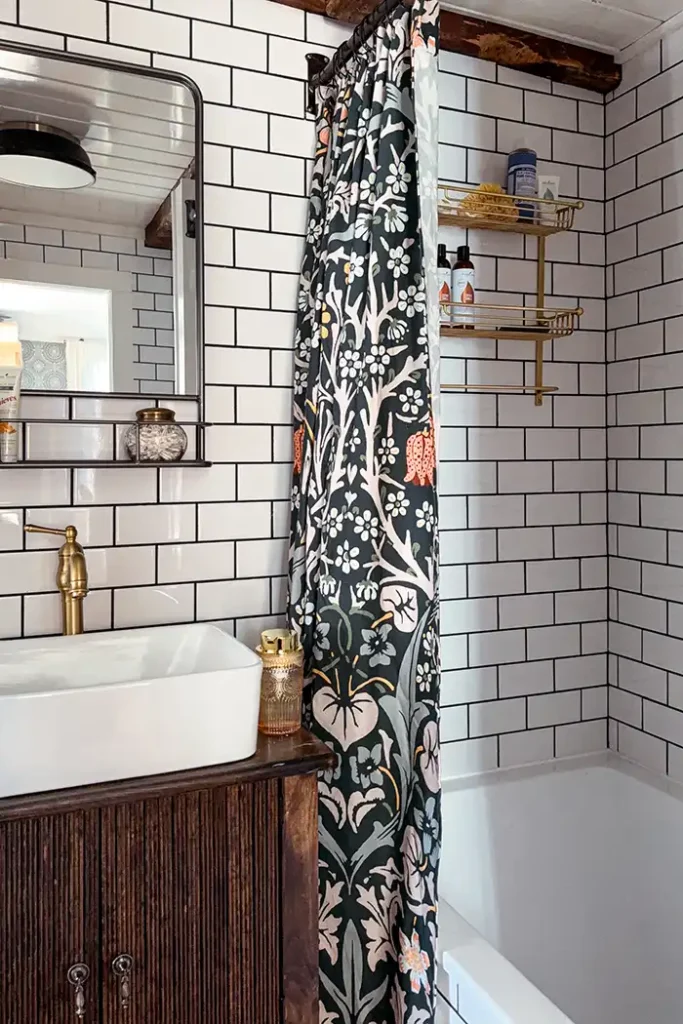

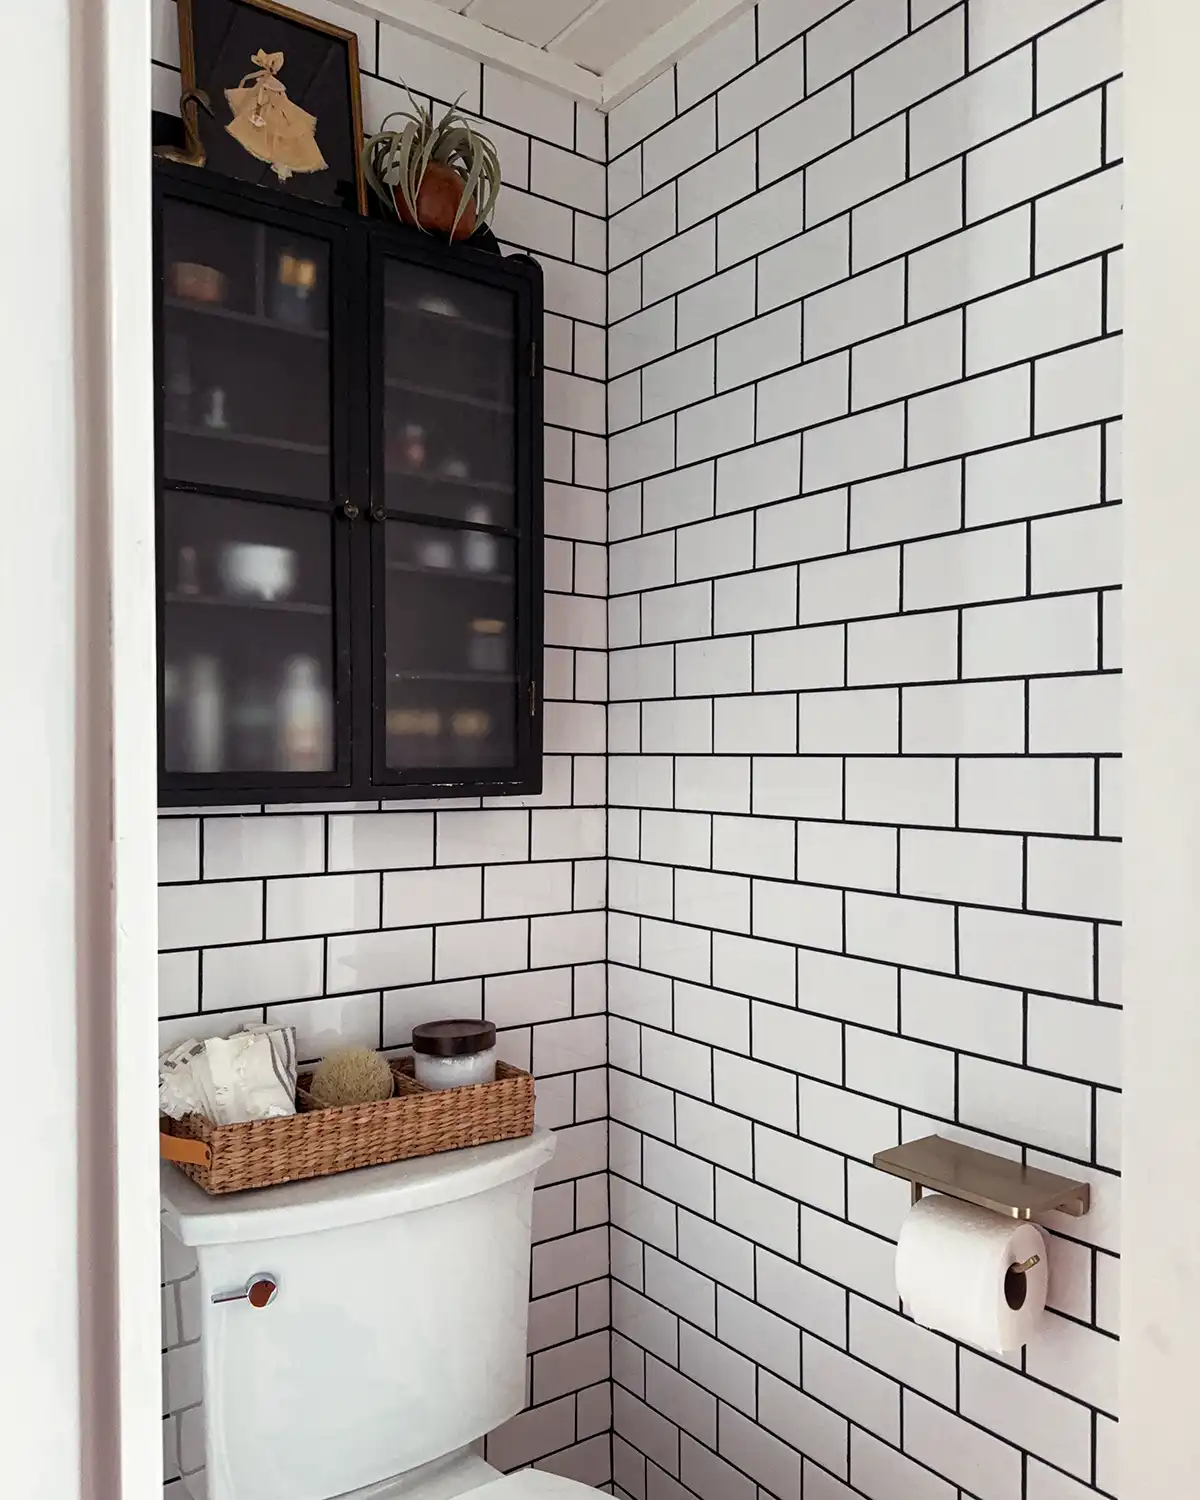
Hey what is that piece you installed on the front of the wall that separates the shower from the toilet? I have a similar wall but on the other side is a cabinet not a toilet.
Is it the white piece in the finished picture? If so, that’s trim. We used a simple pine board and installed it against the framing underneath. Then we attached another piece of pine on either side, bumped out just a little bit, to make like a cap for the end wall. Hopefully that makes sense but let me know if you have any other questions.