We spent some serious…and I mean SERIOUS time working on our new desk this weekend. And it was a gorgeous, GORGEOUS fall weekend to be outside constructing things. Armed with a recent pine buy (it’s our go to wood for pretty much everything we build):
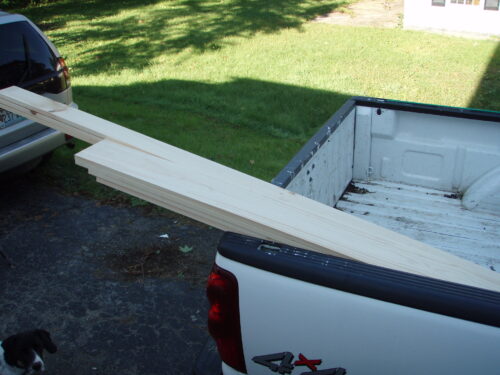
And a mobile workstation/table saw setup in our driveway:

We were armed and ready to build the first piece of our desk, the top. Since the dog doesn’t let us sleep past about 6:00 am (silly Goose), we were out in the driveway measuring and sawing by about 7:00 am. Our neighbors must love us! Usually Colby takes the reins when it comes to furniture building and disappears into his man cave…I mean…shop for a day or two, emerging with a beautiful piece of furniture ready for me to finish up with paint or stain. This time, I convinced him to let me help…as long as I didn’t have to saw anything. That’s just too much responsibility for the power tool novice that I am. Oh…and I’m completely inept at measuring anything. What I lack in measuring skills, I make up for in sanding ability! So Colby measured, squared up the pine boards, measured and cut:

We were going for a rustic-ie, pieced together desk surface so we used one long, 10′ board for the first row (the row where our desk chairs belly up to the desk), two 5′ pieces for the middle row of pine, and two 2.5′ and one 5′ pieces for the third row. To attach the boards together, we opted for using Jig…Kregg Jig. A master of making amateur wood workers look good. He’s a tool of mystery, and takes his wood chips shaken, not stirred. Now, remember, I’m not the wood worker in the family, but the Kregg jig seems so much easier than using dowels or biscuits/dominoes. Meet our main man, Kregg:
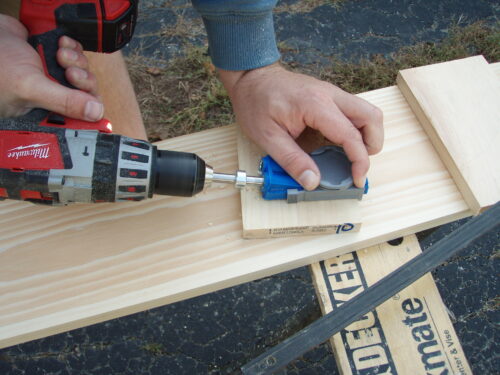
You can change the depth and length of the drill hole with Mr. Kregg so we made sure we did a few test runs on some scrap wood to be sure everything was lined up okay. It took us three tries, but we finally found the right setting. Then we went to town drilling holes in the wood using the jig and screwing the planks together:
Not only did we screw together the boards but we also used a nice, even bead of wood glue to help bind everything together. Clamps were also quite useful. Is it painfully obvious that I have no idea what I’m talking about yet? No? Such lies! But I’m trying…desperately trying. Here’s a closer look at how the boards are screwed together:
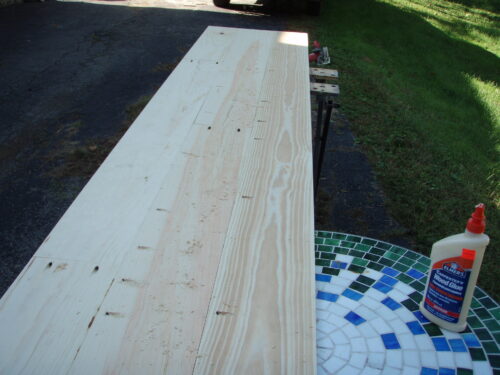
With our 10′ desk surface all pieced together it was time for my favorite part of projects….finish work! I’m a sucker for the dirty details such as filling cracks with wood putty, sanding down the mistakes…I mean…happy accidents, and staining/painting….oh how I love painting! So I spent some time filling the cracks with wood putty for a nice, smooth, seamless finish:

Pretty sweet, huh?! While I was wood puttying, Colby worked on adding some molding around the edge of the desk surface to give it more of a finished look:
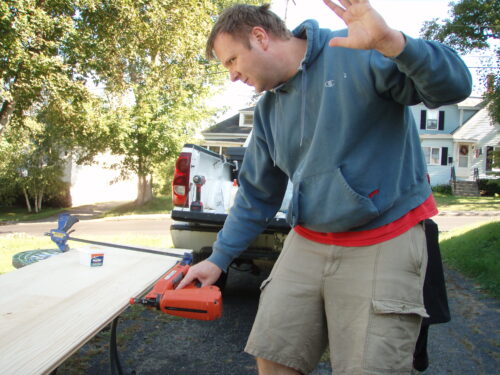
He scored some serious style points, a 9.8 to be exact, from the Chinese judge, 9.6 from the USA judge, and a 8.7 from the Russians. The Russian judge is one tough bugger and Colby is no Nancy Kerrigan. So here is a close up of the trim around the desk edge that Colby installed:
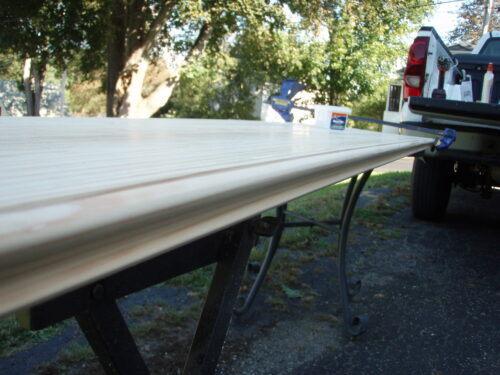
It’s actually the same stuff that we’ve been installing on our baseboards, to cap it off and add some flair to the basic pine boards. We’re thrifty like that. We were also thrifty with our stain. It’s the same stain that we used to stain all the trim in the office and also the ladder shelf that Colby built for the old, upstairs office.

After some serious sanding:

We stained and poly urethaned both the bottom and top surfaces. Since the bottom won’t get much wear and tear we went for one coat of poly. The top was a different story. We went with three coats of poly but I’m sure I’ll add a few more after the desk is all done and in place. I’m a little OCD like that. So now our desk top is living in our hallway:
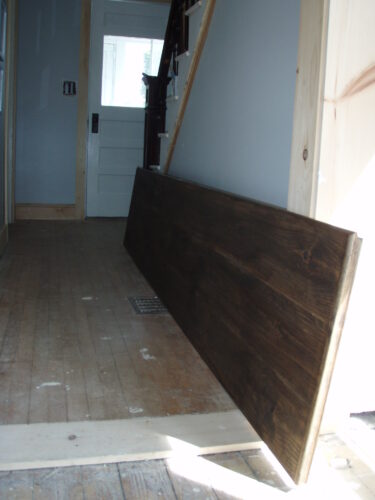
It’s pretty much the only place that the behemoth of a desk surface (it’s 10′ long by 2′ wide) fits. It impedes a little in Goose’s personal playground (we spend alot of time playing fetch up and down that hallway on rainy days), but it’s just a temporary home. Famous last words. Our “temporary” bathroom vanity, which is basically a piece of plywood attached to the wall is still in the bathroom a year and a half later. So what’s next on the great desk build of 2011? We just got started on building the custom cabinetry so we’ll give you an update once we make some decent headway.
Pssst….Angie’s Roost is heading to the land of limited to no internet connection for a few days. If posts are sporadic or non-existant there’s no need to call in the search party. In the famous words of Ace Ventura Pet Detective, “If I’m not back in five minutes…just wait longer.”

Looking good! Can’t wait to see the final output. Btw, thanks for the sweet comment on my blog. Hope you’ll continually link up in my Creative Blogger’s Party & Hop.
I’m addicted to your blog and the Creative Blogger’s Party & Hop…it’s awesome…and to quote Annie (as in Little Orphan Annie) “you can betcha bottom dollar” that I’ll keep participating!