
Before we dive too far into the before and after of each room from our Maine farmhouse fixer-upper, let’s take a good, long before tour of the entire thing. Who’s with me?! We teased the tour a bit in our story of how we bought the house, but now for some more details. I love a good before-and-after home renovation story, and this is our before story from our Maine house.
Farmhouse Fixer Upper Basics
This house was built in 1910 and renovated sometime in the 70s or maybe early 80s. It was originally a small farmhouse with three bedrooms and a bath on the second floor. Later, a large kitchen and entryway were added onto the back of the house.
I wouldn’t say it was renovated or cared for. There is a stark difference between what we found in our first home in Maine (shoddy work and things covered up that shouldn’t be) and what we found in our current farmhouse in Vermont. So it was no surprise that most of what we saw we intended to replace. Like hollow core doors, failed shower walls, a dishwasher that didn’t work, and a rainbow of shaggy carpeting.
I’ll go into much more detail about each of these areas in later posts. But for this tour, let’s appreciate the basic flow and our intentions for using each space in the house.
Exterior Before
The exterior of our Maine home was in decent shape. One of our hesitations about buying the home was that the original footprint had asbestos siding. The kitchen addition in the back of the home had clapboards. We gave the siding a good inspection before even putting in an offer and decided it was in good shape, none of it was broken, and we would diligently paint the entire house without scraping the siding, to keep the asbestos material encapsulated and in good order. The siding was extremely popular in our area and was not uncommon to find.

Two exterior problems existed that needed relatively quick attention. One, the roof needed to be shingled. And two, the stairs were rotting and falling apart.
Exterior Plan: Paint the entire house, re-shingle the roof, build a small deck to replace the stairs, replace the entry door, and switch out the vinyl replacement windows.
The yard was one of the selling features when we bought this home. It was a double lot but unusual in that it was double-long, not double-wide. Our yard stretched from one street in the front to another street in the back. Around the midway point, we had a decent-sized shed to store yard tools and supplies. Our yard ended just beyond those evergreen trees in the photo below..
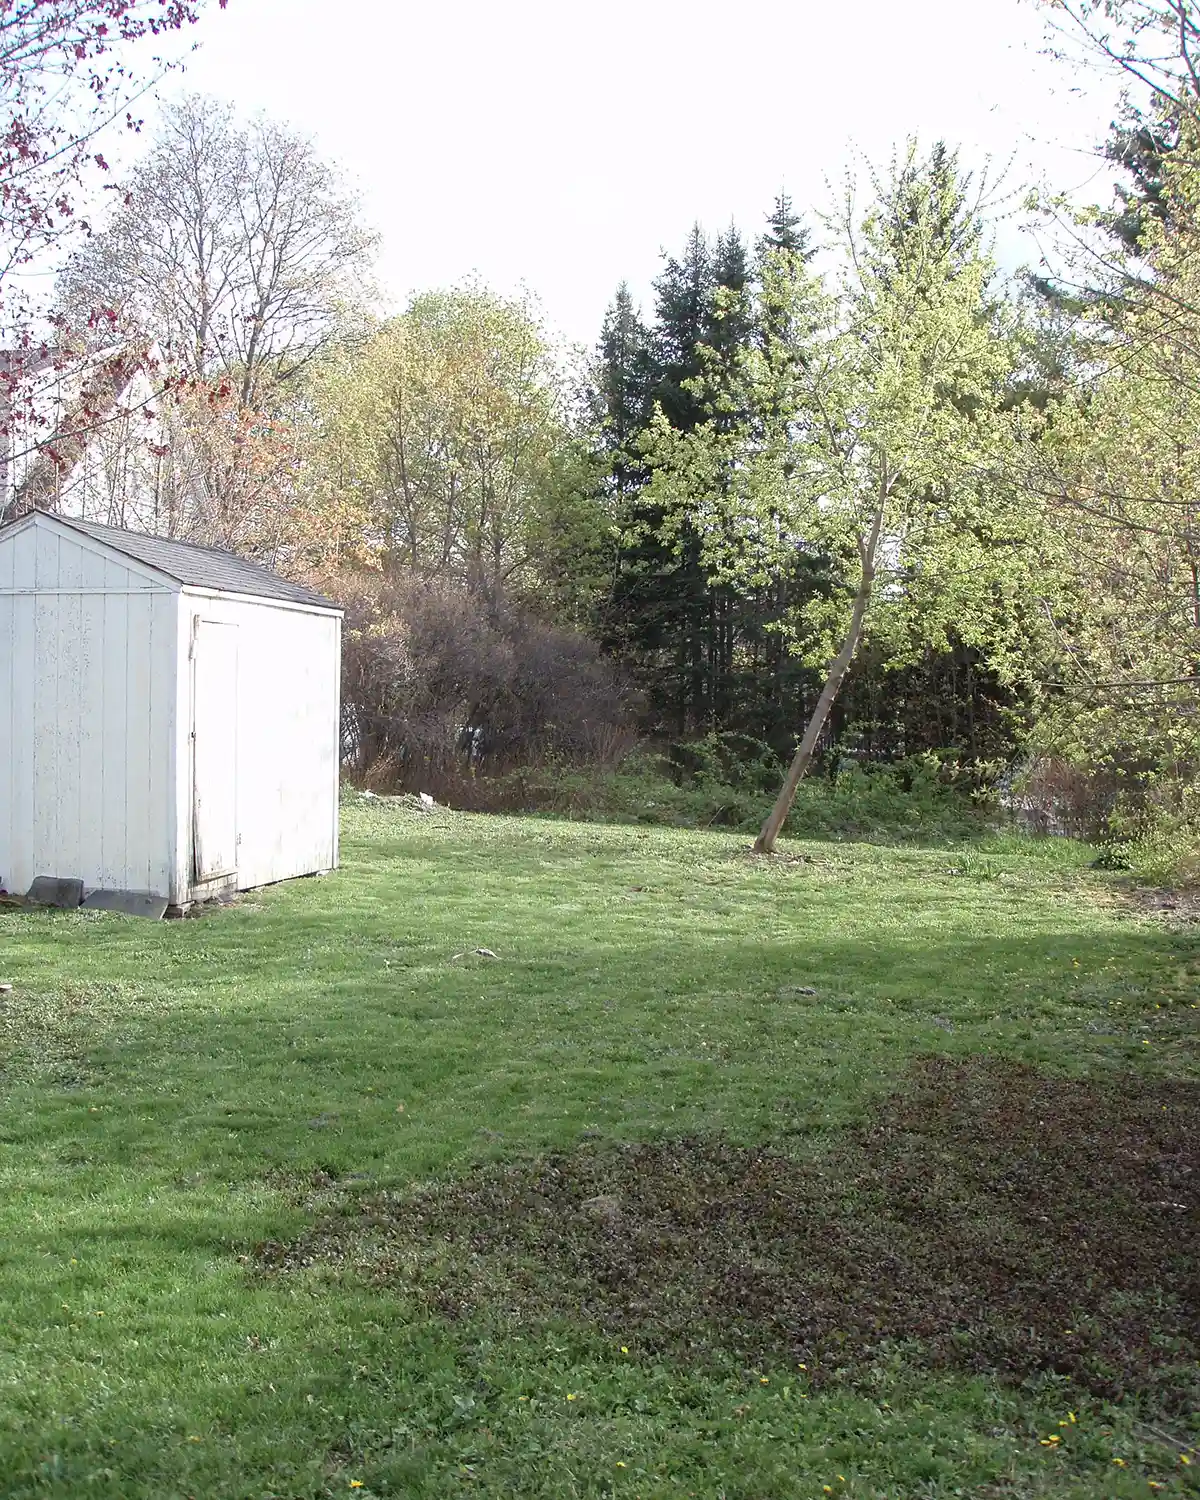
Yard Plan: Give the shed some maintenance, tame the wild side of the yard, build a raised bed garden, construct a fence to keep the dog out of said garden, level and reseed the lawn, repave the driveway, and add more landscaping around the house.
Front Porch Before
The porch was one of the biggest selling features when we bought our first home. I instantly fell in love with the bead board, enclosed space, and the charming screen door that could be replaced with a glass panel. It was the ultimate of three-season living and reminded me of a sunroom. Plus, Colby assured me that he could make the windows operational again, and if we added a space heater in the winter, we could enjoy the front porch all four seasons. Sold!
This enclosed porch was not without its problems. We noticed significant rot and water damage while touring the home, but it wasn’t anything we couldn’t fix.
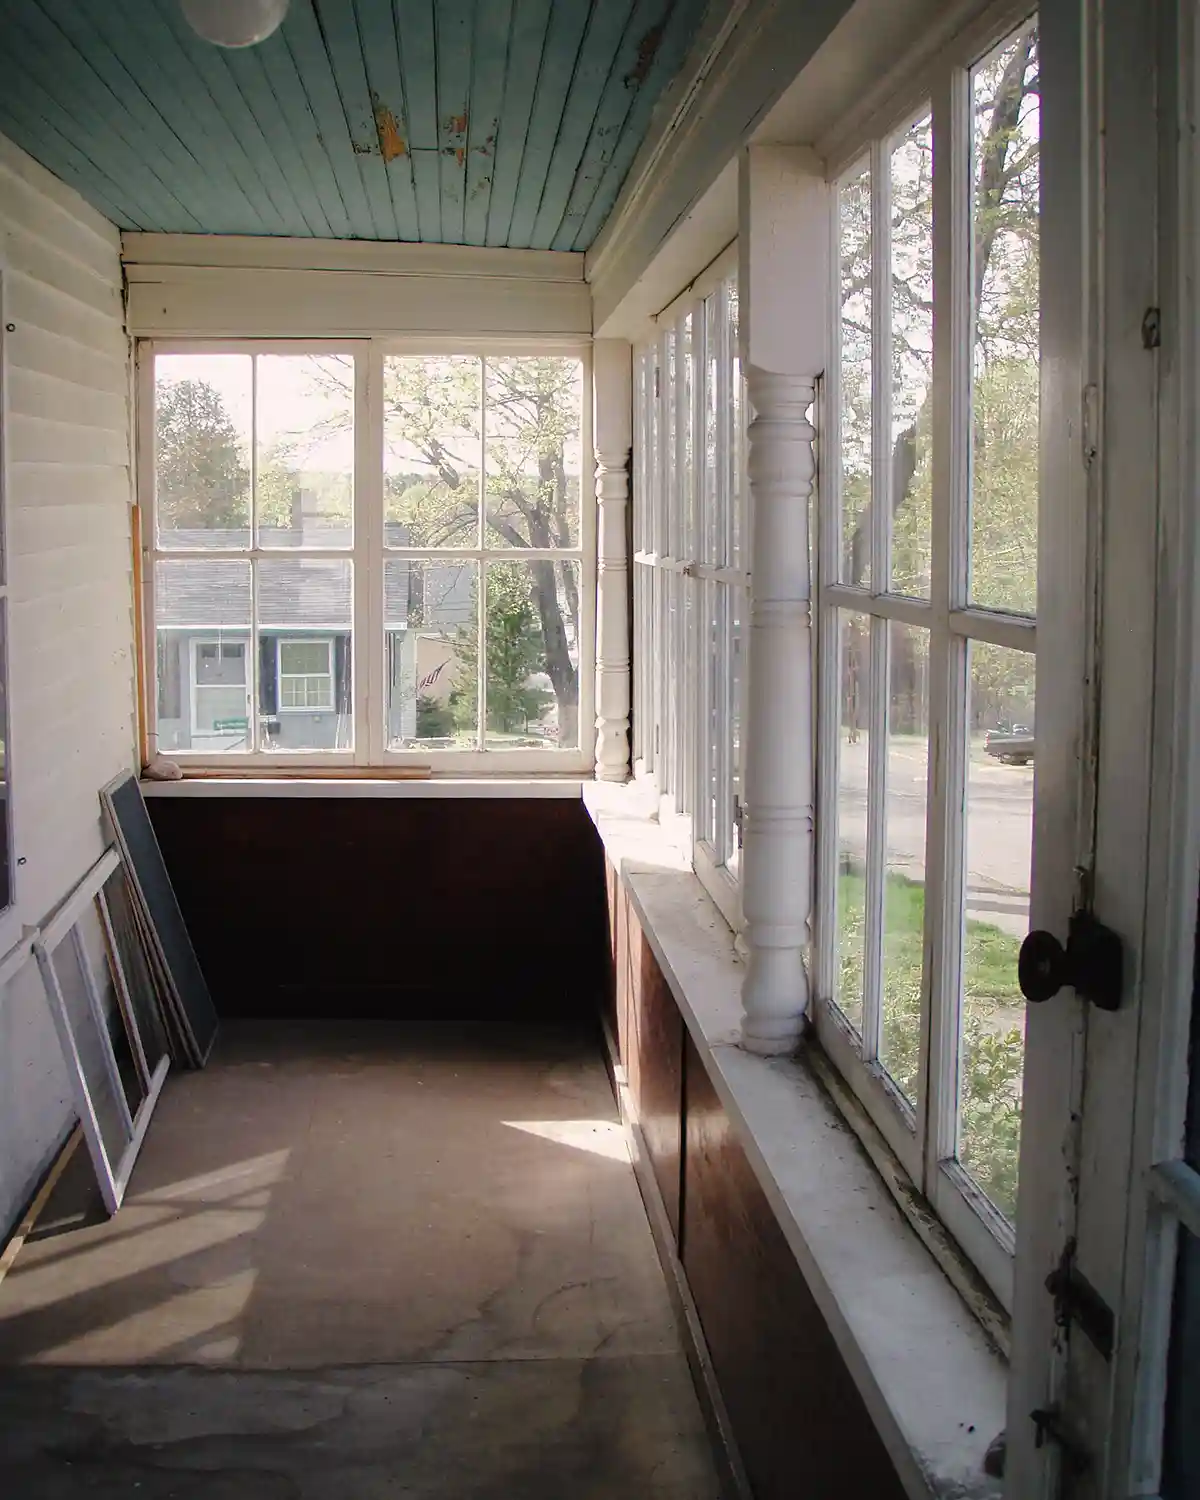
Porch Plan: Replace the non-working light fixture, remove the lower panels and water-damaged subfloor, repair or replace the floorboards, patch the beadboard, make the windows operational, paint everything, and turn the space into a front porch sitting area.
Entry Before
The entryway in our Maine home may have been the most uninviting I’ve ever seen. It may also have been the smallest. But it did serve a purpose with its exterior door and interior door, meaning less cold got into the home. But it was giving serial-killer vibes.
I would consider this entrance the back door to the house. Although it’s more like a side door at the back of this old house.
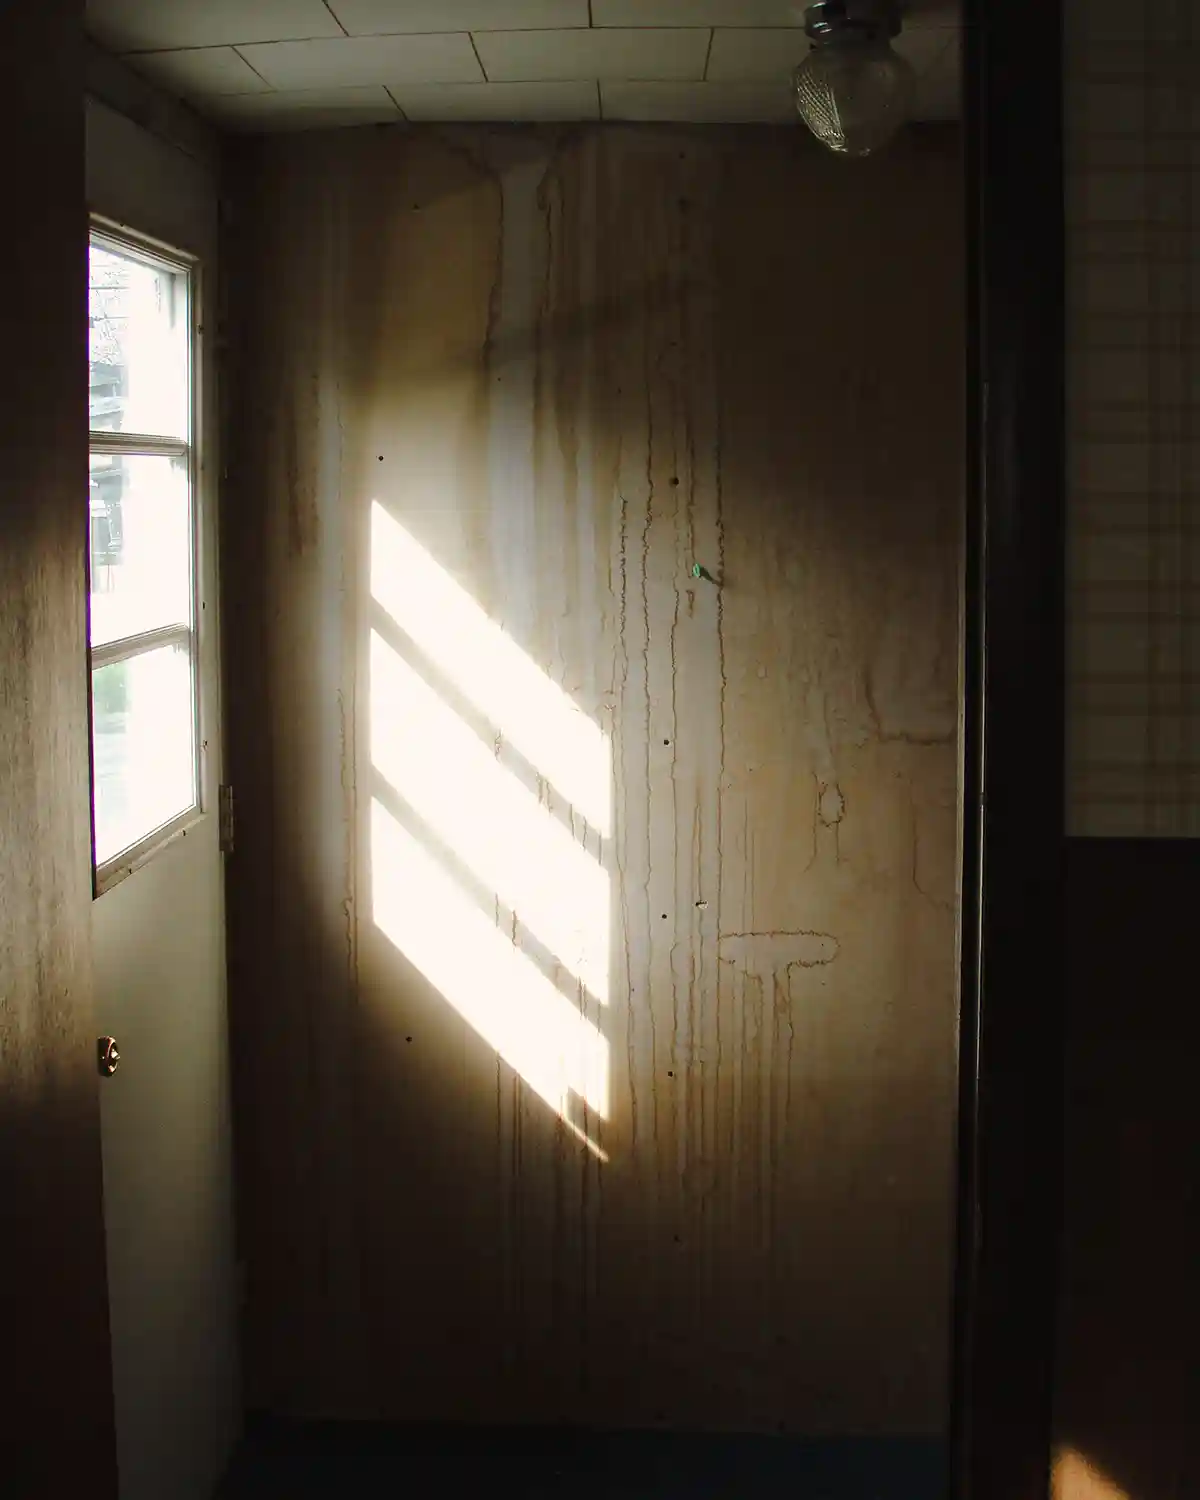
Thankfully, all the water damage in the home was old, and repairs had been made to prevent water from entering the home. But the damage remained and needed to be fixed.
Entry Plan: Make the entry flow into the kitchen, replace the entry door, replace the flooring, re-sheetrock, replace the light fixture, and organize the entry space with hooks and storage for common grab-and-go items.
Kitchen Before
After coming through the entry, you find a large, open space in the kitchen. There’s a coat closet on the far wall, an eat-in kitchen area with a window to the backyard, a view of the laundry room, and then the actual kitchen space. All of it is extremely dated with questionable appliances. Here’s the open, eat-in kitchen side.
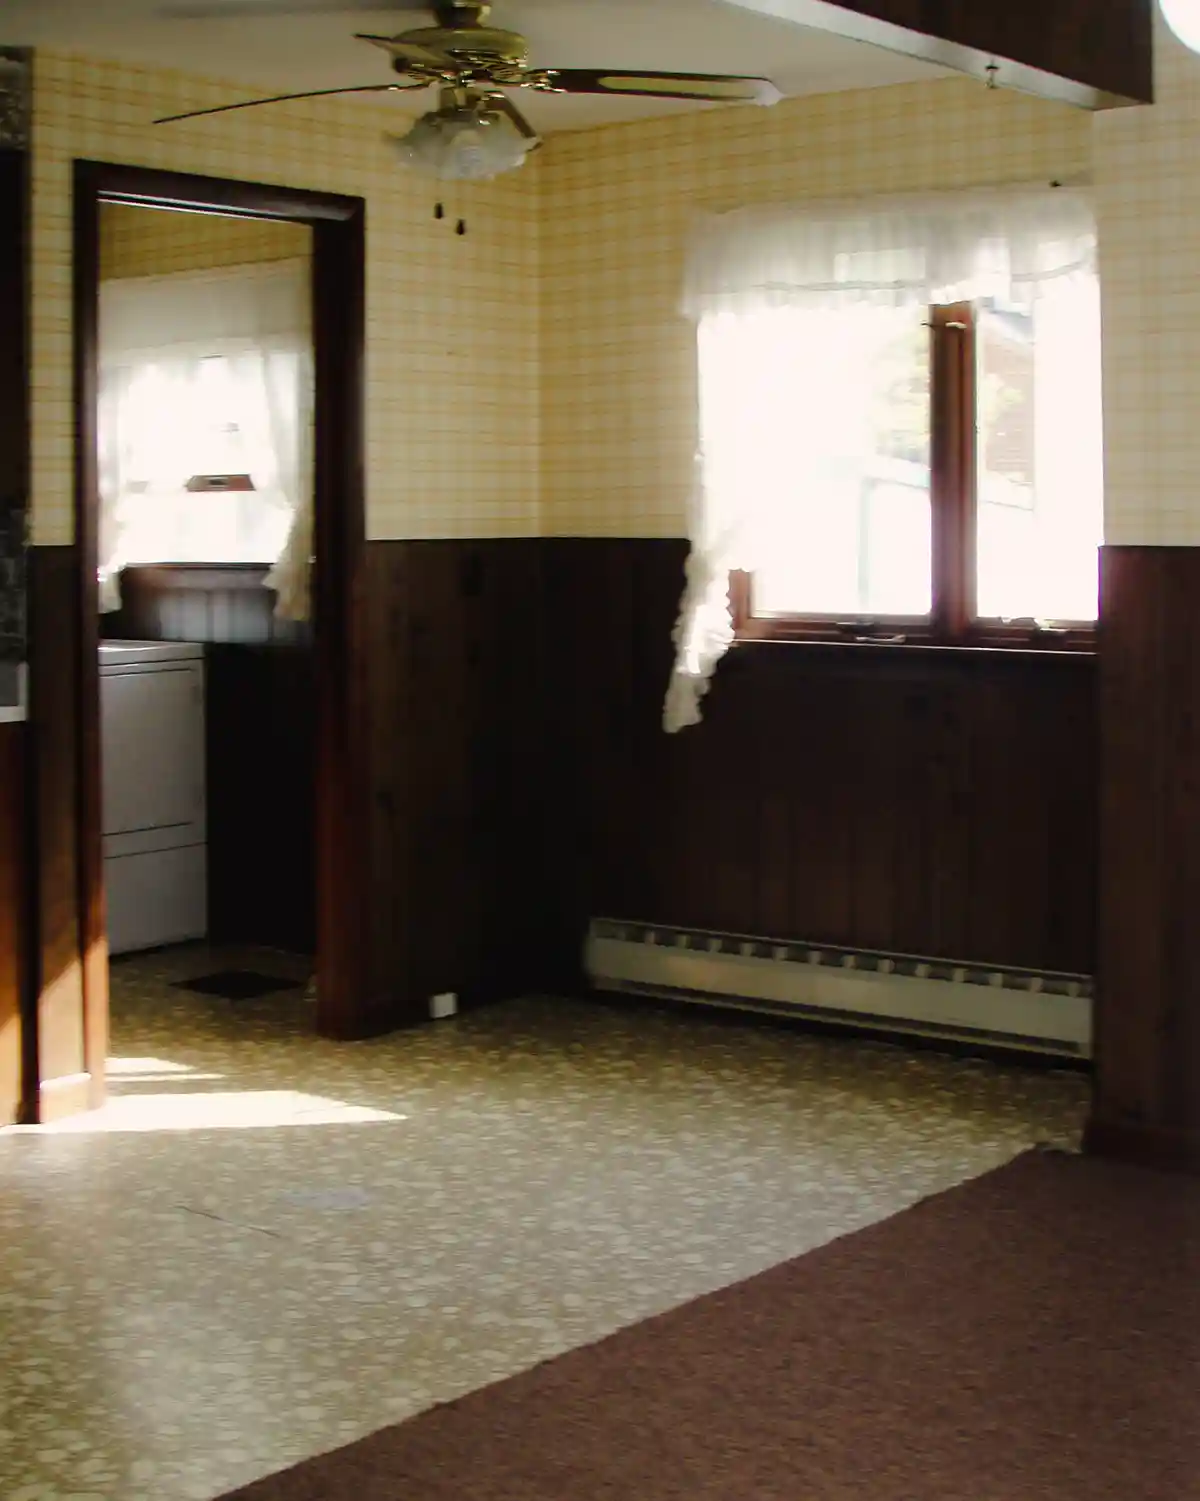
And then the working kitchen section, which sits next to the laundry. The countertop looks great from afar, but it was pretty damaged up close.
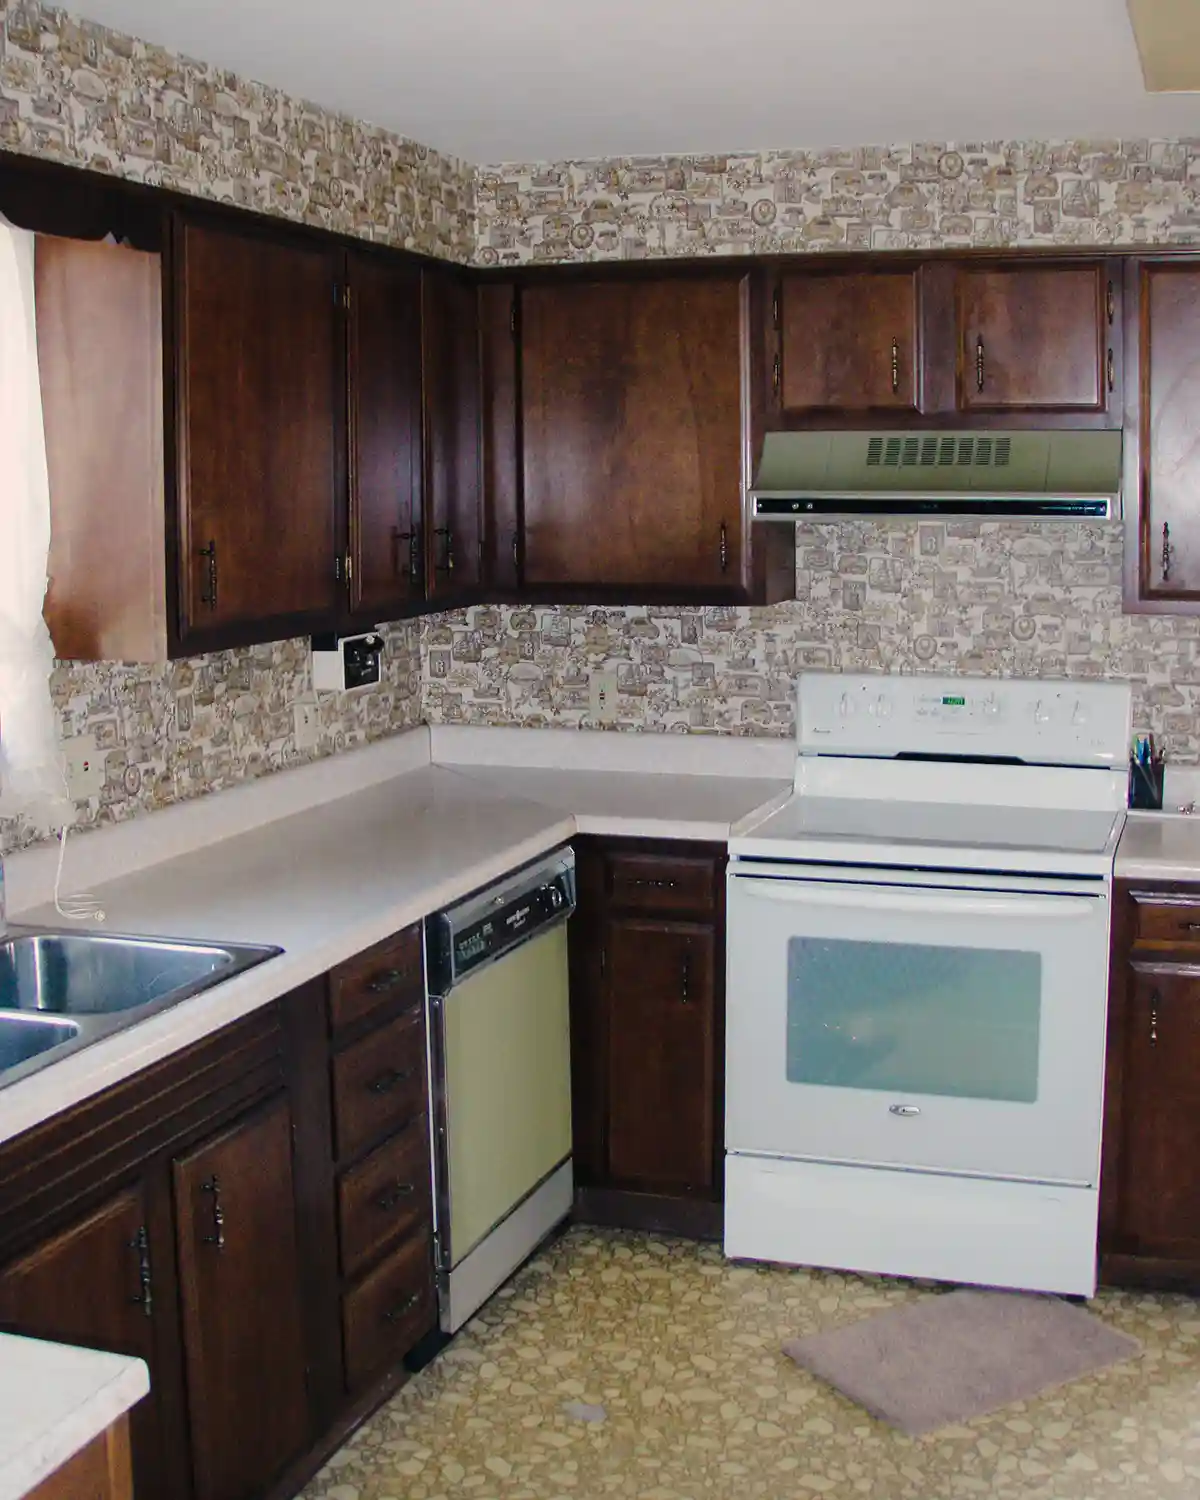
Kitchen Plan: Extend the entry cohesively to join the coat storage area, build a pantry, enclose the refrigerator to make it look built in, install new appliances, refinish the cabinets with paint, new wood floors throughout the entire first floor, update the light fixtures, add a new backsplash, update countertops, paint the windows, add a dining table, and improve how each zone works.
Laundry Room Before
The laundry area, when we first moved into our home, was like this little vintage time warp. Between the metal cabinetry and yellow wallpaper paired with dark paneling, it was like stepping back in time. And who noticed the ruffled curtains?!
I love having the laundry on the first floor and planned to tackle this space in our fixer upper farmhouse at the same time we work on the kitchen remodel. It will make installing the hardwood floors so much easier to do it all at once.
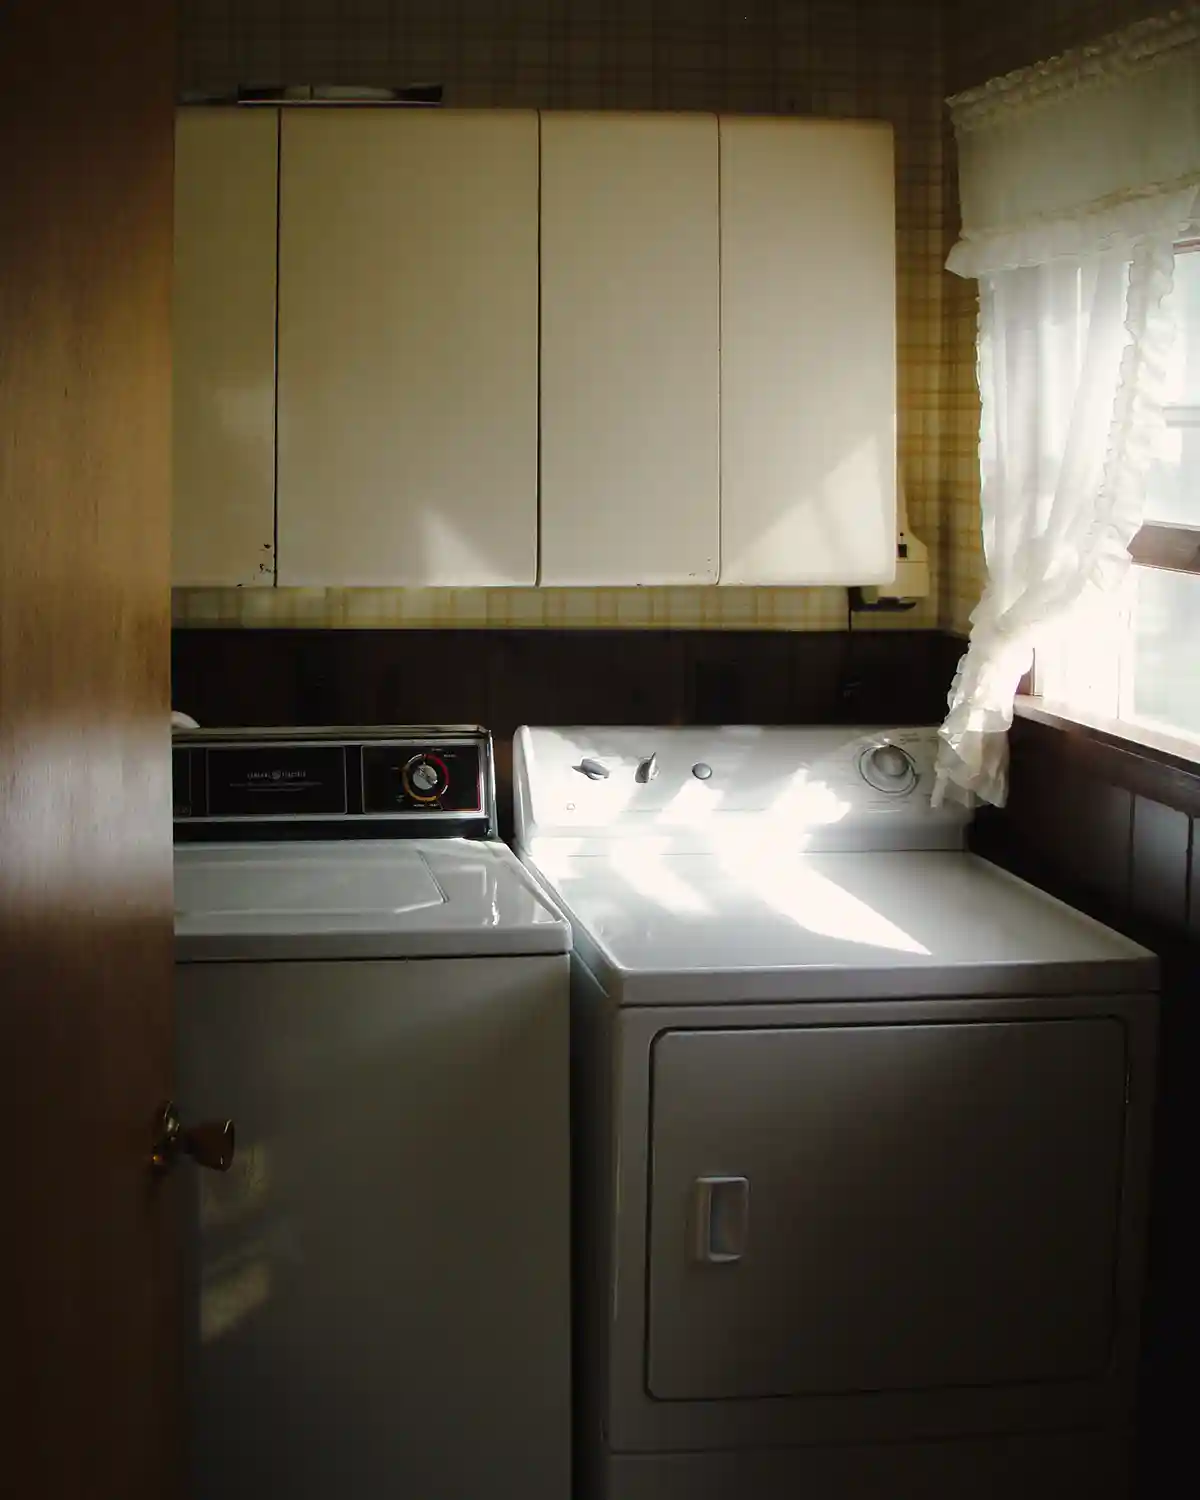
Laundry Room Plan: Remove the panels and wallpaper, skim coat the walls, paint everything white, replace the appliances, remove the metal cabinets, add open shelves for storage, build a folding table over the machines, plank the ceiling, replace the flooring, make a sliding barn door, and update the light fixture.
Dining Room Before
The number of jokes we had in this dining area on that first day of homeownership involving the light fixture was unbelievable. It telescopes up and down, which is genius and bizarre. All in all, the dining room is a small, pass-through room between the kitchen and the staircase hallway. It’s dark and very dated with its fake wood and shaggy rug, but it has a lot of potential.
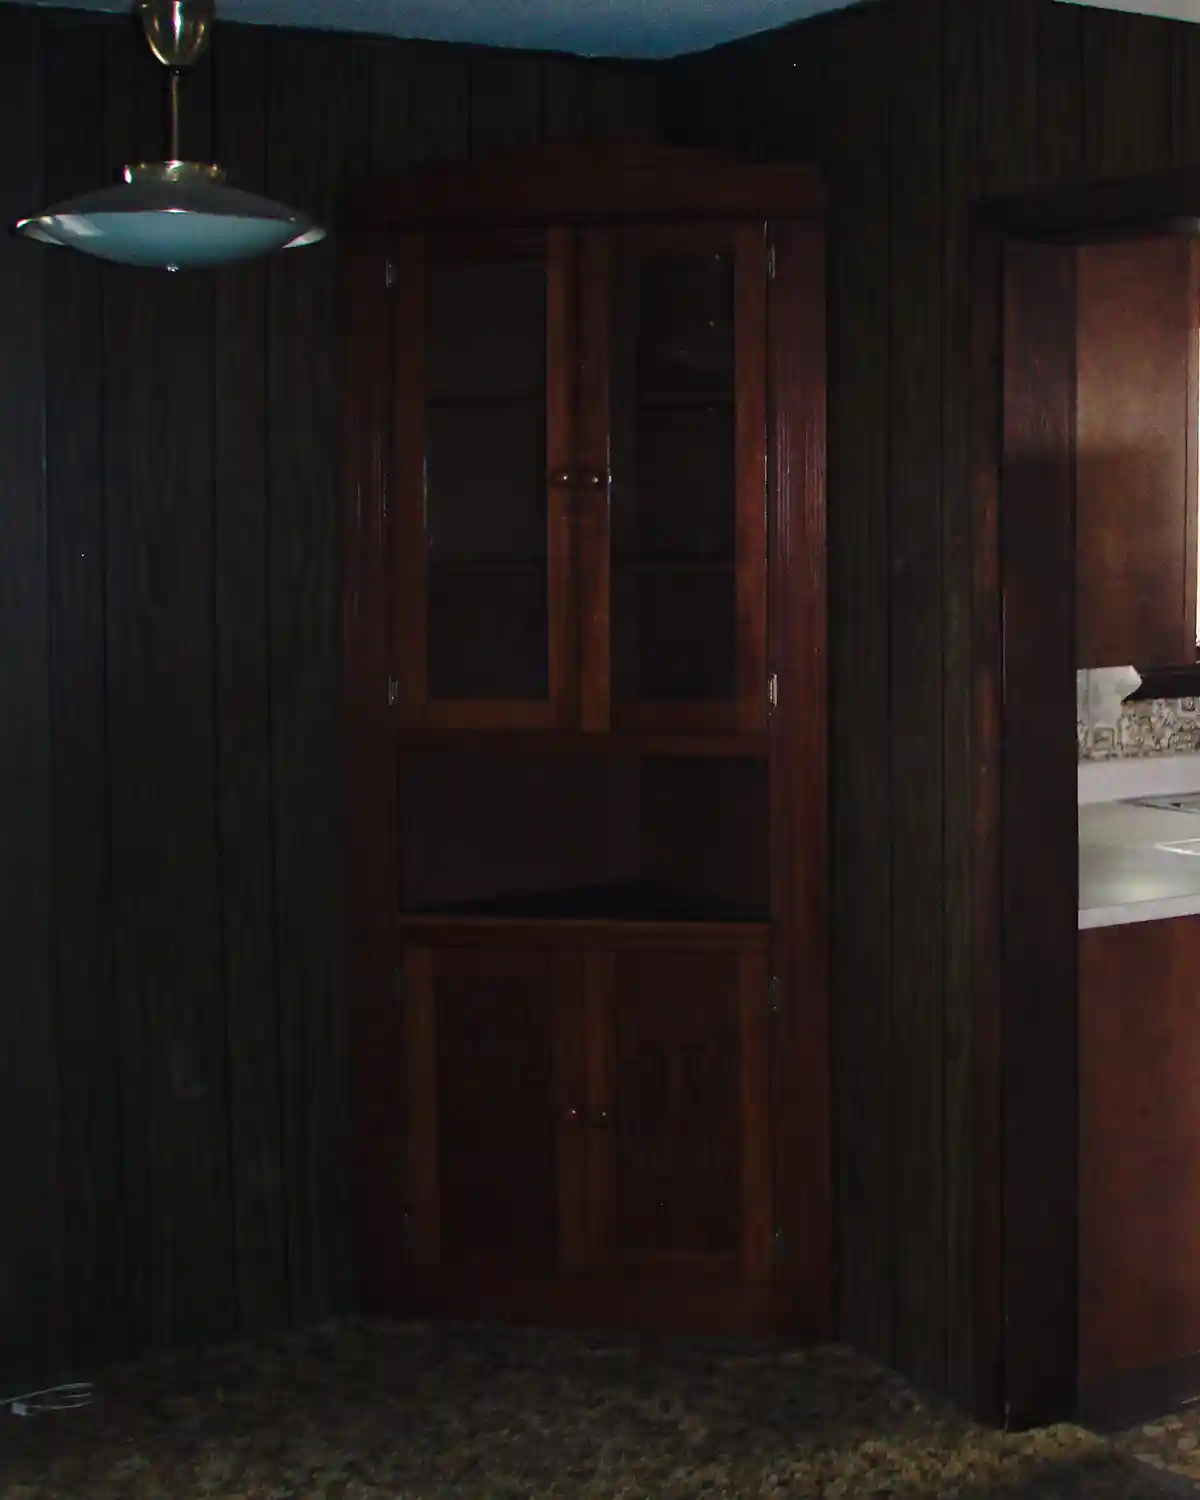
Dining Room Plan: Replace the small window with something larger, sheetrock the entire room, remove shag carpeting, install new flooring, update the light fixture with a chandelier, add fun trim, and paint everything.
Parlor Before
Our first home had a double living room. We didn’t really need two living rooms, so the one between the dining and the living room was dubbed “the parlor” and became Colby’s home office. Colby has worked from home our entire relationship and prefers an office on the first level to avoid lugging sales literature all over the house. So we say “parlor,” but we really mean home office open to and adjacent to the living room. Here’s the before in all her paneled, shag rug glory.
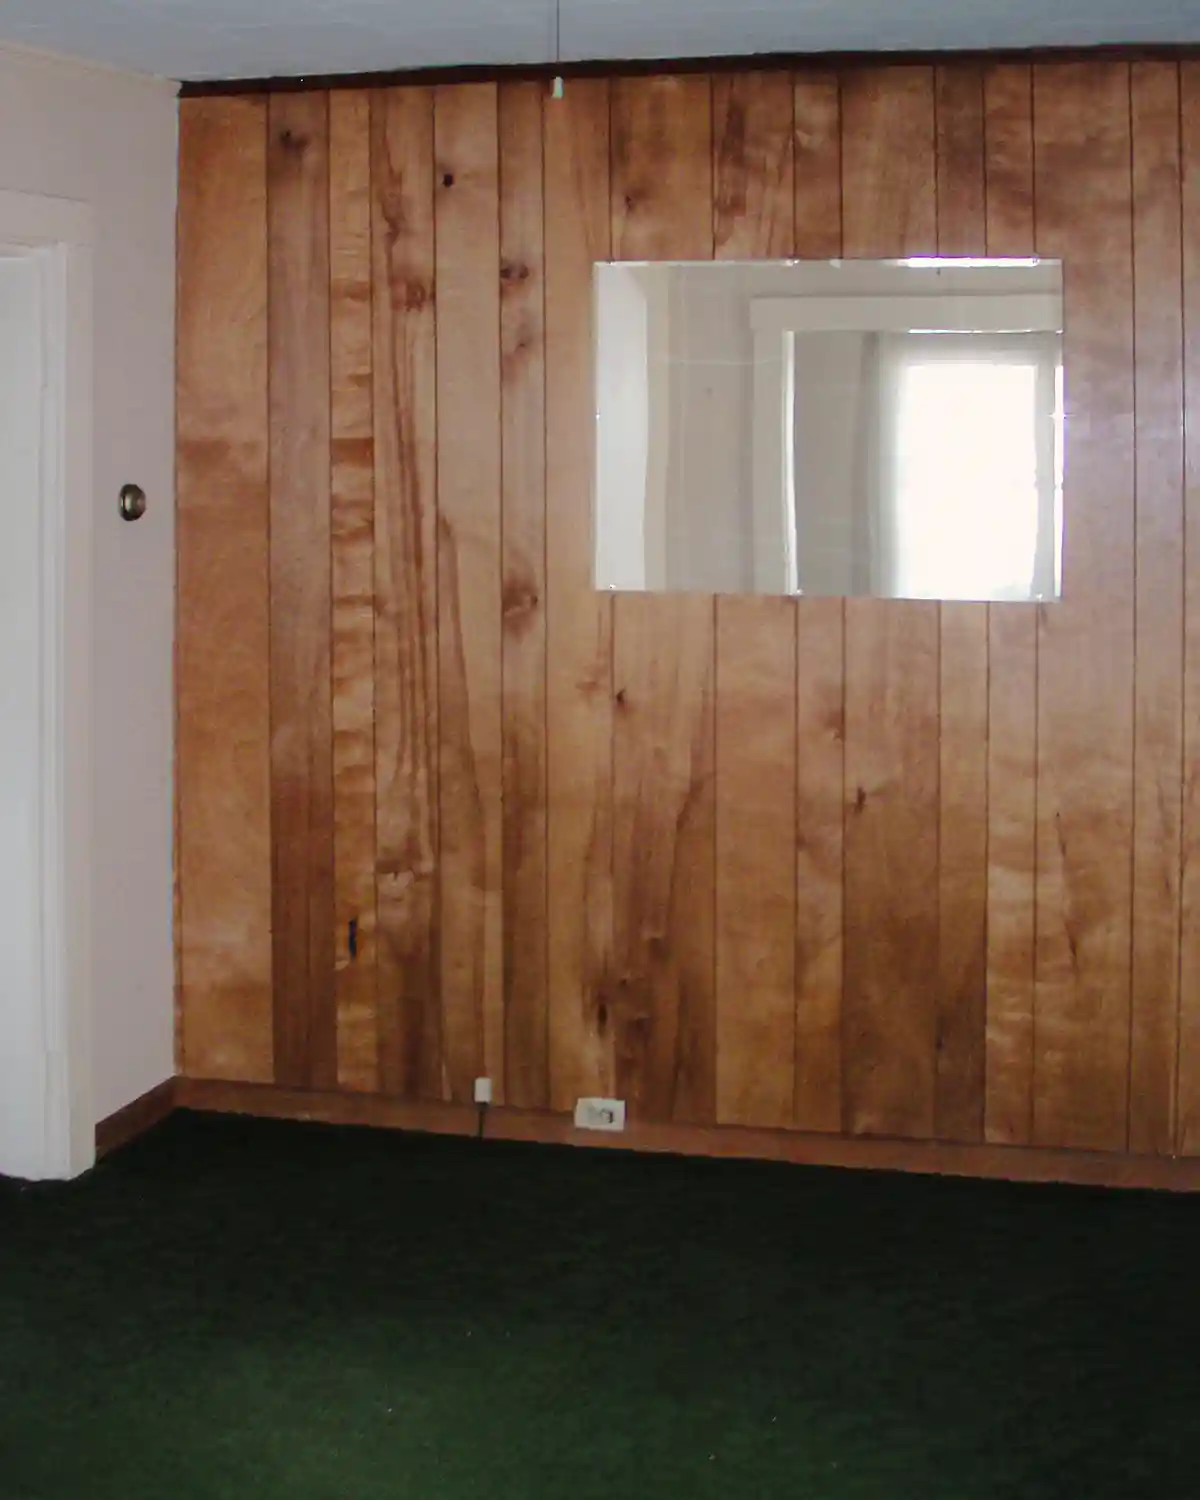
Parlor Plan: The plan for this space is to remove the faux wood, skim-coat the plaster walls, repaint everything, replace the ceiling (try to match the tin in the living room), update the light fixture, update the flooring, and make a big ol’ wall-to-wall desk system for Colby.
Living Room Before
Opposite the parlor is the living room. The two rooms are open to each other with an extra-wide opening. It’s enough wall to define the two spaces, but open enough to feel like one room. The living room was a spitting image of the parlor with one huge difference: an original tin ceiling.
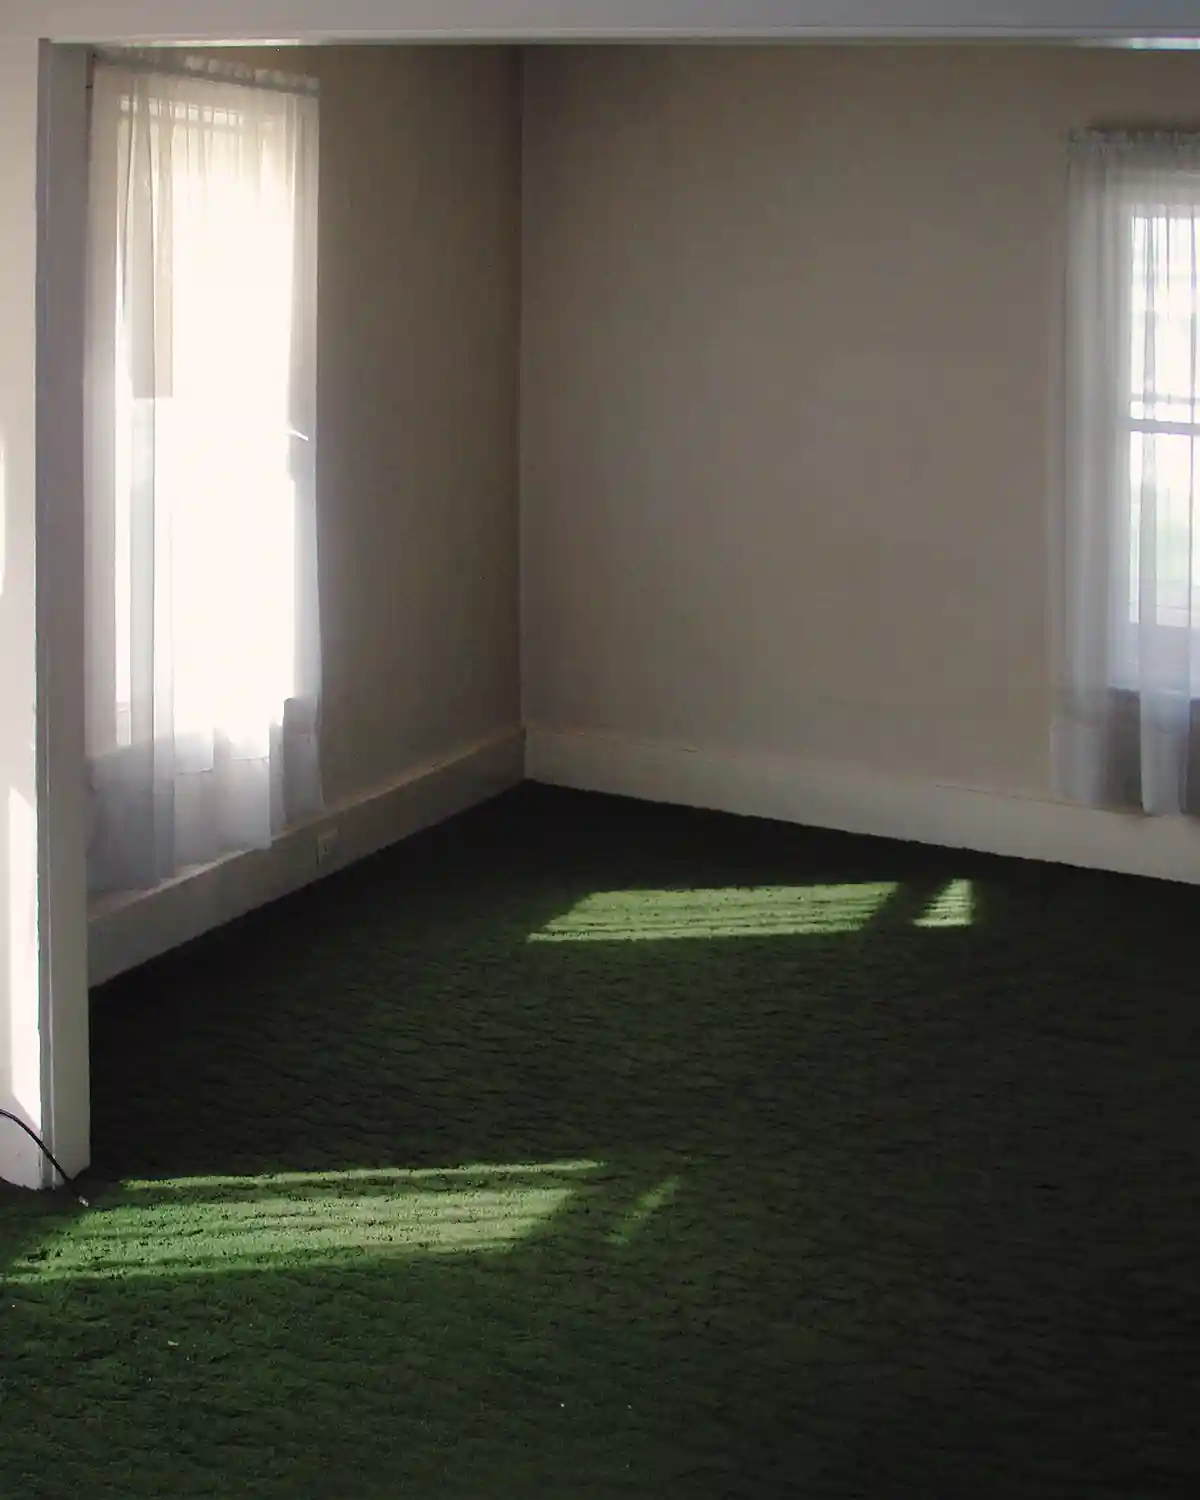
Living Room Plan: Pull up the carpet and replace the flooring, skim-coat the plaster walls, repaint the entire room, and build some furniture (like a bookshelf) to fit the space.
Hallways And Stairwell Before
The hallways and staircase in this home were just as charming as some of the other spaces, albeit a bit dated, with fancy faux wood panels. Here’s a view from the dining room looking down the hallway towards the front door leading to the porch. The living room is to the left, and the stairwell is to the right. Please note the vinyl accordion door.
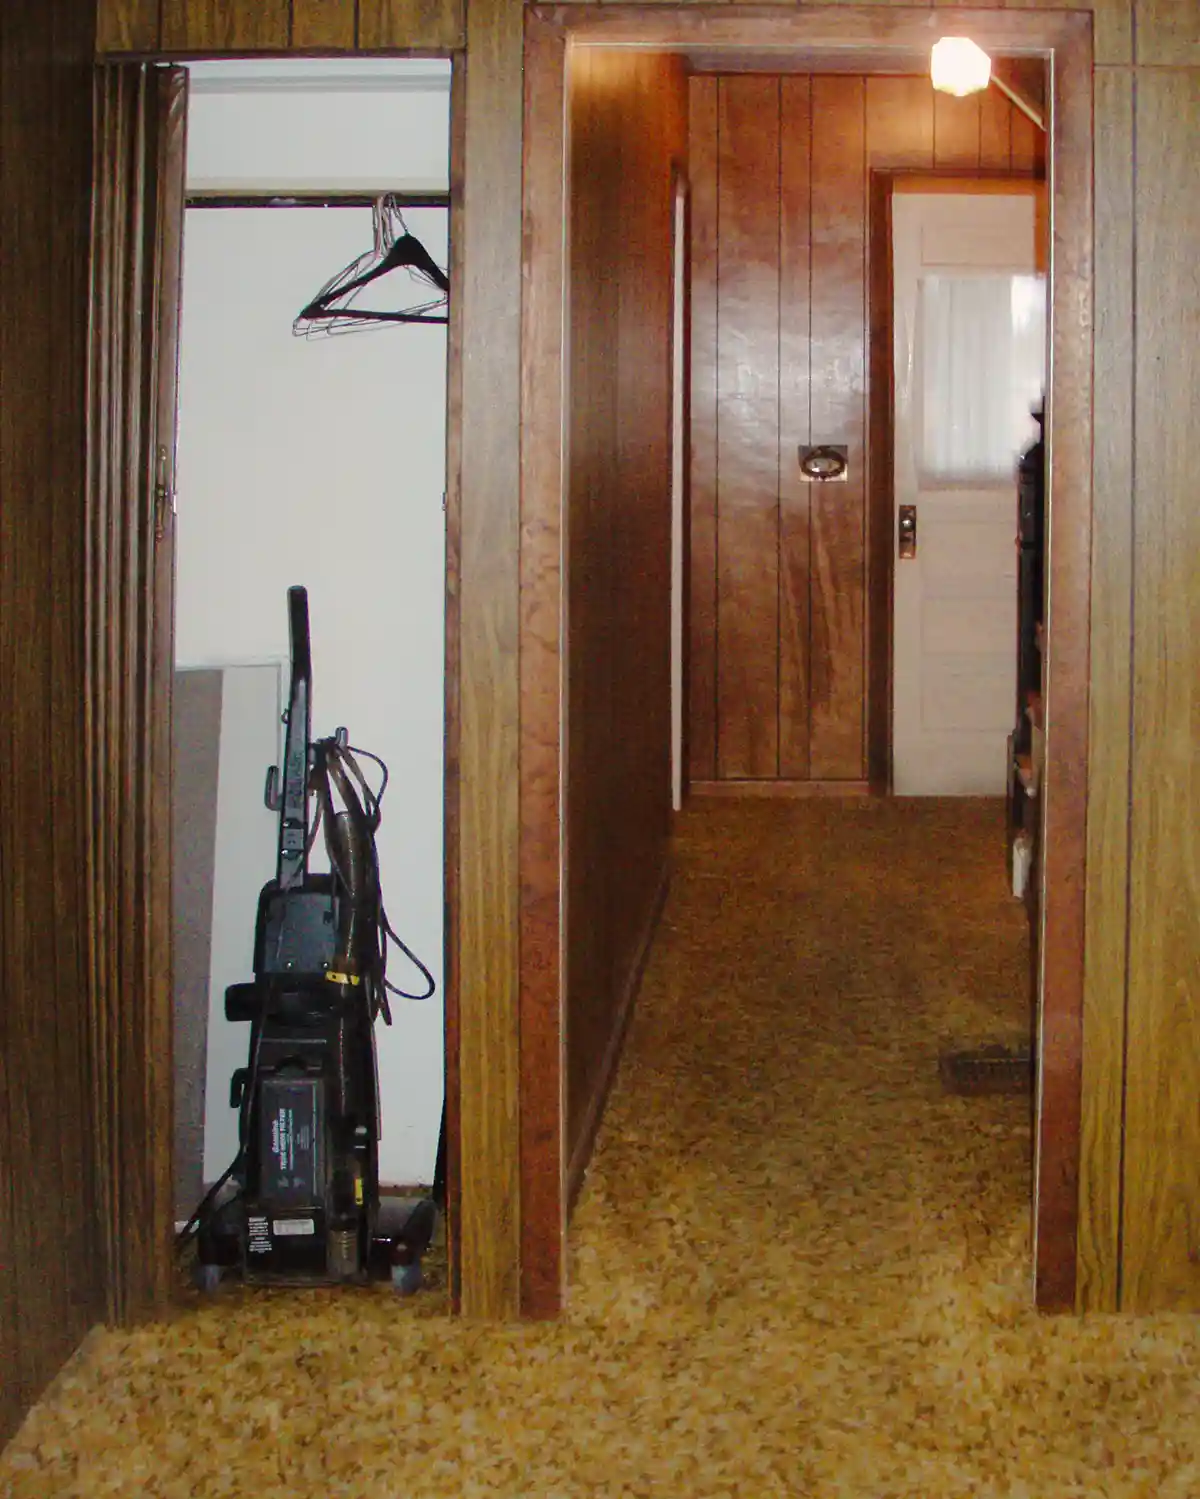
Hallway Plan: Rip up the carpet and replace it with pine flooring, take down the paneling, remove the plaster, add sheetrock, install trim, paint it all, and update the light fixture.
And here’s a view of the staircase. The newell post is lovely, and there’s no way we are replacing it. It does need some repairs, though (the top comes off). Many of the spindles are also broken, but either beyond repair or missing altogether. They’ll need to be replaced.
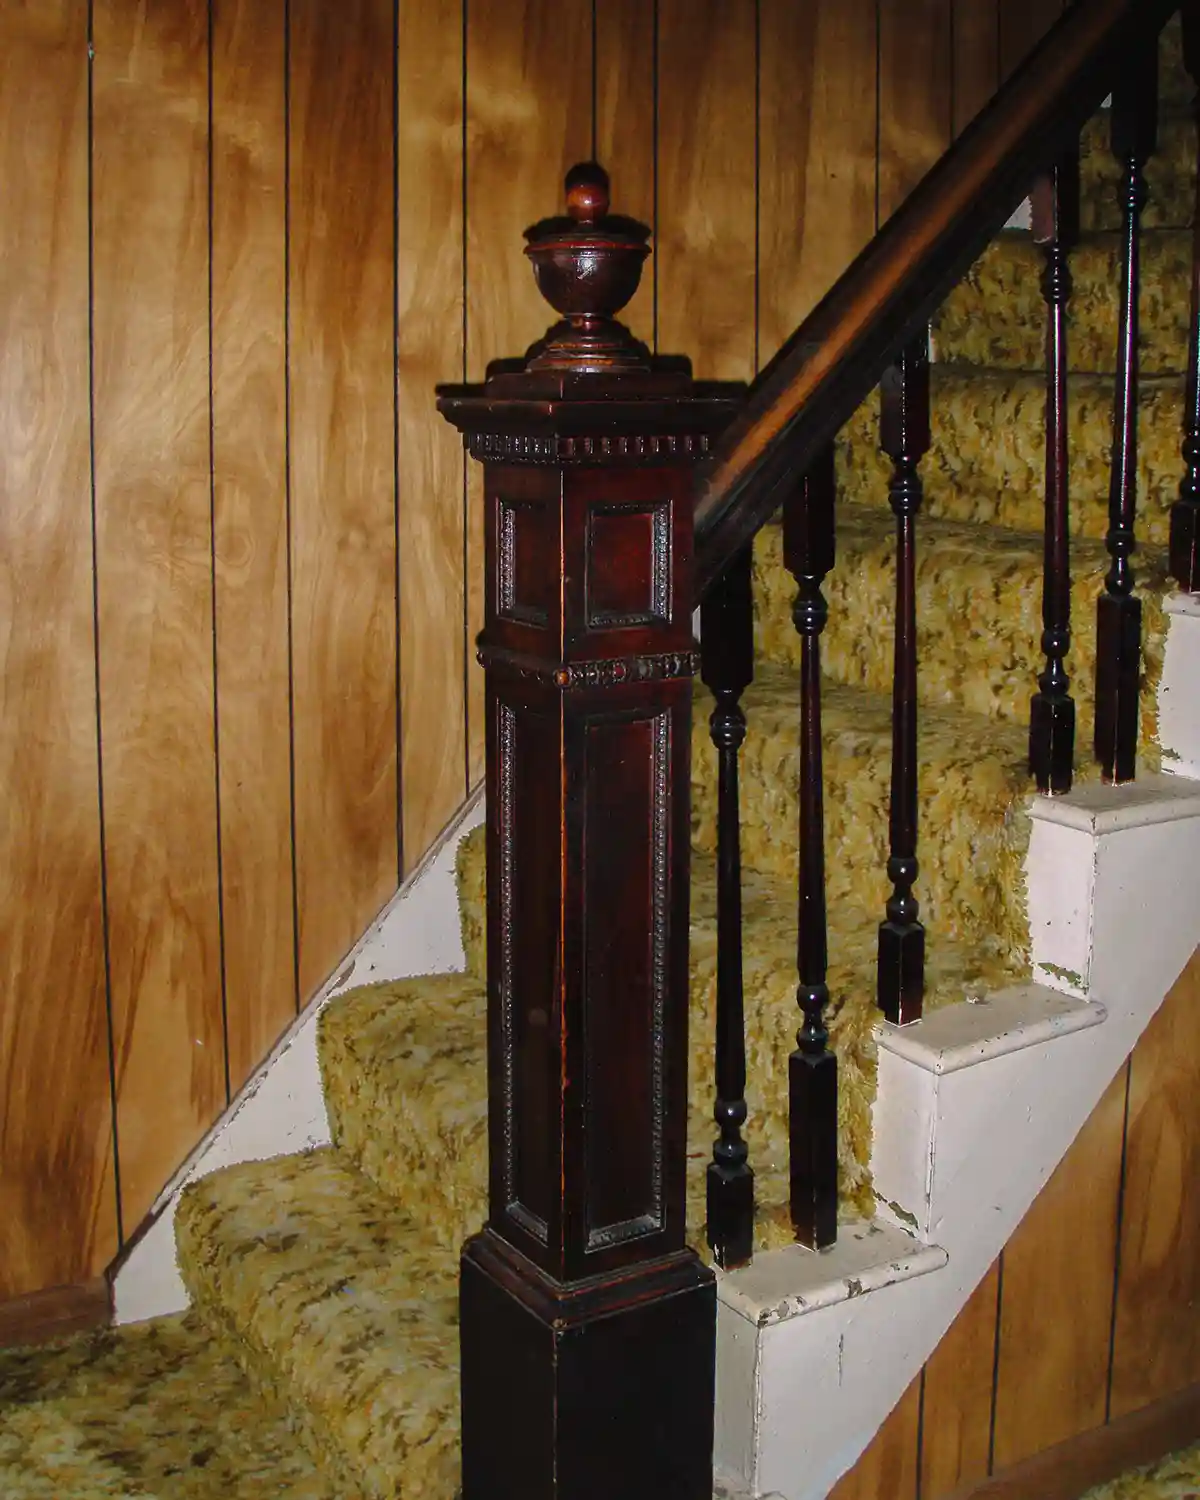
Staircase Plan: Remove the carpet and panels, repair the plaster or replace with sheetrock, sand down and refinish the stairs, paint the staircase, repair and refinish the newel post, replace spindles, and give everything a fresh coat of paint.
Bathroom Before
Oh, the bathroom. It’s by far the space in our farmhouse fixer upper that needs the most tender loving care. While most spaces in this home need some work, the bath needs the most work. It’s cramped, not nearly enough room for 6’5″ Colby to use the toilet without bonking his head, and in poor condition. The toilet leaked at one point, and supposedly it’s been fixed. We also found water damage right underneath the bathtub downstairs, so we just planned a full-on gut remodel of the space.
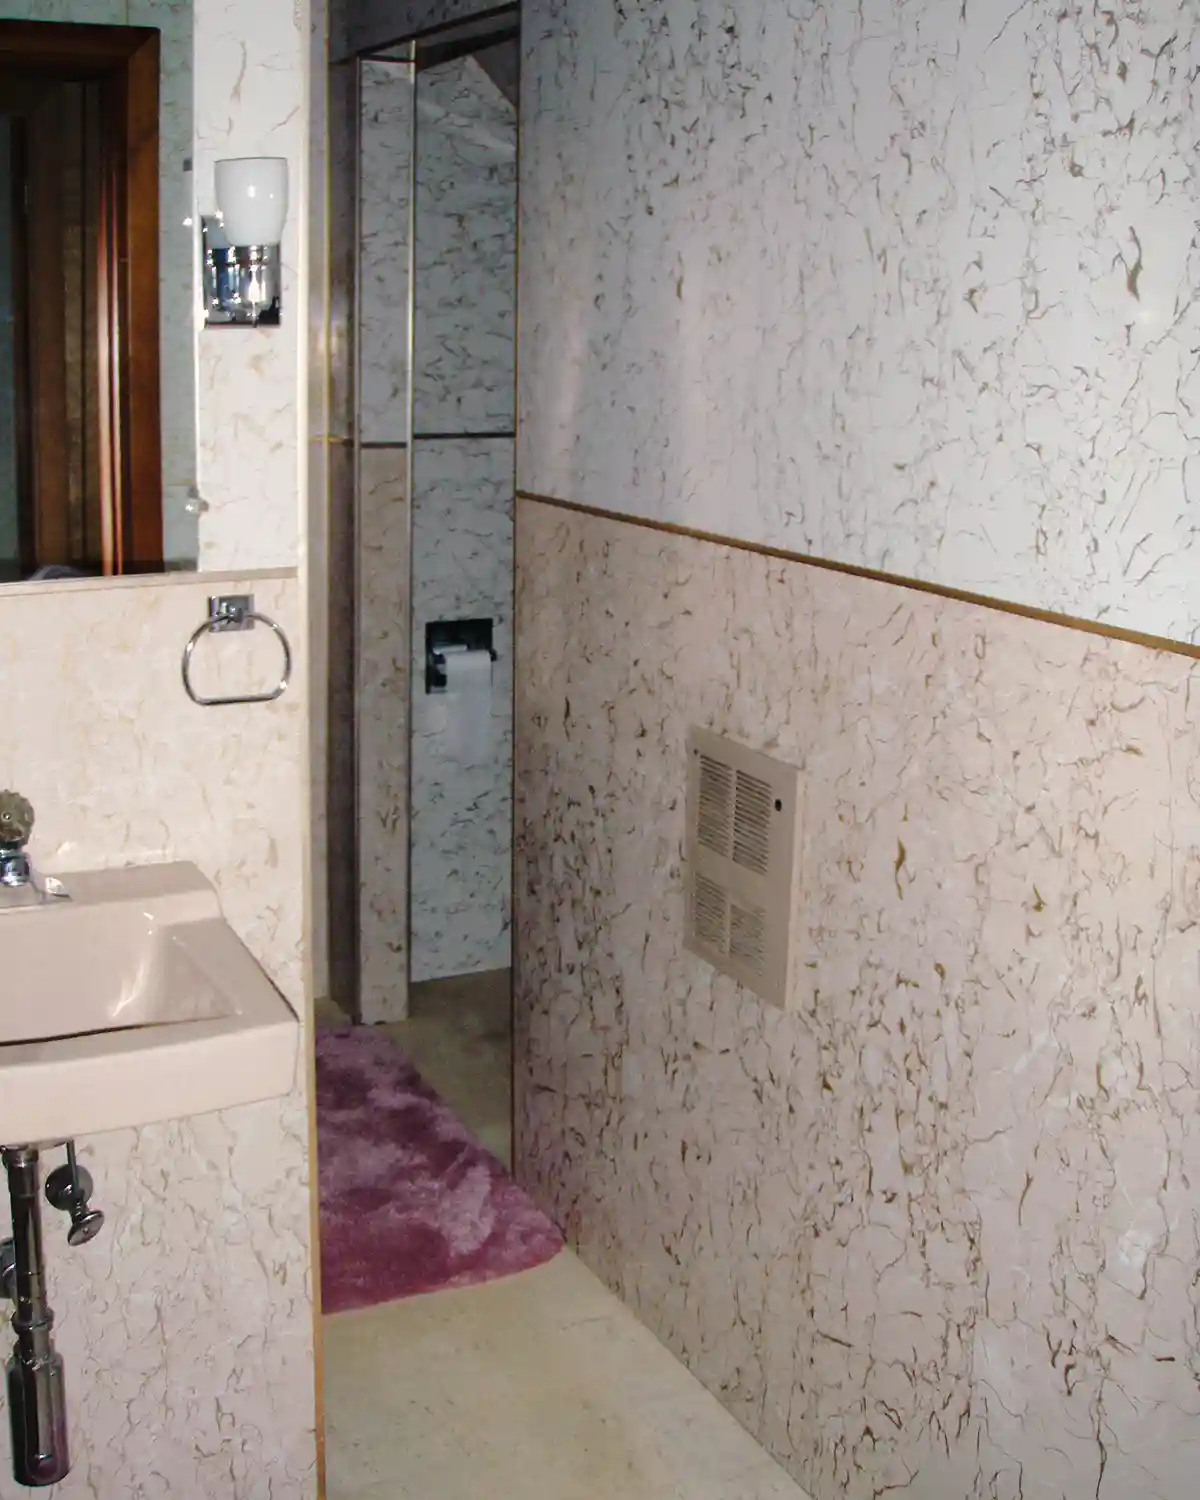
Bathroom Plan: We’re keeping the same layout for the bathroom with one exception. The neighboring bedroom closet juts into the space, and we want to steal it to shift the tub away from the toilet so we have room to move around, and there’s no longer a window in our shower overlooking a busy road. Other plans include gutting the bathroom, replacing the bathtub, tiling the shower, updating plumbing, building storage shelves into the wall, creating a larger vanity nook with counter space, painting everything, and updating the lighting. It’s a heavy lift and (spoiler) we weren’t able to finish it in a month as we hoped, but we did get it usable.
Primary Bedroom Before
All of the bedrooms in this house are the same size, very small, with awkward closets. The bedrooms barely fit a bed and a few basic furnishings. Any of the rooms upstairs could be considered the primary, but we chose this one. It’s at the end of the upstairs hallway and overlooks both the backyard and the side yard with the driveway. The other two bedrooms will serve different purposes since we don’t really need three bedrooms.
The primary is in decent shape, just a little (okay, a lot) dated. Like the other rooms, it sports faux wood, 70s/80s-style carpeting, and a hollow-core door that my window-and-millwork salesman husband cannot fathom.
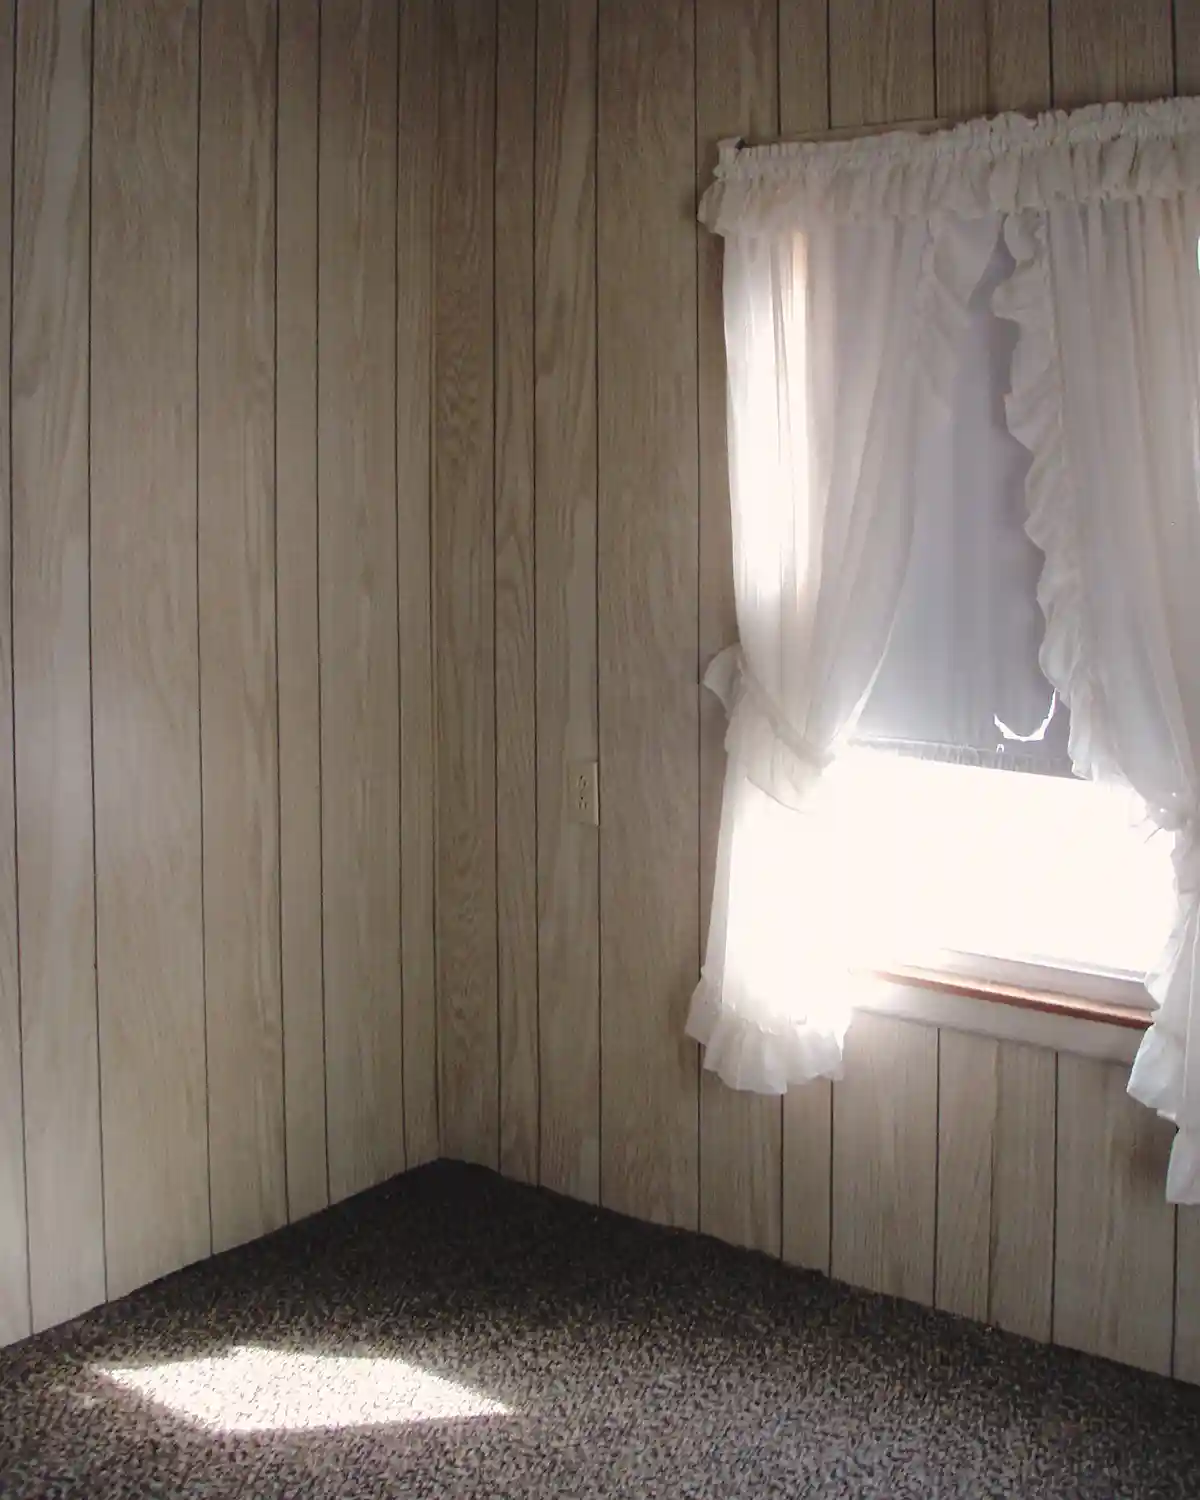
Primary Bedroom Plan: Pull up the carpet and replace it with pine flooring, remove the paneling, either skim coat the plaster or replace it with sheetrock, add new trim, remove the current closet to create a dresser nook, build a floor to ceiling storage area, paint everything, replace the light fixture, and make it cozy and calm.
Guest Room Before
The second bedroom we slated as the guest room, which is right across from the primary bedroom and adjacent to the bathroom. Since we’ll be removing part of the closet in this room to make extra space for the tub, we planned to renovate this room at the same time as the bathroom.
We don’t host many guests, so the goal for the guest room was dual purpose. To make it so we could host, but also serve as a home office. At the time, I still had three more semesters of grad school to go, and I wanted a space to escape and study away from Colby’s office space and the television in the living room.
I love how this shot of the guest room, through the hallway, and into the craft room shows the various colors of shag carpeting in this home. So many different colors!
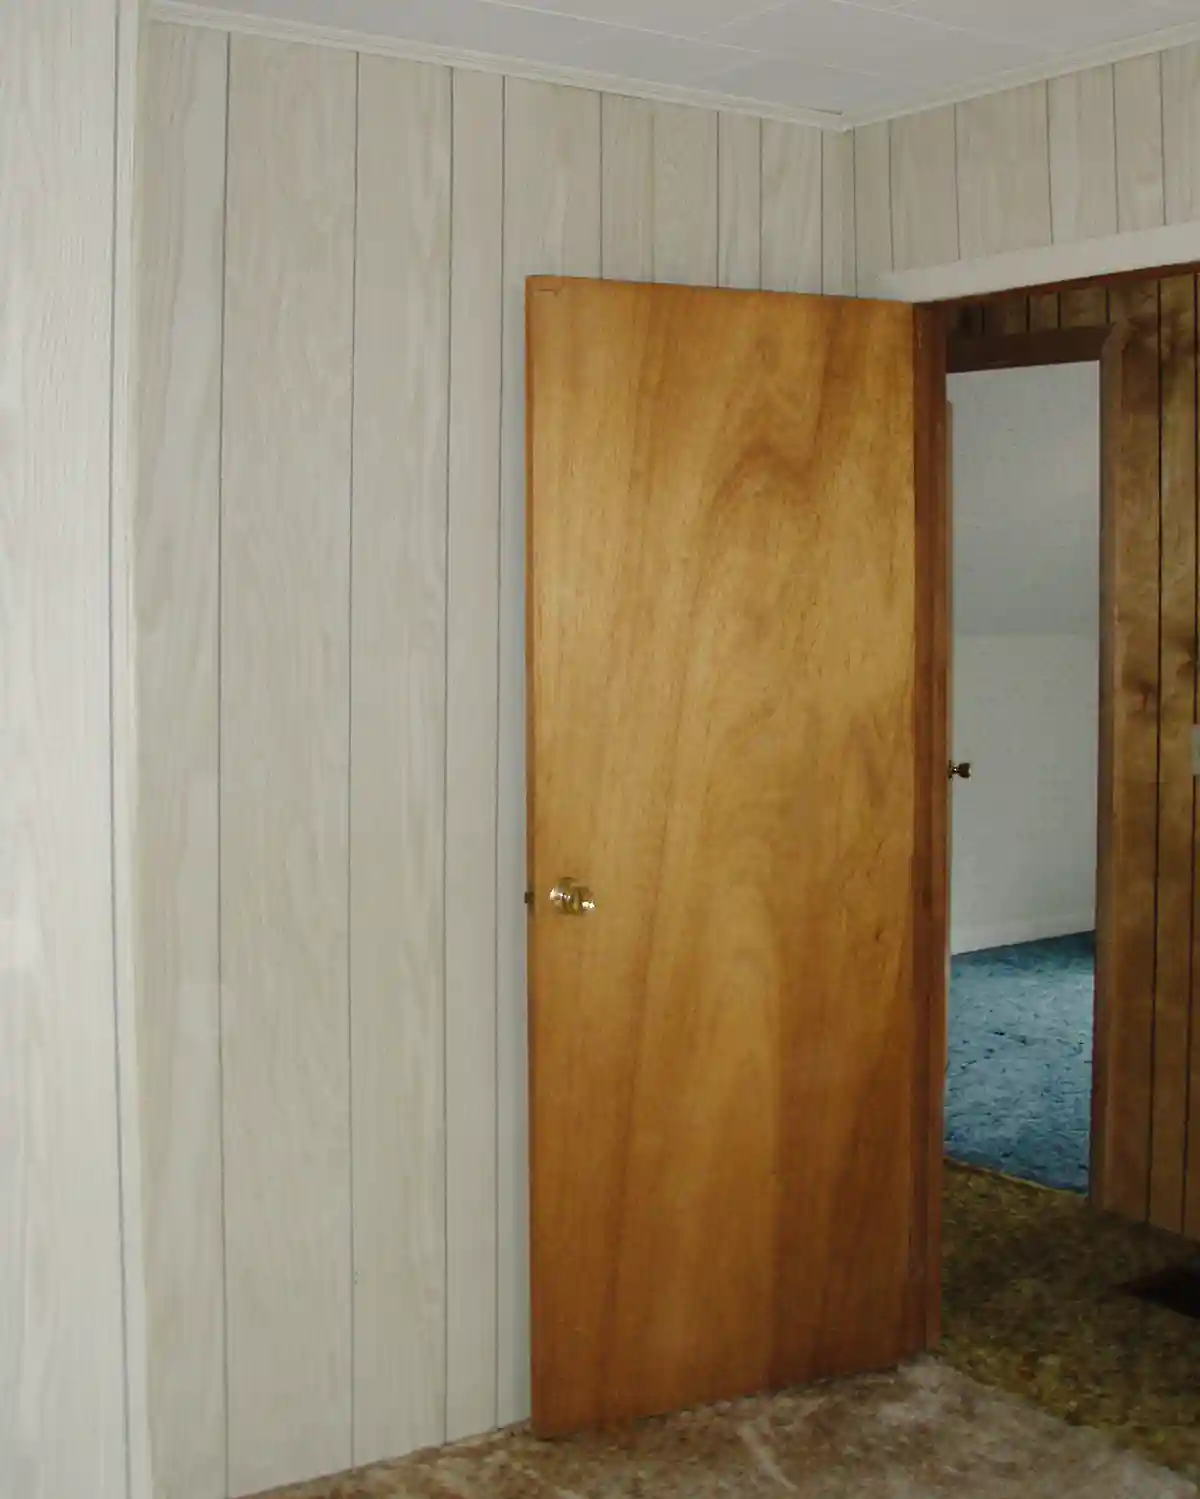
Guest Room Plan: Basically gut it, take out the closet, lay new wide-pine flooring, replace plaster with sheetrock, update the light fixture, add fresh trim, replace the hollow-core door, paint everything, and turn the room into a combo guest room/study space.
Craft Room Before
This room was my favorite room in the house when we first bought it. I loved the wallpaper, even though it sported so many signs of water damage, which we would come to find out later was still an active leak. This room is at the top of the staircase, just across from the bathroom, with a view of the backyard. It’s sunny and lovely. While we didn’t have a plan for the room on closing day, it eventually turned into a craft room. More specifically, a workshop for what would become a booming Etsy business.
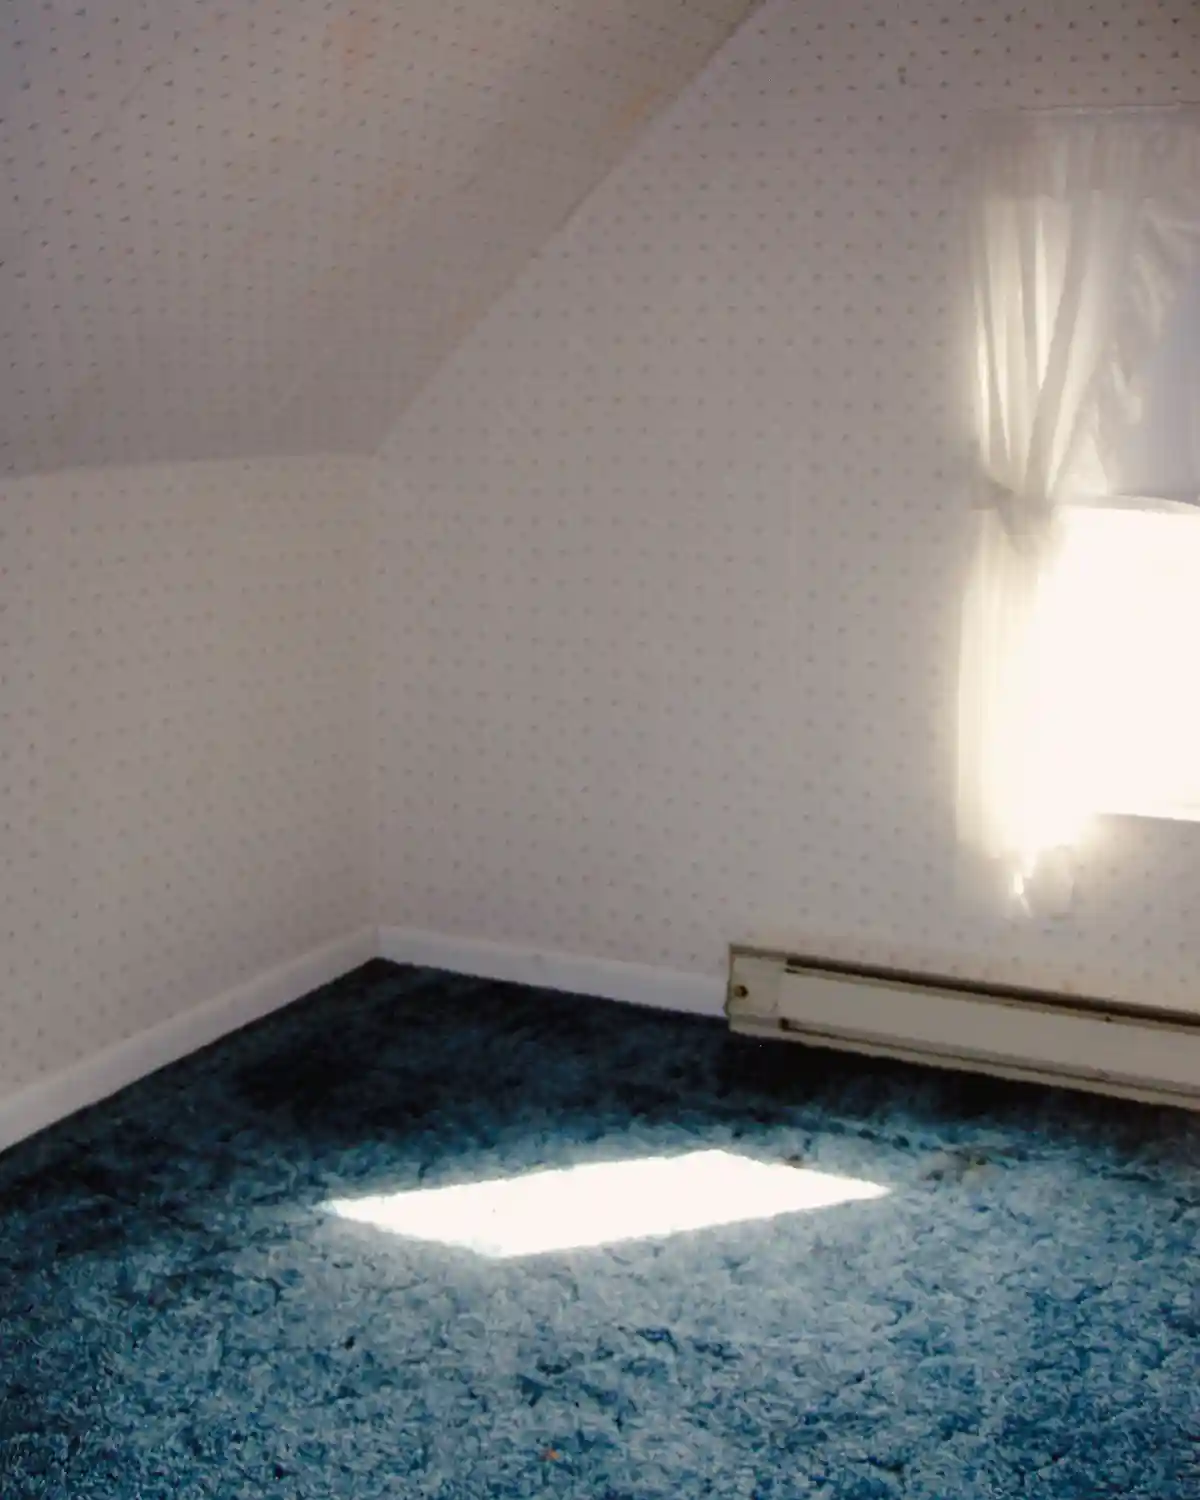
Craft Room Plan: Remove the carpeting, replace the plaster with sheetrock (it was incredibly damaged), add beadboard to the angled surfaces, install wide-pine floorboards, add trim, paint everything, replace the light fixture, install pull-down attic stairs, build a giant work desk, and turn it into an efficient work space.
Thank You For Touring Our Fixer Upper Farmhouse – Before Edition
Phew! We made it through the seven levels of shag carpeting on our fixer-upper farmhouse tour and have managed to survive. Medals for all! Now, to take you through how we completely gutted just about every room in this home and transformed it, both on a budget and in under five years.
Pssst…What room in the house should we go through first on the grand tour? The entry? The bathroom? Do tell!
