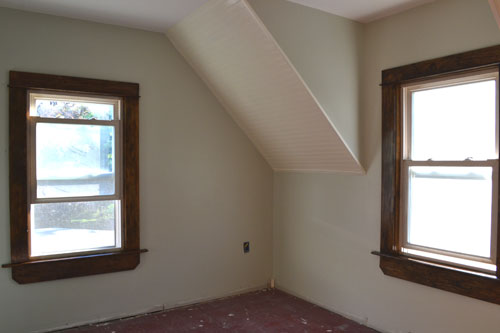
And we’re back in the master bedroom yet again for another riveting “where are we now” post. When we left off on Tuesday, things were looking a little like this:
Walls were painted, window trim installed and stained, and bead board installed and painted on the slanty ceiling parts. Now batting for team bedroom reno…floor painting. The bedroom floor was looking pretty nasty.
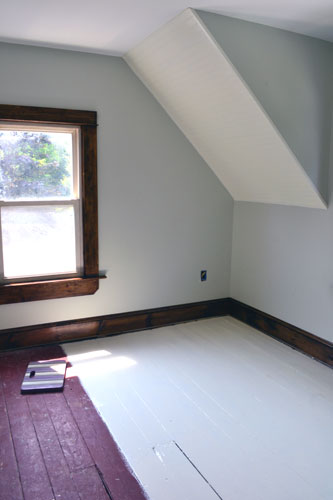
That’s actually the subfloor in the bedroom. It was used as the actual floor way back when our house was built in the early 1900s but was covered up in the 70s with particle board and shag carpeting. Shortly after moving into the house, we removed all the nasty carpeting and particle board to reveal these old floor boards. We initially painted the floor red, and called it good. After a considerable amount of damage during demolition, we needed to repaint it. This time around….we went with white.
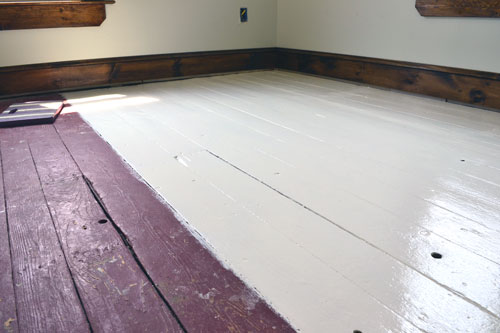
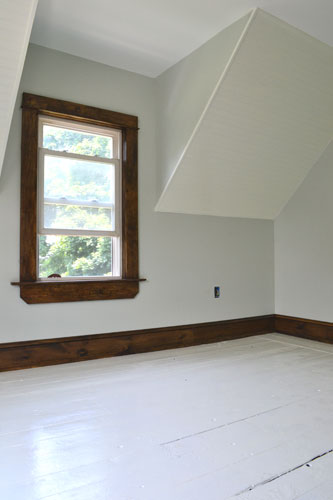
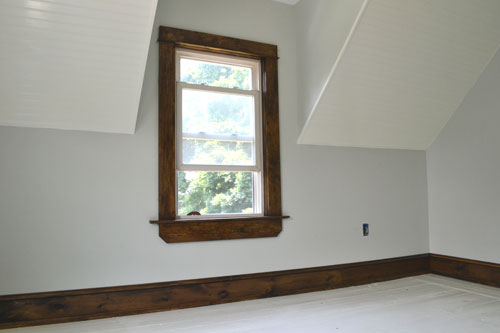
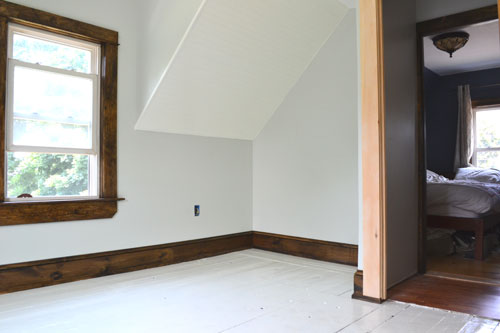
Big difference huh?! The white really helps brighten the room up compared to the dark red color. When it came to painting the floor boards, I took it nice and slow, painting only a few floor boards at a time. I layered on a couple coats of primer followed by one coat of Valspar high gloss enamel paint in Betsy’s Linen (it’s the same paint we used on the bead board and also all the trim on the first floor of our house).
After about a week of floor board painting, we finally called the floor painted. Although quite sticky. I chose about the most hot and humid week we’ve had all summer as floor painting week. But it’s finally cooling off a little and the floor finally feels normal and un-sticky today.
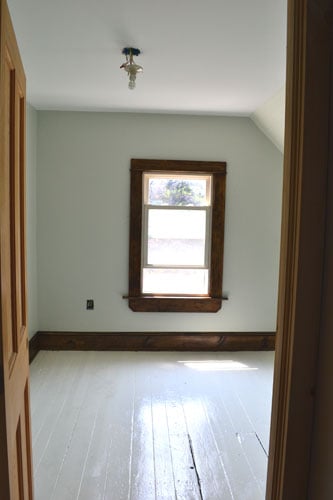
And I love how consistent the floor color is with the bead board. And how it completely contrasts the dark walnut stain on the window trim. It’s a stark contrast but is totally warmed up by the grayish/greenish wall color.
Oh white glossy floor how I love thee! Colby was actually the one to pick the floor color. Quel surprise?! That’s my limited French by the way. Confession…that’s not true. I know way more French than I let on. Try me! Anyway…I was just going to repaint the floor red since we still had alot of leftover paint kicking around. But Colby saw a few pics of white painted floors on my Pinterest boards and fell in love with the farmhouse/cottage-ie feel. I didn’t need much convincing. Glossy white floors are gorgeous.
So now the room is pretty much ready for moving in. We still have to stain and poly the new door and trim and hang a new light. Sadly, it will probably be one of the extra boob lights we have kicking around. We tend to use cheap, $10 boob lights temporarily until we can afford, craft or find a light fixture that’s more us.
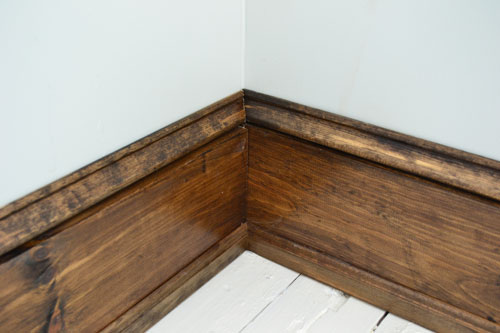
Oh….and I almost forgot to mention the other new piece in the room…the baseboard trim.
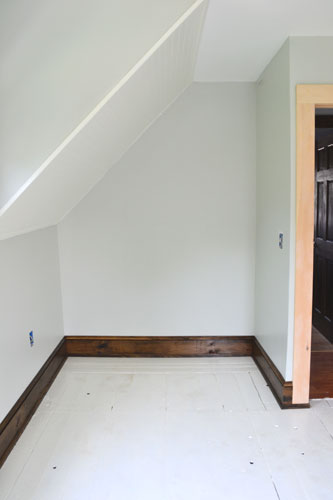
Colby used 1 x 6 pine for the meat of the baseboard, base cap on the top of the wide pine, and colonial stop to cover the gap between the baseboard and the floor.
The colonial stop is tacked on there very lightly. Someday we have grand plans of installing wide pine floors but until we can afford real floors, the painted ones will do. Thus, the colonial stop hides the gap where we would slide the pine boards under the 1 x 6 pine baseboards. Sneaky sneaky.
So since we’re oh so close to moving into this room (confession…we started tonight and it’s looking AMAZING), how about a little what-our-grand-plans-are tour? This is where the bed is going to go, under the window.
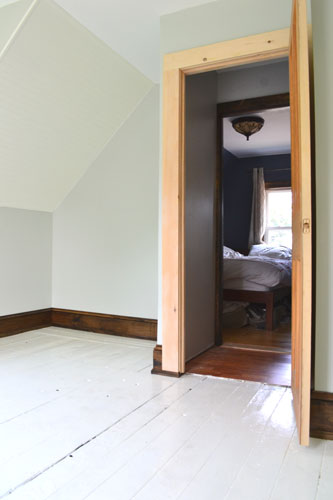
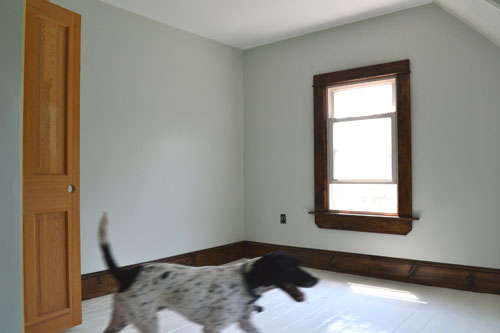
And then there is the door, which still needs finishing, across from the craft room where we have been housing our bed temporarily.
And then to the left of the door is where our old closet used to be and where our dressers are going to live. We currently have a cheap set of Ikea dressers but envision a grand old, antique dresser in the future.
And what blog post would be appropriate without Goose photo bombing it. I was trying to capture that large wall behind the door where our wall to wall closet will go.
That’s better.
And one last shot of the dresser nook which turned out much larger than expected.
Ahhhhhh…bliss! We love our new bedroom. Now that the floor is painted, pretty much all of the major projects are complete. You know, the heavy hitting projects like demo, sheet rocking, painting, etc. Now it’s time for the fun stuff….decorating! My favorite! I know what I’m going to be up to this weekend!
Pssst…So while I’m decorating and setting up our bedroom in the next few days, what are you up to? Any exciting projects coming up? Any weekend warrior projects planned?! Do tell! And happy (almost) weekend everyone!







Honestly? I want to make these cool looking jars for my back porch…. You sprinkle them with glow in the dark paint…. sort of make your own firefly thing 🙂 And miss lady! What the heck are you doing painting in the heat we’ve had?!? The bedroom looks awesome.
Glutton for punishment perhaps?! That’s what I’m going with! And I’ve seen those jars! If you make them let me know how it works!!!
looks AWESOME, cant wait to see pics with furniture!
I had to paint the original floor in one of the rooms in my old house too. Someone painted it maroon too (whats up with people doing that anyway?) at some point, so there was no use in trying to refinish. Throw a rug on top and it’ll look so cool, plus the paint makes it super easy to clean. I haven’t noticed any scratches or chipping but we dont use that room alot either. We used floor/porch paint though, should we not have?
Floor/porch paint would be preferable…you definitely did the right thing. We just didn’t want to buy yet another gallon of paint when we had some high gloss trim paint available. The floor stuff is definitely more durable. We actually used it on our stair treads which turned out amazingly well!
What color stain did you use on trim/baseboards?