I love a crafty project. Especially when said crafty project means that this goes away:

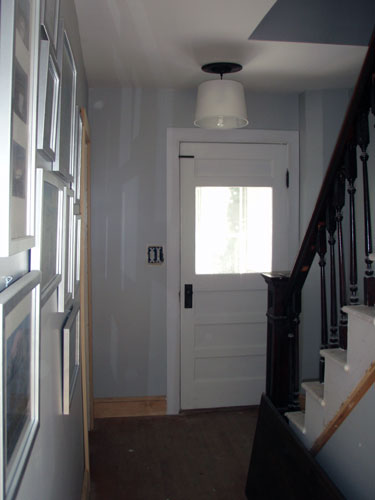
Yup. That’s our “temporary” hallway light that’s been “temporary” for oh….13 months. We haven’t had a traditional light fixture in the hallway since we ripped it out last August. Instead, we’ve had this pig tail light, which actually makes it a dream to drywall, mud/sand, and paint without constantly taking the light down and putting it back up. It’s kind of like that saying, “let the dog out, let the dog in, let the dog out, let the dog in.” Except that it’s more like, “Take the light down, put the light up, take the light down, put the light up, etc.” So now that the hallway is all done (well…if you’re gonna be technical about it…almost…almost done), it’s time for a new light. The game plan, a pendant light with a plain old lampshade hanging from it. It’s a essentially a cheaper version of the drum pendant lights that you always see in Lowes and Home Depot. I picked up a pendant kit from Home Depot for less than $10 and a lampshade from Target for $12. After unpacking it and taking it for a little test drive, we found this:

It’s kind of hard to tell, but the base of the pendant light is actually too small. The unpainted/un-mudded areas of sheet rock around the light is totally exposed. Uh-uh, not cool. Solution…a ceiling medallion. But do you realize how expensive those things are? Ridiculous! A small and rather unattractive one costs over twenty bucks! Thus, the DIY-er in me awakened and I decided I was going to make one. And make one out of materials we already had. We ended up crafting this ridiculously awesome ceiling medallion from cedar shakes leftover from an old siding fix project:

And now for the play by play. First, I determined the size of the medallion needed using one of my serving bowls that was about the perfect size and worked well as a template:
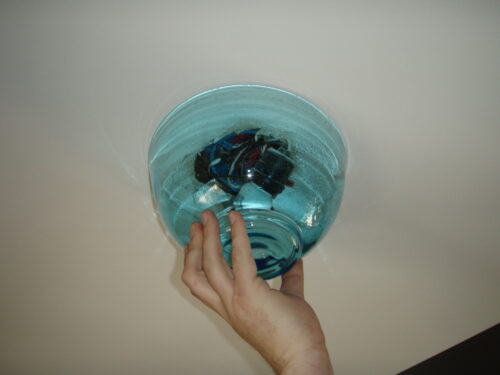
For my ceiling medallion material, I chose to use some old cedar shakes that we had from replacing some of the siding on the house. Perfect! Next, Colby cut down he shakes to about 1.5″ x 3″.

Since the shakes are tapered, they ended up all completely different, giving my pattern some extra dimension.

Now I’d like to introduce you to the leading character in this here story, the protagonist of this little drama, the caulk. I’m gonna dive into some obligatory caulk talk now so if you’re reading this to small children (because sooooo many of our readers do…please note the sarcasm), it’s earmuffs time for the kiddos.

I chose a strong, tough caulk for this project since I was gluing cedar shakes to a thin piece of plywood later to be cut with a hole saw and a jig saw. I was uncertain where the cuts would be made so I made sure I caulked that sucker good…real good. The caulk got worked! Sorry.

And the end result:

Pretty, right?! I let it dry for a few days before it was time to cut the ceiling medallion down to size. First, I traced my bowl (aka…the size template) onto the glued down pattern and then Colby cut it out with a jig saw. I lack pictures of this step because I cannot confirm nor deny that Colby utilized “safe” practices while making his cuts. Then it was hole saw time to cut out the center piece of the medallion. First we drilled a pilot hole to help the hole saw get started making sure the medallion is clamped down to prevent movement.

Then we cut out the center of the medallion with a 4″ hole saw. Please note the idiocracy of how we clamped the medallion down directly to the work bench. I don’t claim that idea as my own. Colby takes full credit for that one.

Because of said clamping setup, this was the result:

Oooops….4″ hole in the workbench. It wouldn’t be right any other way. Honestly. If we don’t have a major/minor oops moment during our projects, something is wrong. Seriously wrong. We come to expect it these days. Sad, I know, but life isn’t perfect and neither are our house projects. Next up was the staining and polying portion of this evenings program.

We used the dark walnut stain that we had left over from the office trim, ladder shelf, and the new desk top from this post. Then we wired up the new pendant light, snipping off the extra cord.

To determine proper height, we used a very sophisticated method of Colby holding the pendant up to the ceiling with the lamp shade attached and moving the cord up and down while I instructed “up a little bit…no…down just a hair…maybe just a hair more…ohhhh…too far, too far” from down the hallway. Hey…it worked because look how awesome the pendant and homemade ceiling medallion turned out:

And even better with the lamp shade attached.
Don’t mind the desk top that’s been hanging out in the hallway while we finish building the bases. Here is the closeup of the newly assembled hallway light fixture:

Two things I would like to change: one…the light bulb sticks out just a bit so I’m thinking of upgrading to a slightly prettier light bulb…two…I’m seriously thinking of covering the lampshade with fabric to help spice it up from it’s plain old vanilla look.
All in all, quality project and I would do it again in a heart beat. Actually, I will be doing it again when it comes time to fixing our other long-time-no-light-fixture situation in the upstairs hallway.
Pssst….I’m curious if anyone else has ever crafted their own ceiling medallion? Please share if you have because I think it’s a novel idea and I always love hearing from you all!

I love it! Very pretty, the texture is so nice and unexpected on a ceiling medallion!
Awwww…thanks so much for the comment! And by the way….I’m absolutely in love with your deer silhouette art! Genius!
That is awesome!!
Thanks Vivienne!
Along with talent, you need a sense of humor. You apparently have both.
Awwwww…thank you so much! By the way…your pantyliner post….HILARIOUS! I’ve totally done that before.