I know I always say this after finishing a project, but the Fall Pinterest Challenge project that I worked on is SERIOUSLY the COOLEST project we’ve ever done! Woo to the hoo cue up the band and set off the fireworks!
As you may or may not recall, my inspiration for the project looked a little something like this (read a little bit more about it back here):
- Hidden closet door bookcase from Hidden Passages
- Another hidden door bookcase from Ana White
- And a painted china hutch from Better Homes & Gardens
Did you figure it out? Is it painfully obvious? I think it’s painfully obvious but obviously I know what project I did. Do you want me to stop asking questions and using the word “obvious” and just spit it out already? Alright. We converted our old corner hutch into a hidden closet door.
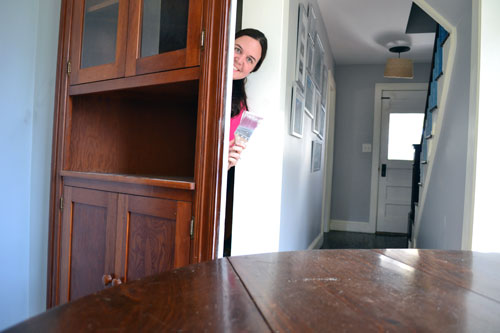
That’s me peaking out from behind the hutch as I was trying to paint it. Someone learned how to use the timer function on her DSLR…booyah! And I one-taked that photo…double booyah!
This project has been a long time coming yet it was a little spur of the moment. So sit back, relax, cuddle up in your blankie and grab a mug of tea because it’s story time here at Angie’s Roost…the story of the corner china hutch that could. It used to live in the living room for a lack of a corner that could properly hold it.
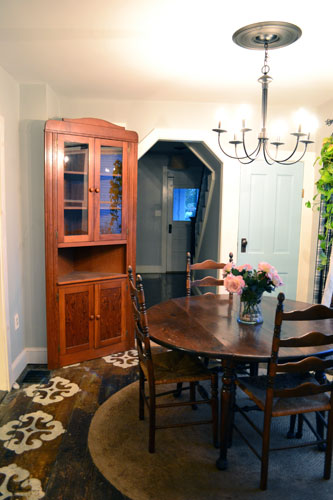
I know, strange place for a china cabinet. But we have very few right angles in our home that had enough wall space to hold the cabinet without covering up a door or a window or whatnot. So when we tackled a mini makeover in the living room, the china cabinet got moved into the dining room.
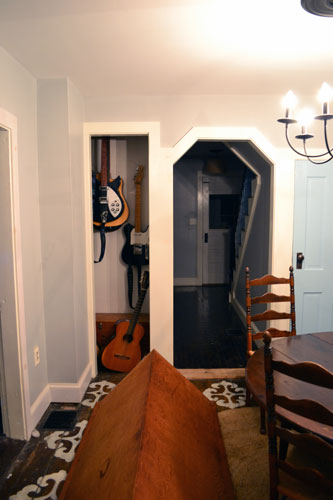
And it blocked the closet that held Colby’s guitars. Please excuse the ginormous hutch laying on the ground in the following photo. We have occasional strange moments.
But anyway…the cabinet sat there for a couple months, blocking the closet. We had always wanted to DIY a door that was also a bookcase for that closet but it didn’t dawn on us, until the other night spur of the moment like, that the china cabinet was a PERFECT fit. We could use something we already had (in fact the cabinet came with the house) and use something that we loved in a useful way. We were THIS close to getting rid of the cabinet because we had no place for it. And the sad part was that neither of us wanted to do that because we love that cabinet almost as much as our dog child. And what a novel idea it was to have a china cabinet in the dining room. Brilliant I tell you! We could even…GASP…store dishes in it! Oh the insanity!
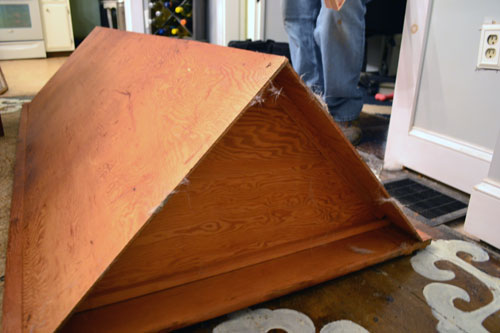
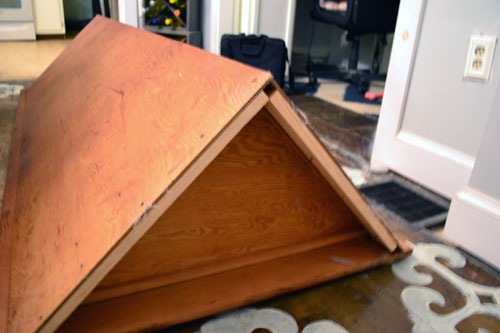
Now that story time is over, let’s get into the nitty gritty on how we did it. Surprisingly, it was an easy project. The plan was to put the cabinet on casters and hinge it to the wall so we could swing the cabinet open and closed as needed. We started by flipping the cabinet down onto the floor to inspect the base.
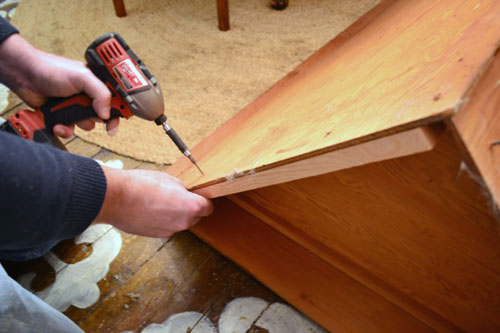
Once we could see what we were working with, Colby and I decided that we needed a platform with a trio of casters for the cabinet to rest on. Since the cabinet is mostly made of a flimsy plywood, it needed some beefing up so it wouldn’t fall apart one day and break all the plates in the cabinet. That would be tragic. And would definitely involve tears…many many tears. So to avoid tears, Colby screwed a couple of 1 x 4 pine boards onto the bottom of the cabinet to provide a beefier surface for the platform to adhere to.
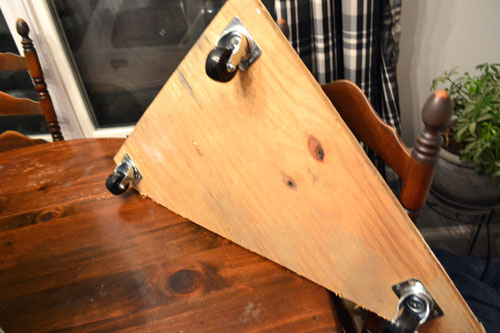
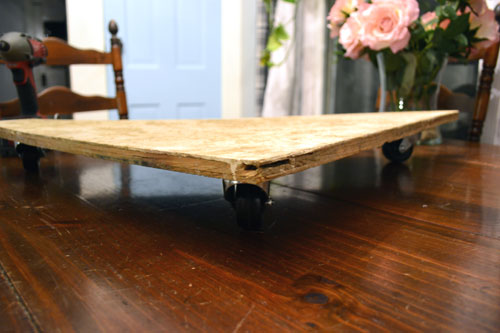
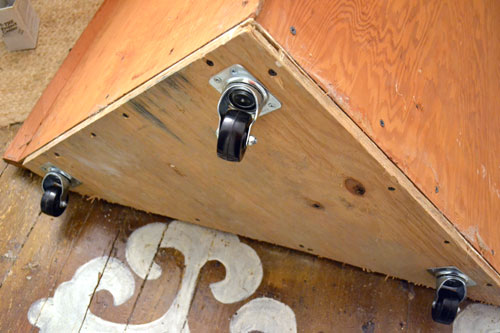
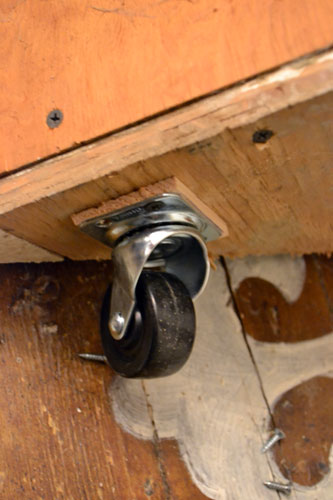
Then Colby measured the base, cut a piece of 3/4″ plywood to size, and screwed three casters, which we purchased from Lowes for about $4 each, into the bottom of it.
The caster trio was our optimal combo for the cabinet as they provided needed support but also optimal maneuverability. Any more casters and the cabinet motion would have become a little more jerky and difficult to spin open.
Then, with the beefed up cabinet base…
…screwed the platform onto the cabinet’s newly adhered 1 x 4 boards.
Which left us with a fully secured, rolling cabinet base.
We slowly lifted up the cabinet and by George that thing worked! It rolled…and rolled smoothly! It was like we actually knew what were doing. But we weren’t out of the woods yet. The cabinet was a little un-level thanks to our super un-square, un-level ancient, older than dirt, 100+ year old home.
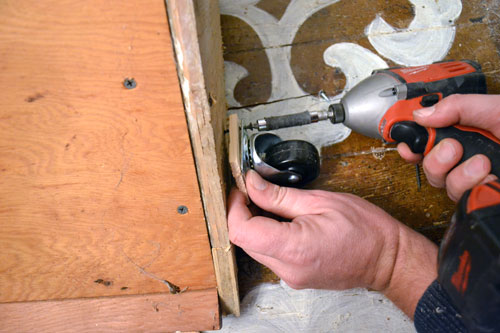
First we leveled up the cabinet. To do this, Colby played with shims underneath the casters until the cabinet leveled out.
Then he removed the shims, removed the casters, and screwed the shims underneath the casters at the same thickness that he had the shims underneath the casters.
And voila…shimmed up casters on our china cabinet.
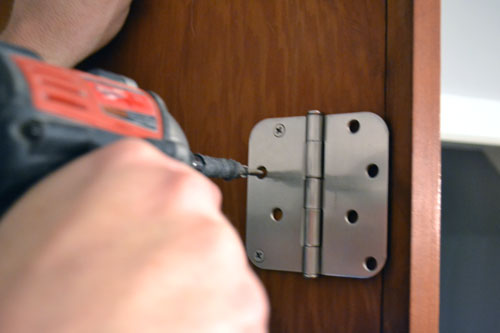
Next up was the moment of truth moment. The moment where we had to attach the cabinet to the wall. If the cabinet wasn’t properly level or if the floor was too un-level, there would be a chance that when we attached the cabinet to the wall while it was in an open position that it wouldn’t close properly. So we pulled up our big kid pants and screwed those door hinges into the cabinet first.
And then into the wall, making sure that the hinges operated in the correct direction and that we were also “hiding” the hinges from general view for when the cabinet was closed.
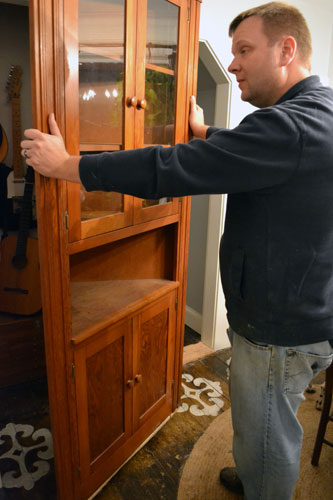
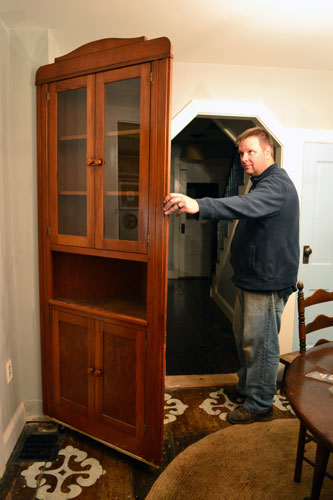
After a significant amount of breath holding, where Colby turned almost as blue as his sweatshirt, we tested out the cabinet and it worked! Colby doesn’t look nearly as excited as I was. Picture me holding the camera and skipping around the room while humming that annoying Hampster Dance song.
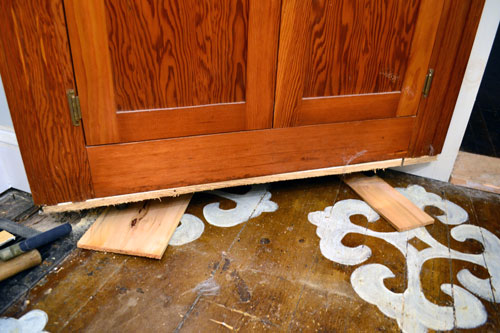
As you can see above, we ended up having to rip out some of the trim to get the cabinet/door to open properly.
I’m hoping we can replace it with something a little more low profile, but we’ll see what we end up with. We also have to trim out the bottom of the cabinet to hide the casters. But that finish work stuff is for another day. I’m just stoked that we have a working “china hutch as a closet door” situation going on.
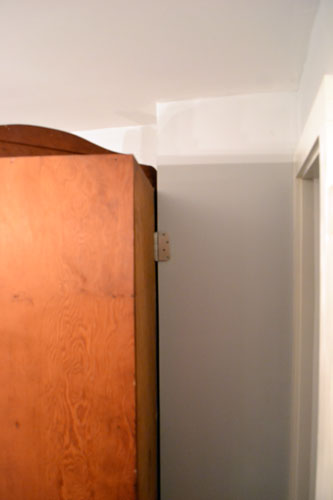
My favorite part is that you can’t tell that the cabinet is hinged unless you tuck your head around the side of the cabinet, wedging it in between the cabinet and the wall, before you can see the hinges. They’re there, but just neatly tucked away.
So that’s what we did on a random Thursday night. Not too shabby of a project. But now let’s take a little post project photo tour of the hinged up cabinet in the good light.
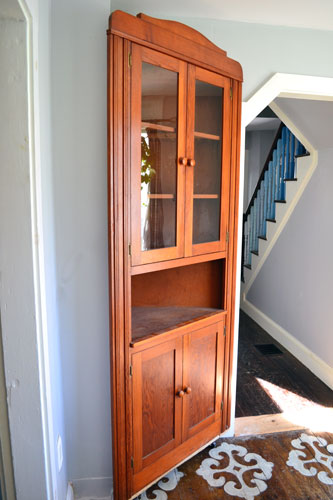
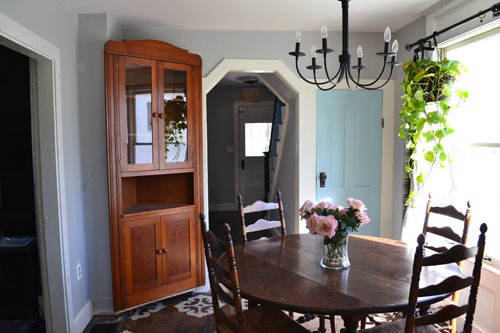
The cabinet is such a perfect fit for our dining room space. AND it’s going to look even more amazing after I paint it. I’m pulling in a little blue from the baluster colors that you can see behind the cabinet, as well as the white from the trim. Here’s a better view of the cabinet against the blue ombre balusters, which was a Pinterest Challenge Project of yore.
The basement door in our dining room also pulls in a shade of blue from the baluster project. It’s amazing how those 8 shades of blue have become the main color pallet for the living areas and open spaces for our home.
I have to confess that I had intended to have the cabinet all painted up, installed, and fully loaded stocked in time for Pinterest Challenge link up day, but alas, I don’t have it done (hanging head in shame). I kind of bit off more than I can chew. Painting that cabinet is proving time consuming and then there’s this little thing called Hurricane Sandy which is making it uber hard to spray paint outside with all this rain and moisture happening out there. But I’ll at least give you a little sneak peak.
I feel like such a tease. But at least you can see what that third inspiration pic was for. I was looking for a dark color to paint the inside of the glass door shelves since our wedding china is white. The dark color should help make our dishes pop! One other note about the china before I call it a night…a wordy night at that. I was worried that the china would fall over or break as the cabinet-as-a-door opens and closes. But as long as we don’t whip the door open, it rolls quite smoothly so I don’t fear for the safety of our plates.
Okay…now it’s linky, mc-linkerson time. As I’m sure many of you are familiar with, this whole Pinterest Challenge has a link-up component to it. So tomorrow (Tuesday), be sure to check out the blogs of our four gracious hosts and link up your projects and check out all the new Pin-spiration.
Our hosts this time around include the quirky, paint covered Sarah from the Ugly Duckling House, about to pop because she’s so pregnant but is still tackling a Pinterest Challenge project Katie from Bower Power, the ever weird ever awesome Sherry from the infamous Young House Love blog, and finally Carmel who I swear could double as Salma Hayek from Our Fifth House.
Pssst…Speaking of Pinterest, you can follow me here to check out all my house project inspiration.







Very Clever! Fits perfect in the space. I wish I had a spot for a hidden bookcase door.
Awwww…thanks! And I’m sure you can find a spot for one…there’s ALWAYS space for a hidden bookcase door! Haha!
Very cute idea! I’m looking at doing something like this in our guest room, but haven’t had the nerve quite yet! Can’t wait to see it all finished up, thanks for sharing!
Do it, do it! You totally have my endorsement!
Wow… this is pretty freakin’ amazing!! Such a great idea and nicely done. Plus who doesn’t love a secret storage area in their house?!
Eeeeee…thanks for the love! And seriously…shouldn’t everyone have a secret spot in their house?!
So cool. Really. I am so impressed and so jealous of your corner cabinet/door-ness.
We need to be friends…just saying…I’ve been using the phrase “door-ness” too. It’s been my latest favorite! Haha! Thanks for stopping by!
Wow, that is awesome! I would LOVE for you to link this up at my Ginger Jamboree Link Party!!
Ooooh..more linky parties! Totally on it! Thanks for stopping by!
Wow – I have never heard of such a thing. What a cool idea! If I had a hutch/hidden door, it would be the first thing I showed people whenever anyone came to our house 🙂
Haha! I didn’t even think about that until you mentioned it…the showing the “secret” off to everybody. I’ve totally been doing that! Secret is out! Thanks for stopping by!!!
Angie! I loooooove it! Very awesome
Thanks so much! I can always tell how much you really like a project by the amount of vowels and exclamation points you use! Haha!
I speak the same way when I’m excited or like something. LOL Keep on crafting my friend- I enjoy your blog tons 🙂
This just made my day! You’re awesome!
Oh WOW! What a clever solution! That’s actually my house (well, old house now, we sold it and moved) in that second pic 😉 We loved our hidden bookcase door! I’m thinking of a good place to incorporate one in our new house. I love, love, love that you used a hutch, and that it worked out so well! Great project
No way! That’s so crazy!!! And that bookcase is GORGEOUS! Not gonna lie, it was my favorite secret door bookcase out there. And you can TOTALLY work one into your new house!