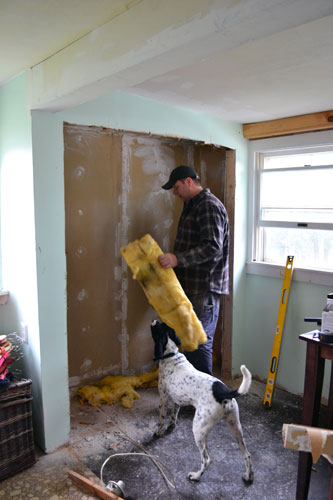
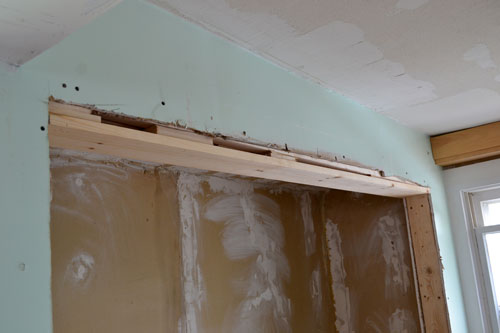
When uploading these pictures, I realized they are just about the most unglamorous pictures imaginable. Just about as bad as yesterday, where we left off here with the kitchen closet re-do process.
With the demo complete and the kitchen a total and utter disaster, it was time to put it all back together again. And first thing is first, the closet needed some structure…aka beefing. So Colby installed a new, twice the size as the old one, header.
Headers are important and thankfully the boy toy understands this. They provide structure and support the walls above open spaces (such as closet door openings) preventing the wall from sagging. When Colby installed our new closet header, he shimmed it out to make sure it was perfectly level and square with the sides of the closet door opening. It was essential that the opening was oh so perfectly squared up since we’re planning on installing a pair of doors in the space. About this stage of the construction process, Colby called me into the kitchen (I’m not one for construction so I had parked my butt in the parlor working on a painting project) to discuss the organizational plan for the closet…aka where are shelves and hooks going. That’s when we discovered this:
Those are the closet depths. The top measurement is for the left side of the closet and the bottom pic is for the right side of the closet. Notice anything funny or weird or old house like? One side of the closet is 18-1/2″ deep and the other is 20-1/2″ deep! This stuff drives Colby cah-razy! I usually shrug it off, chalk it up to old house syndrome and scheme about how to make the space pretty…you know…the important things. Meanwhile, Colby spazzes about how in the world he’s going to get doors to line up. So after Colby returned from his measuring trip to crazy town, he started to work on the walls. Since we had zero point zero desire to tear down the raw, never painted nor finished sheet rock or even fix it’s severely damaged condition, we opted to just cover it with bead board. But to do this, we had to even out the back wall with some strapping.
You can see in the above pic over towards the right that there’s this odd little bump out. Turns out that sheetrock was covering a supporting beam for our kitchen so we couldn’t tear it out. Instead, Colby attached strapping to the rest of the wall to make it even. After that was complete, he cut a piece of utility plywood and adhered it to the ceiling.
This was attached by using a construction adhesive/nail gun combo. Then, in a similar fashion, Colby applied construction adhesive to the strapping.
And put the first of several bead board panels into place and nail gunned it. The strapping not only leveled out the back closet wall but it also provided extra support and a solid place for Colby to nail the bead board to. Oh….and I should also mention that prior to installing the plywood or the bead board sheets, that Colby ever so carefully measured and cut each piece down in his man cave…I mean…workshop.
Colby repeated the measure, measure again, cut, adhesive, nail process throughout the whole closet until it was completely covered in bead board. And since not one seam was perfect thanks to our…wait for it…drastically unsquare/unlevel home, we were left with a lot of gappages in the corners.
With all the walls and the ceiling complete covered with either plywood or bead board, it was time for trim. Colby got creative when it came time to trim out the closet. For the spaces where the wall meets the ceiling, he made his own trim by ripping down a a 1″ x 4″ piece of pine to make some basic, square trim. It’s nothing fancy but tt totally works for now.
And then to cover the vertical seams in the corners, he used some old scotia molding that we had inherited with the house. The molding has been living in our basement for who knows how long but was still in great condition and served a purpose. Double score because we didn’t have to purchase any trim pieces for this project, which can add up.
Here’s a view from inside the closet where you can see the closet ceiling, header, and trim pieces.
Ta-da…..a put back together closet…well…a somewhat put back together closet. There’s still so much to do to finish it up.
Speaking of to-do…it’s about time we put together a little to-do list for the completion of the kitchen closet reno project…you know since I eat, drink, sleep and basically live to-do lists. Here we go, hold on to your britches people:
Clean out and gut out the closet spaceInstall paneling ceiling, bead board walls and trim out the space- Punch in/fill nail holes and give the whole closet a white paint job (except maybe not the ceiling…I’m debating just leaving the natural wood grain and just polying it…what do you think?! I’m on the fence)
- Build and install storage shelves/cubbies
- Add a coat rod
- Paint and install the double doors adding some new hardware
- Move into the closet and give it the uber organization once over
Later in the game, probably later this summer, we’re thinking of installing a new floor in the entire kitchen, including the closet area. A complete kitchen reno isn’t in our cards for awhile, and since we’re pretty much at our breaking point on living with the nasty linoleum floor, it’s just a matter of time before we crack and come home with some basic laminate wood flooring. But anywho, back to the closet. So far, this is what our materials list and budget breakdown looks like for the project:
- (3) sheets of bead board paneling: $80
- (1) tube of construction adhesive: $3
- (1) sheet of utility plywood (and we used only a fraction of it): $9
- About $40 worth of pine for both trimming it out and building the header/supporting beams, and we still have lots left over
- Wood putty, paint, nails, etc. are all materials that we already had
- Grand total so far: $132
- Amount of time spent so far: Colby’s Saturday morning and afternoon
So now it’s time for our exquisite painter…moi…to step in and paint up this space so the builder can get cracking on custom shelving system. Wha-pah! That’s my whip cracking noise.
Pssst…This whole project has really gotten me going cleaning and organizing our home. It must be that (late) spring fever finally catching up to me. What have you all been up to? Any cleaning/organizing projects?


