Some days, you wake up ready and raring to go. You’ve got your to-do list, goals for the day, and the top three work priorities. Other days, you wake up to a rainy Tuesday and restlessly wander the house, procrastinating on the chores until you finally throw out the to-do list and freestyle it. On those days, as a creative type and a maker at heart, I need to unleash some creativity and make something. Fast! And since my husband will probably kill me (not really) if I start another project (I really wanted to paint our nightstands today), it’s a small project day. Today, I’m making DIY paperclip bookmarks using a stash of scrap ribbon and paperclips.
There are three things I always look for at the thrift store. One, books. Books for the kids and books for me. Two, leggings for my girls since they wear them out sooo fast. And three, ribbon. Anytime I find a package of ribbon for $0.25 at the thrift store, it magically jumps into my basket. I’ve accumulated quite the stash over the years. My husband likes to make “Why do you need so much ribbon?” jokes. But jokes on him when I use that ribbon stash up on every Christmas and birthday gift. And now, bookmarks!
We are in desperate need of bookmarks in this house of three readers. Let me introduce you to them. Reader number one, me, age 42, a devourer of novels, and a reader of at least 7 books simultaneously. Reader number two, eldest daughter, age 9, lover of dragon-themed graphic novels and stealer of my bookmark stash. And reader number three, youngest daughter, age 4, who thinks she can read, steals all the books, and “reads” us wacky made-up stories. My husband is not a reader. He tries, so he doesn’t understand our bookmark woes.
While anything can work as a bookmark, I like having a stash of pretty ones in my nightstand or purse. Since my children (and probably me too) have lost all of them, we’ve had to get creative lately. Case in point, things I’ve used lately in lieu of a bookmark. My employee pass (which I almost lost at the ballfield). The electric bill. A Post-it note with my grocery list. A piece of scrap fabric. A felt bird craft that my eldest made. An Instax picture of my youngest at the dentist. A paper napkin from my sister-in-law’s wedding. I’m overdue for an upgrade.
Let’s make some DIY paperclip bookmarks, shall we?!
How To Make Paperclip Bookmarks
Supplies
- Paper clips (regular size or jumbo)
- Ribbon (ideally 1/2″ in width or smaller)
Tools
- Fabric Scissors (Wilkinson by Whiteley Fabric Shears are my ride or die choice)
- Ruler

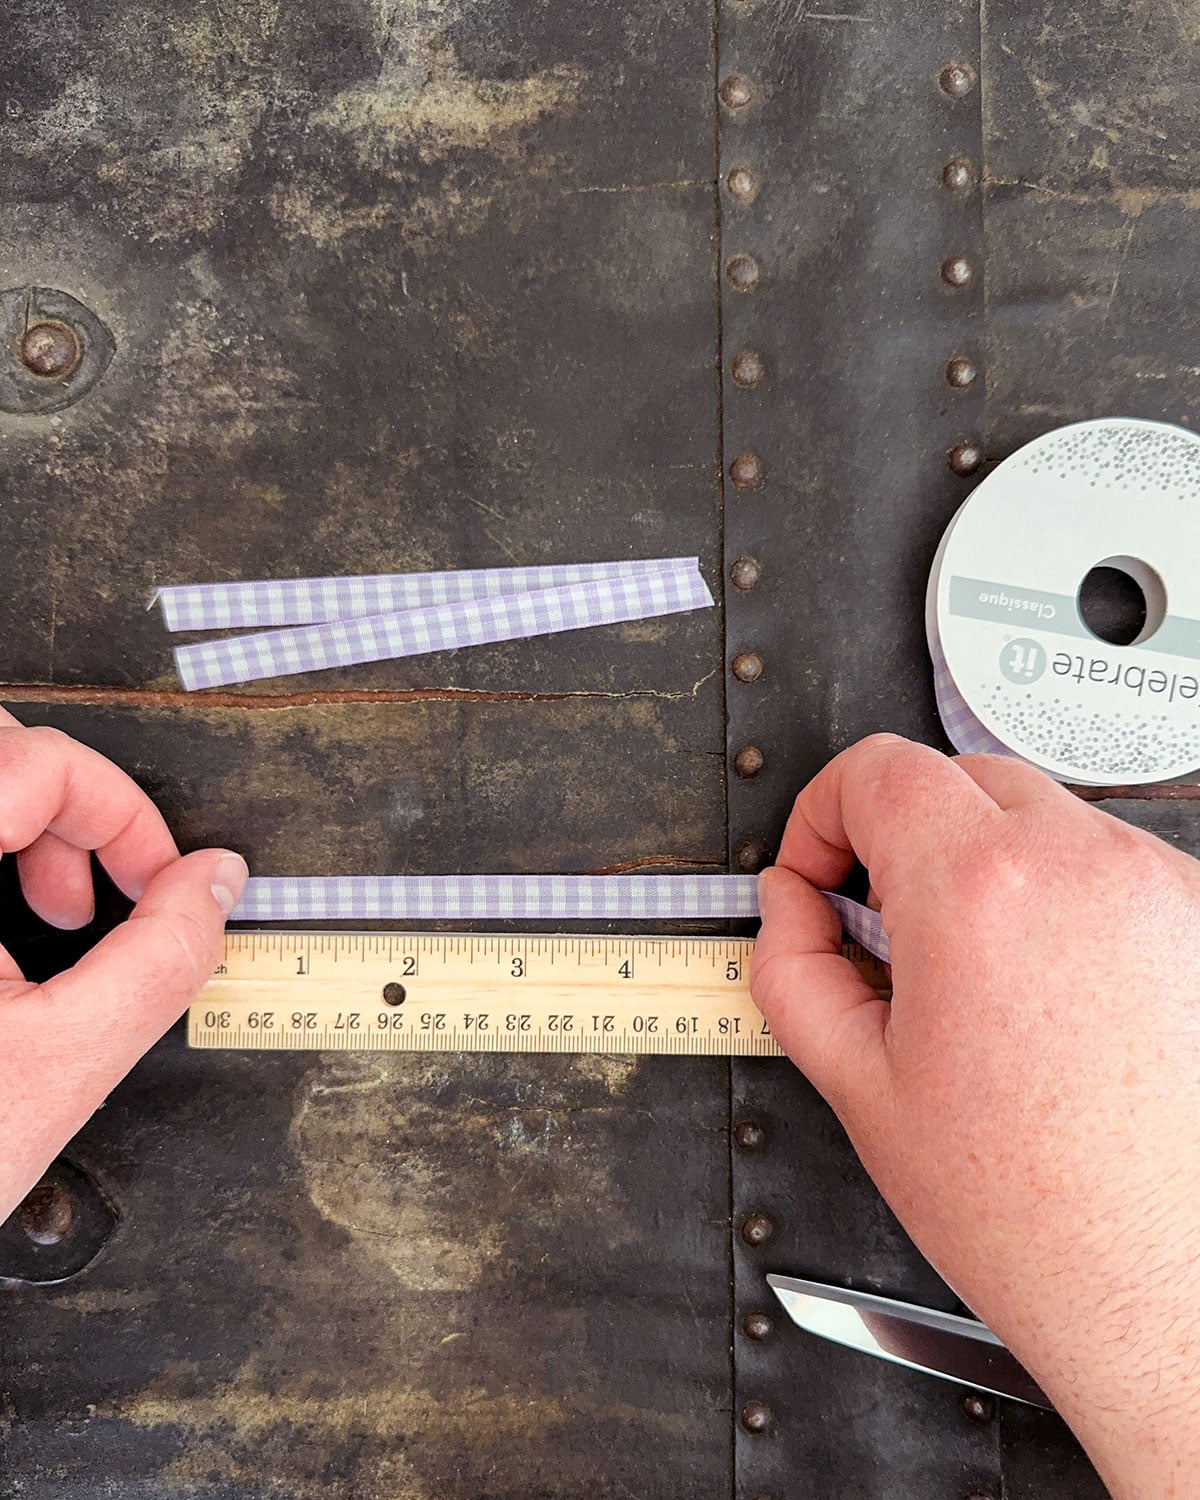
Step One: Cut The Ribbon
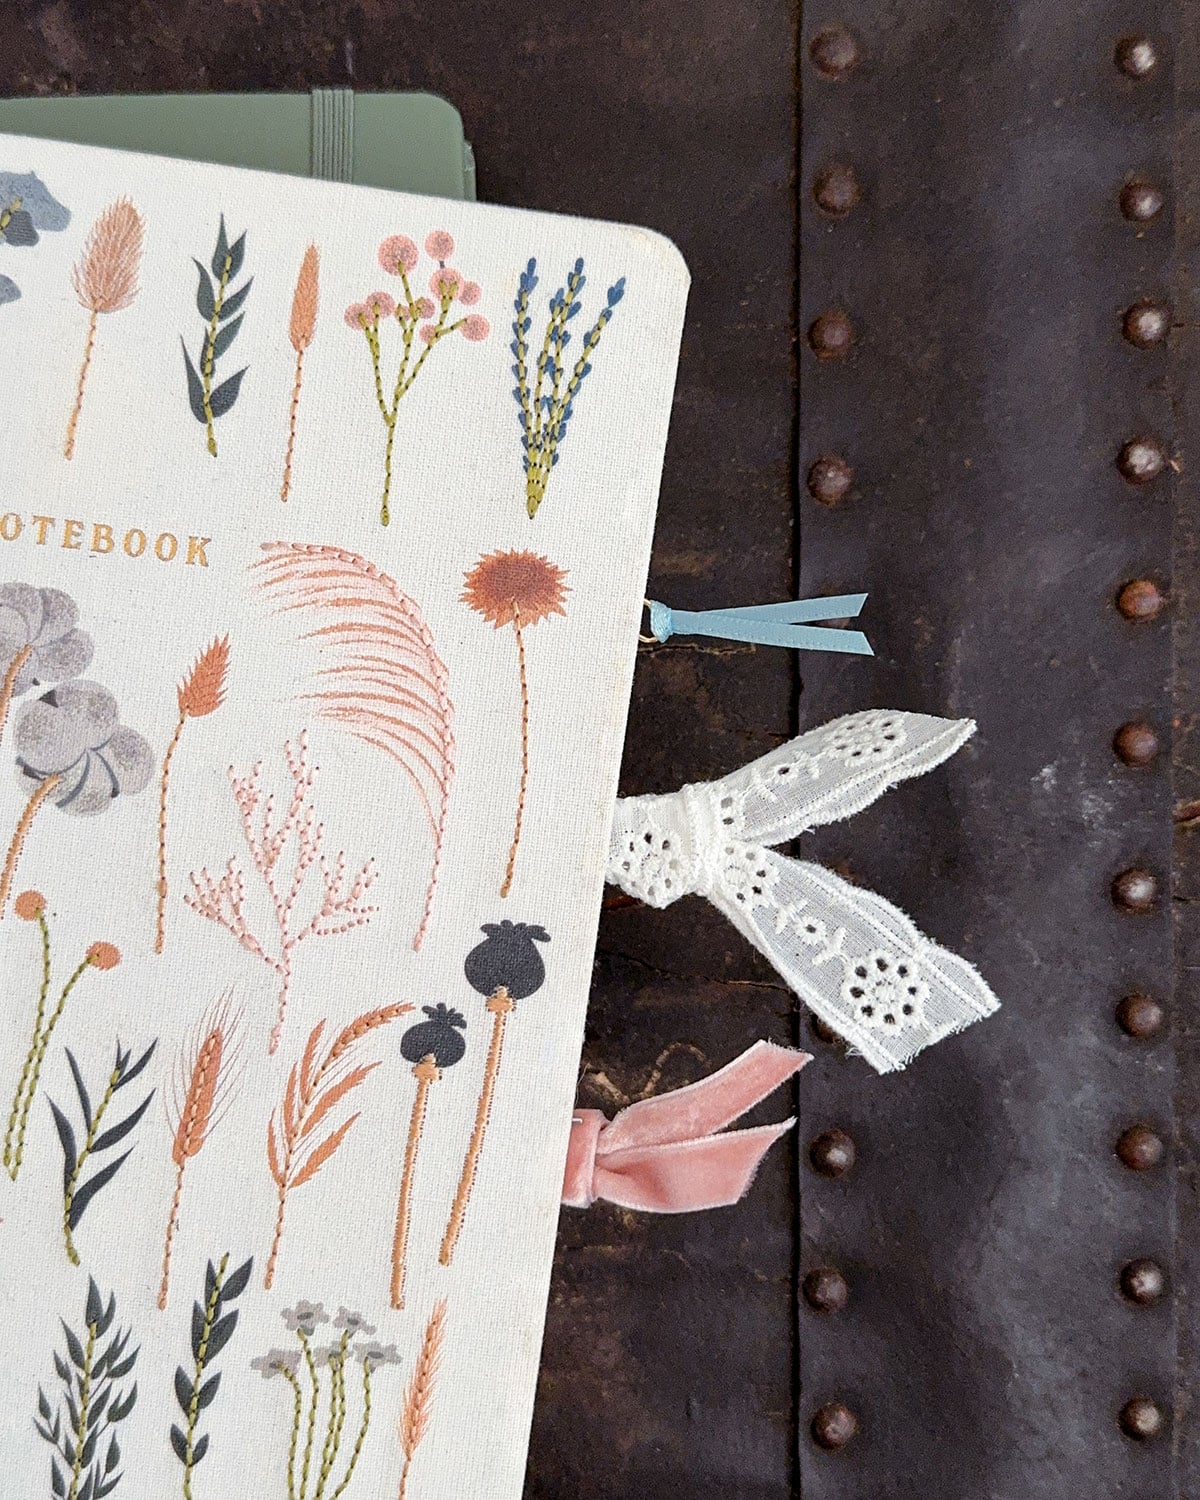
Cut the ribbon to 5″ lengths if you’re using jumbo paperclips, or to 4″ lengths for regular-sized ones. It is a little long, but this is the best length to give you enough ribbon to loop through the paperclip and make a knot. Cutting any shorter while optimizing your ribbon usage is difficult to tie and leaves little room for angled trimming.
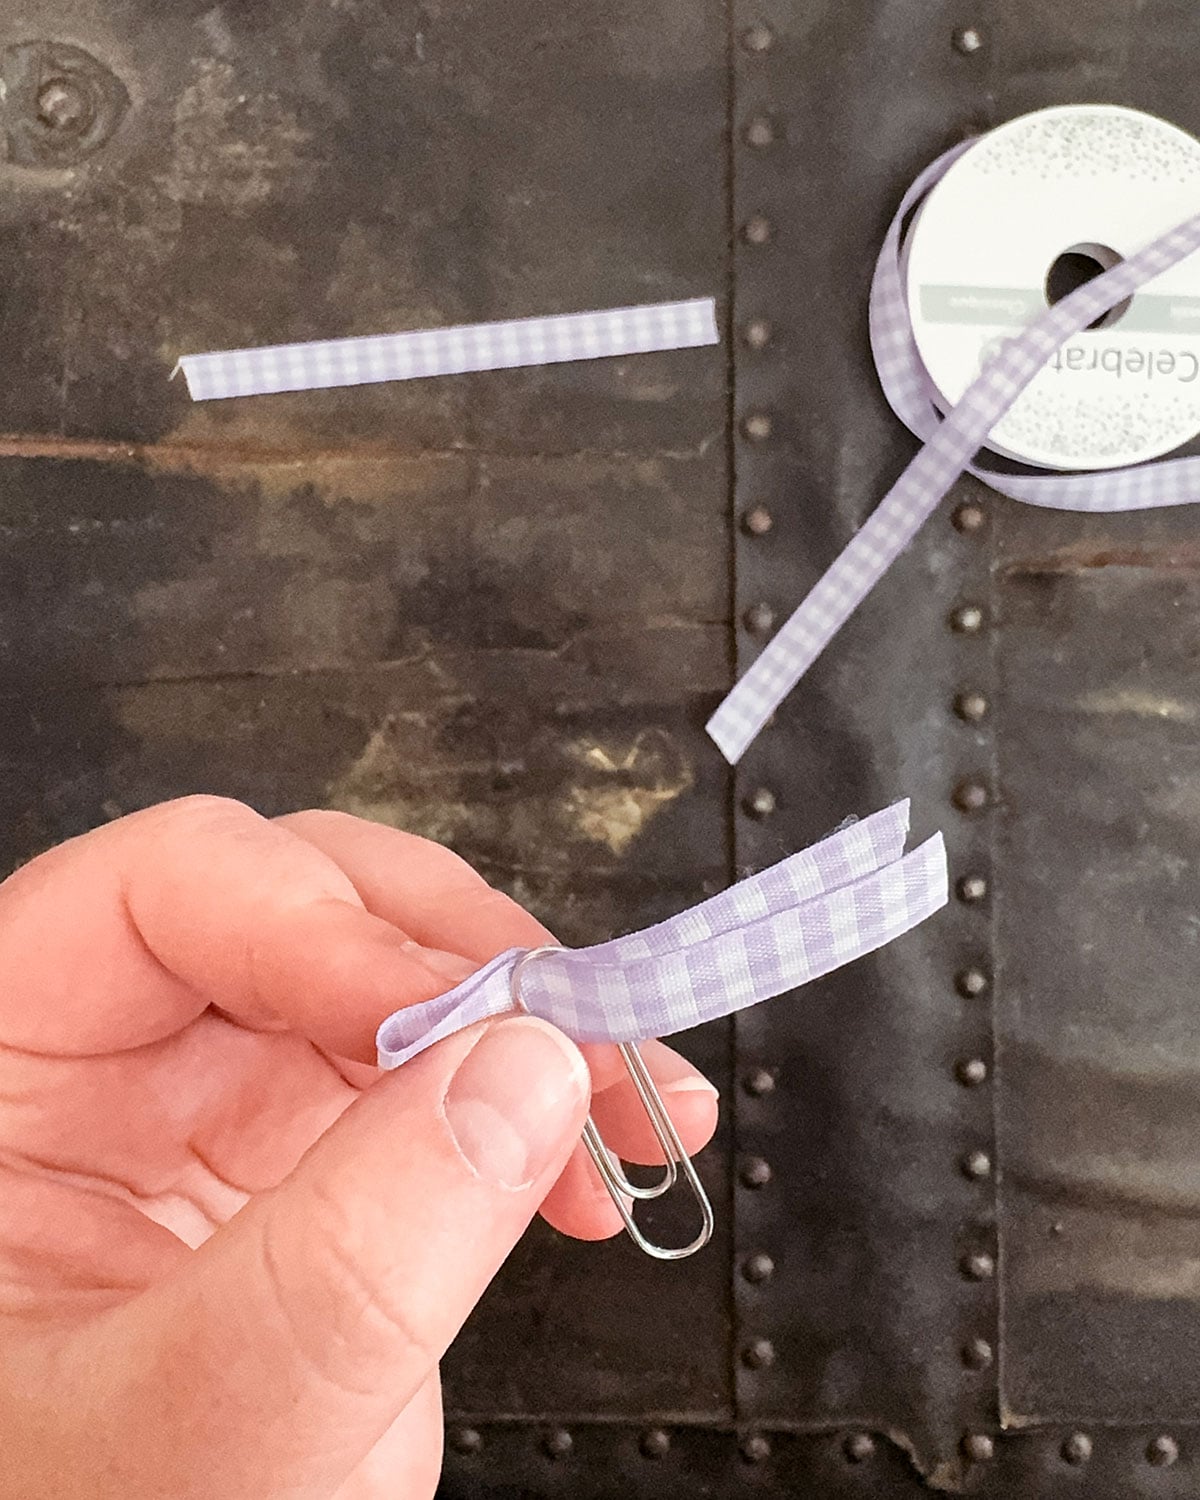
Step Two: Tie The Ribbon To The Paperclip
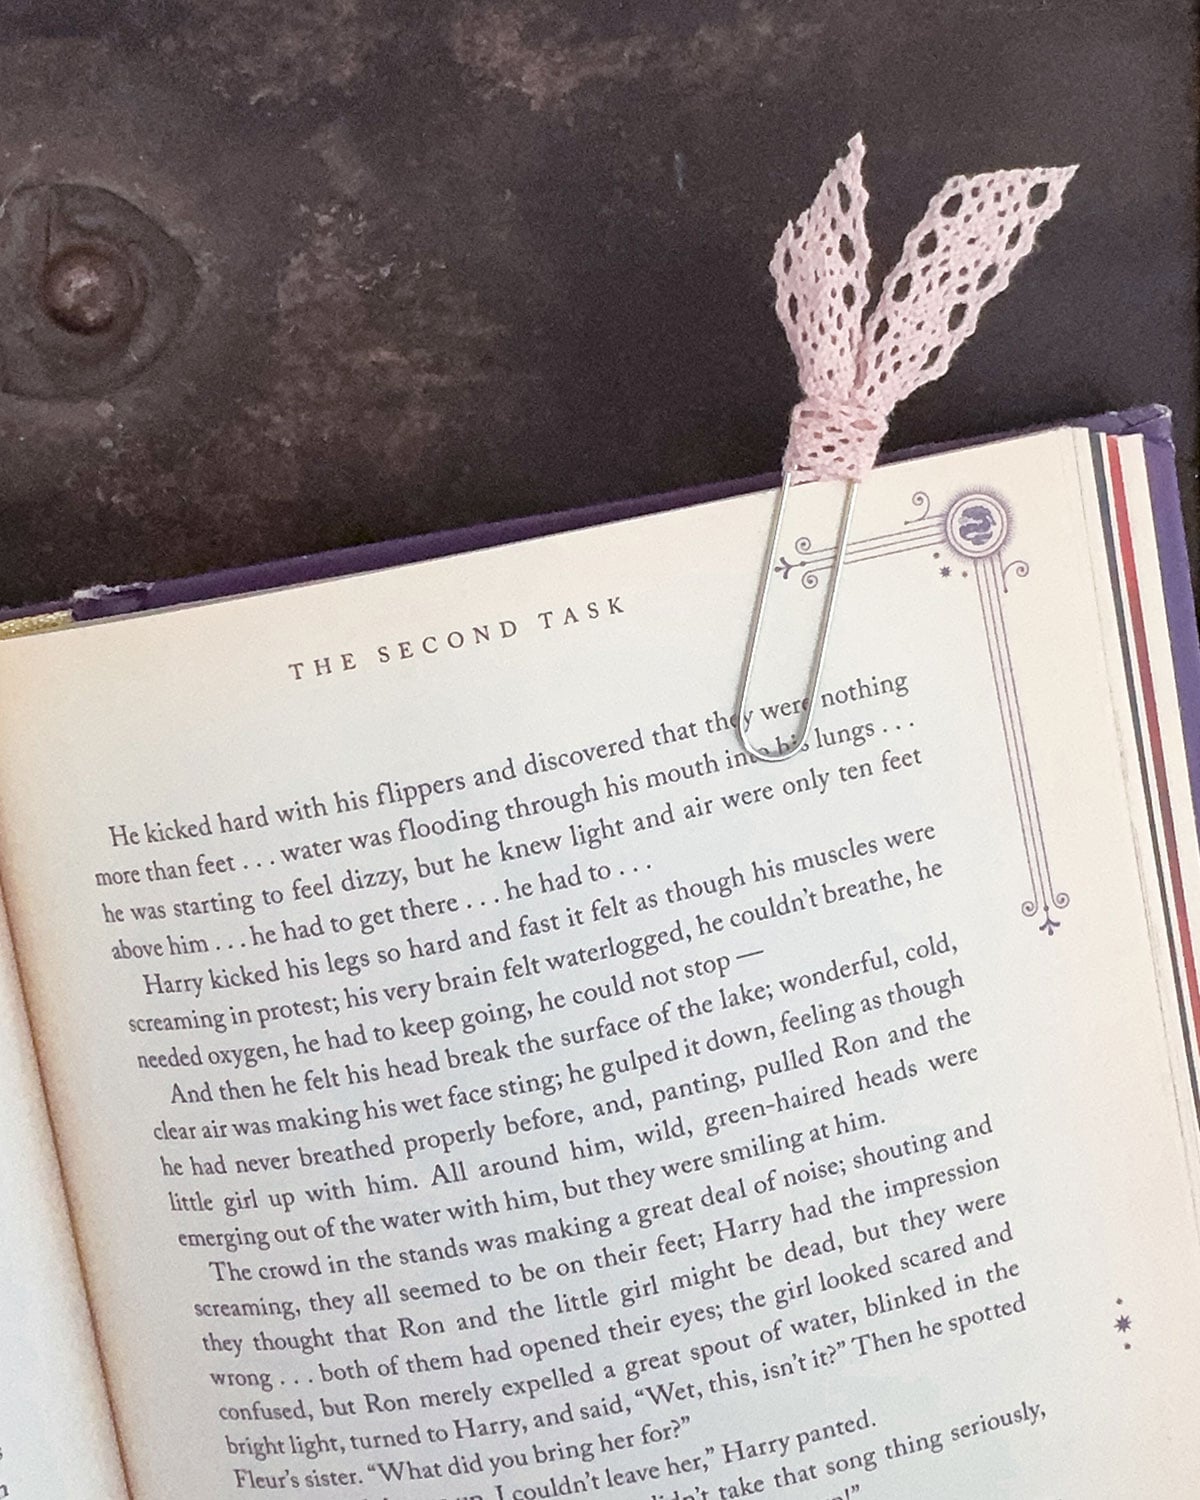
Tie the ribbon onto the paperclip using a basic cow hitch knot attached to the opposite end of where you clip. To do this, first fold the ribbon in half. Loop the folded end of the ribbon through the top of the paperclip, enough so you can make an opening with the folded end.
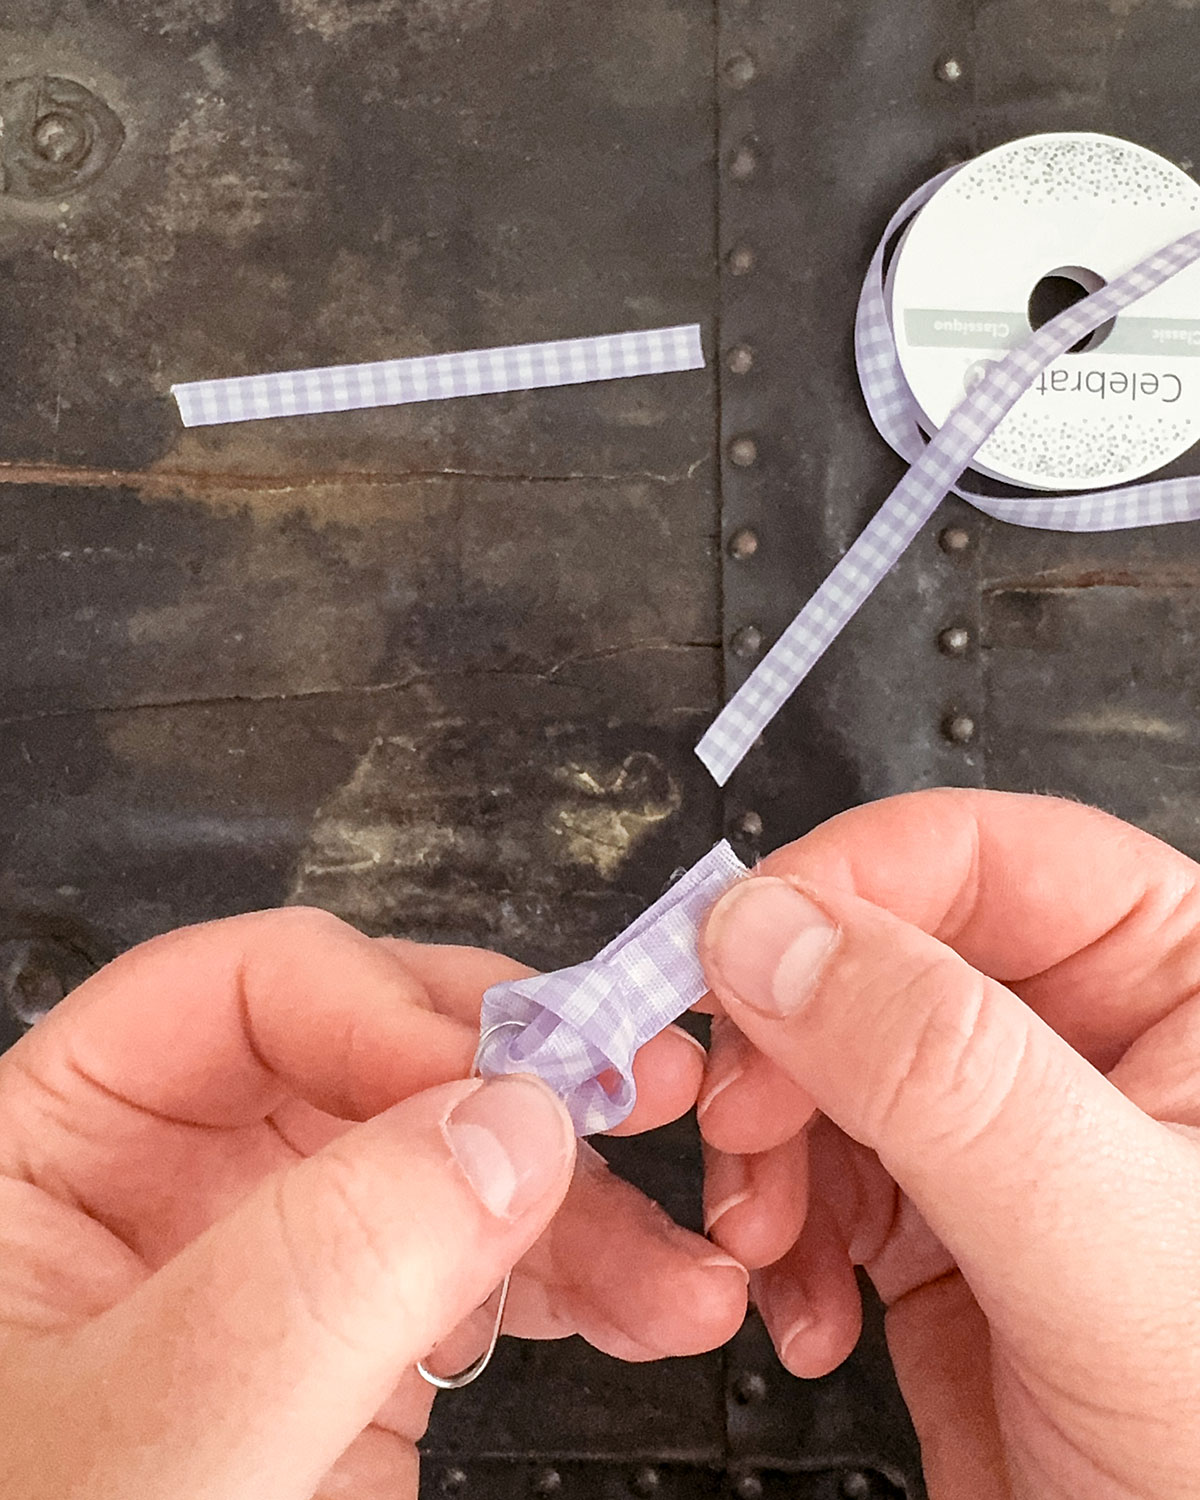
Then thread the two ends through the loop and pull the ends tight until the knot is secure.
It helps to pinch the knot with your thumb and pointer finger and then gently pull each end of the ribbon until the knot is tight. It also helps splay out the ribbon into a V-shape instead of lying on top of each other.
Step Three: Trim The Ribbon Ends
Adjust the ribbon so that the two ends are a little separated and arranged as you want them. Then, using fabric scissors, trim each end to your desired length and style. Simply cut the ribbon at an angle or trim from the edge towards the middle, depending on your chosen ribbon style. I like angles.
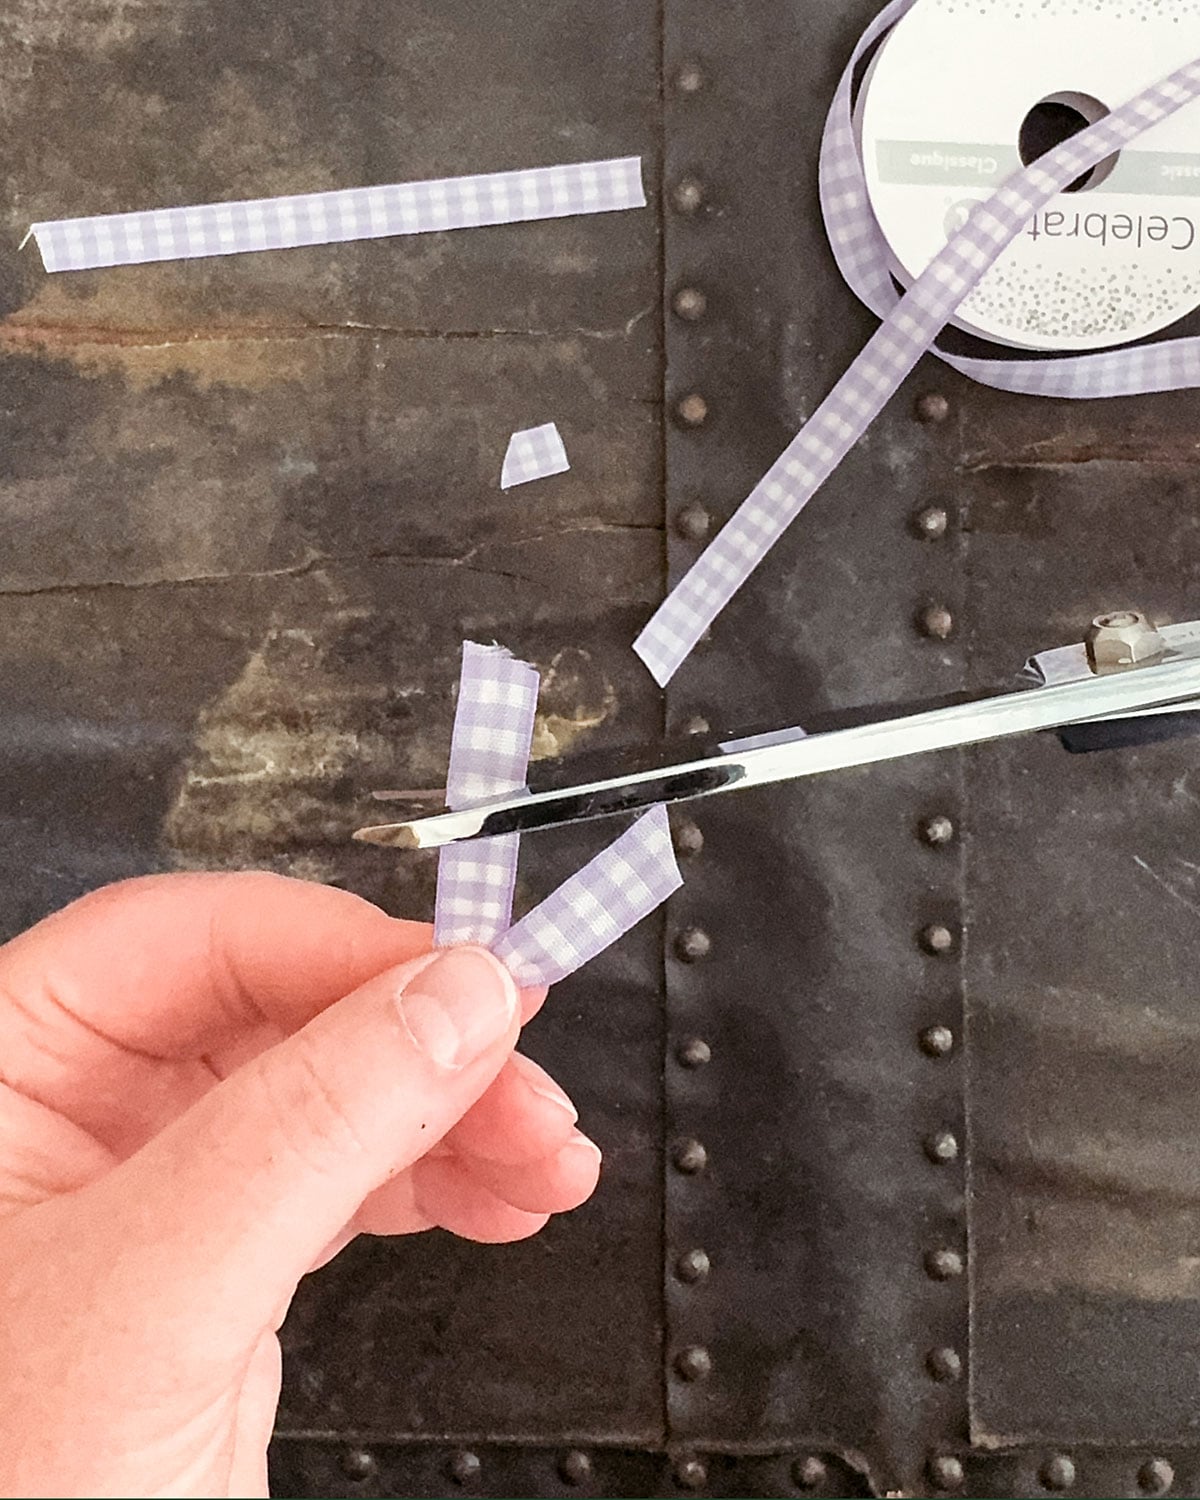
It is absolutely imperative to use fabric scissors for this step. They’ll give you a nice, clean, smooth cut. Regular kitchen scissors have a habit of pulling or leaving jagged edges when you cut ribbon. Also, the better quality the fabric scissors, the smoother the cut. I recently upgraded my run-of-the-mill Fiskars fabric scissors to Whiteley fabric shears. They cut like a hot knife through butter. The kids have been warned of impending doom should they use the scissors for cutting sticks in the playhouse.
Step Four: Go Read!
Pick up a good book, either from your to-be-read (TBR) pile or from the local library, and get reading! Now you have cute bookmarks to make reading just a little bit more enjoyable!
Paperclip Bookmark Variations
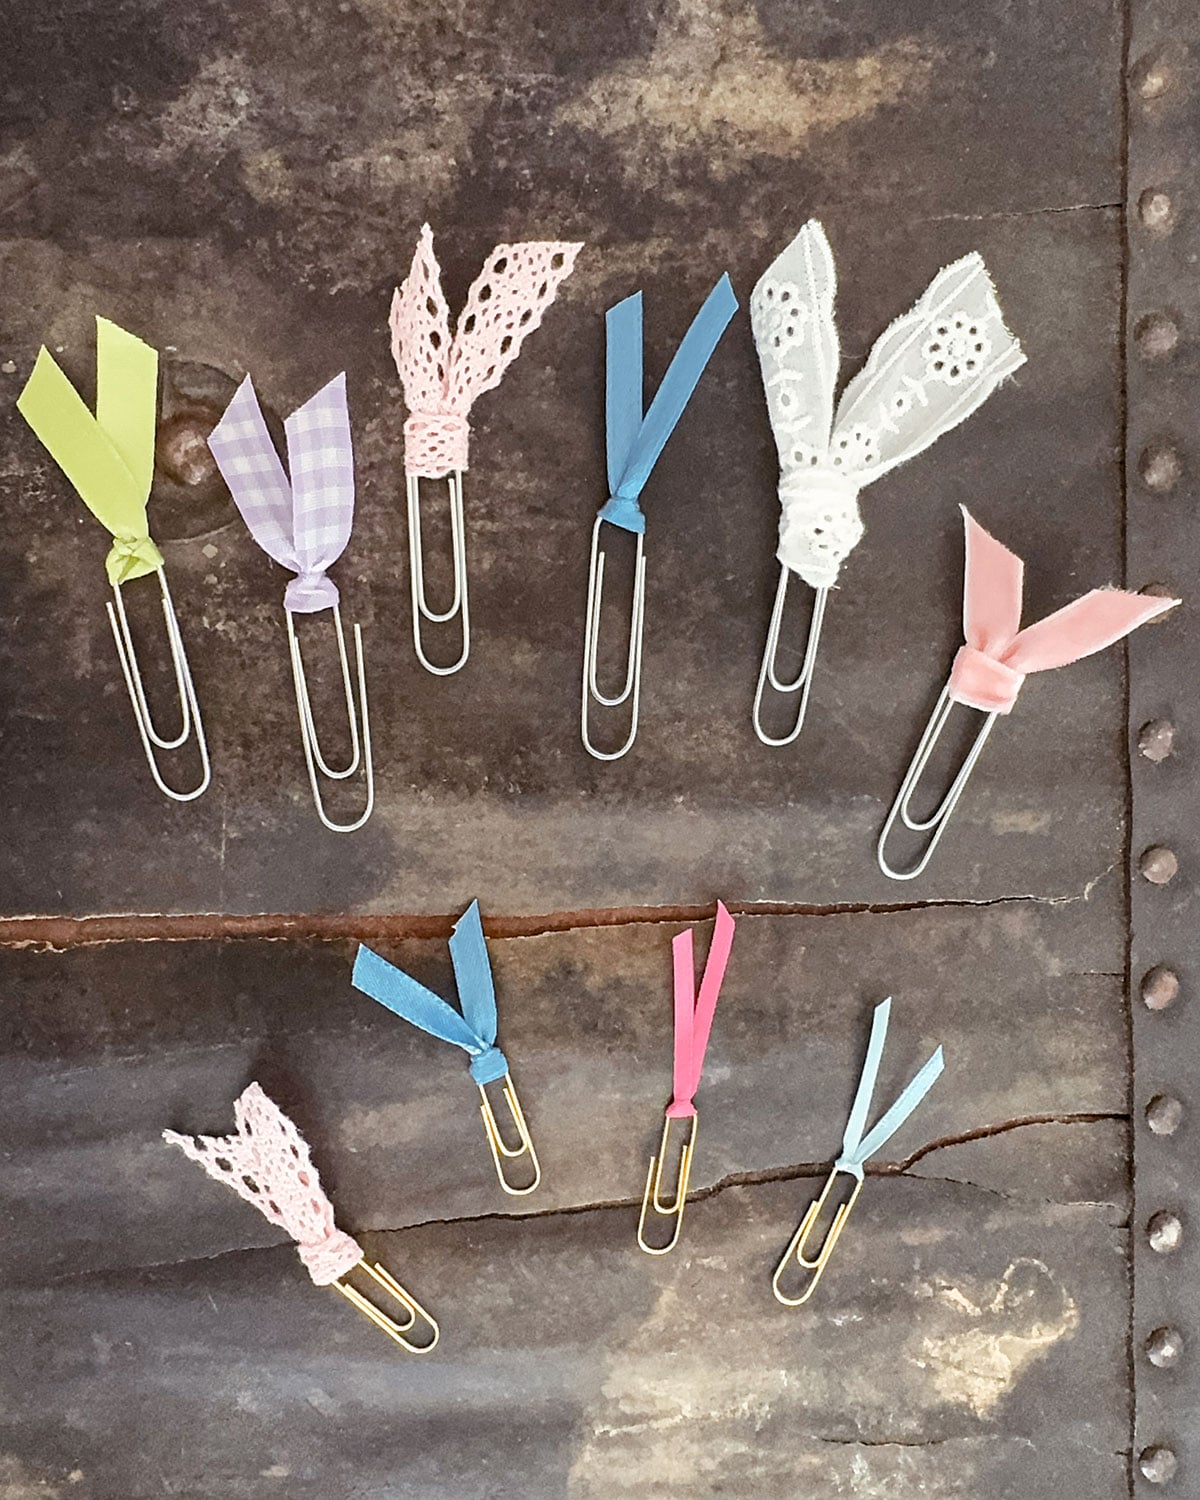
Paperclip Size
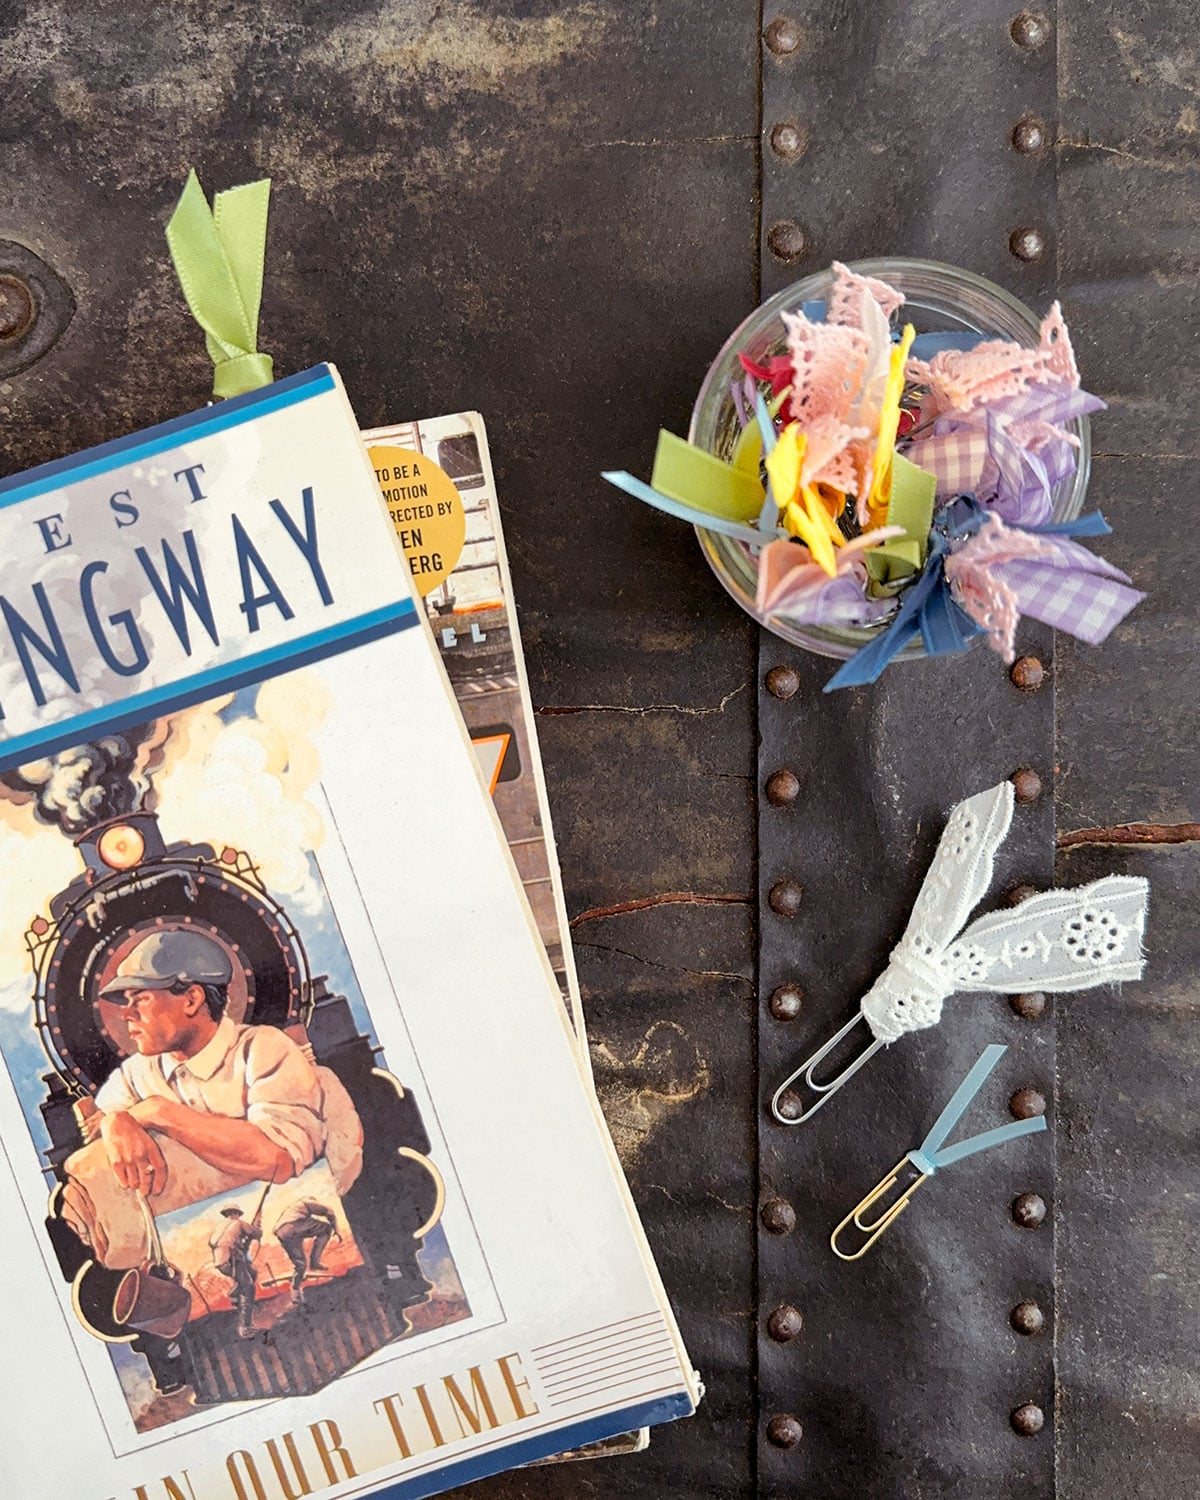
The size of the paperclip you use makes a difference. Below are a few standard-size (1″ length) paper clips vs. jumbo paperclips (3.5″ length). It’s also a great idea to trim the ribbon length differently depending on the size of the paper clip. The jumbo clip can get away with a longer ribbon tail than the standard size.
Ribbon Width
I tried all kinds of ribbon widths ranging from 1/8″ up to 1″. Everything I tried over 3/4″ was an absolute failure and just didn’t work. The 3/4″ width was tough to work with, but I love how it turned out. 1/2″ was the sweet spot for the jumbo paperclips and 3/8″ was the winner for regular size.
The 1/4″ and 1/8″ width ribbons were also hard to work with, and combined with the fact that they were of satin material, made it really hard to knot. When working with this size, it would be helpful to double-knot the ribbon.
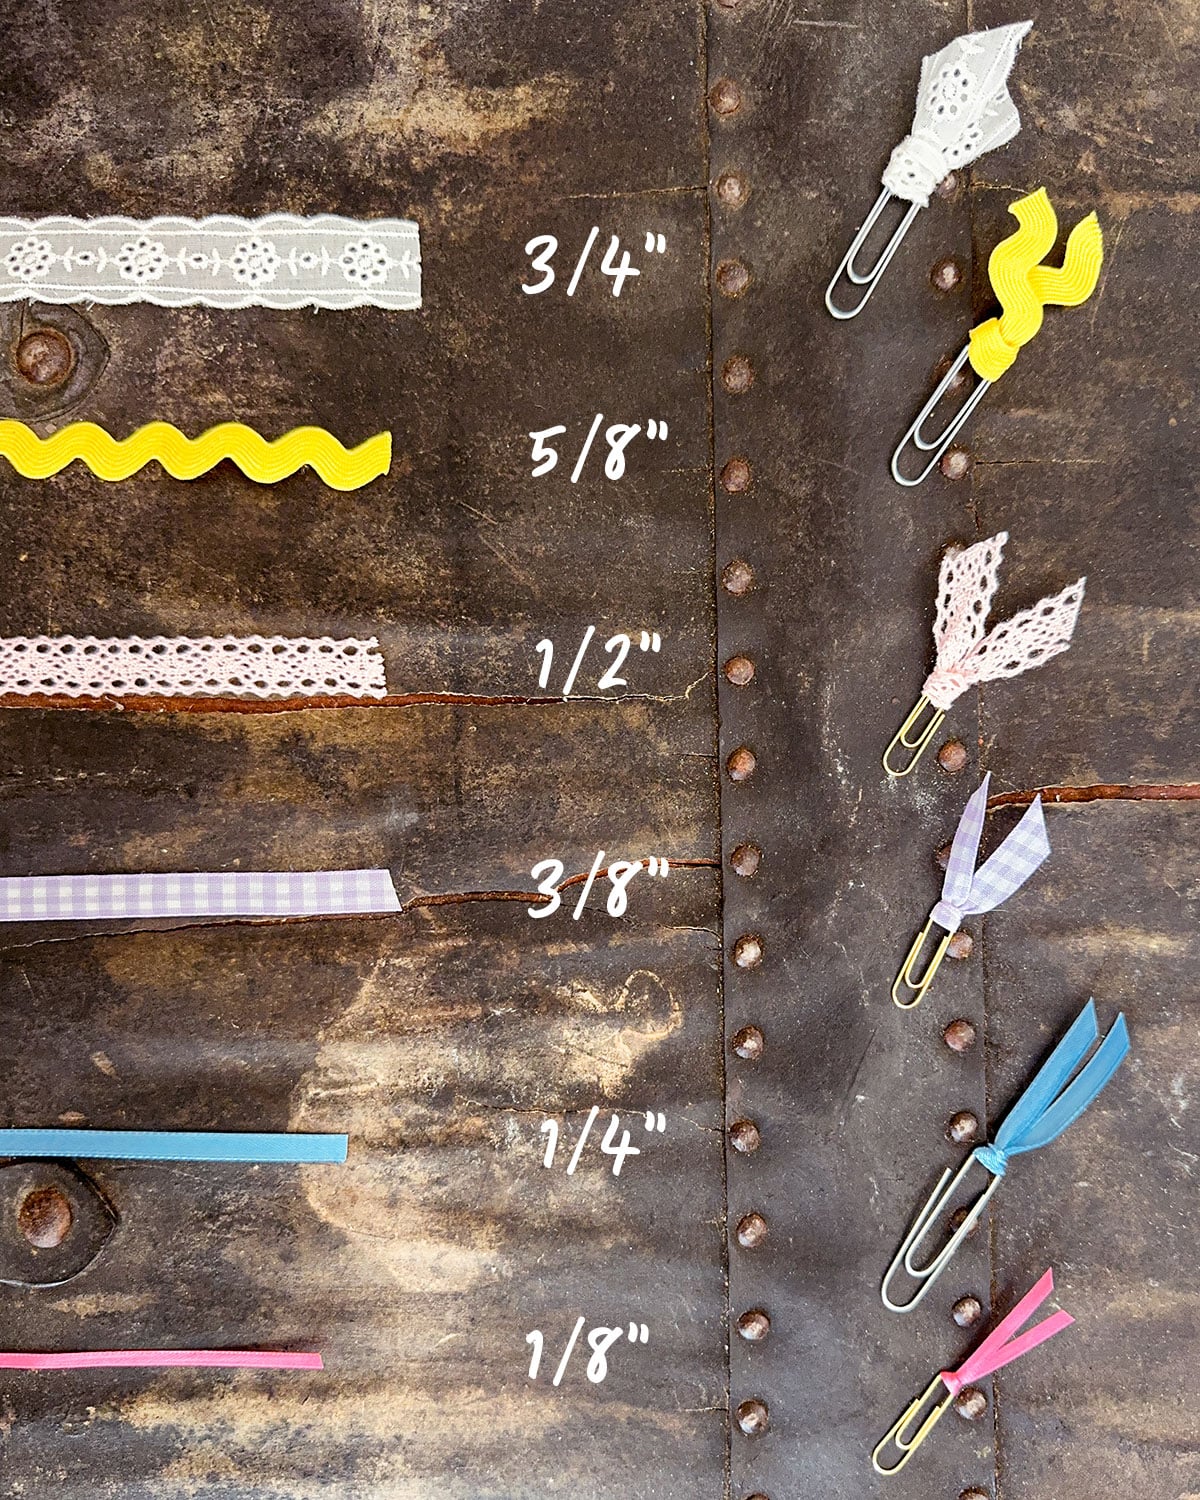
Ribbon Type
I used a wide variety of ribbon materials for this project. From standard satin ribbons to velvet, crocheted flowers, lace, ric rac, and more. Feel free to experiment with different materials. It’s a great way to change up the look of your paperclip bookmark.
Here are some notes on the material options.
- Satin – Easy to work with, shape, and cut. The smallest widths are hard to keep the knot tied, and benefit from double-knotting
- Lace – Beautiful and one of the easiest to work with. Remains in place well.
- Eyelet – Similar to lace, easy to work with, stays in place, looks gorgeous.
- Velvet – Surprisingly hard to keep tied and positioned in place. Also difficult to keep the velvet side facing out.
- Ric Rac – Nearly impossible to knot. The paperclips keep getting stuck in the curves when pulling the knot tight. Looks cute though, and they’re my kids’ favorites.
I hope you enjoy making your own DIY paperclip bookmarks on your next rainy day. It’s such a great way to use up all that scrap ribbon that we makers just can’t seem to part with, because you never know when you might need that 6″ piece of ribbon.
And now, you must excuse me because I have books to read. The TBR stack beckons.
Pssst…Since this post is about books (kind of), I just can’t help it. Tell me, what’s your favorite book you’ve read this year? Or all-time favorite?! Because what reader doesn’t need to be perpetually adding more books to their TBR!