I must have babies on the brain because today’s project is for baby Beatrix’s nursery. Although I guess it’s technically toddler Beatrix’s nursery. Today I’m sharing how to make a DIY pink ultrasound art print.

But don’t leave me hanging if pink isn’t your thing. It’s mine and I know it’s not for everybody. So an alternative title could be “How to turn a sonogram print into any color you can fathom! The Pantone Colour Chart is your oyster!” But that doesn’t have the same ring to it and Google is telling me that’s too many characters for a title. Oy Google!
Why I’m Creating Nursery Art
I’m not sure why I’m working in the nursery. Chalk it up to our baby hitting the 2-1/2 mark this month and feeling all the feels about said baby no longer needing a nursery soon. Maybe that or I’m feeling the must squeeze every ounce of creative joy and making out of the nursery while we still have one. Its days are numbered!
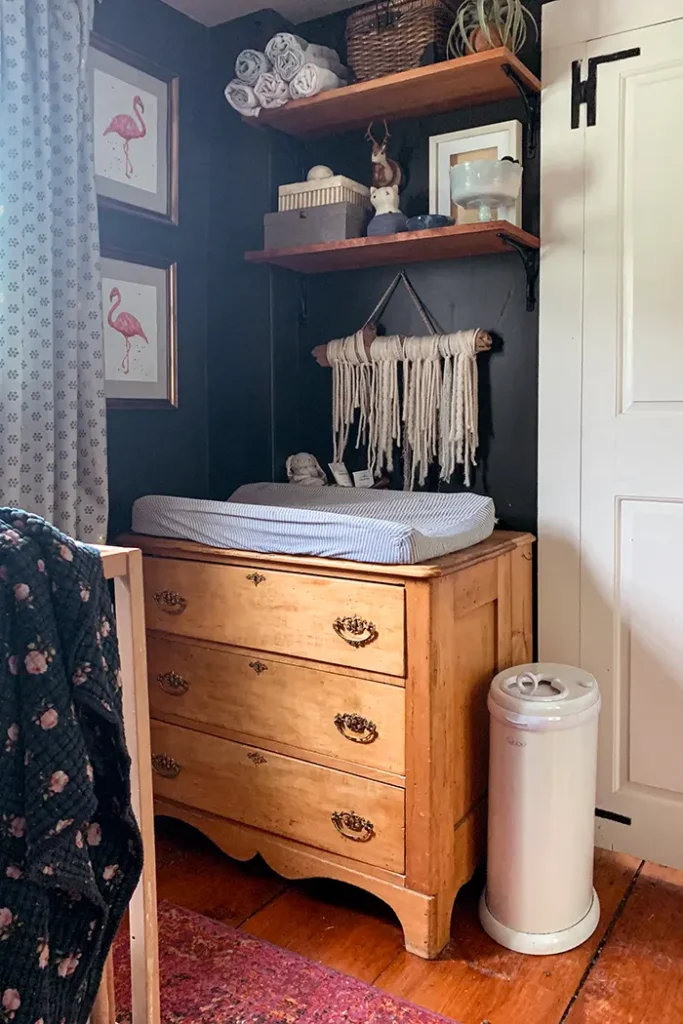
Either way, I’m on a tear to finish and document all things nursery. I spent a decent chunk of time working in the nursery this week. First, trading in Bea’s too-small 3T clothes for 4T, after organizing the space last year it was an easy switch. And then I finally got around to creating an ultrasound art print for Beatrix.

This is my second time creating an ultrasound art piece for the nursery. I made a similar print for Rowan’s nursery to commemorate my pregnancy with her. The print has been living in Bea’s nursery since she came home from the hospital, but lately, Rowan has asked if she could have the print in her room.
I suppose I could go along with that. It is technically Rowan’s after all. But I loved that sonogram art piece in the nursery and the space feels naked without it so it’s about time we make a print for baby (now toddler) Bea.
Ultrasound Art Inspiration
When I was pregnant with Rowan, I wanted some special way to document and display my pregnancy in her room. And let me just go on the record and say framing belly pics and hanging them in here just wasn’t my thing. I love a gorgeous pregnant woman but my belly pics always come across as so awkward. There’s proof in the old expecting Baby Campbell post if you need it. You’re welcome.
Inspiration for the ultrasound art design struck me when I came across beautiful designs on Etsy. I can’t find my original inspiration but it was similar to this Etsy ultrasound print. The ultrasound image was cropped in an oval and the available colors to choose from were very bright. None of them quite fit my house style.

I could have contacted the artist or one of the many other artists creating original artwork from women’s ultrasound images. But I knew I could create a similar print using Photoshop without spending $30+ on a print.
If you would rather buy a sonogram art image than make one, search on Etsy for one. There are so, so many! I’m obsessed with this watercolor sonogram art print and this IVF embryo artwork as well.
They can also be a thoughtful gift for that pregnant woman in your life. Or even as a baby shower gift, as long as you’re close enough to the gift recipient to get your mitts on the original ultrasound.
Choose Your Ultrasound Art Color
Before we get into the tutorial, let’s talk about color. I chose to turn our baby’s ultrasound image into a pink print, but you can use this tutorial and choose a different color. Blue, green, yellow, atomic tangerine, purple mountain’s majesty. You name it and that color is yours! Those grainy black ultrasound images are perfect for transforming into a colorful print.
How To Create A Colorful Ultrasound Art Print
Now that we’ve unearthed Crayola’s most interesting color names, let’s get into the instructions for how to create a pink ultrasound art print. I’m choosing pink for the tutorials because that’s the color I wanted. I know pink is a cliche color for girls but I still love pink and wanted to incorporate the color in the nursery art.

Install Photoshop
These days, installing Photoshop is pretty affordable. Gone are the days of the $700 license fee for the photo editing program. Now Photoshop is subscription-based so you can sign up and unsubscribe after you finish your project.
Adobe also offers a free 7-day trial of their programs, including Photoshop. My favorite plan is the Adobe Photography plan, the one with both Photoshop and Lightroom for just $9.99 a month. It’s the plan I use for all my photo editing for the blog.

Photograph or Scan Your Print
The next step is to digitize your ultrasound pic. Scan it and send it to your computer or take a photo with your smartphone.
I opted for the take-a-picture route since my smartphone has essentially replaced our scanner these days.

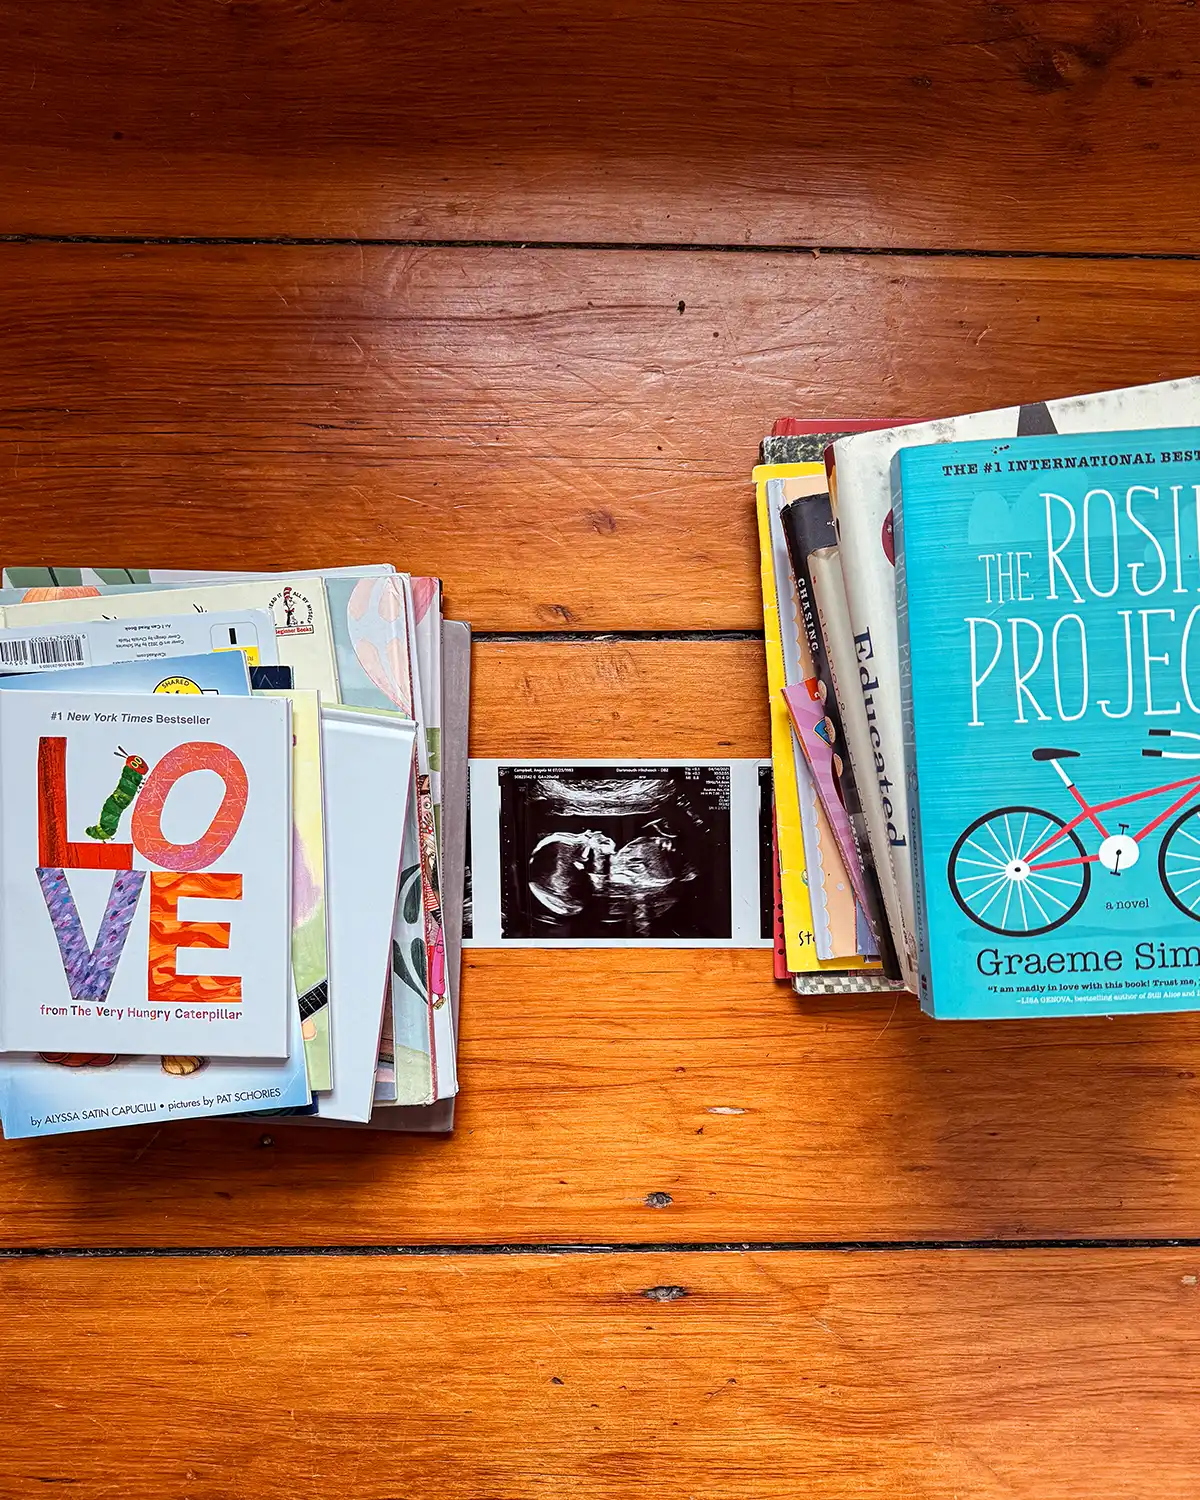
Hot tip for flattening your ultrasound pic because if you’re like me, you received a giant strip of ultrasound pics that you rolled/folded up. Stack books on either side of the ultrasound pic you’re using for your print, pulling each side of the ultrasound strip tight. Then take a picture.
Open Your File In Photoshop
Now here we go, the Photoshop fun! Open your ultrasound image in Photoshop and let’s get to editing.
Duplicate Layer
This step isn’t necessary. But I always like to first duplicate my layer when manipulating a photo like this. I do it just in case I want to easily revert back to the original image.

Then you can hide the original “Background” image by toggling the eye next to the background layer in your layers tab on the right.

If you’ve never worked in Photoshop before, layers are important. You’re only working on the selected layer, adding new elements in new layers.
Crop Image
Next, we’re going to crop the image. This is when taking the straightest possible picture of your ultrasound comes in handy. If your photo is super crooked, there are ways to edit that under “Edit” and then “Transform.”
First, select the crop tool located in the toolbar on the left.

Then select the size of the photo you’ll be printing. The most popular photo sizes are in the drop-down, but you can always select a custom size by selecting “Ratio” and filling in the blank boxes for the dimensions.
I chose to crop at the 2:3 ratio which is the size you need for printing a 4″ x 6″ image.

After you select the crop ratio, the orientation of the crop may be wrong. To switch it from portrait to landscape (or vice versa) hit the arrows between the ratio numbers. When you hit the button, you’ll see the crop on your screen flop.

Then drag the crop lines until it fits around your ultrasound the way you want it cropped. You can crop out the white border or leave it there.
Use the arrows on your keyboard to adjust your photo up or down within the crop area.

One thing to keep in mind when cropping is whether or not your frame has a mat. I forgot about the picture mat when I did this project and it was tight trying to line up the photo so it didn’t cut off the date on the ultrasound.
When you’re happy with how your image is framed, hit “return” to crop your image. Or if you hit any other tool on the toolbar, it will crop your image.

Create A Colored Background Layer
To create a colored background layer, the color that will tint the sonogram picture, you first have to create a new layer. Select “Layer” from the menu, then “New,” and then “Layer.”

Then rename the layer “Color” but you can call it anything you choose.

And then in the layers workspace, drag the new “Color” layer behind your ultrasound image layer.

Now let’s pick your background color. Double-click on one of the colored squares at the bottom of the toolbar on the left. That brings up a color selector. Play around and choose a color you want to tint your ultrasound pic.

I chose a light pink for my ultrasound color. Specifically, it’s hex #f7c9c9.
With your color selected, click on the paint bucket tool and then click anywhere on your image, making sure that you’re on your “color” layer listed in your layers.

Your image stays the same color since it’s a separate layer. But if you toggle the eye next to your ultrasound image layer, making the image disappear, you’ll see the color.
Tinting The Ultrasound Image
Now for the fun part, bringing the background color through your ultrasound image to give it a colored tint.
To do this, click on your ultrasound image layer. Once there, click on the blending mode drop-down options (its default is set to normal). Look for overlay and select it. Your image is now pink!

Feel free to change the color in your “color” layer. You can also play around with the levels of the layer. You can adjust opacity and fill until you get the look you’re seeking.

I’m sticking with 100% opacity and 100% fill for a bolder image but you do you.
Once you get the image where you like it, it’s onto border creation.
Adding A Border
Adding a border around the image helps when it’s time to frame the print. I missed this step when I printed Bea’s pink ultrasound picture earlier this week and it was hard to get it framed without cutting off the ultrasound date. So let’s add that border!
First, let’s color-match the border to the edge of the ultrasound so the border blends. Select the eyedropper tool from the toolbar (circled pink below). Then click on the edge of the dark pink color of the ultrasound (circled black below).

A new color will pop up in your toolbar that will be used when drawing the border.
Ensure you’re working on the ultrasound image layer on top and select the rectangle tool from the toolbar on the left.

Now let’s draw. Don’t worry about being accurate. Just draw a rectangle right on top of your ultrasound image.
And before you click out of the tool, adjust your properties on the right to turn it from a rectangle to a border. Fill should be empty (that’s the white box with the red arrow through it). When you click on the fill color it gives you this color option.
Set the stroke as the new color you picked with the eyedropper tool. Then adjust the stroke size (the border) so it’s nice and large. I went with 120 px but could easily have gone larger.

Now it’s just a matter of dragging the border edges in and out, nudging the border position using the arrow keys on your keyboard, and altering the size until you mask the white border with a color that matches your tinted ultrasound image.
Et voila! Special ultrasound art that goes beyond the grainy black print you get from the doctor’s office.

Saving The Image Layers
Just in case you want to manipulate your photo later, let’s save the image with all its layers. Select “File” from the top menu, “Save As,” name it what you will, and select “Photoshop” from the format drop-down below. Done
Saving The Image For Printing
Now onto saving the image for printing. First, we must flatten the layers.
To do this select “Layer” from the top menu then “Flatten Image.”

A pop-up asks if you want to discard hidden layers. It’s okay to discard it. Just make sure your original ultrasound image is saved somewhere.
Now your image is flattened, with no layers other than the background image. You can check by looking in the layers tab on the right of your workspace.

Now let’s save it in a printing-friendly format. Often a JPEG.
Just like when saving the Photoshop version, hit “File” from the top menu then “Save As.” This time, select “JPEG” as your file format. After you name your file and select a location for saving, hit the “Save” button.
There’s a pop-up to select your image quality settings. If you don’t have size restrictions for printing, set the quality to maximum. If you’re sending the print digitally to be printed, sometimes there are file size limits. Slide the file size scale down to the size you need, then hit okay.

And scene! Send your print off to get printed or print at home and you’re now ready to frame your ultrasound art. I used a basic wood picture frame from Target for Rowan’s print but the one from Bea’s seems to be no longer available.

Here’s a shot of the ultrasound art I created for both Rowan and Beatrix, showing the different shades of pink. After our nursery days are over I would love to find a special spot to hang these prints in our home.

Special Gift For The Nursery
I absolutely adore this ultrasound print hanging in the nursery. I know there are so many ways to add custom art to a nursery (like a baby’s name print or original paintings), but there’s something special about an actual image of your baby in utero. I know it’s not a super high-quality art print, but it’s oh-so-special to me and hopefully for Bea as well.

You can find all the nursery posts and inspiration on our nursery page.
Pssst…So tell me, did you frame anything special to hang in your nursery? Or create any art for your little one?