In our old farmhouse, we have two attic spaces. One is above the main part of the home. It’s a giant walk-up attic that we use to store all the things, like Christmas decorations and hand-me-down kids’ clothes. Then there’s this other attic space above the keeping room.
It’s the small section to the side of our main home. You can see the keeping room attic to the right of the picture below. You can also get a feel for the layout in our whole house renovation floor plan. We’ve always dreamed of finishing an unfinished attic space to create some extra storage and today’s post is all about that journey!

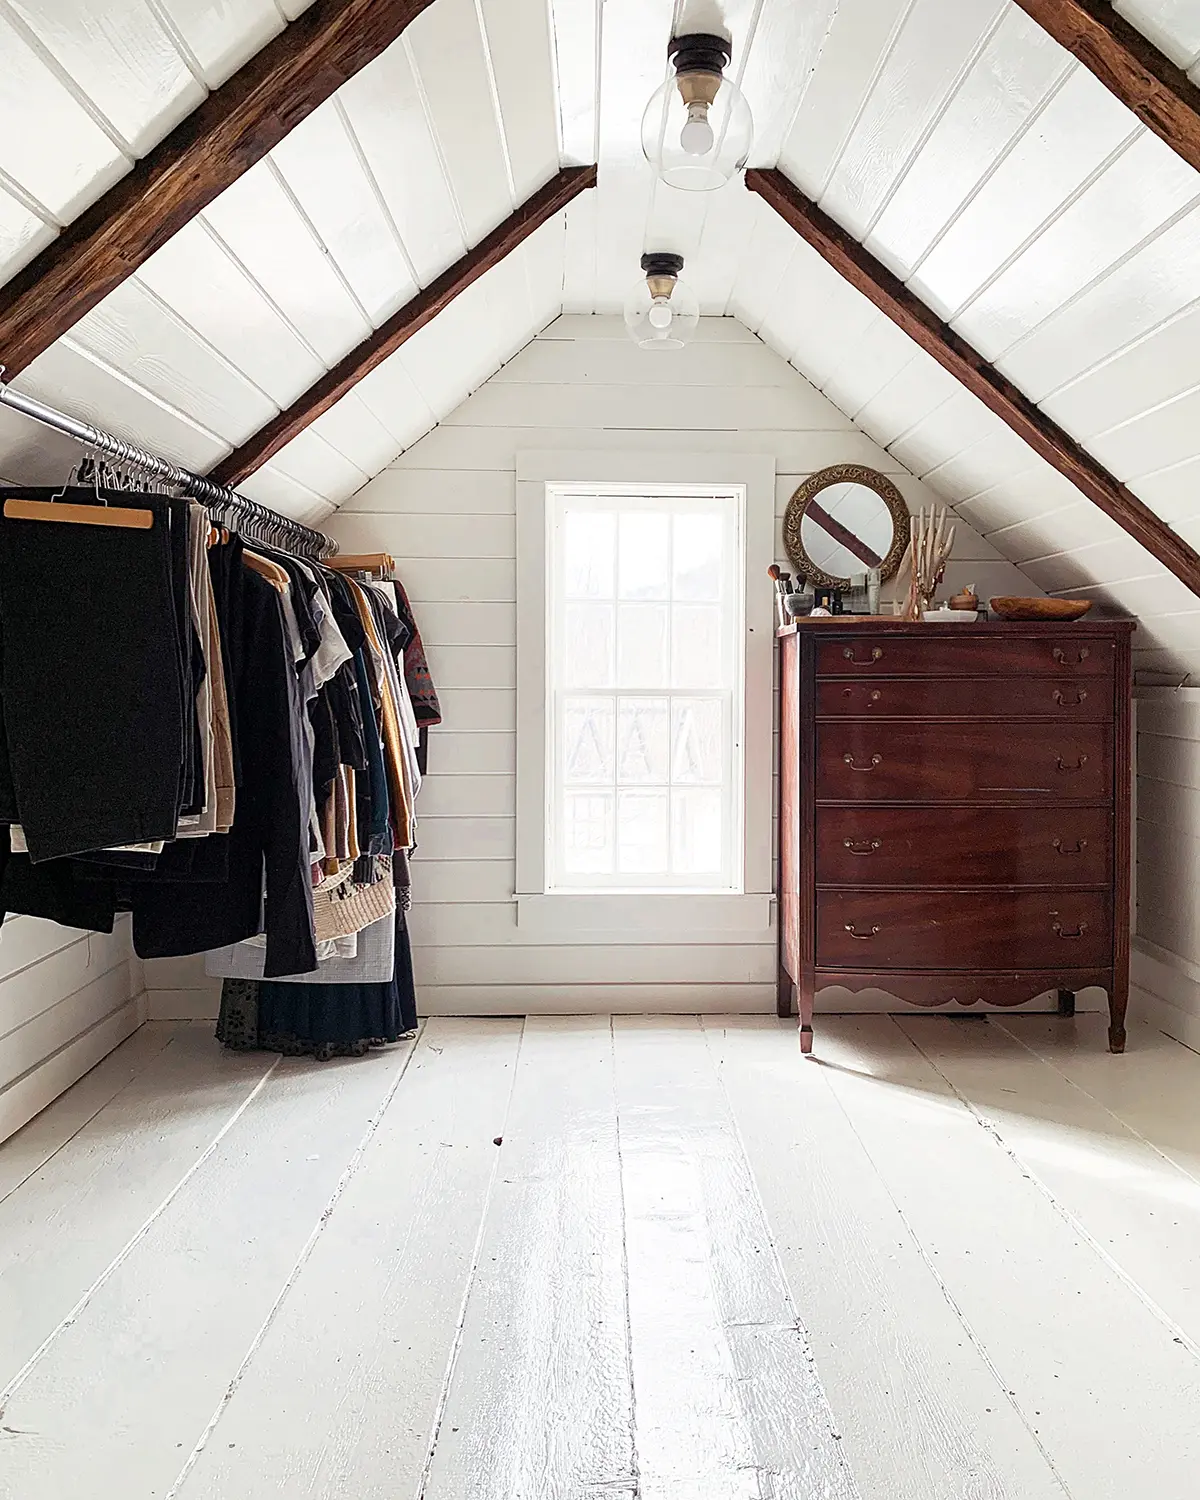
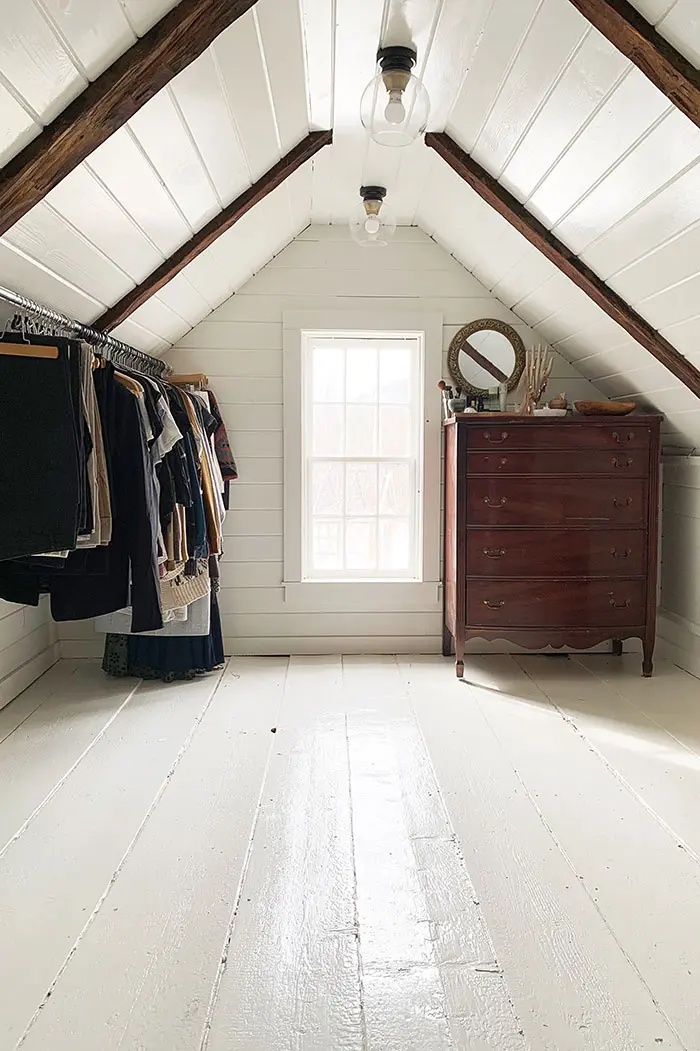
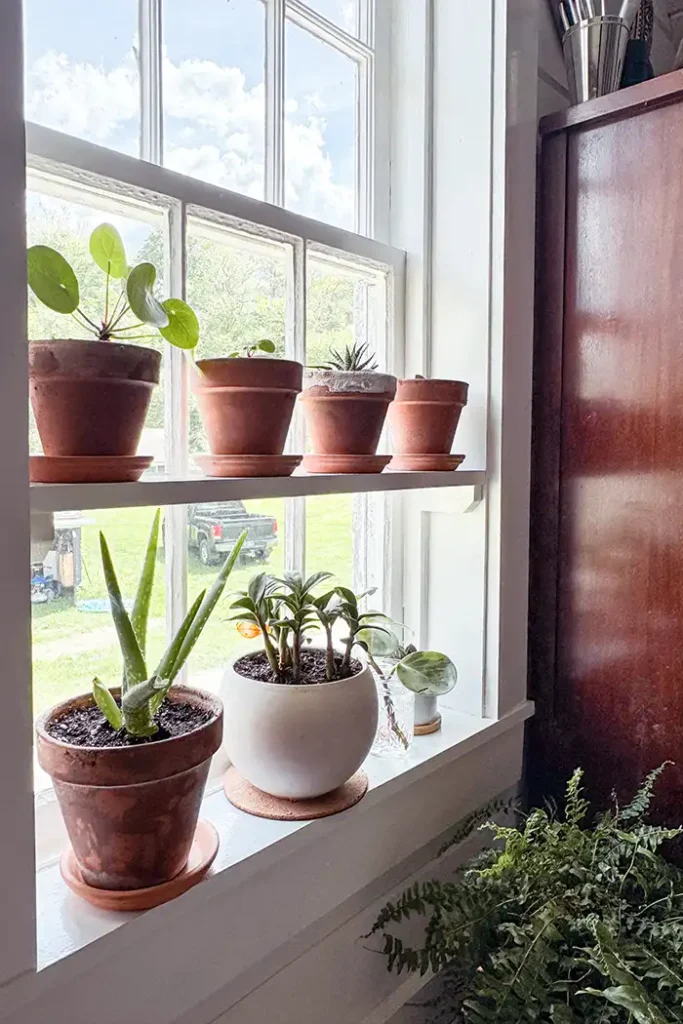
That attic space is off the bathroom in our primary bedroom, making it strange to do anything other than turn it into a closet. We have wanted to finish the attic since we first bought our home but haven’t prioritized it until recently. Given that our old 1700s farmhouse lacks closets, it’s the perfect space for a giant walk-in closet. How dreamy would it be to get out of the shower, step into this attic space turned closet, and get ready for the day?! So dreamy!
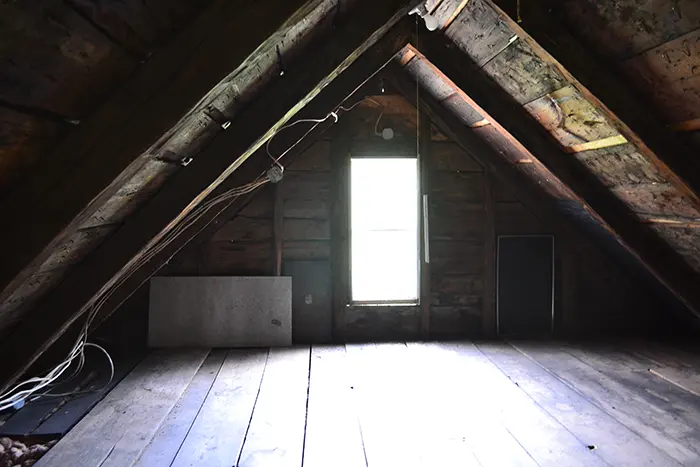
We started this project two summers ago and here’s where we began:
Important Information For Finishing an Unfinished Attic Space
Before we get into the details of how we went about renovating and finishing an unfinished attic space, just a few words of advice. It’s important to consider a few things if you’re looking to do something similar.
One, be sure to abide by the building codes where you live. There are precisely zero building codes where we are, which is a little strange but it’s rural Vermont. Many towns do have a planning commission with building codes to abide by. When we renovated our old house in Maine there were pretty strict codes and inspections for projects of this nature.
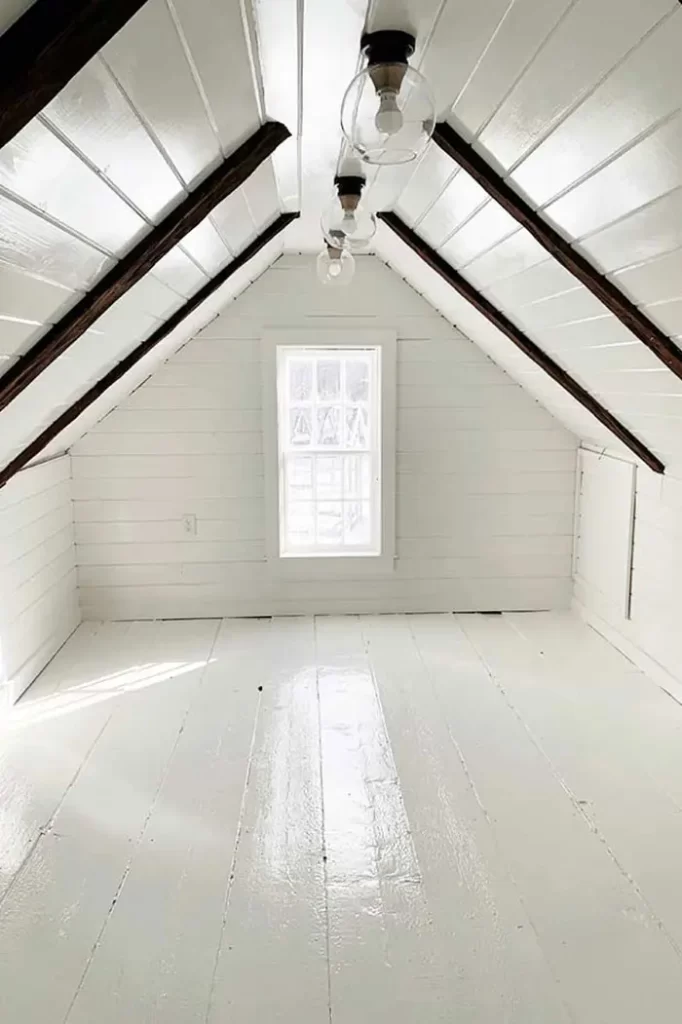
Two, factor in the height of the attic for both usability and code requirements. Is the attic truly tall enough to make the space usable? Can people move around and function in the space? Many codes for attic finishing projects require a certain amount of usable space with a minimum height. Our attic space is only tall enough in the middle but I planned on using the shorter areas for storage. At 14′ by 18′, it’s also plenty big to function the way I wanted.
Three, think about the structure below and if it can bear the weight of the project. It’s one thing to store boxes in an attic, but another to bring in lumber and finish materials. Finishing an unfinished attic can add a significant amount of weight. The framing and floor joists may not be able to support it.
Four, think about ventilation systems so air and moisture can circulate throughout the attic. Airflow is super important in a home, especially an attic. Proper attic ventilation helps with excessive heat, cold, and moisture that can wreak havoc on a home. I remember my childhood home having significant ice dam issues that resulted from incorrect attic ventilation. Consider adding ridge, rafter, and soffit vents.
And finally, think about access. Our attic is strange in that it’s only accessible from a bathroom. There’s no way our attic could pass as a bedroom to add square footage to our home. If you’re looking to finish an attic to increase the livable space of your home and increase resale value, there are often stricter rules to abide by. Also, some attics are even less accessible than ours. If an attic is only accessible by a ladder or pull-down stairs, factor in the space and expense required to add a staircase.
How We Finished An Unfinished Attic
Here’s the basic outline for the steps we took to finish off the attic space. This was once we had an idea of how we wanted the space to function and made sure the framing was sound.
Screwed Down the Floor
The old floorboards in this space were not well secured. Before we did anything else, Colby went through with a box of screws and screwed down the boards in a million places.
Built Knee Walls
We wanted to continue to have access to the electrical wires and the soffits, which are located approximately where the eaves meet the floor. It was also important to have airflow to the attic space from the outside. To make this happen, Colby built two knee walls with access panels. The knee walls also helped define the usable space.
Roughed in Electrical
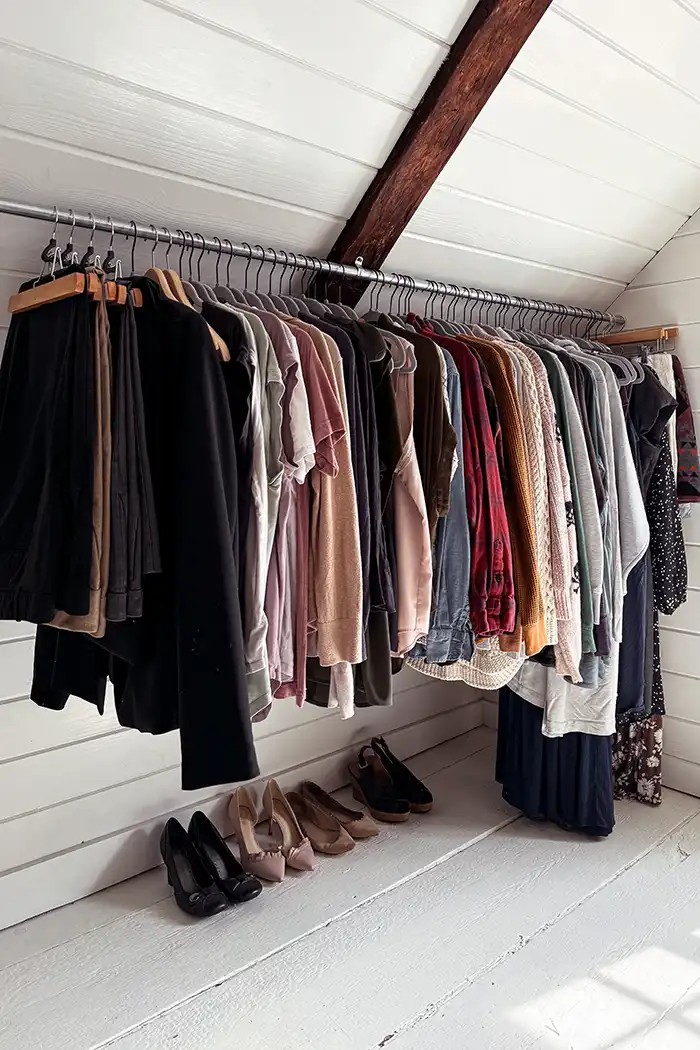
With the framing of the knee walls completed, we had an electrician wire a few outlets and add light boxes for a trio of overhead light fixtures. Learn from mistakes when it comes to outlet planning folks! In our attic the outlets are all on the left side with none on the right. My original plan was to have furniture on the left and a closet rod on the right but once we got the furniture up there, it fit better flopped. Now I wish we had just added outlets to both sides because you never know.
Install Rafter Vents
Again with the ventilation! I know, I know but it’s important and you don’t want a moldy, musty house OR ice dams. Rafter vents, often called baffles, allow air to freely move through a channel. Air comes into the attic from the soffits, moves through the channel, and out through the ridge vents.
Add Insulation
Next it was insulation time. Because we wanted to keep the beams of the attic exposed, we had a maximum depth for insulation before adding v-groove planks between the beams. Colby added the highest R-value insulation he could without it being too thick for the space.
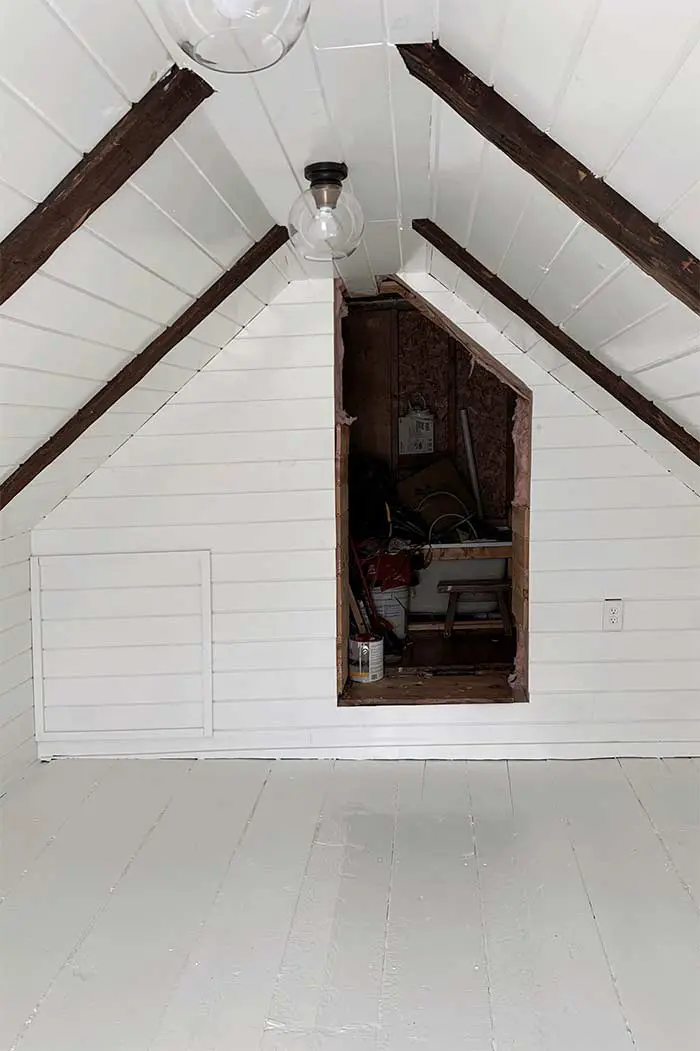
Built Attic Access Panels
Because we wanted to keep access to the soffits and crawl space above our kitchen, Colby built three access panels. These panels can easily be removed if we need to access those spaces to make repairs or run new electrical. Here’s a view where you can see the kitchen crawl space access panel to the left of the bathroom door.
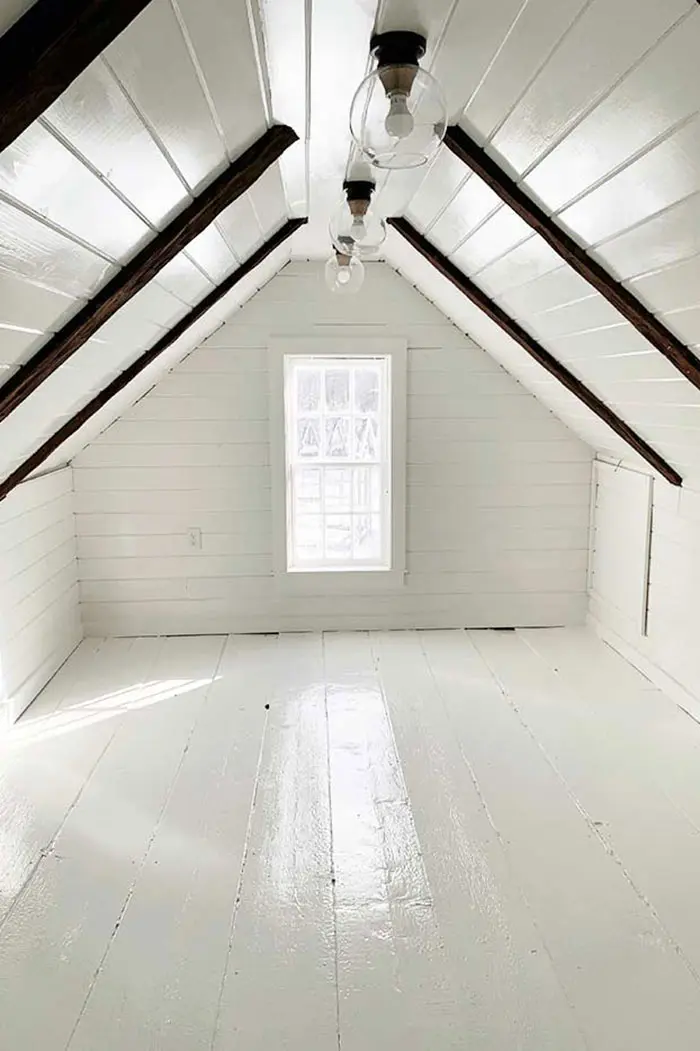
Installed V-Groove Boards
This is where the renovation project really started coming together! We installed v-groove pine boards on the ceilings and the walls. I love the look of a v-groove paneled space. We used it for the bathroom renovation in Rowan’s room and plan to use it in many more spaces in our home.
Painted the Wood
We first primed all the knots with Zinsser B-I-N, which is our favorite primer for knotty pine. Then it was onto two coats of paint. All of the v-groove got painted with Benjamin Moore Regal Select Semi-Gloss paint in White Dove. The floors were finished with Benjamin Moore ADVANCE Semi-Gloss paint also in the White Dove shade. It was the first time I had used the product and was so impressed with its durability. The paint went on thick and dried to a super durable finish. It’s a popular product for furniture and cabinet painting as well. I may have to give it another try on another project.
Finishing Touches For Finishing an Unfinished Attic
Then came the literal light at the end of the tunnel. It was the “let’s pump these out so we can start moving in” finishing touches stage of the project. We installed a trio of bronze flush mount light fixtures from Home Depot, added outlet covers, installed trim and baseboards, refinished the window, and touched up all the paint.
I’m just going to take a moment to shout out how amazing Colby is because he scribed in the baseboards in this space. Let’s just say this attic floor is about as level as a ruffled potato chip. Meaning baseboards don’t line up flat with the floor. He used a jig saw to custom cut the bottoms of the baseboards so they all look like the floor is flat and level. That is patience I just don’t have, folks! Kudos to Colby!
Turning the Attic Into a Walk-In Closet
Now is the fun part for me, turning our previously unfinished attic space into a walk-in closet. I am by no means close to done with the finishing touches in this closet, but it is so nice to have a space for all my clothes to live happily ever after. It’s the first time since we moved into this home that everything I need to get ready in the morning is in ONE SPACE. I am a changed woman! It’s amazing how finishing an unfinished attic in our home added so much functionality and some calm to my morning routine.
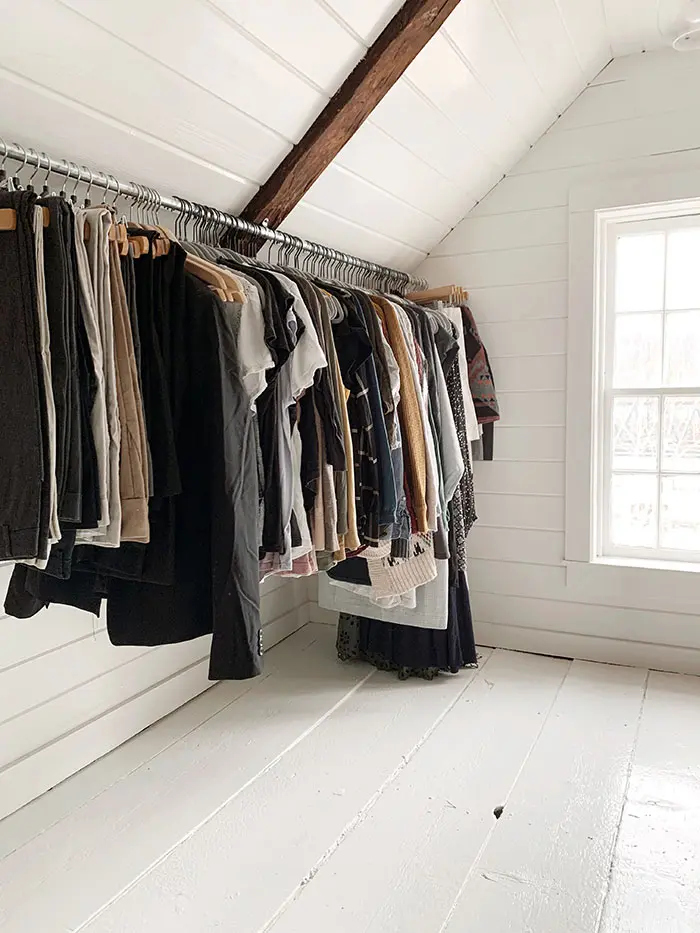
I pulled all of my clothes out of storage in the big attic and either hung them on the hanging rod or tucked them into the dresser. Everything is now visible, even the things that don’t fit. I’m really trying to pare down my clothing collection even more so than I already have but it’s getting difficult. Like so many women I swear I’m going to lose the baby weight and fit into my old clothes but at this point, I should probably just let them go. I have found that it is so much easier to weed out clothes I don’t need now that I see them on a daily basis. About every other day, I’m pulling a piece off a hanger and tossing it into the donate pile. Hot tip…keep a donation basket IN your closet to collect all those castoffs.
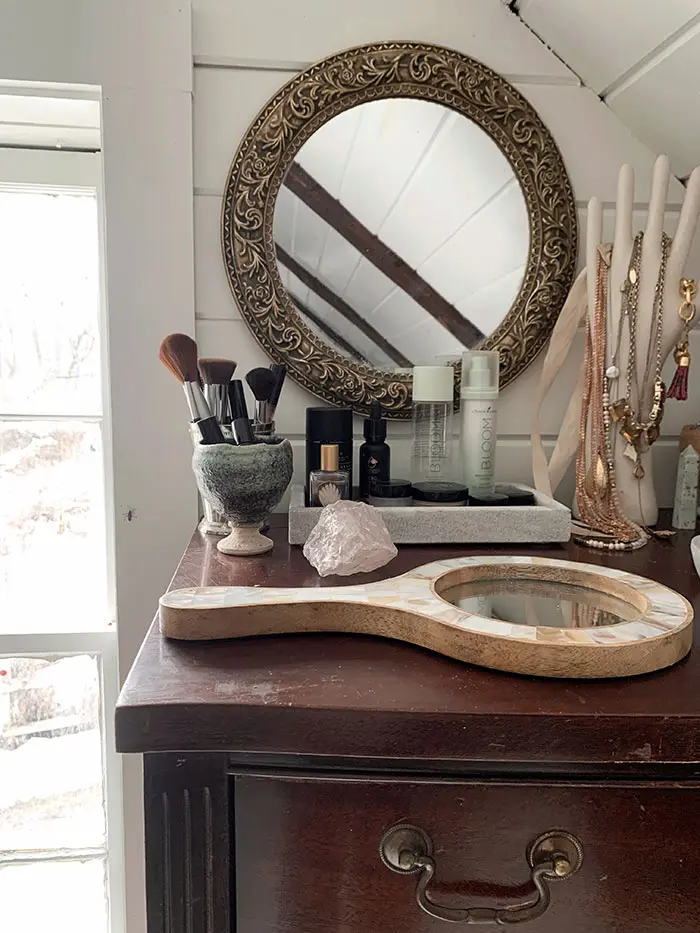
Can we also talk about the vanity nook for a second?! Not only are all of my clothes in one space but so are all of my jewelry, makeup, and hair accoutrements. It is dreamy and magical and never in my adult life would I have imagined having a space like this to get ready in. This is what middle school Angie dreamed of, except throw in a hair crimper for good measure.
There’s still so much that I want to do in this space to really finish it off. Not to mention there’s a whole bathroom attached to this room that is in desperate need of our attention. It is likely the next major project and will be capturing our focus in the near future.
Because I love lists and I just cannot leave this post hanging without a “finishing an unfinished attic space” to-do list, here are my plans to truly finish the attic-turned-walk-in closet.
- Find a vintage rug (or rugs)
- Make a linen shade for the window
- Paint the blue stained wardrobe (it’s for bathroom storage)
- Finish organizing (there’s still so much unused space that I’m not sure what to do with)
- Maybe build storage shelves for baskets or add a dresser to the right of the bathroom door
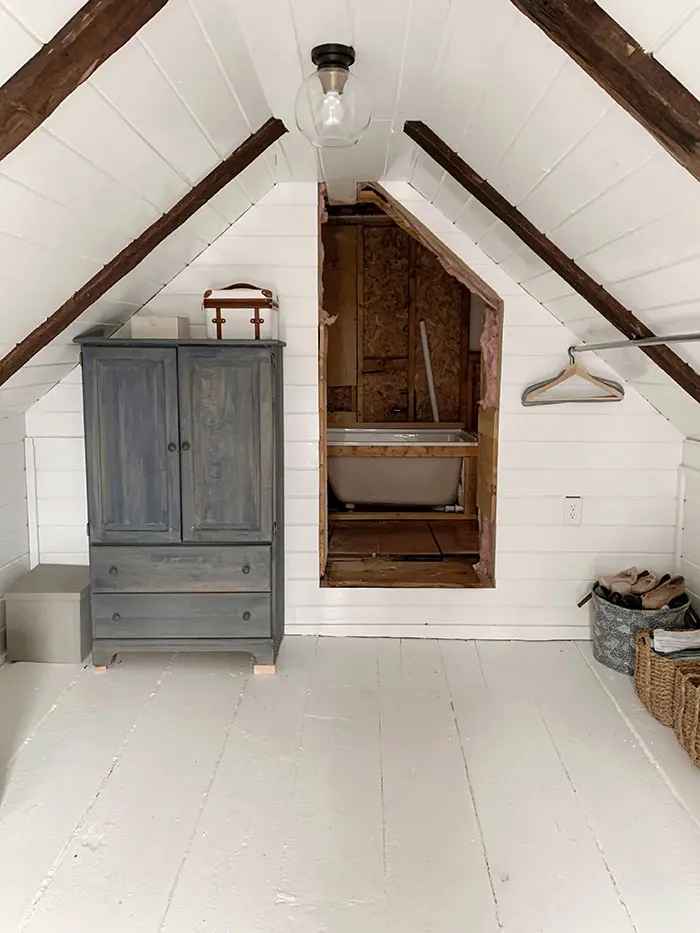
I’m still very much undecided about what I want to do on this half of the attic. There’s so much storage space to work with. I’ll probably give it some time and figure out what other things in our home need a place to live and shuffle some other things in here. Maybe our suitcases? Or the kids sleeping bags? Stay tuned. In the meantime, send me your best ideas!

I love this space! What a great idea!
Thank you so much! We just couldn’t let that kind of space go to waste when living in the land of no closets!
Love love love
Thank you!