We’ve mentioned this a few times, but we have been super hesitant around the Campbell Compound (#circa1781) about doing any major renovations until we figured out what our whole house master renovation plan would be. Granted, we did do a major guest bathroom remodel but we knew that’s what we wanted without a single doubt. Other spaces have been less certain. Like the kitchen. Or Colby’s office. Or the downstairs bathroom which has looked like this for the last few years:
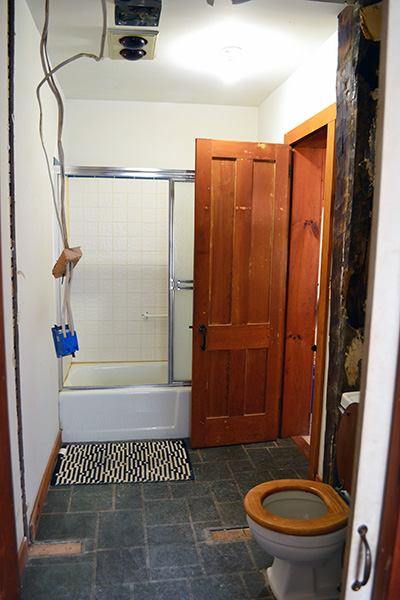
Gah! Thank goodness this space is now a work in progress. But anyway, back to the whole house master renovation plan. We spent the bulk of our summer working on a must-do project, painting the exterior clapboards of our home. And by we I really mean Colby because (A) being pregnant he wouldn’t let me on ladders and (B) being pregnant and nauseous this summer, painting in the heat really didn’t settle well with me. While puttering away at that painting project, we had some serious time to think about how we wanted to use our home and what our ultimate plans were for it renovation-wise. Having a master plan meant we wouldn’t be spending serious dough on a renovation project just to hate the idea a few years later because it didn’t really work for us. So today, we’re going to talk about our master renovation plan.
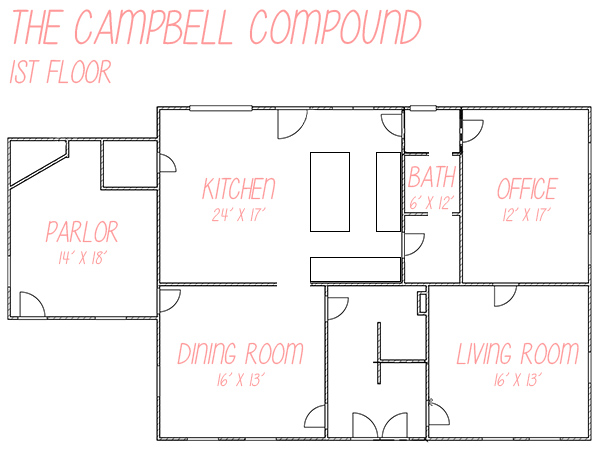
So here is how our house is currently laid out on the first floor:
And the second-floor layout:
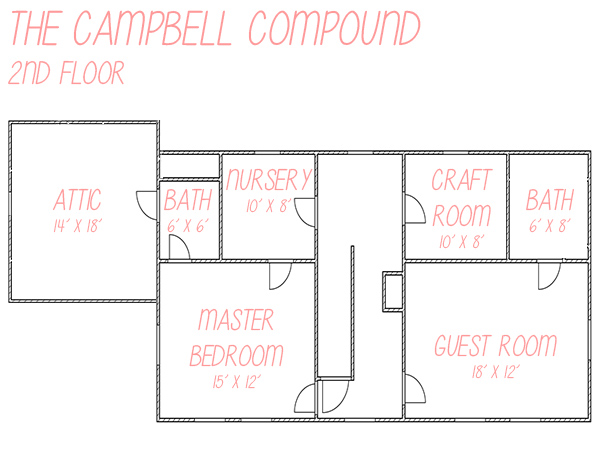
We don’t hate the house layout, but there are definitely a few places that we would like to make some edits. After some serious mulling over the floor plan options and about 8.2 million different versions, liking each version just a little bit more than the last, I think we’ve finally settled on a whole house master renovation plan to help guide our renovations. First up, the master renovation floor plan for the first floor.
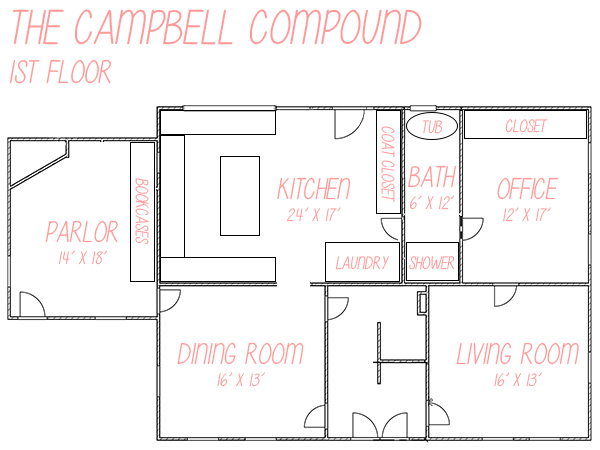
The biggest changes that we’re making when we renovate the house are happening on the first floor, particularly the kitchen. The dining room, living room, and front entry are pretty much staying the same. The biggest change to Colby’s office is adding some built-ins, or as Colby refers to them a “man closet” to house all his hunting and fishing gear in a convenient location. But the other spaces are getting a major overhaul.
Let’s talk about the parlor (our second living room) for a second. Here’s the last photo we took of the space before we moved the living room to the other side of the house:
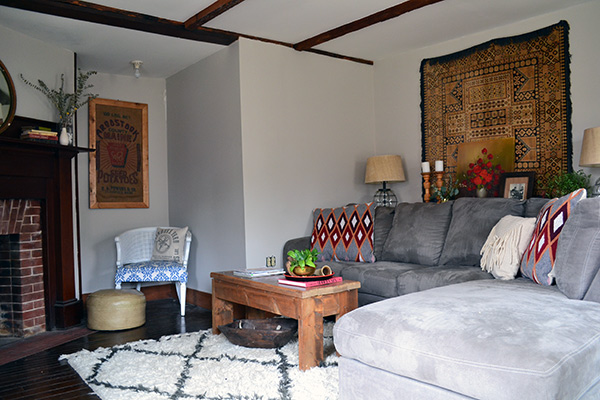
A few major changes are going to happen in this space. First, do you notice that big jut out between the chair and the couch? That’s currently the coat closet in our kitchen. During the kitchen renovation, that closet is going away which should open up the parlor a bit more, making it square. That also allows us to build some wall-to-wall, floor-to-ceiling bookcases on the wall behind the current couch.
The fireplace is another area that will end up getting an overhaul. Not so much in looks but more in terms of functionality. Currently, the fireplace doesn’t function since there is no chimney. We either want to hire a mason to build back the chimney or insert a wood stove in the fireplace along with a stove pipe venting outside.
Finally, we plan to completely rip out the floor in this room and replace it. You can’t tell in the pictures, but this floor is totally out of whack. It rolls, it dips, and you can’t open the front door all the way because the floor curves up under the door.
Let’s talk kitchen game plan because this is where we plan to make the biggest changes to the house. Our kitchen currently has two distinct sections to it. One side is the actual kitchen side and the other side is for storage and an entry/mudroom of sorts. It works for us for now, but we dream of a better use of this massive 24′ x 17′ space. So we plan to completely overhaul the kitchen and flip the two zones. So the current kitchen side, this side:
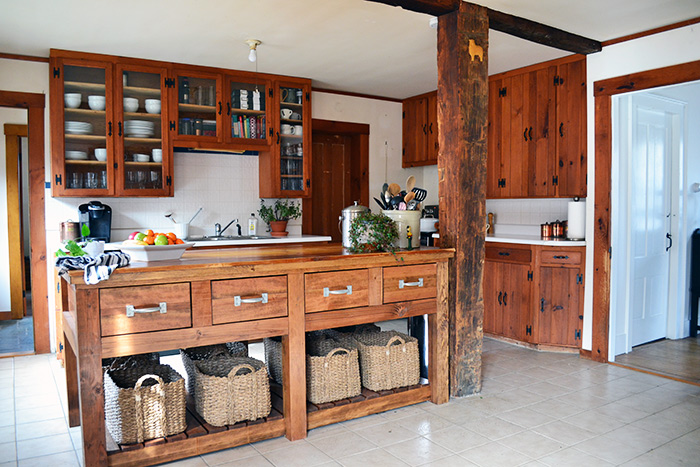
Will become a mudroom and laundry space. We plan to move the kitchen entry door to where the window currently is, just to the left of the kitchen island above. Where the sink and cabinets are will become a built-in mudroom closet. The cabinet section behind the beam, where the stove and cabinets are, will end up in a laundry nook (our laundry is currently housed “temporarily” in Colby’s office).
Then the other side of the kitchen will be an expanded, dream kitchen:
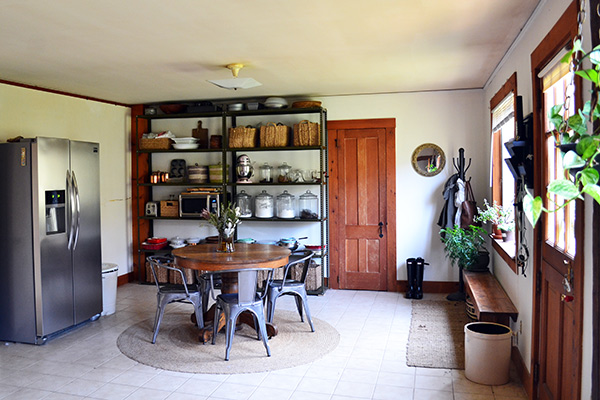
This space will be entirely kitchen space. Just imagine wrap-around cabinetry starting on the left at the refrigerator, wrapping all the way around to just to the right of where the door currently sits. That closet will come out and an island (likely a different-sized one than the one we currently have) will be planted in the middle. The bench area will house cabinets, an apron sink, and the dishwasher under a set of huge windows overlooking the backyard. I’ve always dreamed of having a sink overlooking the backyard and made sure to work this spec in. The back wall will have an overly large gas range centered on the wall, think Viking range with a double oven (I told you…dream kitchen here). The wall where the refrigerator currently is will have deep builtins surrounding the refrigerator to serve as pantry storage. I’m also envisioning an island with a counter overhang for stools.
The kitchen is a major, gut job type of makeover so we likely won’t be tackling this for a while. But because of how we want to rearrange the kitchen, moving the actual working kitchen part to the other side of the room, means we can chip away at the renovation while still keeping our current kitchen usable. We can also take our sweet time on the project, which is great because we want to take a stab at building our own cabinetry.
The third major overhaul on the first floor is the bathroom:

Yeah…that bathroom. We’ve already blown out one wall in this space, but just imagine if we blow out another wall, this one:
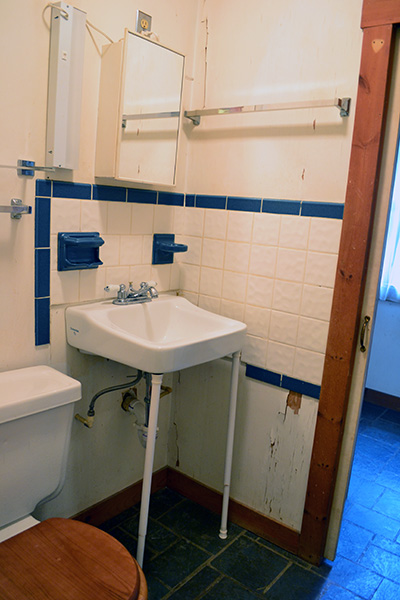
Expanding the bathroom into that little hallway space between the kitchen and Colby’s office. I’m envisioning a big, old clawfoot tub for soaking under the window, a larger vanity/sink, the toilet pretty much in the same spot, and removing the current tub/shower combo and replacing it with a large, glass door shower.
This space is one of the spaces we’ve waffled on a bit, especially when it comes to having two entry doors. One door to access the bathroom from the kitchen and another door to access the bathroom from the office. We’re thinking long-term here when someday we don’t want our bedroom and bathroom upstairs. Whether it’s because we have a house full of kids and the kids’ rooms are upstairs. Or if it’s because we’re old and decrepit and just don’t want to go up the stairs all the time. Thus why we want to expand the current first-floor bathroom to master bathroom status with a separate tub and shower and also why we want to keep the bathroom accessible to visitors.
Enough about the first floor, let’s roll on upstairs and address the second floor of our whole house master renovation plan:
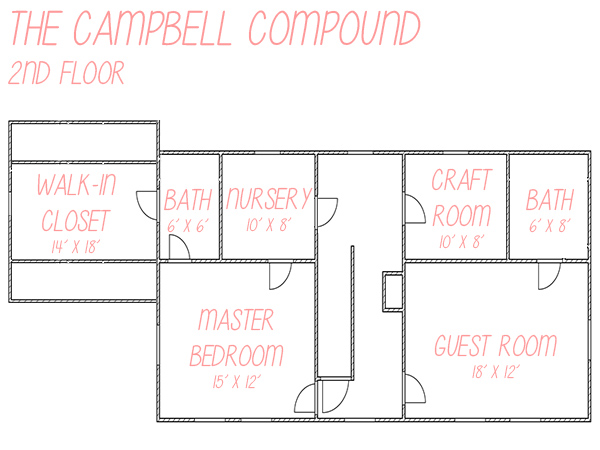
There aren’t a huge amount of changes going on upstairs. Mostly just cosmetic work. But there are a couple of things happening here.
We already renovated the guest bathroom earlier this year and absolutely love it, but our “master bath” if you can call it that, still looks like this:
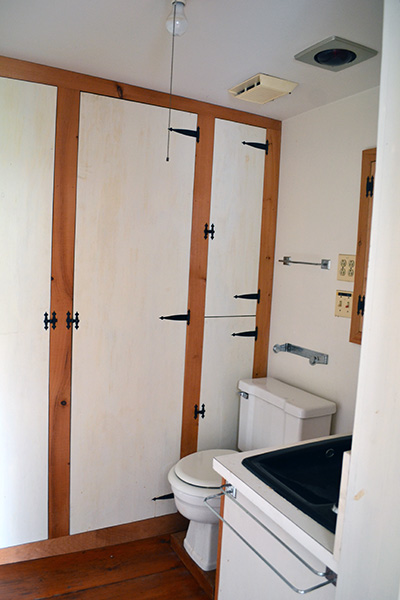
So we want to give it more of a master bathroom feel. Think tons of subway tile, a soaker tub, and possibly blowing it out a bit, size-wise, into the attic space adjacent to this room. You see, there’s this little random door off the bathroom that goes out into the attic above the living room. Here’s the door:
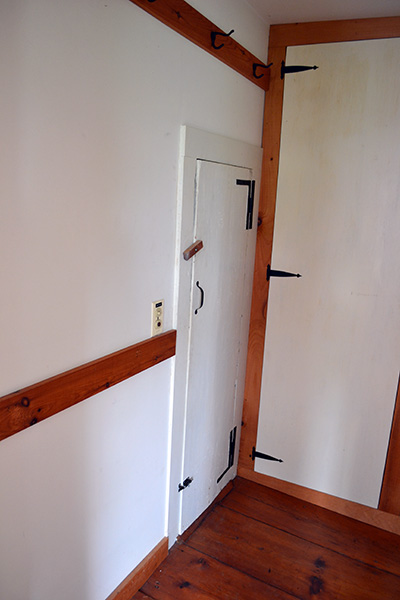
And here’s the attic space:
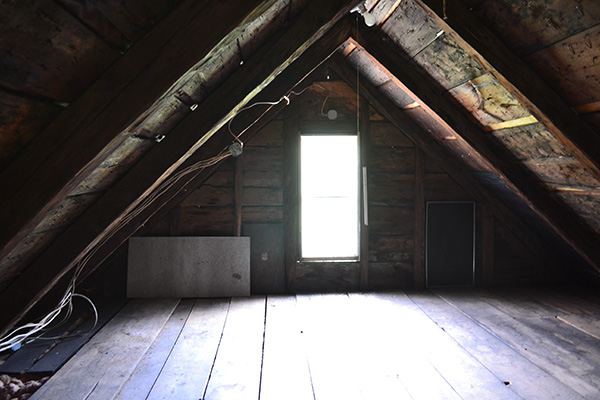
We’re still not quite sure how we’re going to go about doing this or even if it’s really doable, so it could be a big fat fail and we scrap the idea. But our ultimate goal is to expand the bathroom a bit and also build out the attic to be a his-and-hers giant walk-in closet. It’s better than its current use as a bat house (bats like to live in here in the summer…ick).
We also have a third-floor, walk-up attic that may be fun to finish someday into a guest bedroom or maybe a kids’ bunk room or play space of some sort. But it’s also nice having the attic space just to store junk. Like light fixtures, I hoard from the dump or my ever-growing collection of Christmas decor. Can one ever have enough wreaths?!
So now that we have a whole house master renovation plan, it’s making it much easier to decide what to work on and how much effort and money to put into projects. For instance, now that we know the first-floor bathroom renovation likely won’t happen for several years since we intend to renovate the kitchen first, we’re okay with spending a couple hundred bucks to give it a “for now” makeover. We were hesitant before just in case we wanted to do its “forever” makeover. The plan also helps us decide what to work on first since some spaces need to be renovated before others. Like kitchen remodel before parlor remodel.
We’ve already started working on the first-floor bathroom and it’s currently in a respectable state (thank goodness since we hosted Thanksgiving for about 30 this year). So stay tuned for some bathroom makeover posts along with some nursery progress.

