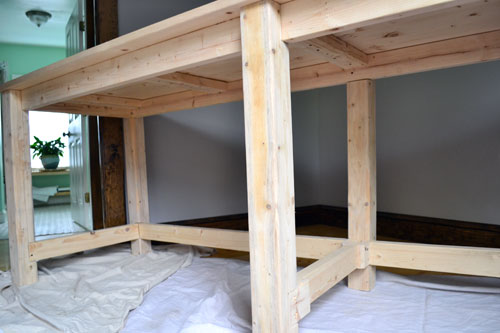
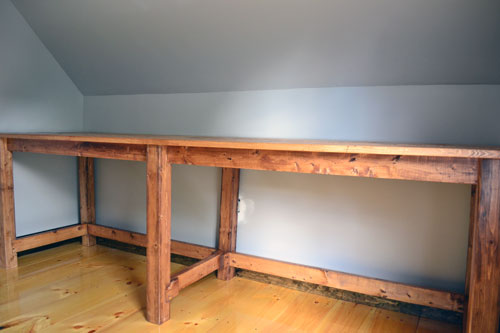
A few days ago we introduced you to the newest member of the family…the beefy desk.

As we mentioned before, since the cheaper-than-it-should-have-been-because-it-was-really-wet wood needed some serious dry time, we let the desk air out a bit before staining it. More like let it air out for about two weeks-ish before staining it. I probably didn’t need to wait that long, a week would have sufficed, but I tend to overdue things. And I was too busy doing other things…like Facebooking and Pinteresting, you know, REALLY important stuff. So desk staining got put on hold. After a weekend of staining and polying, the desk looked a little something like this:

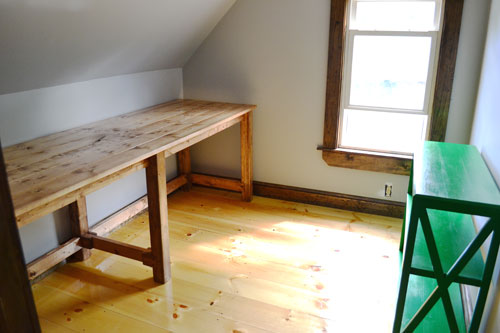
Now that’s a purty desk! And one that’s ready for some serious Etsy shop madness! When it came down to choosing a stain/finish for the desk, I had one serious debate. My first thought was Minwax Dark Walnut but that’s the same stain that’s on the trim and doors, which would have felt way too matchy matchy. My next thought was the Minwax Gray stain (same stain as the wine rack and the CD crates), but after moving the wine rack in to check out how the colors worked, it was just all wrong. Then I thought to myself, “self…wouldn’t it be appropriate to stain the desk in the same shade as all those iPad stands you’re creating for the shop?! So when you spill stain it just blends right in with the desk?!” Self is genius! So I went with it. But I felt that the Minwax Classic American stain was just a bit too saturated for the desk. The two dark-ish stains would be competing for attention, so I went for a slightly tinted kind of finish. I created my own stain shade by lightening the Classic American stain with mineral spirits.

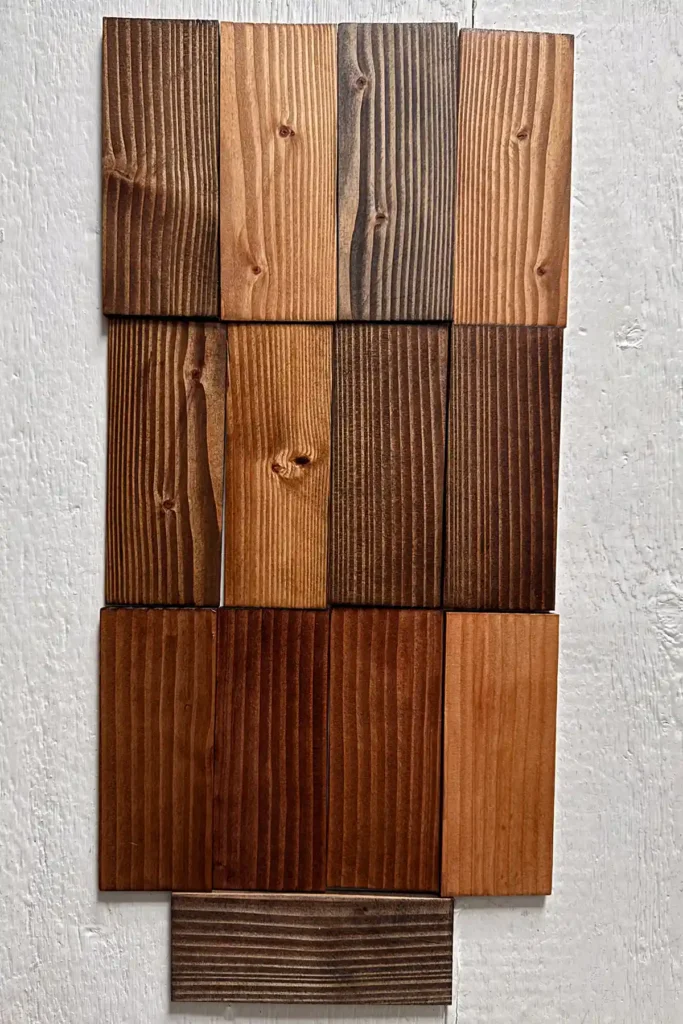
On a scale of one to awesome…stain lightening is da bomb (I don’t know where that came from…my apologies) AND super easy to do. All I did to get the light washing effect from the stain was to take an almost empty stain container and pour mineral spirits into it until I got the desired shade. I did a few test runs on a piece of desk leg leftovers before I stained the real deal. You can see the spectrum that we tested below.

The verdict…we really liked the look of the barely there, one part mineral spirits to one part stain combo. It just gave the wood a hint of color without being overbearing. And for the record…I didn’t measure out a thing and totally used the eyeball method like the daredevil DIYer that I am. So down went the drop cloths and I began staining away.
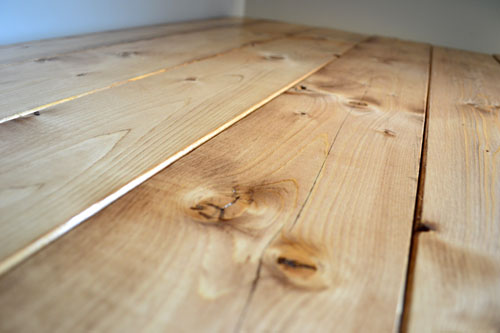
The stain ended up looking just a little bit darker on the wood than during the test run, but I still loved it. Here’s the difference between the unstained and the stained wood for comparison’s sake. The stain adds just enough color to make the desk a bit more interesting.
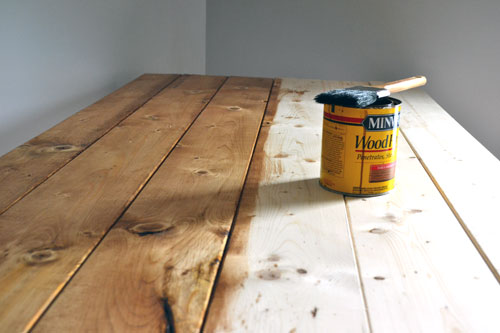
It took about an hour to stain and wipe down the whole desk, which was actually quicker with the watered down mineral spirits down stain than it would have been with regular stain. The full concentration stain tends to soak in more and requires more stain to get equal coverage to the lightened stain.
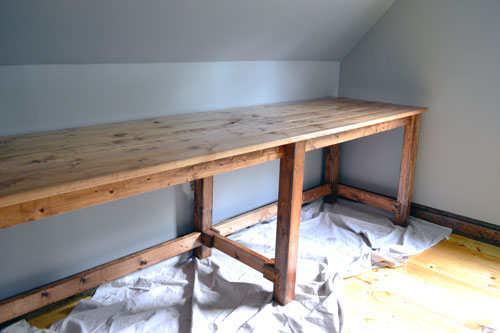
After staining, I tucked the desk back into it’s nook and let it dry overnight before polying. My poly of choice these days is the Minwax water based poly in a semi-gloss. I love the coverage, how fast it dries, and the durability. It’s probably the strongest of the water based stains that I’ve found so far.
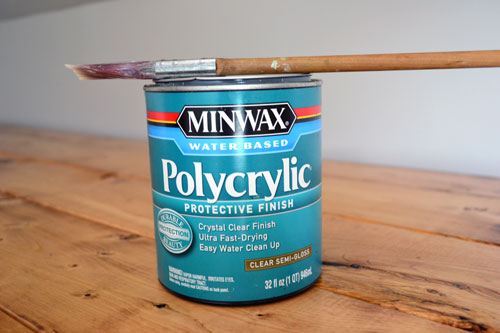
After two coats of poly the desk was finished…and what a beautiful finish it is. I really couldn’t be any happier with how the finish turned out. And not bad for a whim, right?! Speaking of, I should mention that this stain lightening was a total experiment which worked out pretty well. I had no idea if mineral spirits would help lighten a stain, but it seemed like a good theory since mineral spirits helps clean up poly, so I tested it out and so far so good.
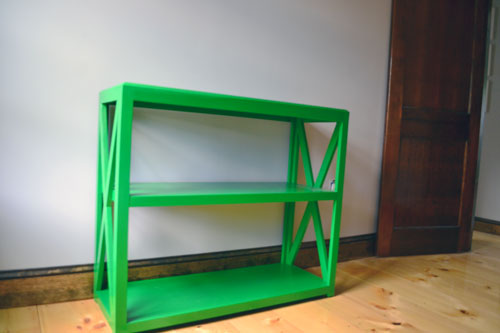
After the desk dried, we took out the drop cloths, moved the desk into its proper position, and also brought back the green bookcase, which was the only piece of furniture that we had for the guest room before deciding to turn it into an Etsy office. I’m not sure I like it style wise in the space, but we’re still in that “The Middle Makes No Sense” part of putting together the room, so it works for now. But I do like the added work surface area that the bookcase provides.
And true to form, the poly is barely dry on the desk and I’m already starting to scheme organizational plans. I’m thinking product storage bins of some sort underneath the desk. Maybe a wall to wall cork board in that small vertical wall space area above the desk top, to pin product inspiration ideas or sketches, and some kind of drying rack for all the polying projects we tackle as part of the Etsy shop.
As for the green bookcase, I’m thinking packing station! The top is just the right size to pack a box on and the shelves below offer up good storage for packing materials or to hold packages waiting to be taken to the post office.
Ahhhh…I can’t wait to start assembling my office space. I’m not gonna lie, it will be so nice to have the dedicated space for all things Etsy related. Let’s get organizing, shall we?! And REALLY start using the space for the greater Etsy good.
Pssst…Have you guys ever lightened stain before? Or paint? How did you do it? Did it work?

Thank you!! So helpful- your desk looks fantastic!
Your site was exactly the information I needed
thank you for being here
keep up the good work 😊
Thank you so much! I’m glad you found it useful. Good luck with your project!
Great thank you! I have a stain that onlooker the tones, but didn’t know what to do to lighten it! Perfect!!!! I’m excited:) love polycryllic too, but satin is my go to & sand lightly by hand with 400 grit by hand
How did you get sponcererd by Minwax? Haha. Is mineral spirits the only thing you can use?
We weren’t sponsored by Minwax…I wish we were! I’m not sure if other thinners or would work. It’s worth a try especially if you have something else on hand. We just always have mineral spirits on hand to clean our brushes post staining so that’s why we used it.