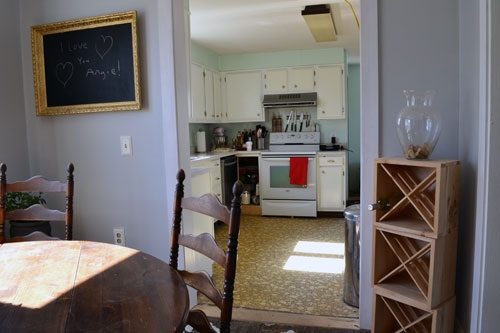
This little project definitely belongs in the “2012…Year of the Nagging Project” category. It’s the wine rack in the dining room. Colby built it for me based off an old Pottery Barn wine rack design way back, we’re talking circa July 2011 (back here).
The wine rack has just sat in it’s little corner of the dining room throughout the entire dining room renovation. And sadly, because I knew I would eventually be finishing the rack, I never truly stocked it. Most of the time there was just a handful of bottles…or one…so sad.
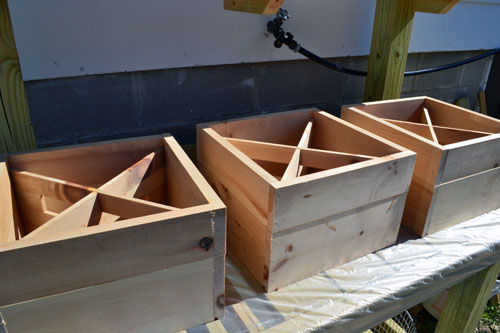
Did you catch the note Colby left me on the chalkboard? He’s so cute! He left me the note before he escaped to Massachusetts for a few days worth of sales meetings. Oh the life of a mill work salesman. Anyway, it’s about time I stained the crates. Since it was so gorgeous outside this weekend, it was a perfect opportunity to take the project outside.
I chose to stain the crates the Classic Gray stain, which is a new shade from Minwax.
It’s a leftover stain from when we stained the CD crates which live in the living room. I’m definitely glad we waited so long to stain the wine racks. If I had stained the suckers right off, they probably would have ended up some random shade. But by waiting, I was able to use a complementing shade to our light gray wall color and something a little different from the floor/other furniture stain (dark walnut).
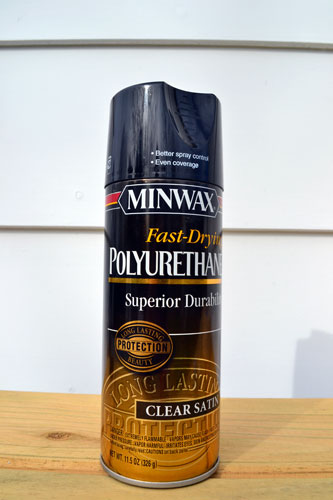
The stain dried up quickly and it was time for poly. Usually I’m a fan of brushing on the poly but the crates were a slight pain in the behind to finish since the cross sections are permanently fixed to the crates, making for tight awkward angles. The whole interior was awkward to stain. It was like band geek in a football uniform awkward. Thus, I opted to try out spray poly in the same brand/finish as my favorite oil based furniture poly, Minwax satin finish.
Which worked like a dream. There was one minor mishap when it came to “what direction do I point this fancy nozzle” time. There may have been an incidence of poly to the face that could have been avoided by reading the directions….or at least by looking at the arrow on the nozzle. Doh! But I’m blind anyway so what’s a little chemical to the eye matter?! After the poly dried in the sun for a bit, I brought the crates inside and set them up in their usually spot.
I love the tone on tone action going on here. The darker, wood stained gray looks so cool up against the lighter gray wall color and bright white trim. I’m 100% happy with this stain choice.
And by total accident, the wine rack picks up on the gray planter that sits across the room by the window (which I stupidly forgot to take a picture of…I blame the poly to the eye…it’s messing with my mental capacity). Now I just need to stock the wine rack.
Isn’t that the problem with wine racks? Once you build it, it’s time to fill it. It’s like the Field of Dreams in wine world. If you build it, they will come.
Pssst…Okay all you wine-o’s out there…what are some of your wine recommendations? Keep in mind that you’re talking to a girl who chooses her wines based on labels and names. O Schist and Jam Jar just happen to be my favorites!


Definitely get yourself to a Trader Joe’s, and get a case or three of assorted 2 buck Chuck, also known as Charles Shultz. It’s awesome, and at 2.99 a bottle, you can stock the whole wine rack!
Curses! We don’t have a Trader Joe’s anywhere around here! Do they sell that anywhere else? That sounds awesome! Thanks for the tip!
I love it, Angie! Every project you do is so sweet and your home is just lovely. I love your style! 😉
Ooooh…I didn’t know I had style! Haha! Thanks so much for the sweet comment..and more importantly the feature!!! You’re amazing!
Are there any photos of how the crossbars were made?
Ack…sadly…no. We tackled that project before I “found myself” as a tutorial loving blogger. But here’s how we did it, in case it helps. We first built the box, then took the longest measurement from corner to corner, then made bevel cuts to the inside pieces of wood, and inserted it into the box. Then took a measurement for the other corner to corner (to make an X), made the 45 degree bevel cut, and stacked it in the box on top of the other cross section piece. And repeated this process, adding some spacer pieces (the small pieces) along the way for extra support. Because the cross pieces fit so snuggly, they’re just glued right into place, no nailing required. Hope this helps and if you have any other questions, feel free to email me at [email protected] !
hi there, wondering what the dimensions are of the boxes?
Where do I come across the boxes???
We built them out of plain old pine boards. They’re just cut to size and held together with nails and wood glue. Super simple.