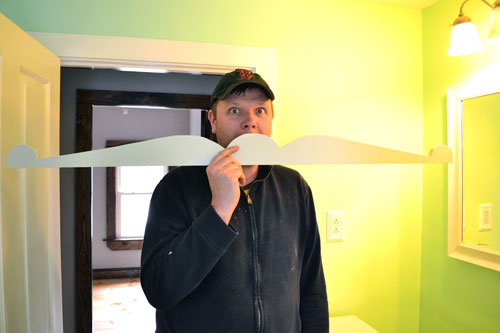
I mustache you a question…does Colby have something on his face?
I was sifting through photos on my mac this evening, trying to play blogger catch up after the craziness of opening an Etsy shop has subsided just a tad, when I realized I missed a complete step in our bathroom remodel, specifically with transforming the buffet into a vanity. Egads! Oh the insanity! We missed the back splash! How could we miss the back splash?! We shared with you the part where we ripped it off:
But somehow missed the “how we put it back together again”. So here’s that part. Let’s start with a little backtracking and why we ripped off the back splash in the first place. Two reasons…one…it was rickety and not well made, two…it wasn’t even centered! Seriously…the un-centered-ness sent my obsessive compulsiveness into a tizzy! The buffet back splash had a peak on it that peaked about four inches too far to the right. I couldn’t handle it. So off it came, we painted the vanity, and moved it into the bathroom before coming up with the new vanity design.
We probably should have designed, made, installed and painted the back splash prior to moving the vanity upstairs. But I really wanted to see what it looked like in the space before committing to a style. Once the vanity was moved into place, the design was perfectly clear. It needed to be curvy. There were too many harsh angles already going on in the bathroom and a curvy back splash, somewhat similar to the legs of the vanity would be perfect. Speaking of vanity legs…we actually traced them onto cardboard to come up with a back splash design/template.

See the leg shape on the cardboard?

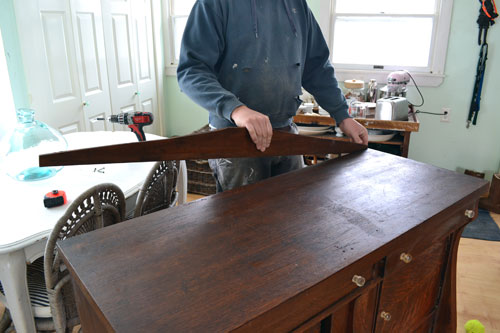
We just used the silhouette of the legs in a mirror fashion to make the back piece. After cutting out the cardboard template, tracing it onto pine, and cutting it out with a jig saw (with a little sanding too to clean up the rough edges) we plopped the backsplash on top of the vanity to test it out. Perfection!

A little painting it up to match the vanity (which is painted Gray Owl by Benjamin Moore) and it was ready for installation.

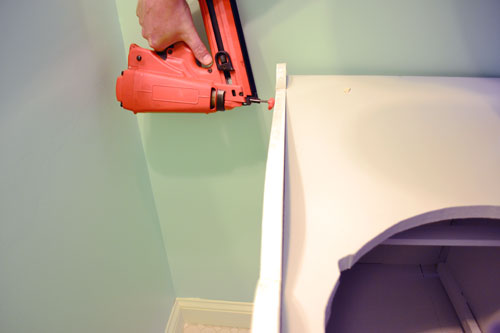
Installation was so simple, especially since the new backsplash piece was replacing an old one with the same width. The painted pine piece fit seamlessly into the notched void that was left after removing the old backsplash.

We pulled the vanity away from the wall, enough to fit the Paslode finish nailer in the gap, and shot a couple of nails right through the backsplash and into the back of the vanity. If you don’t have a nail gun, a simple hammer and nails works wonders too. It just doesn’t make that magical nail gun noise.
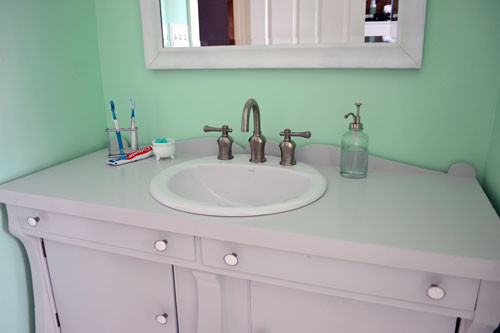
We didn’t even bother to fill in the nail holes since no one would ever see the back of the vanity. Some call it laziness…others (like us) call it genius efficiency. Later we installed the sink and hitched up the plumbing, but that’s all old news to you.
Next up in the bathroom project, if we don’t get distracted back to the guest bedroom, are towel hooks, art, and shelves…oh my! Stay tuned.
Pssst…Show of hands, anyone else lose folders of pictures to the depths of their computer only to discover it weeks/months/years later? I need a weekend of organization!
