Are you ready? Can you contain yourself? Are you inching towards the edge of your seat in anticipation for the great big Pinterest Challenge Fall Edition big reveal?!
Well, let’s start by revealing which project I chose to tackle as discussed back here. I chose to do the art project, this one:
How did I land on this as my project pin-spiration? Well, I also chose to move my blog this weekend, which turned into a length process, while participating in the Pinterest Challenge. I’m still struggling with CSS and code and resizing all my old images and fixing broken links (I am so sorry for any difficulty anyone is having reading old posts right now…rest assured I’m working on it). Anywho….I was busy putting those mad computer skills to work and this project seemed like the least time consuming one. I mean c’mon…building a bathroom vanity in a weekend was a bit ambitious! So the idea with this project was to take my old, college days Endless Summer movie poster, hack it up, and mod podge it to some re-purposed boards. And then hang it here:
It’s hard to photograph, but that’s the ginormous (yes…that is the technical term for huge) empty wall space above our staircase that was begging for some interesting art…or chandelier…or both (cackle, cackle).
So the search for the Endless Summer poster was an epic fail. I know I’ve stumbled upon it a million times, stored down in the basement but I could not find that poster if it smacked me right in the face. I was dead set on hacking up a poster for this project so off I trekked to AC Moore with a 40% single item coupon in tow to find a poster. I asked Colby if he had any poster preferences. His first response was, “a hot chick” (and by the way…he is going to turn about five shades of red for me telling you all this story). Then he retracted that statement and said, “nahhh, I get to wake up next to a hot chick every morning, maybe a fifties style movie poster.” He’s so cute…definitely a keeper. Well, I managed to pick up a hot chick after all…enter Marilyn.
Marilyn Monroe that is. The above picture is my attempt to flatten her (hehehe) but a steamroller ain’t flattening that chest! Mind you…ms. Marilyn was CHEAP! After using the coupon she only cost about $4 including the tax. She spent the night on the kitchen table being flattened by my random assortment of coffee table books. What can I say…I have an affinity for high end makeup and antique dishware. Who knew?! Meanwhile, Colby was busy piecing together my canvas.
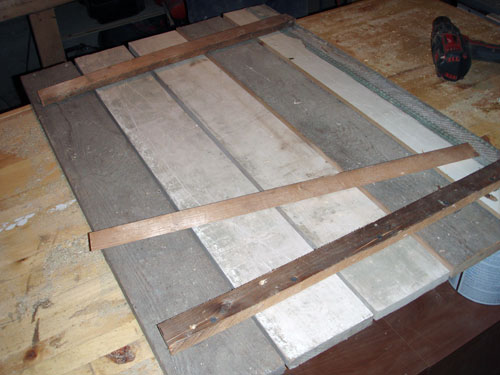
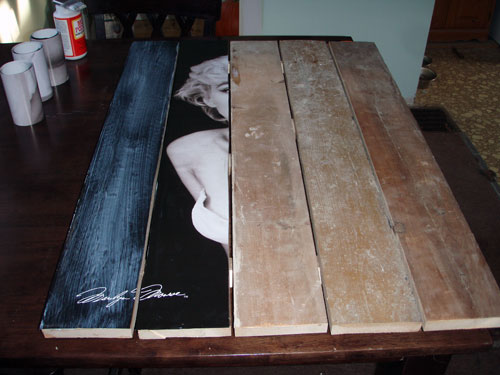
So what you’re looking at there are five recycled boards. They used to be our bathroom sub floor that we salvaged during our bathroom renovation. We knew we would use them again somewhere. I wanted to use recycled wood for this project mainly because (1) we have a TON of it and (2) I was really going for that rustic-ie look and wanted the imperfections of the wood to show through the poster. To hang the recycled wood canvas, Colby nailed an angled piece of pine to the wall and another piece on the back of the canvas so they would fit together.
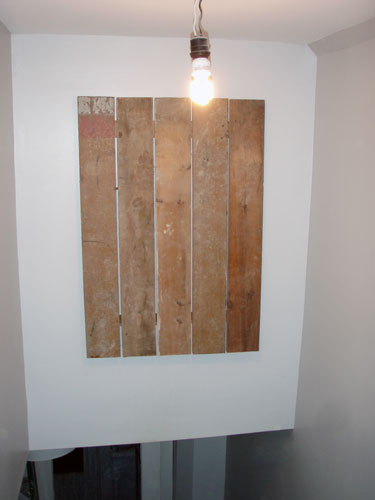
Think of it kind of like lobsters holding claws. I know, I know…bad analogy, but I really can’t think of a better one right now. Before gluing the poster onto the boards, we tested out the hanging system…just in case.
Please excuse the pig tail light fixture. We haven’t had a traditional light fixture above the staircase since we ripped it out over a year ago. We use these pig tails temporarily until we decide on a permanent fixture. They only cost a buck or two so they’re a great temporary solution and tend to stay out of the way during sheet rocking, mudding, sanding, priming and painting expeditions. Back to the poster. The next steps were easy, and started with some measuring and cutting:
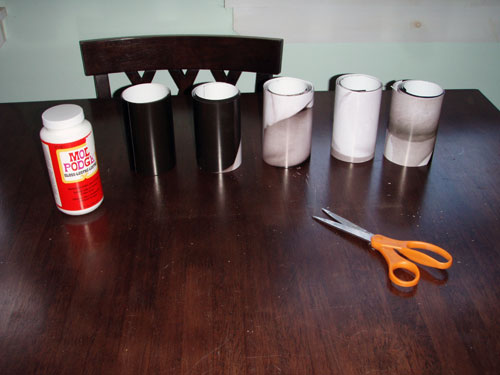
Oh…and my supplies were pretty minimal. They included glossy Mod Podge, which I already had on hand, some scissors and a paint brush. And those cylinders are the cut up, rolled up poster pieces.
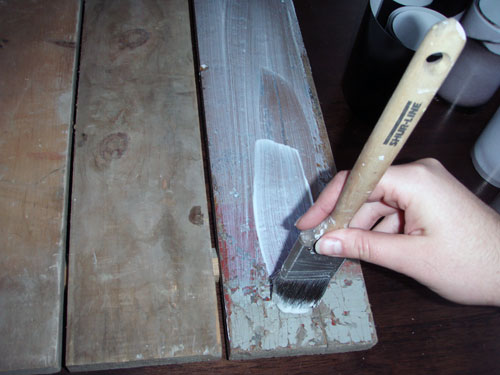
I worked one board at a time, painting on the glue:
Aligning each poster piece and Mod Podging over top of it:
The poster started to curl just a little bit around the edges so I immediately layered on a top coat of Mod Podge. After it was all glued together, I put a second top coat of Mod Podge on, just to make sure everything was glued together solidly, and called it good.
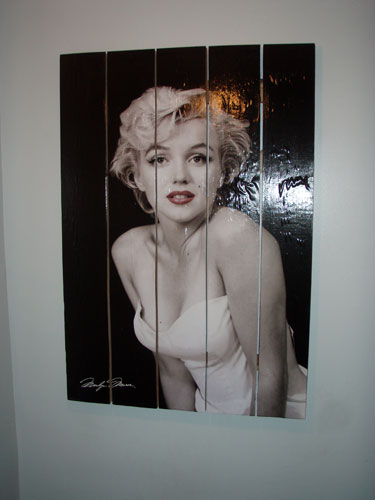
After letting my art piece dry for a few hours, I tested it out and was loving the impact it had on our staircase.
The imperfections were my favorite part, as you can see in the previous two pictures. Because the wood was rough and uneven, the poster bubbled and curled in random places. I find imperfections like these to be beautiful. It’s what gives art or projects character, as we affectionately call our screw ups around this pad. Sometimes, depending on the scope of the screw up, I channel Bob Ross and have “happy little accidents”. Here’s a shot from the top of the staircase looking down at the front door:
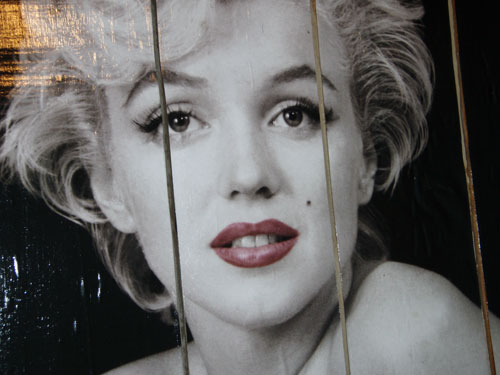
And we can’t forget about Marilyn’s closeup…she was born for a closeup:
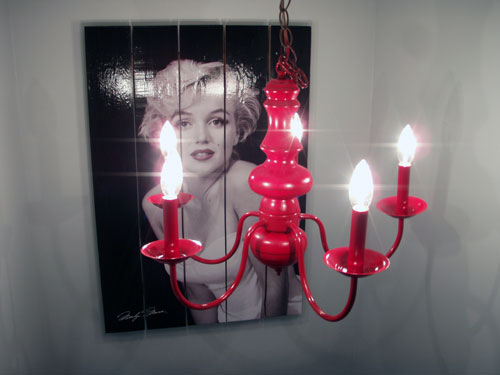
I am so grateful that the spacing worked out so well and it was completely by accident. I really didn’t want to slice down the middle of her eyes but still wanted five, evenly sized boards for the project. I got lucky on that one. So that concludes our little Pinterest Challenge poster project. Oh…but I should also mention that said poster project also spawned another staircase related project…drum roll please….a permanent light fixture project:
The effect from the combination of the poster project and the refinished chandelier project is incredibly dramatic. I’m not going to go into details today about the chand-ie, I’ll save that for another post (maybe Thursday?!) but all I have to say is $4.99 for the light and $3.48 for the spray paint! Boo-ya! That’s a total cost of about $13 for art and a chandelier for above our staircase.
Now that I’ve babbled on for 1,000 plus words about cheap art, I’ll bid you good night. I also encourage you to stop by four other amazing bloggers’ pages, our hosts of the Pinterest Challenge:
That’s Katie from Bower Power, Sherry from Young House Love, Ana from Ana White, and Erin from House of Earnest (all amazing bloggers I might add). Stop by their blogs tomorrow (Wednesday) as they’ll each be hosting a link party. Stop by to check out their Pinterest Challenge projects and other readers and participants! This party rocks too hard for one hand!
Pssst…Don’t forget you can follow me on Pinterest here. I swear, as soon as I get the functionality fixed up here at the new Angie’s Roost, we’ll have a fancy schmancy Pinterest button going on. Le sigh….so much to do!
Psssssst…the Pinteres Challenge pictures above are courtesy of the lovely and talented, Katie Bower at Bower Power.







I love the pink chandy! I did some candle holder painting for the Challenge, too. 🙂
Thanks for the comment! I just checked out your blog and loved, loved LOVED the candle holders! Ahhhh-mazing!
That turned out awesome!
Thanks Vonda!
Good Job! I’m so glad you linked up and shared your project!
Neat idea. Nicely done.
Thanks Jae! And by the way…your blog is adorable and I love its name!
Wow! This is amazing! I might have to create my own! I’ve been meaning to create my own art piece for a big wall in my apartment! For the challenge I just painted pumpkins haha
http://www.larysubero.com/wp/?p=3497
Thanks Lary! It was such an easy way to create a large art piece cheaply. I highly recommend! And your pumpkins are cute. I love the one with the mask!
Very cool!
Thanks Michelle!
I LOVE this! Huge impact. Also…I love that you spent $13! Girl after my own heart! (Stopping by from YHL, btw!)
Ooooh…thanks for the comment! Don’t you just love a big impact for a not so big price?! Makes my day! Thanks for stopping by!
LOVE!!!!!!! This looks soooo good!!! 🙂 …and the pink pretty much rocks to hard for one hand 😉
I knew you would love it! Why’d you have to go and bit my moment?! Did it taste good?! Ahaha!
Oooh Angie, I might just hate you now. I hadn’t yet checked out pinterest, just kind of glossed over it when you posted about it, but I just did and my usable hours just took a dive. The poster looks great – I might try it!
It happens. Welcome to Pinterest addiction world where you never get anything done and you stay up into wee hours of the evening because you just HAVE to check out one more board! You’re welcome!
i love this…you did a great job…totally changes the look of the poster by putting it on the wood….best project i’ve seen all week!
ashley @creating love & joy
This is wonderful! I have a poster that I want to do the same thing with. However, I’m wanting to do a paint-wash and stain on the wood first and then center my poster in the wood (4 planks similar to what you’ve done.). Will I still be able to use this technique on the wood after I’ve painted it? I’ve NEVER done anything like this before so I’m pretty nervous. Also, I see that you traced lines on your poster so you’d know where to cut. How did you do that with the wood already put together? Thanks so much for your help!