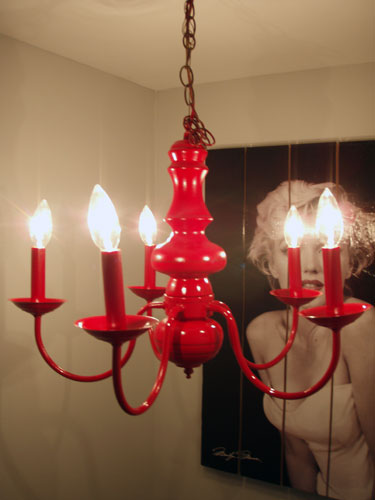
Wasn’t that a TLC song….Red Light Special? Oh TLC how you helped me through some tough times as a seventh grader. I always stuck to the rivers and the lakes that I was used to. But seriously…I believe Red Light Special was one of the more prominent songs off their Crazy Sexy Cool album (which by the way was one of the first CDs I ever purchased). It went something like “I’ll show you the red light special all through the night.” Well….this isn’t that type of red light special…it’s more like this one:
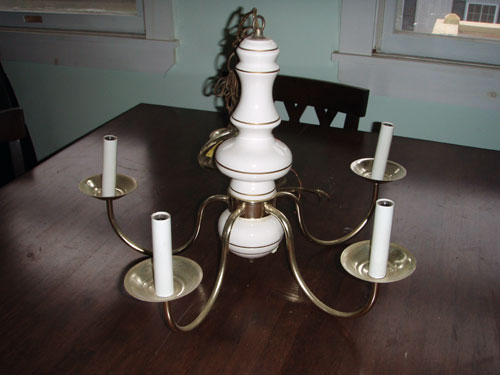
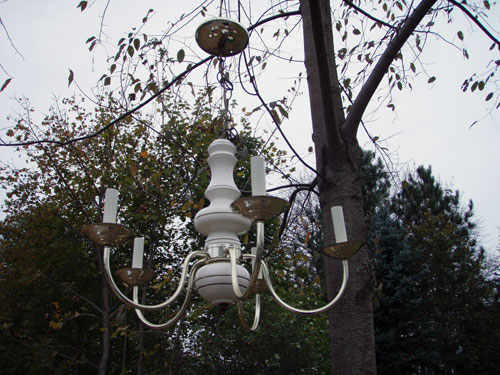
Last week I blogged about the Marilyn Monroe poster/art creation (you can read all about it here) and promised a post focusing on the red chandelier, since it was an impulse project spawned off the Marilyn art project. So here’s a little ditty about Jack and Diane…oh wait…wrong ditty…scratch that…about the red light. First off, after finishing up the poster art and hanging it I just knew we NEEDED a punchy red chandelier, playing off the red in Marilyn’s lipstick. I envisioned it as the perfect complement to the poster. Well, we didn’t have an extra chandelier on hand and couldn’t justify purchasing a brand new, sparkly chandy from Lowes just to spray paint it red. Yeah….not happening. So I trekked off to Goodwill, then to Salvation Army, and finally to the Habitat for Humanity ReStore where I scored this lovely lady:
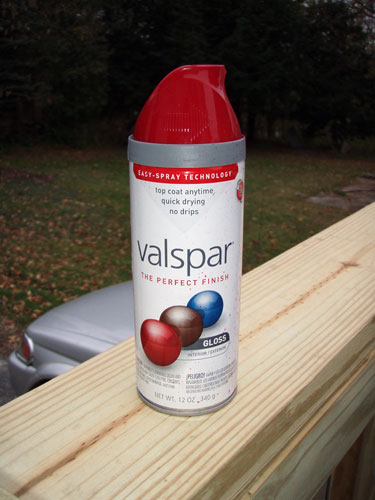
She wasn’t too pretty, but let me take this moment to remind you that it only cost me $4.99. The whole project cost only $8.47 which breaks down to $4.99 for the light fixture and $3.48 for the spray paint. I tried to find spray paint that was cheaper than the light fixture just so I could claim that the light cost less than the paint but I didn’t want to sacrifice quality in paint just for bragging rights. Enter my spray paint choice:
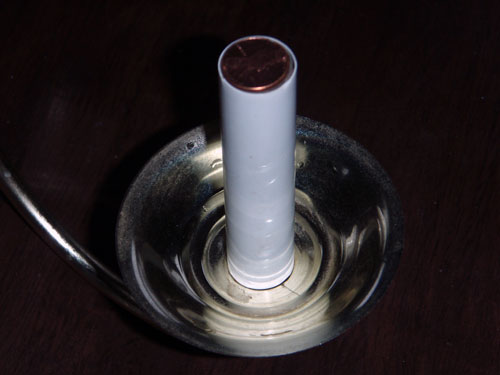
When it came to painting the chandelier I opted not to prime it and not to scuff it up. Something about paying only five bucks for something made me want to skip steps and do it the easy way. I did however wipe off the layers of dirt and made sure to cover the light socket-ie thing-ies (yeah…I have no idea what the thing is called that you attach the light bulbs to). This is where we got a little creative. We used pennies, which were the perfect size to cover the light socket-ie thing-ies:
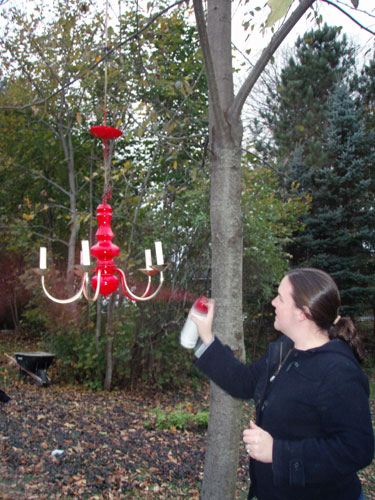
Do you think we can still spend our six bright red pennies? Didn’t think so. This was completely Colby’s idea and it was genius! It was definitely one of his more brilliant moments. Which makes up for those not so brilliant moments like when he plays “spider Goose”. For those unfamiliar with “Spider Goose” it’s when Colby lifts the dog over his head, makes him walk on the ceiling or the wall, and sings the official “Spider Goose” song. Not so brilliant. Anywho…after cleaning up/prepping the light fixture we hung it from our spray painting tree and went to town (we’ve also used this tree for spray painting the golden shovel):
I adore the spray painting tree. We just take a bungee cord and loop it around one of the low hanging branches then attach our painting project to it. It makes spray painting a snap without having to worry about turning, flipping, or rotating the project as we go. I layered on a couple coats of red paint:
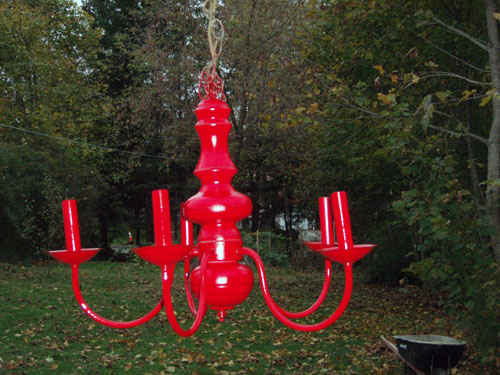
Until it looked something like this:
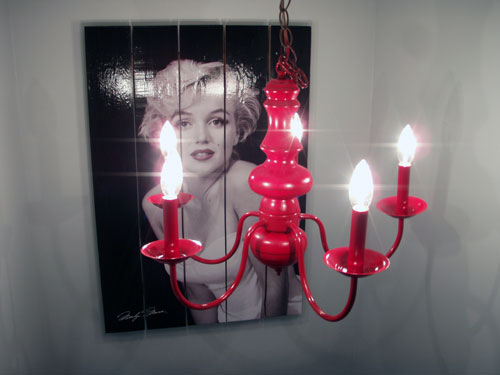
After it was dry to the touch, we brought it inside since it tends to get down into the forties/thirties these days…brrrrr. We let the light dry overnight and hung it the next day. Let’s revisit the hung light fixture:
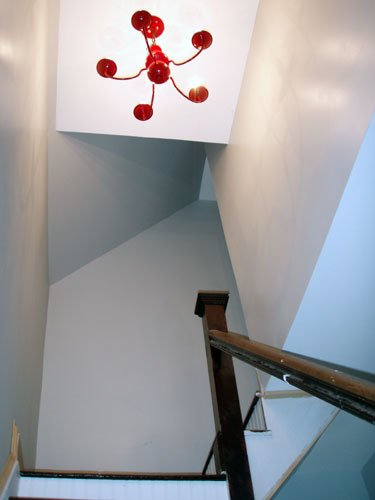
Ahhhhhh….so pretty! And bright! I’m pretty sure this is the brightest our staircase has ever been. It almost over illuminates all the imperfections that I need to fix in the staircase. Hmmm…maybe I should downgrade the light bulb wattage. One of the coolest things about adding this light fixture to the staircase loft area is that it added height to the space above the stairs. Here is a view from the bottom of the stairs looking up:
The height can’t be captured on film, but trust me, it feels so much larger in the staircase area. Before the light fixture was installed, when you looked up the stairs you just saw a large gray box area. Now the light fixture breaks up the monotone gray. It’s a huge improvement and for CHEAP! Boy do I love a deal. It just justifies being able to splurge a little later on something else…like a new couch perhaps?! Maybe someday!
So what’s still on the good ol’ staircase to do list now that we’ve tackled the art/light situation? Well here’s a recap:
Add art above the staircaseExplore and install a light fixture situation- Cover the risers with bead board
- Paint the bead board white
- Install base cap and finish trimming out the staircase
- Prime and paint all of the staircase trim
- Sand down the railing and refinish it and the newell post…oh and fix/reinstall the cap for the newell post (it had a bit of an accident…there may have been a running down the stairs/grabbing it/using it like a pole/spinning situation that led to it’s breakage)
- Paint and install new balusters…we’re thinking cheap-os but dressing them up with an interesting painting technique…which we’ll announce later because I love to make you guys wait for it
Psst…If you look reeeaaaaal close at the picture of the staircase above, you can see that we started installing bead board risers and adding trim. Post on that coming soon…hopefully later this week.


Dear lord, Colby is his father. Our dad has been playing “Spider Chaplin” and “Spider Pootie” with our cats for years.
This is the greatest thing I have heard…EVER! Colby is in total denial that he is his father but it is SOOOOO obvious! Ahahaha!
I love the look with the chandi and Marilyn. As far as the spider dog, not so sure!