Today’s post is oddly niche. I don’t know many people who have a small hoard of square photo prints to store. I also recognize that it isn’t 100% necessary to modify a photo storage box to organize square photos. It’s extra of me to do this. But being extra makes me happy and “happy people just don’t shoot their husbands, they just don’t.” Name the movie quote, “Like it’s hard?!” Show of hands, who had Legally Blonde?!
I collect square prints mostly for the kids’ annual birthday number tradition. Although, I also use them in their baby books and their school years’ memory books. Needless to say, I’ve started to amass quite the collection and it was no longer feasible to stack all the photos in my craft room cabinet.
The goal was to store the photos in a photo storage box. But did you know that there is no such thing as a photo storage box that perfectly fits 4″ x 4″ square prints from Parabo Press (my favorite!)? I searched high and low for a solution. I’m pretty certain I perused every single storage box that Amazon carries. It was not an easy feat! I found some solutions that would work but it wasn’t worth it for $25+ for a single box.

Enter the modification solution for the Michael’s super sale special $3.99 photo box to create a custom, DIY square photo prints storage box. Gotta love a photo storage box hack!
Photobox Modification Tutorial
Supplies:
- Standard Photobox (Michaels)
- Black Cardstock Paper (Michaels)
- Tape Runner (Target)

Tools:
- Scissors
- Ruler
- Pencil
- Archival Pen (optional)

Measure The Box And Make A Plan
You know the old DIY saying, “Measure twice and cut once?” The same holds for this project. Except it’s more like “measure, measure, measure, and make a plan.” Mostly because not every photo box is created equal.
To start, I measured the interior dimensions of the box to get an idea of how best to lay out the photos inside the box. I wanted to maximize my space as much as possible. Ideally, the photo box would fit two rows of the 4″ x 4″ photos. Alas, it does not. So close!

Dry Fit The Photos
With a plan in place of one long row and two smaller rows running perpendicular to the main row of photos, I dry-fit the photos in the box.

This is where I am extra. Most sane people would say, “Good enough,” and pack in their photos and call it good. Me?! I wanted official dividers within the box to keep photos from sliding all over and intermingling with other rows. I know, extra. But let me have my fun because a project like this is my idea of a good time on a Sunday afternoon.
Now that I see how the photos fit in the box, I can start making and attaching the dividers to the box.
Make The Long Divider
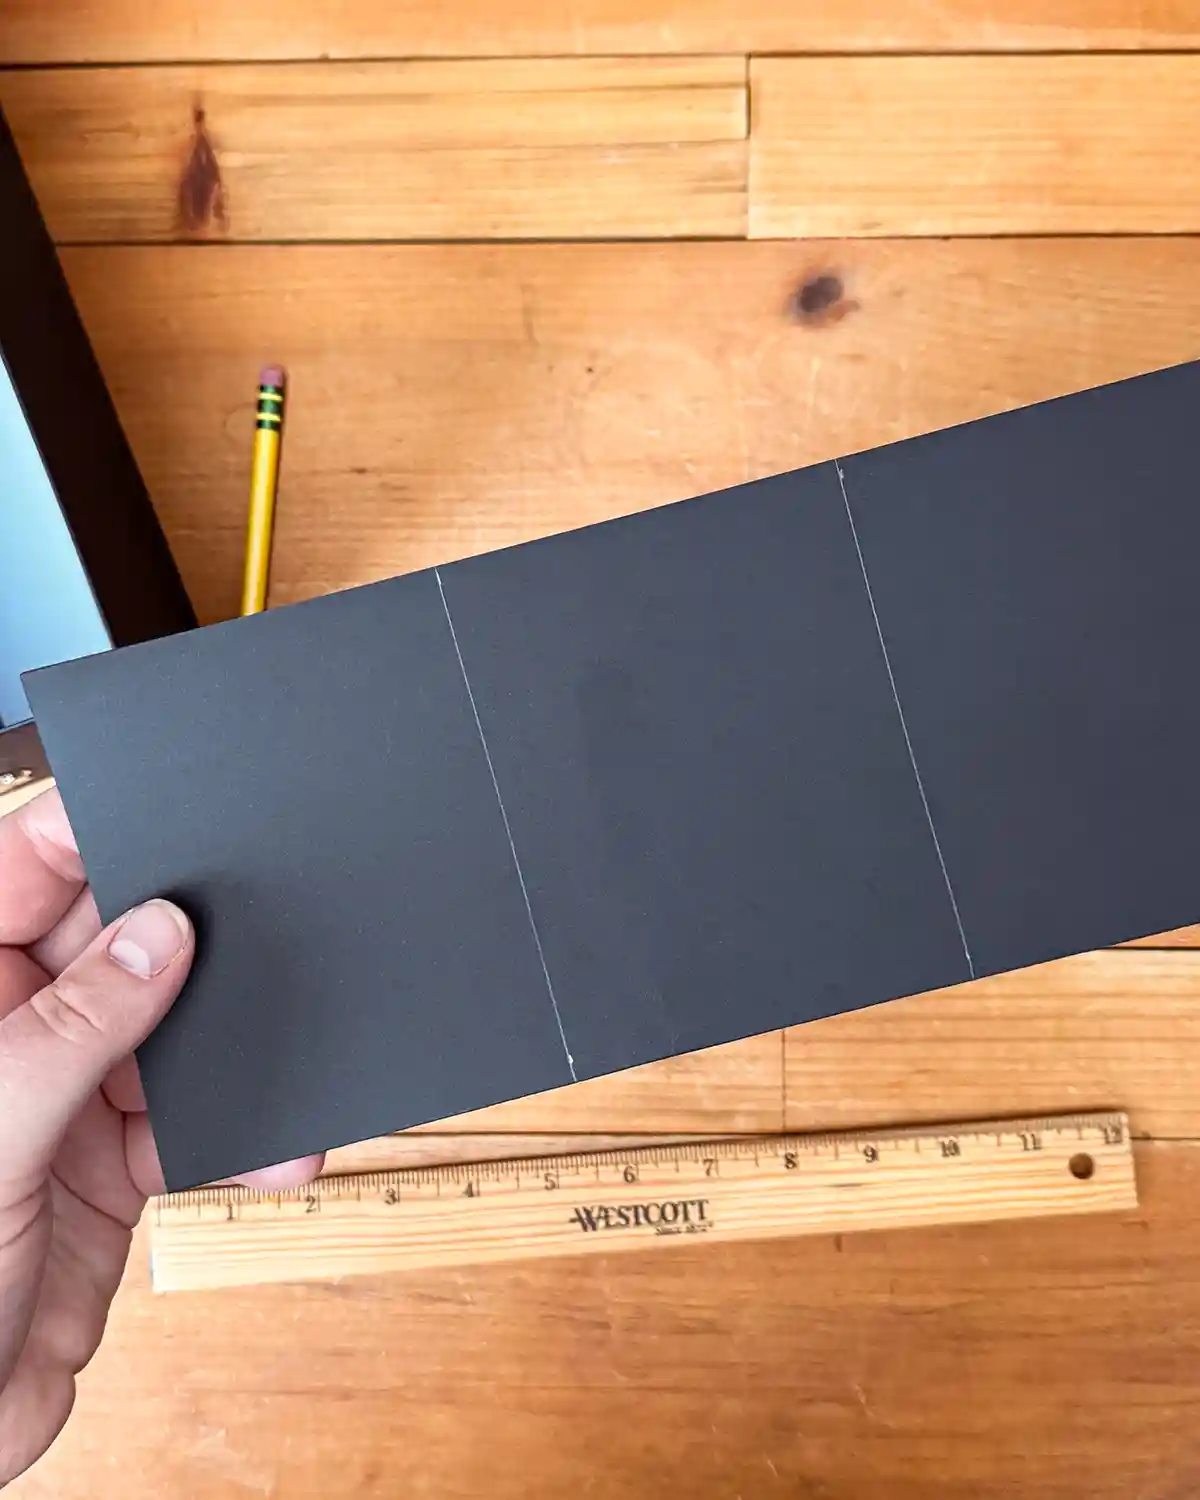
First, I made the longest divider. To do this I took a piece of black cardstock and folded it in half the long way. Once it’s folded in half, it just so happens that it fits almost perfectly within the box.
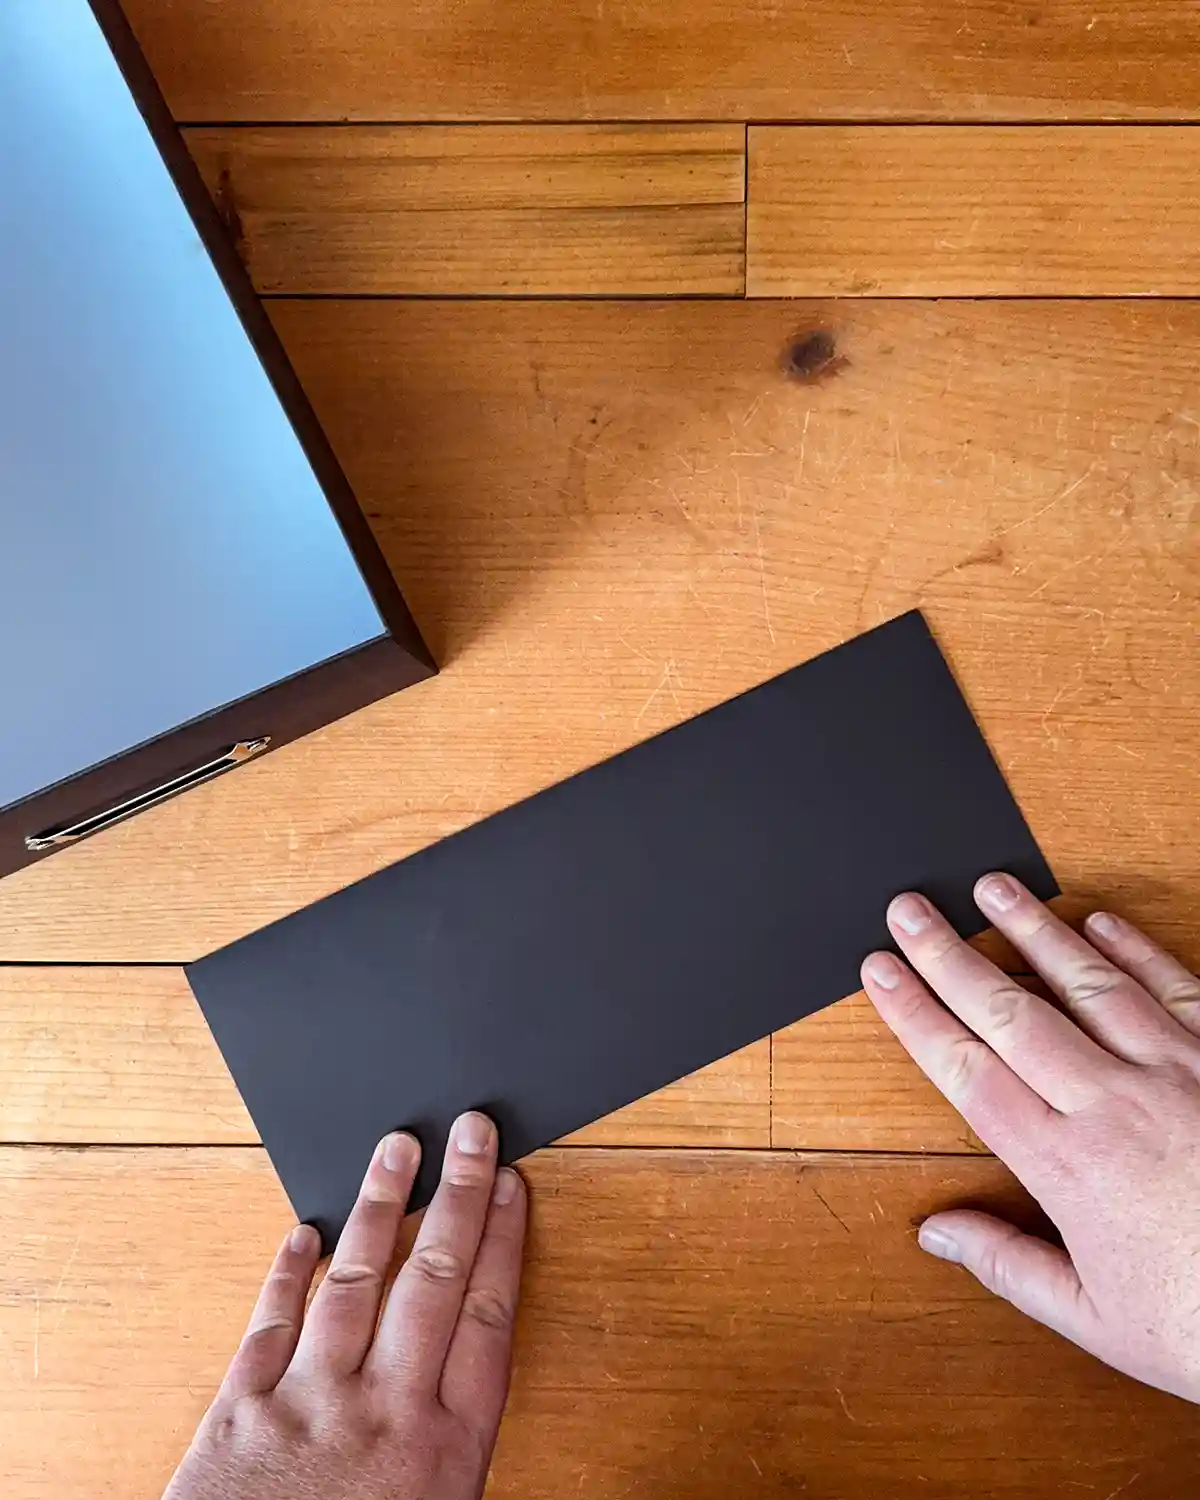
Next, I folded wings where the divider would attach to the base of the box. You can do this by folding up each long edge of the paper about 1/3″ or 10mm approximately. You want each flap to be slightly wider than the width of your tape runner.
After making all the folds, here’s what the cardstock divider will look like.

Don’t worry too much about getting it perfect. I know, it’s hard. Martha’s would be perfect. But you don’t see uneven or wonky folds once you pack the photos inside the box.
Next, apply the tape to the bottom of the folds. Again, it doesn’t have to be too perfect.

Attach The Long Divider
With the divider prepped, it’s time to attach it to the interior of the photo box. I started by marking out where I wanted it to go. To do this, place your square photo prints inside the box and lightly mark the box where the edge of the photo is. Do this on both ends of the box.

Then grab the long divider, carefully get it into place in the box, and push the tape down onto the bottom to secure it. This step is a little tricky. Not only keep the divider centered and lined up with your guide marks, but it’s also hard to prevent the tape from sticking where it shouldn’t go. Hot tip, just commit and go for it. The divider is a little forgiving.

Make The Short Dividers
Before making the two short dividers, it helps to fill the left side of the box with photos. Then measure the distance between the edge of the box and the long divider. This measurement will be the length of the short dividers. It doesn’t hurt to measure in two spots just in case your long divider isn’t perfectly centered.

Then fold another piece of black cardstock in half. Measure and mark the cardstock for the length of the two short dividers. Draw a cut line across the small dividers with a pencil which just so happens to show up lightly on black cardstock.
Cut each divider using a pair of scissors. Fold the flaps and run the tape just like you did with the long divider.

Attach The Short Dividers
Same as before when you marked the location of the long divider. Grab a small stack of photos, place them in the box, and mark the inside of the box and the spot on the long divider where the edges of the photos land. This gives you a guide for installing the short dividers.

Then, using two hands, guide the short dividers into the box lining up each edge with your guide marks. Gently push down on the tape to secure the divider flaps to the bottom of the box.

Fill The Box With Photos
Fill your photo box with your square photos and you’re done! This whole project took me about 15 minutes to do if that. It took me longer to get the plastic packaging off the photo box than it did to make the dividers.

Hot Tips For The Custom Photo Box
Here are a few tips and suggestions for the box.
The Dividers Won’t Work If You Shake The Box
The dividers aren’t hard plastic but just a piece of cardstock. While they work great for gentle shifts, they will not hold if you violently shake the box or flip it around. If shifting is a problem, ball up a piece of packing paper or tissue paper and shove it in the gap to help secure everything.
Add Divider Tabs
If you want to be even MORE extra, make some tabs to sort the photos within the box by year, person, location, etc. Whatever your heart desires! At this point, I didn’t feel the need to organize the photos super well. I just wanted a clean, safe space to store them. But maybe someday…insert wheels inside head starting to spin.
Label Your Photos
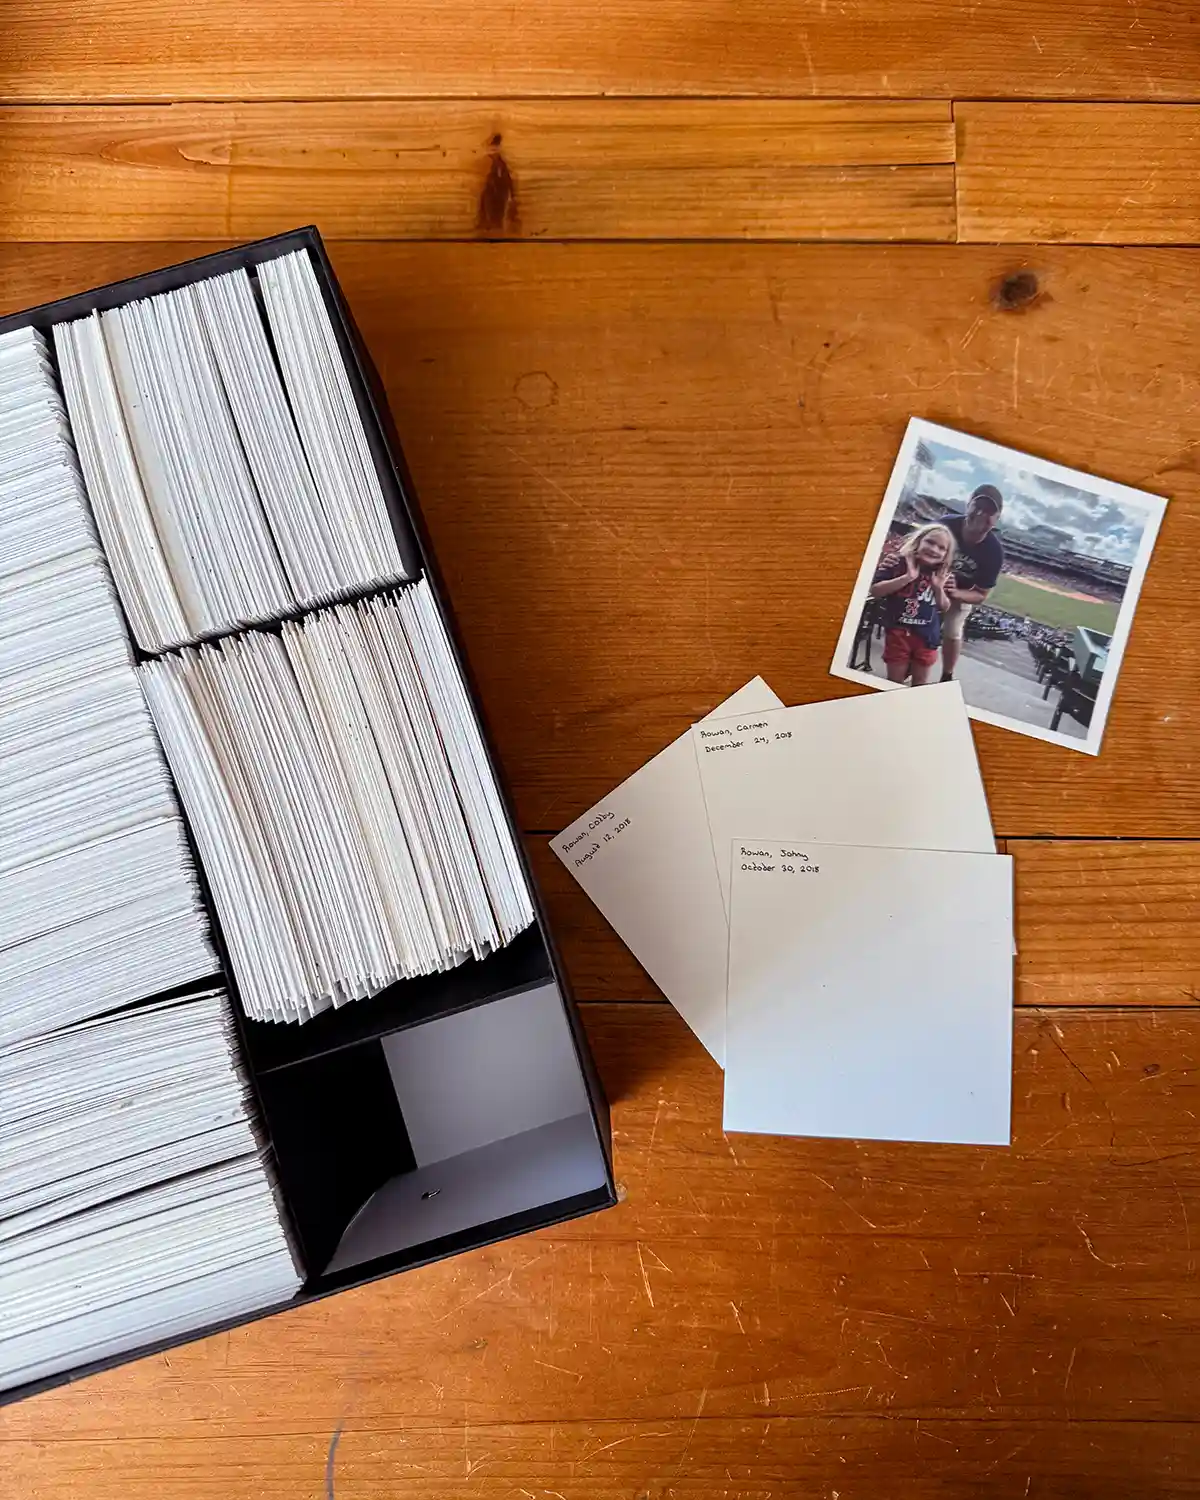
While I was working on this project, I noticed that I was already forgetting the locations and sometimes even the people in some of the photos. In a few instances, I experienced difficulty in figuring out if it was a photo of baby Rowan or baby Beatrix. In my defense, they looked freakishly alike in their first year of life. Actually, they still do.
I used my favorite archival pen, a Micron Fineliner Archival Pen 01 Point Size, to label the photos. I’m trying to add the date, location, people, and any other pertinent info to each photo.

Photo Capacity
Each photo box holds roughly 900 square 4″ x 4″ photos. And yes, I counted. It breaks down to about 160 in each small section and 580 in the large section. Also, I had no idea I had this many photos! It doesn’t seem like that many.
Label The Boxes
These photo boxes didn’t come with labels but it was easy to measure and make labels out of card stock. I only added the year to each box label since I’m organizing mine by the year.

I love how this project turned out. It’s one I’ve been thinking about doing for a long time now and I finally bit the bullet during Michael’s recent organization sale. I snagged each photo box for $3.99 although their regular price is $7.99.
Random story incoming. I also grabbed some of those plastic photo storage boxes, the ones with a bunch of smaller boxes within the large box. I have intentions of using them to organize my massive and growing seed collection. I grabbed to handles to pop them in my rolling basket. Well…let’s just say both boxes were open and the smaller boxes went flying all over the store. Do you know how loud 32 plastic photo boxes are when they hit the floor?! No less than three sales associates came to ask if I was alright. Face…palm.
Now, to finish what feels like a never-ending process of labeling all