Do you ever have one of those weekends where you should do something in particular? You put it on the list, have every intention of tackling “said something” and yet it never gets done? You know, something like utilize the most perfect, rain free weekend to finish painting your porch windows because it’s (look for the blue moon) not raining? But somehow you find yourself installing shelving in the Etsy office? That was my weekend. Obligatory before and after:
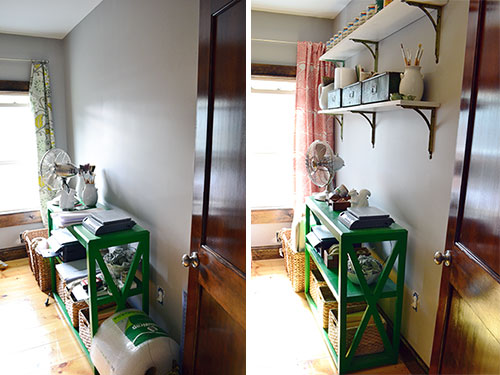
Did you also notice the return of the coral curtains?
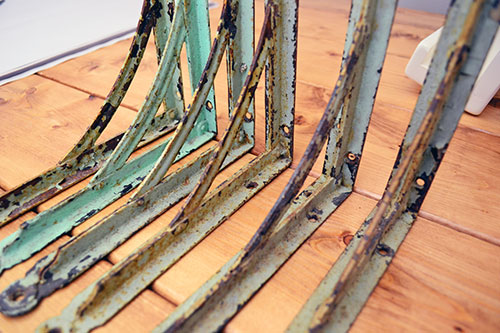
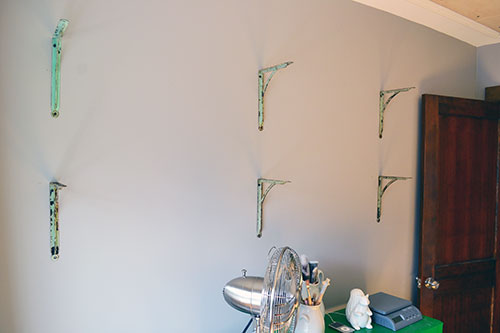
I couldn’t help it. I needed some shelving. It was one of those if-only-I-was-organized-I-would-get-soooooo-much-done kind of things. Which I totally believe in. I feel I finish ten times as many iPad stands when I can see my go-to stain and don’t have to dig through piles of old t-shirts to turn into rags before getting to it. Of course, it didn’t help that I had recently picked up a mess of these beauties during a trek to the flea market. We got 17 of them for $25. I couldn’t resist. They were cheap and had flaky bits…and in my world flaky bits equals purchase.
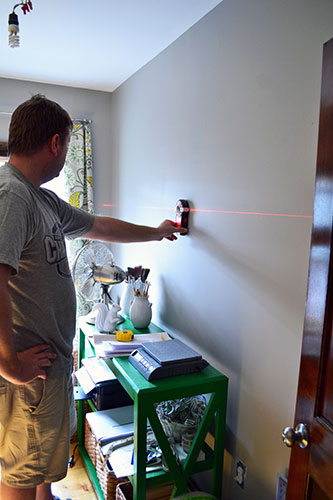
Because I knew I wanted to store quarts of stain on the shelves we made damn sure that the brackets would attach to studs. Colby copping an attitude…I mean…finding a stud.
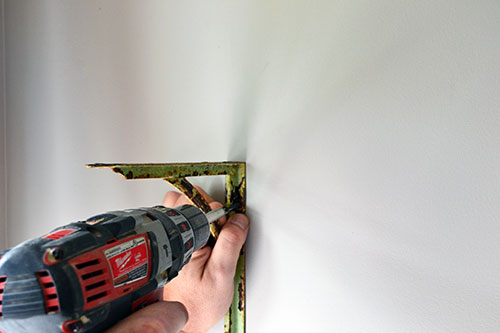
And screwing the brackets into the stud.
When it came to installing/placing the brackets, we used a very sophisticated method of eyeballing it height wise. Width spacing wise, the studs were equidistant apart so we just picked three studs that spanned the area that we wanted the shelves to go.
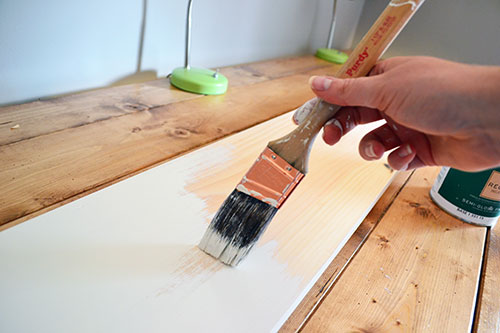
We decided that it would be best to first hang the brackets to help us decide the length of the pine board shelf. We opted to give the shelf about a 2″ overhang on each end (meaning the shelf is a total of 4″ longer than the space between each end bracket). Colby quickly cut down the pine board to the right size, 8-1/4″ x 68″ total size.

Then I quickly slapped some white paint on the board, not bothering to prime it beforehand. I was going for a ‘white washed” look in theory but in reality it was just shear laziness. Like a I-don’t-want-to-spend-more-than-20-minutes-on-this kind of laziness.
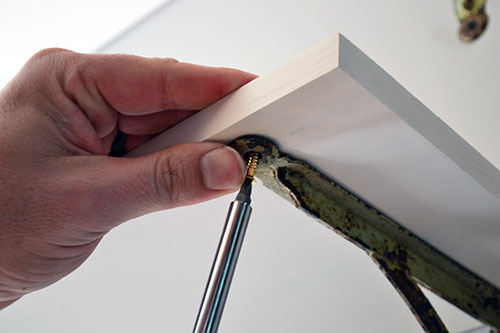
After letting the painted lady shelf dry overnight, it was just a matter of screwing the brackets to the shelves, ironically using some brass screws that we use to assemble our iPad stands.
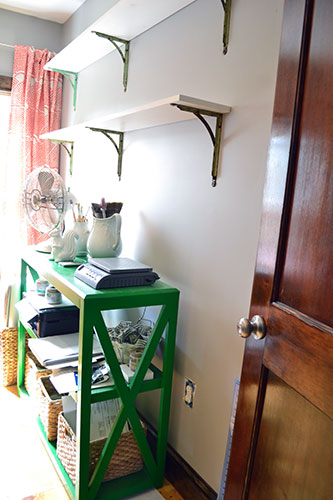
And scene…shelves installed. The entire shelf building, finishing and installing process took a whopping twenty minutes (minus the dry time). But that was the quick part of the project.
The longer part of the project…organizing what goes on the shelf!
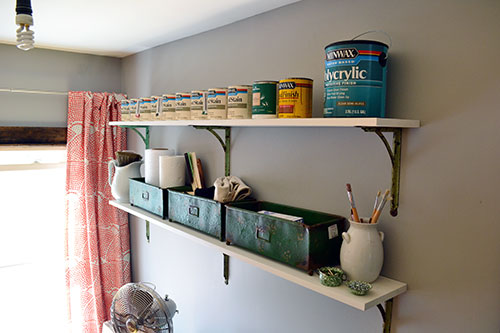
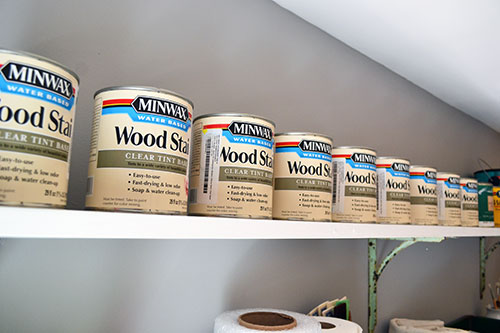
Lining up my water based wood stains in ROY G BIV order is totally my idea of a good time on a Sunday evening.
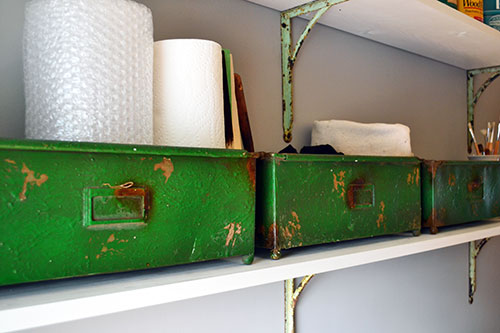
My favorite part of the shelf organizing was utilizing a trio of green, metal storage bins that I picked up from Home Goods a month or so ago. They were only $9.99 each, so about $30 for the set. I organized them by task…for the most part. So when it’s time to stain, I grab the bin in the middle which has rags, my staining brush, drop cloth and stir sticks. No more rummaging through a box under the desk looking for that gosh darn staining rag! Which usually ends up me empty handed and running to our closet contemplating cutting up Colby’s Patriots tee (I’m a Giants fan…can you blame me?), but that could never end well.
I even spent a little bit of time organizing the green bookcase underneath the shelves.
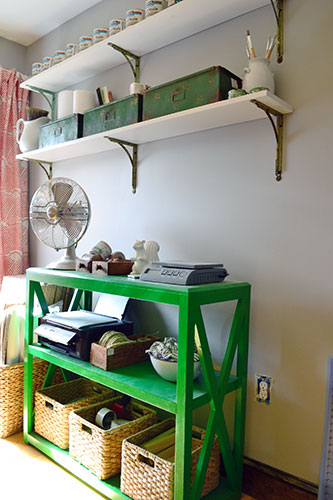
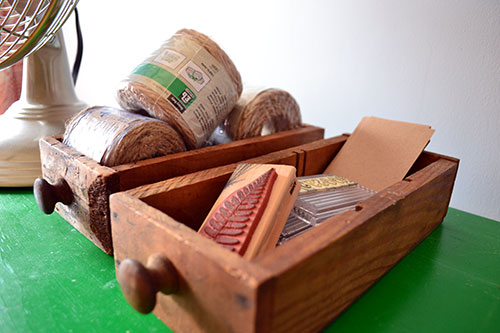
I picked up a few old, wood drawers at a local antique store for about $4 each and used them to store like items. Like extra rolls of twine which I use assembling the iPad stands or stamping supplies for product tag making.
The beauty of the whole shelf building/reorganization is that it freed up soooo much space underneath the desk for product storage. The old, wood boxes used to hold stains and iPad manufacturing supplies mixed in with the stands. But now…all that space is dedicated to product.
Pssst…What have you guys been organizing lately? Craft supplies? Paints in ROY G BIV order?

Looks great Angie 🙂 I love the green of that bookcase too 🙂 xo Kristin
Thanks so much Kristin!
It’s so nice to have an organized space. Everything looks great, Angie. (Especially the pops of green!) I love all the vintage pieces you incorporated into the room, too.
Oh my gosh! Tell me about it! Organization = happiness which = productivity! Thanks so much for the sweet comment!
I love the wooden boxes you use for storage…and the drawers for the stamps and twine are super cute!