In every major renovation project, there is always a project you don’t think of during the planning phase. It’s seemingly small but alas important. You’re plugging away and going to town and then this thing you missed crops up and it’s scramble time to try and figure out what works. When we renovated our bathroom that project was the DIY floor transition between the bathroom and the attic closet.
Don’t get me wrong, it turned out great in the end, but it was touch and go there for a while, especially when it came to stain matching! That’s another post for another day.
But we built a hardwood flooring transition, matched it as best we could to the existing floor material in the bathroom, and created a step down into the attic. All for a minimal cost.
The Bathroom To Attic Closet Transition
How about a little background info on the flooring transitions between the attic closet and the bathroom? Right on, let’s do it.
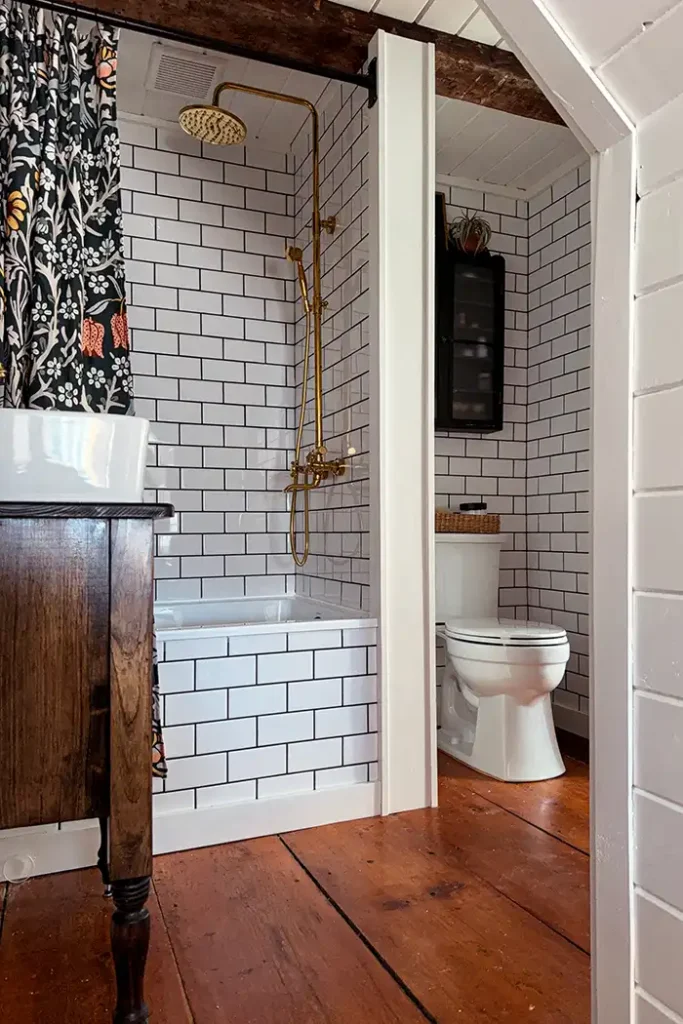
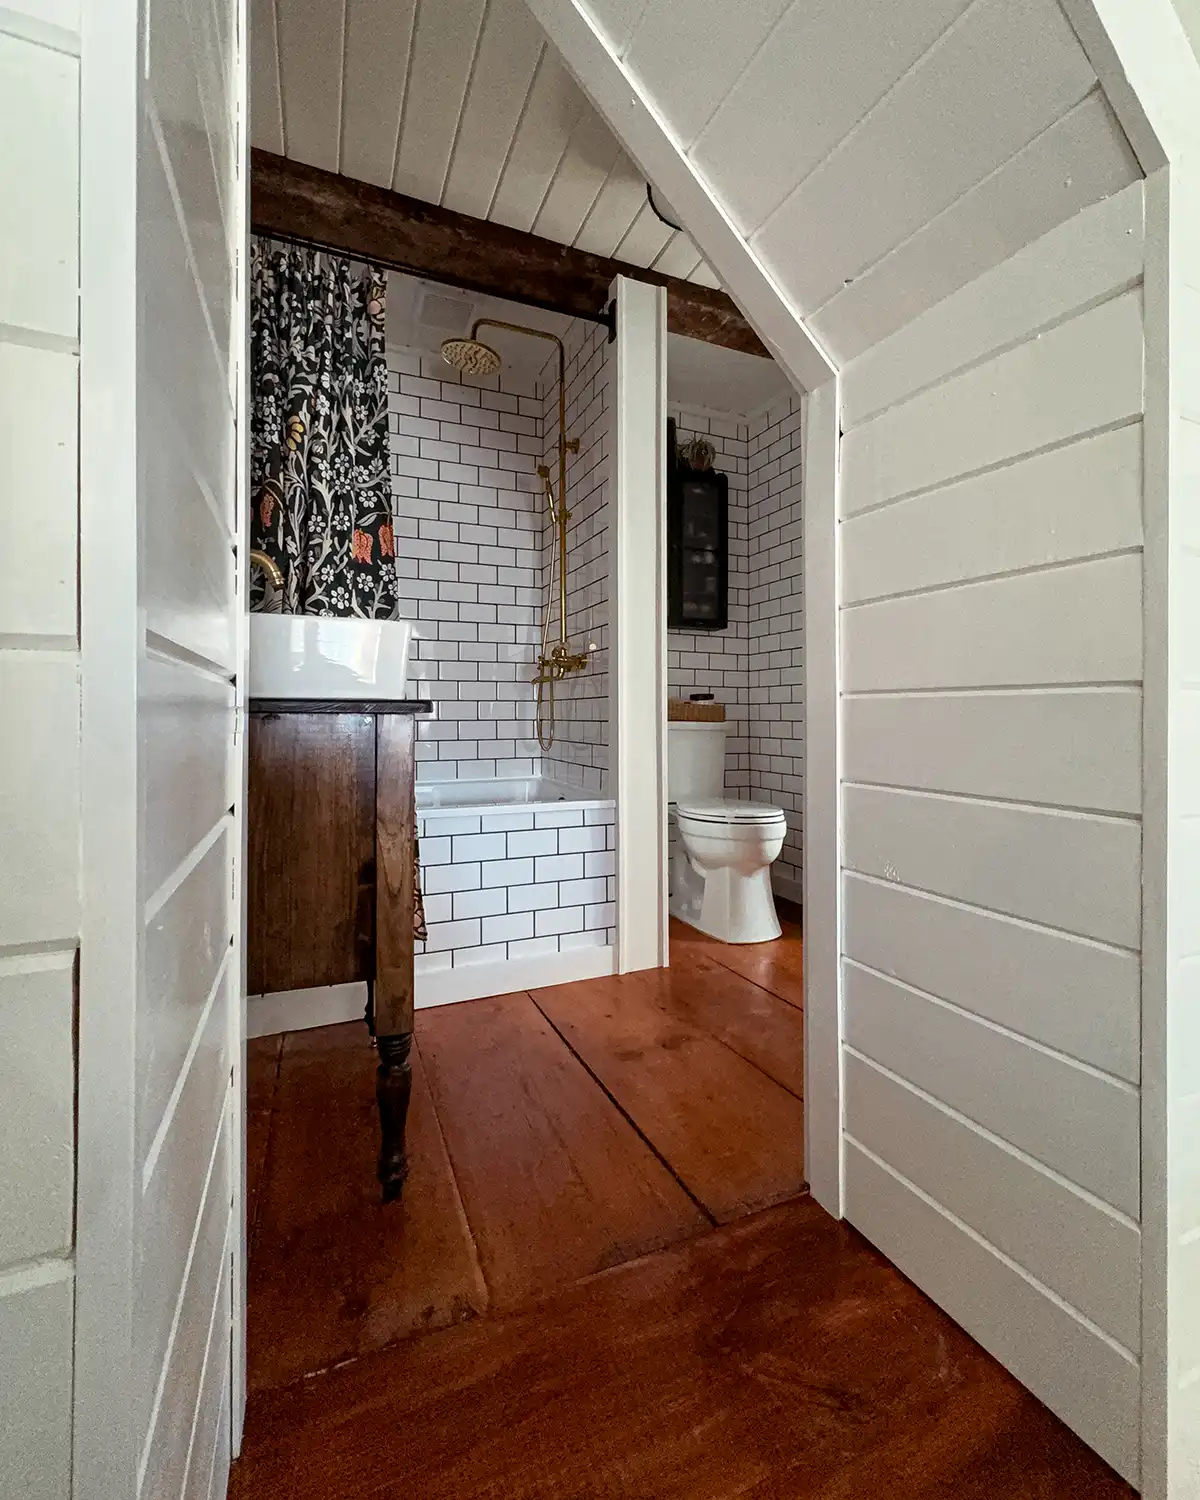
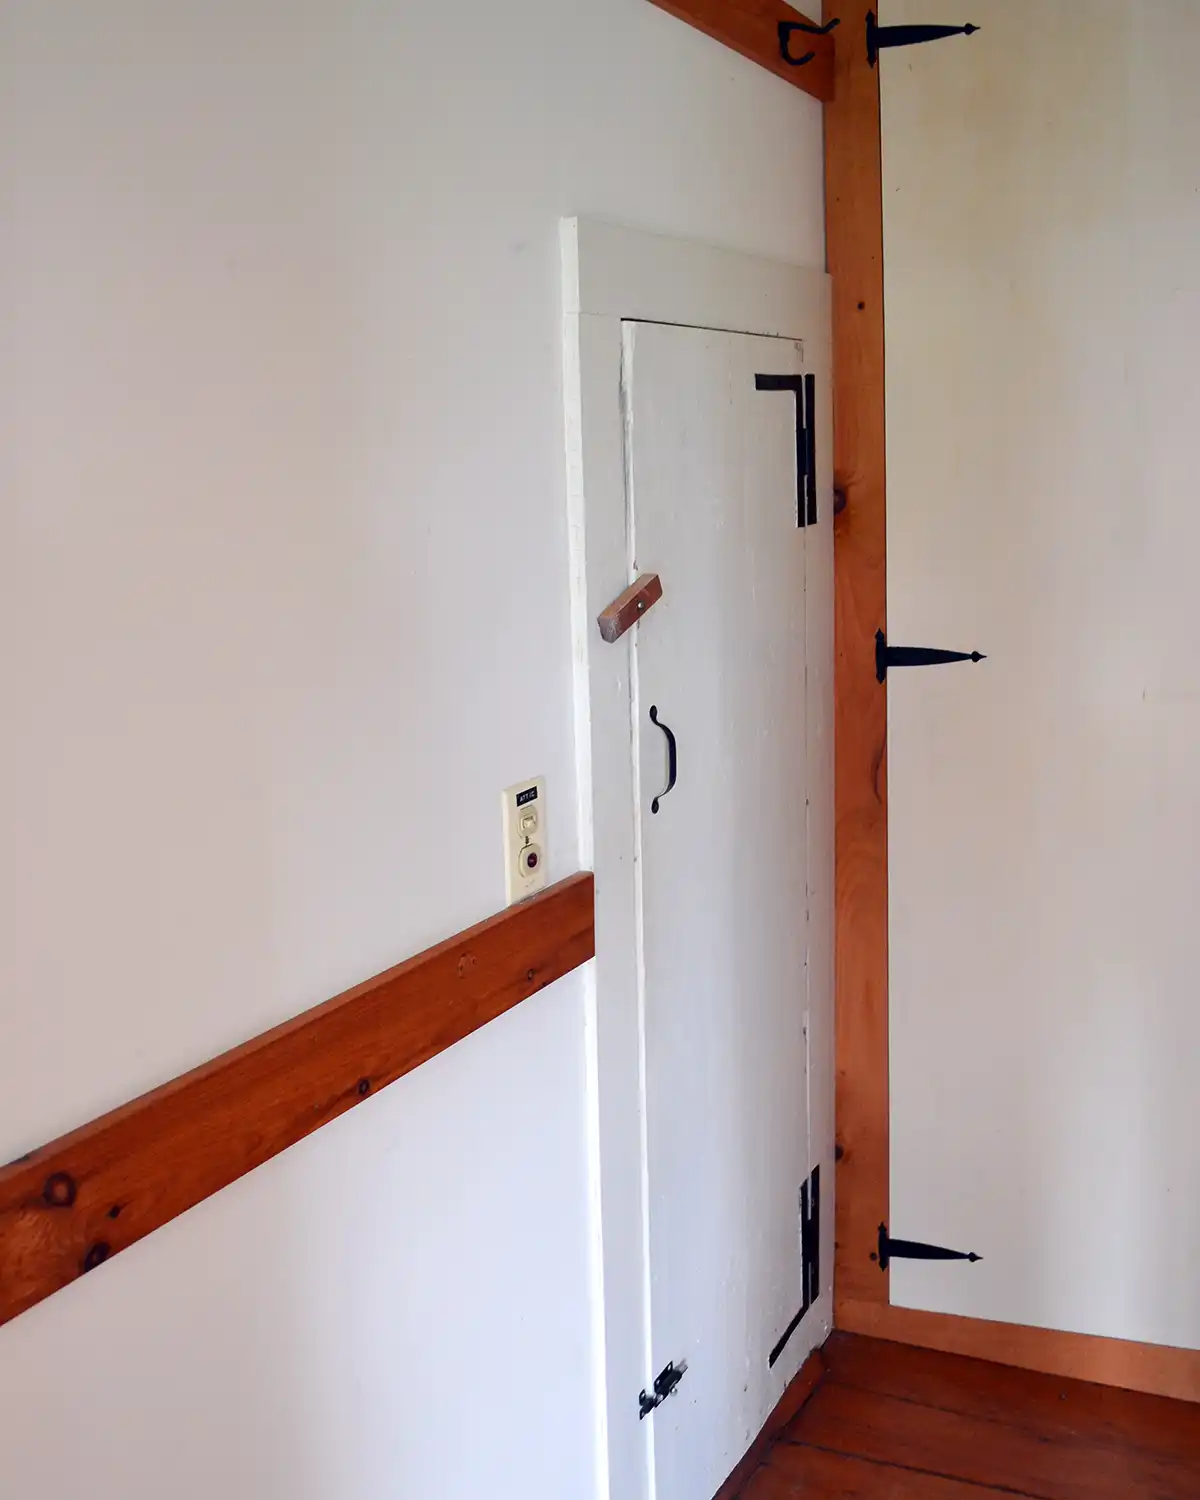
One of the strangest design elements of our original primary bathroom, before we started renovating it, was the attic access door from it. You can see it in the before photos of the bathroom.
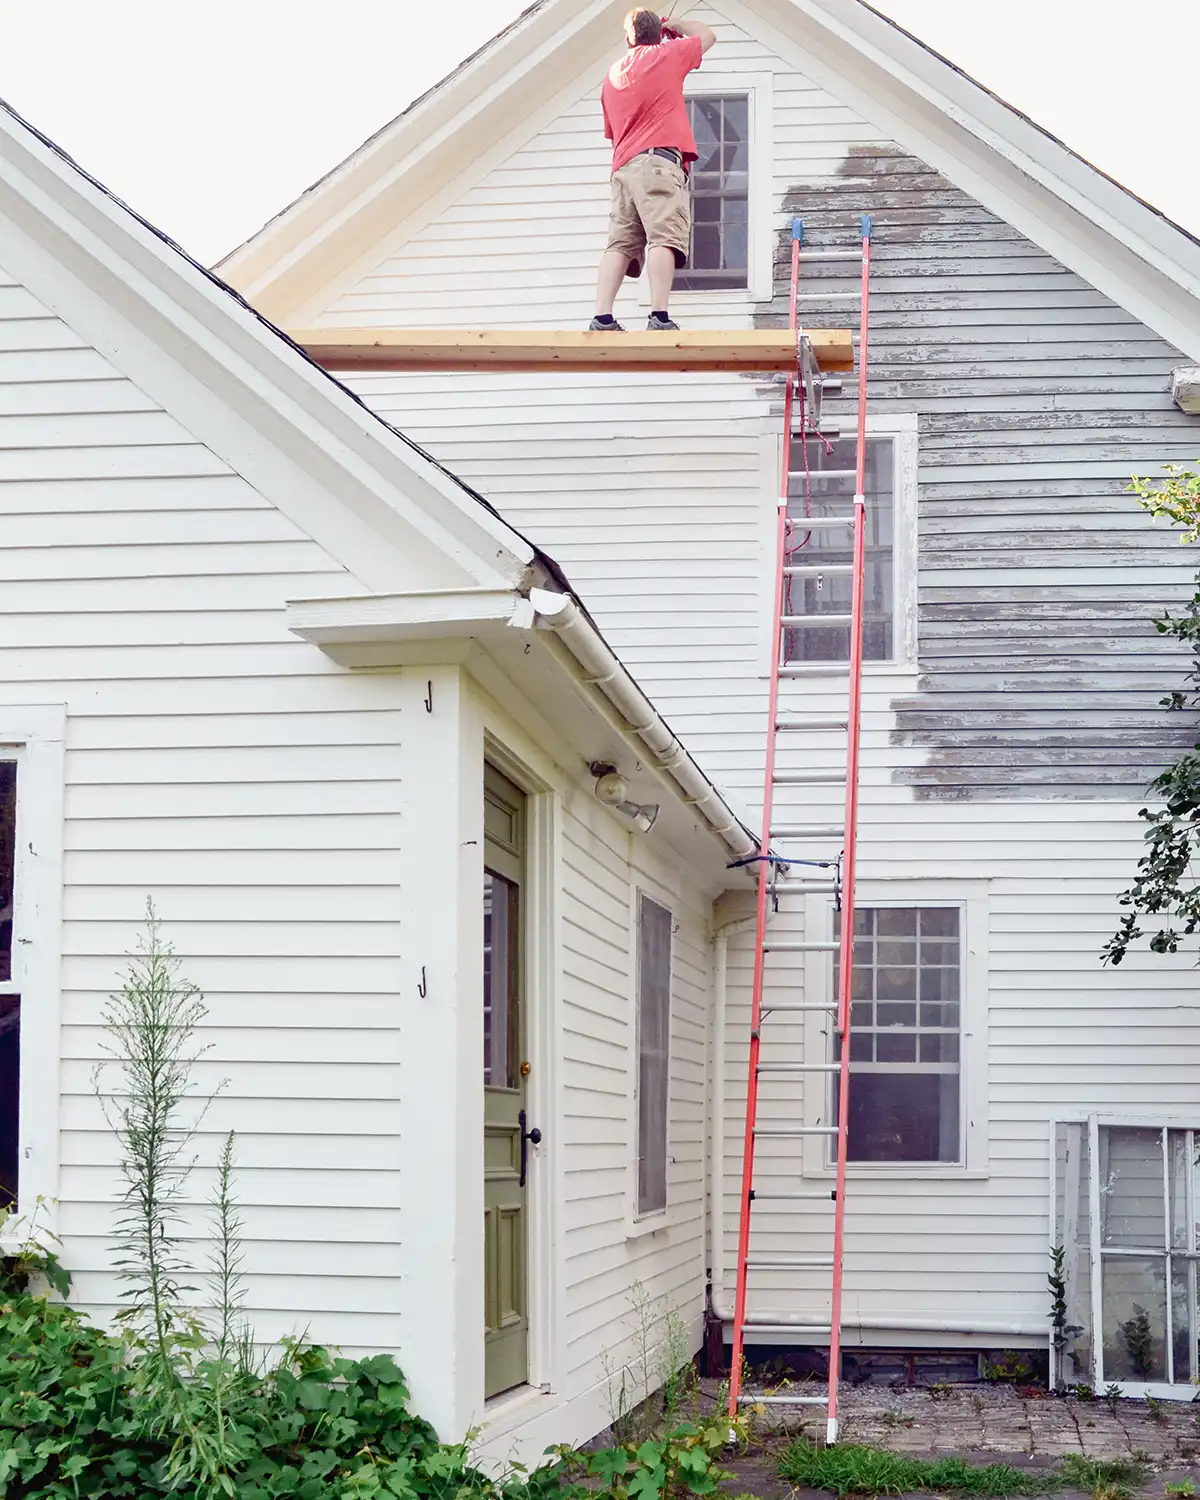
It’s the attic space above the keeping room. Our home is essentially a large rectangular main living space, with this smaller room/attic attached to one side.
Here’s an exterior pic for reference. That’s our bedroom window on the second floor. You can see how the smaller section of our home is offset with the main structure. Fun fact. It was the first part of our home that was built and to this day still sits on giant rocks as a foundation.
So the “little attic” as it’s affectionately called around here is only accessible from our primary bathroom. While at first, it seemed truly odd. We’ve leaned into the feature when we decided to turn the attic into a walk-in closet.
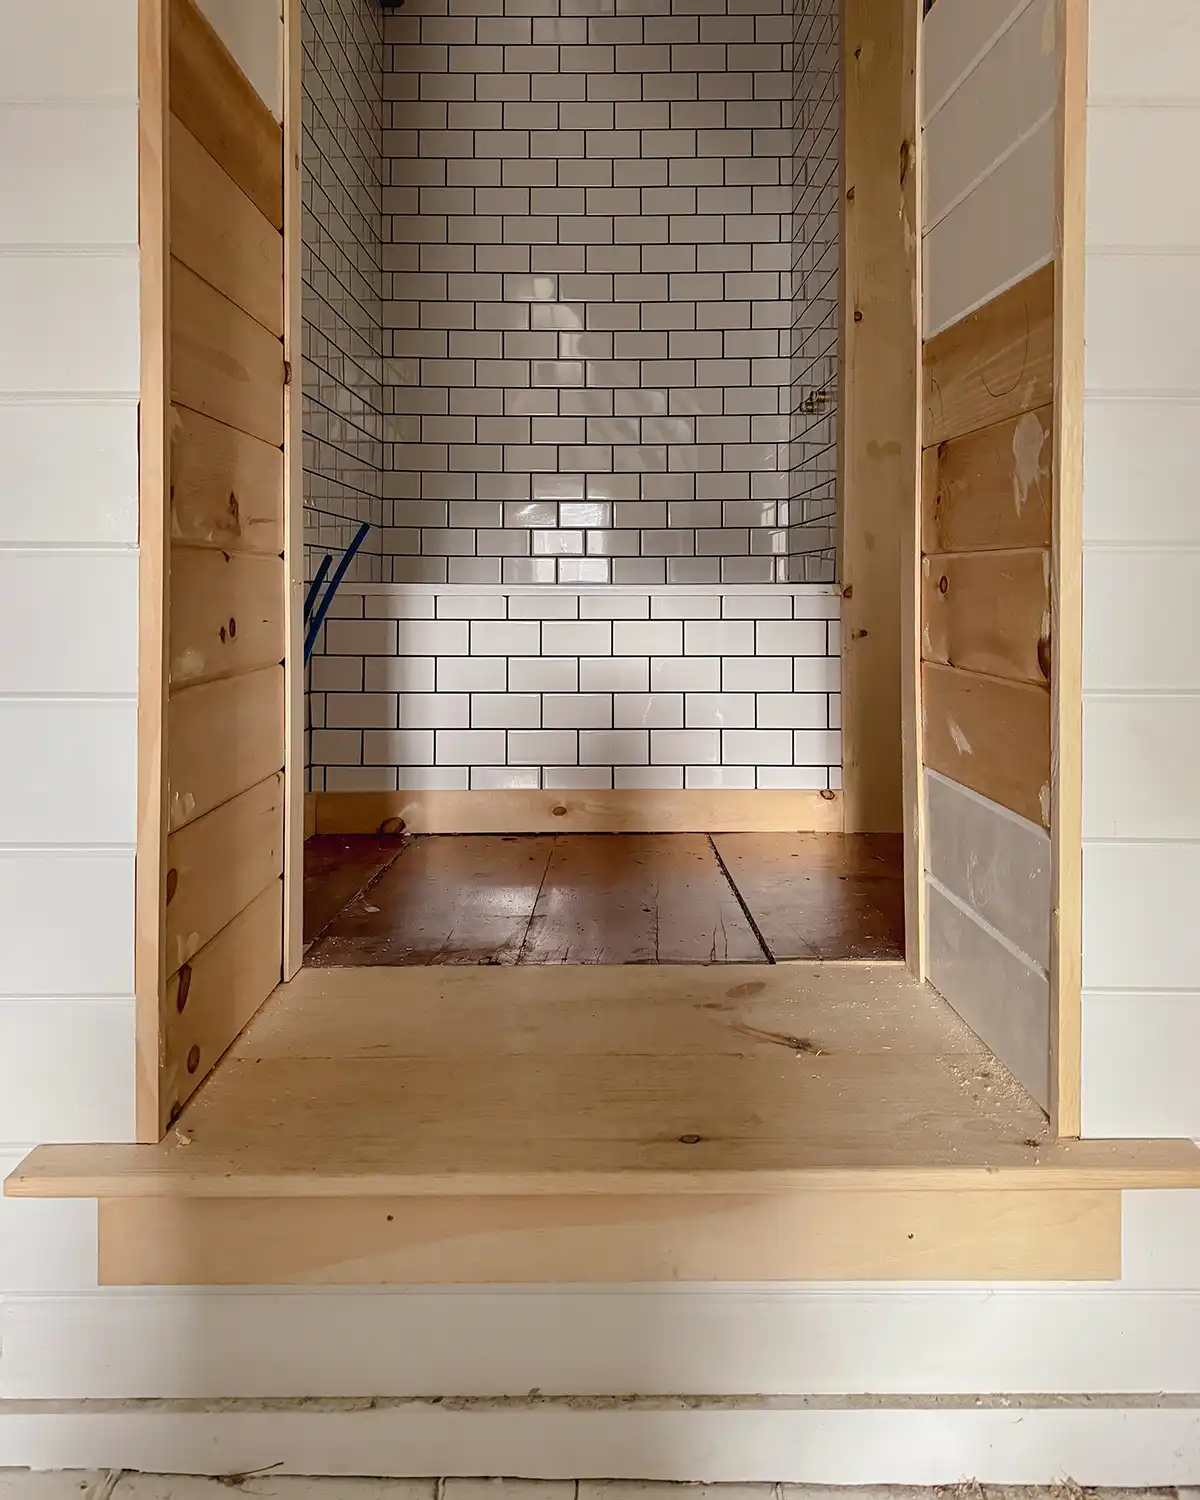
Access to the attic is a step down from the bathroom. The doorway is also in a spot where it’s not full height since it’s up against the attic’s roofline. Colby at 6’5″ struggles getting through but even I at 5’9″ have to duck a little bit. We couldn’t push the door back to the peak because the bathroom wall is an exterior wall. So we made it work the best we could.
But once we opened up the wall and made an open walkway between the bathroom and the attic, instead of the doorway fit for Snow White’s companions, it was evident we needed to work on the floor transition, factoring in a height difference.
Why A Perpendicular Transition Piece
If we were installing new flooring in the bathroom, we probably would have continued the wooden floors right to the edge of the attic wall and added a thin hardwood strip of wood at the end. But because removing our vintage circa 1781 wide pine floor boards was not an option, (spoiler…we adore them) we had to figure out how to transition from the bathroom to the attic seamlessly. I love the look of seamless room transitions and wanted this one to appear like it’s always been there.
We opted to install a couple of pine boards perpendicular to both the painted attic floors and the bathroom floorboards. In the end, it was the perfect transition for our project.
How To Install A DIY Floor Transition
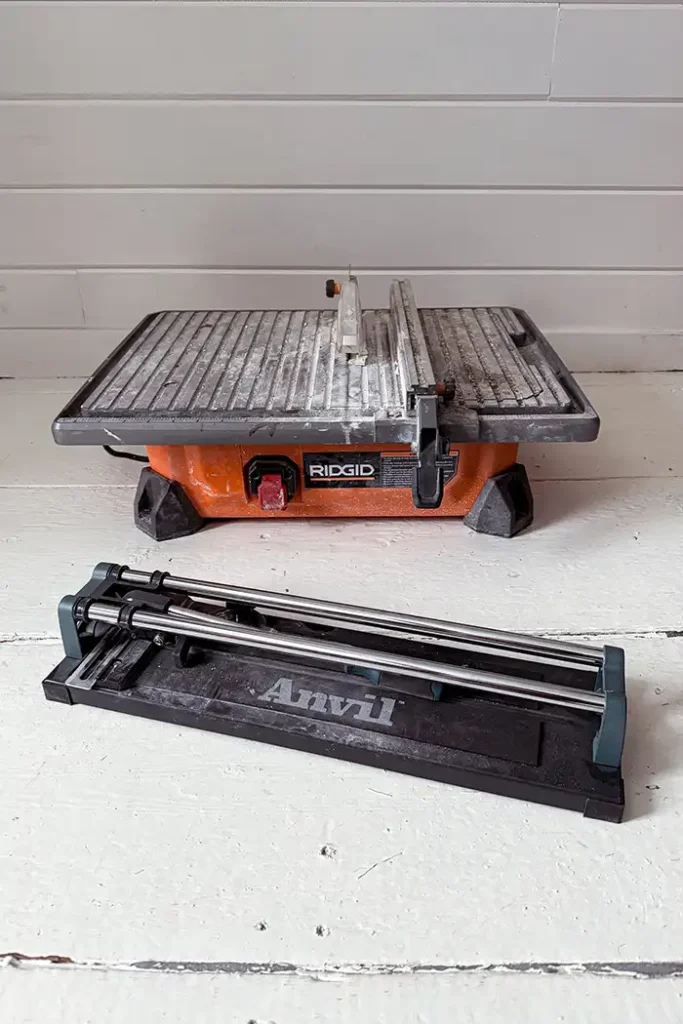
Building and installing flooring transitions is a relatively easy job if you have some basic tools. Like a Dremel, straight edge, circular saw, and a drill.
The first step is prepping the floor and squaring things up. We wanted a clean, straight transition which meant that we had to trim our current flooring material, lining it up with the wall.
To trim the flooring, we used a straight edge spanning the doorway, butted up against the cement board (before tiling the walls), and marked a cut line. This line would be where the door jambs come out to if there was a door here.
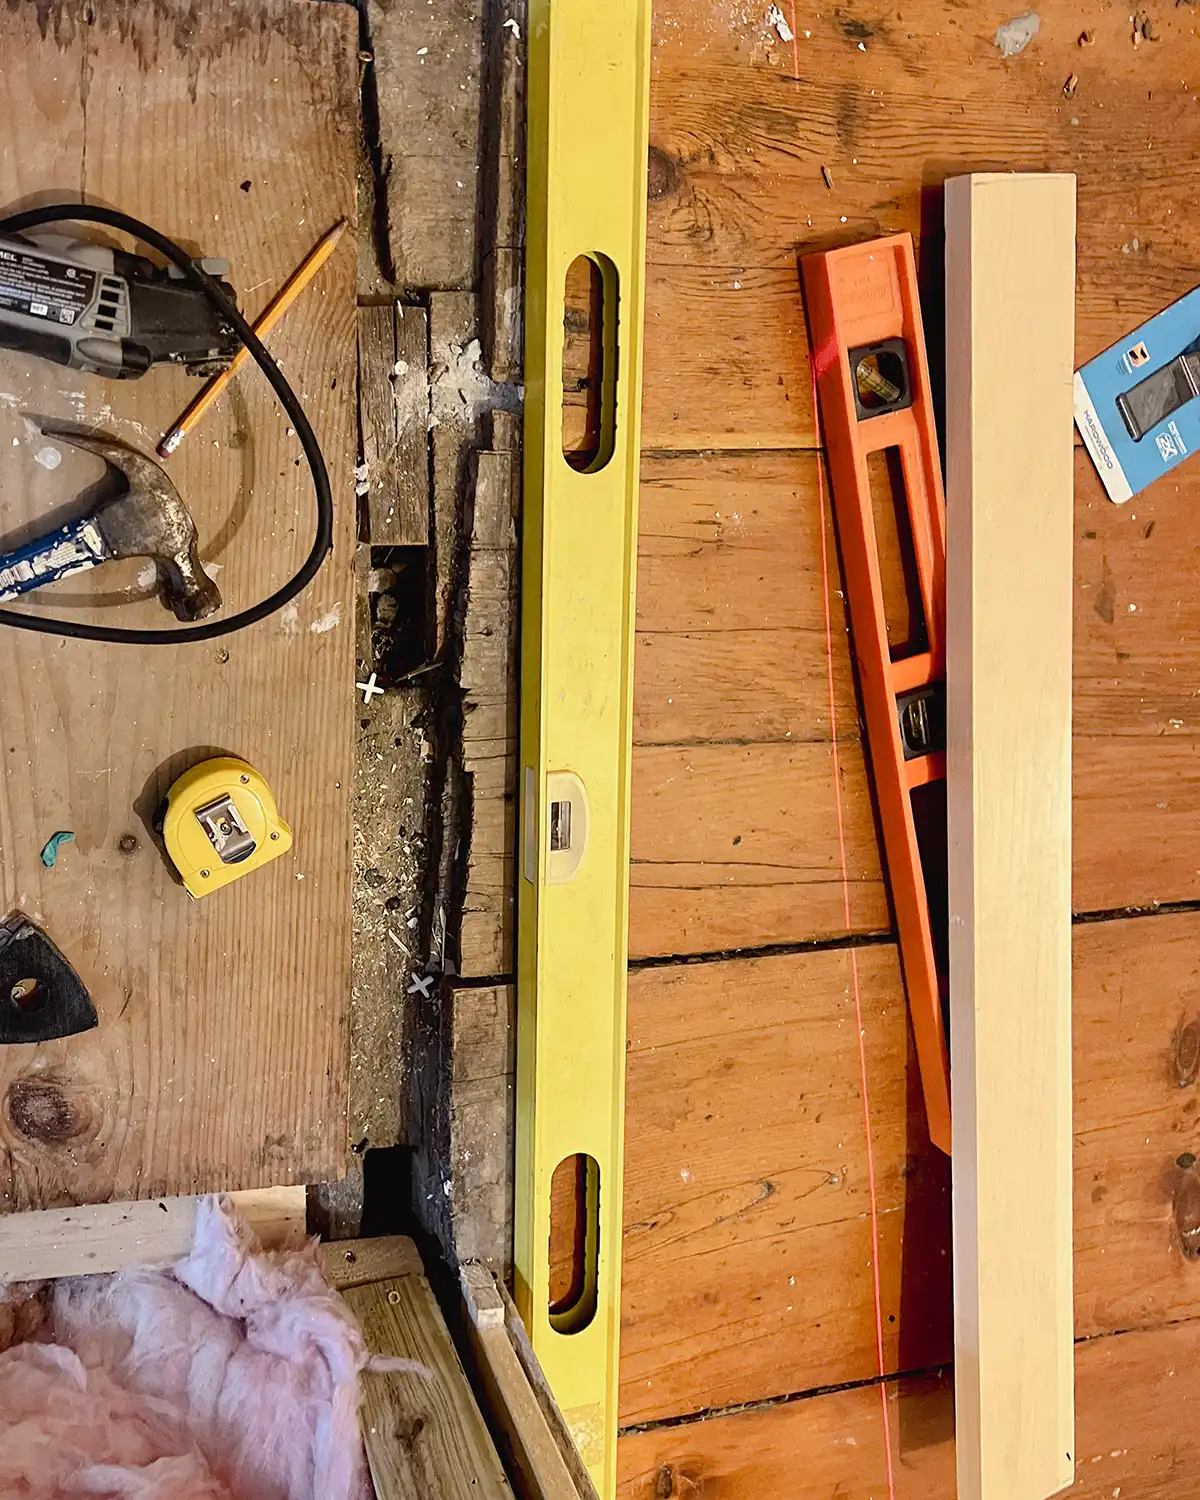
With nice straight lines right down the edge of the flooring, we used a Dremel, with a new saw blade for extra sharpness, and trimmed the boards.
Then we cut two 10″ wide pine boards down to length, shimmed, and fit them to the floor transition space. These were secured with trim head screws from Home Depot and later filled with putty before finishing.
Dealing With Different Heights
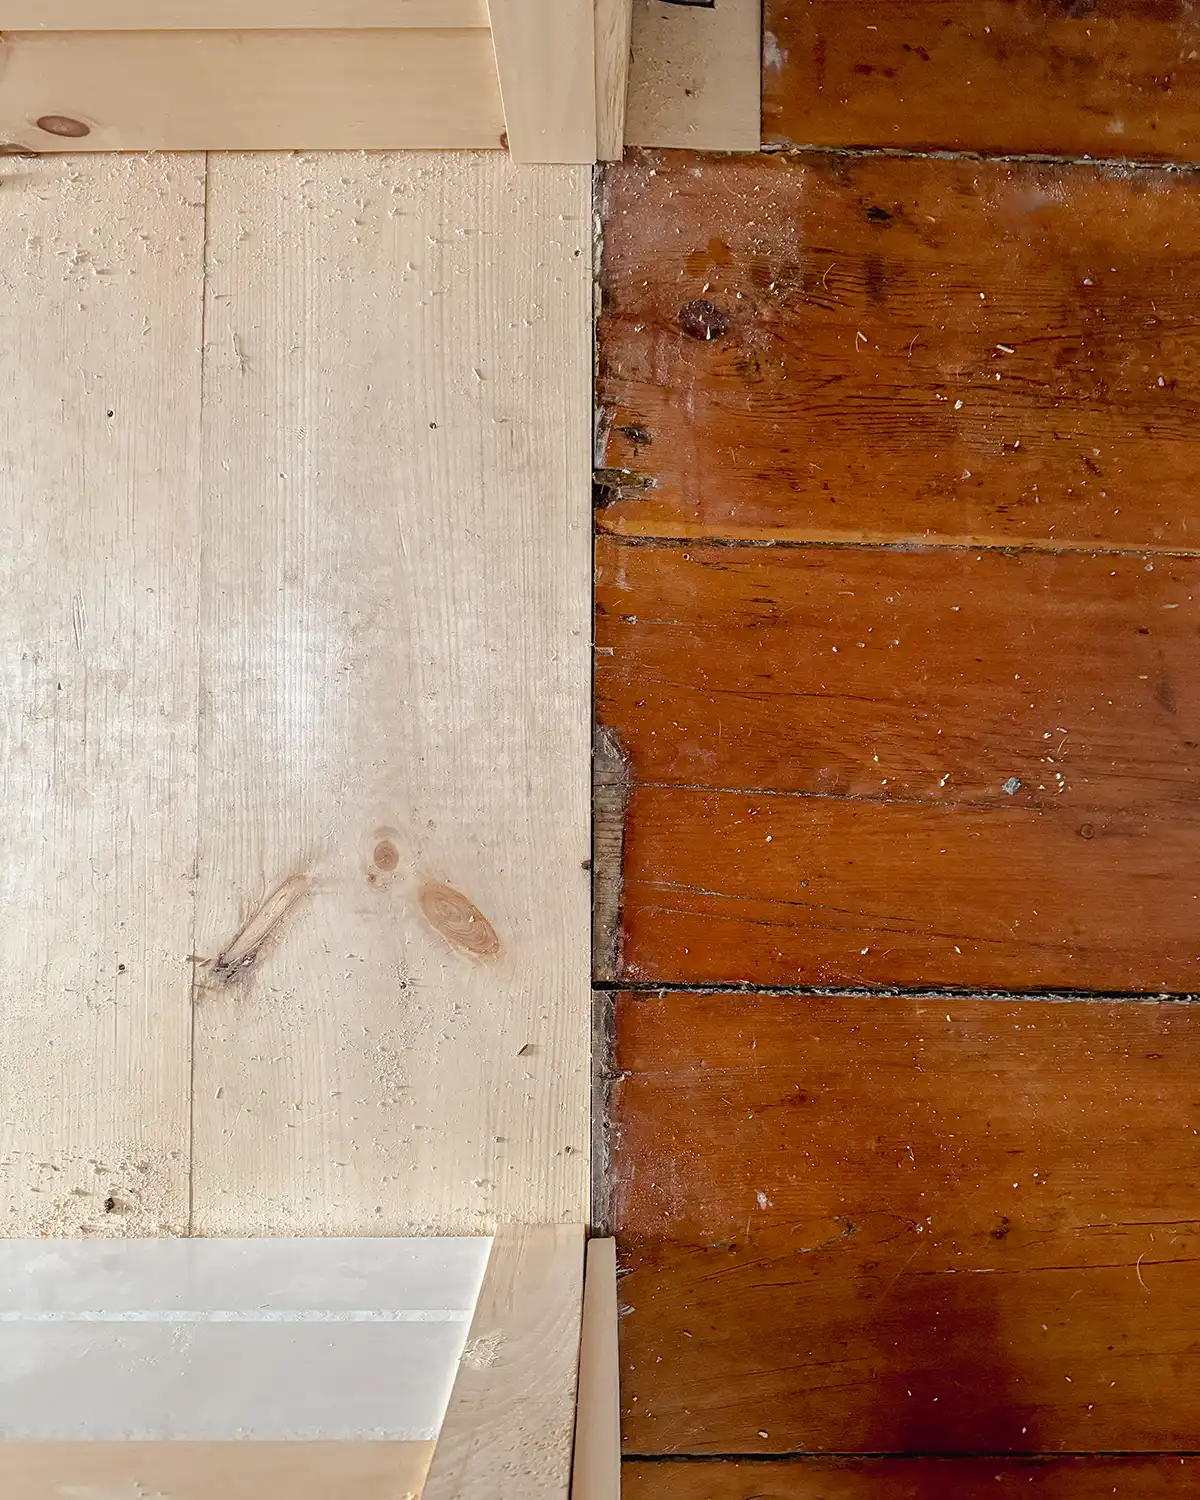
Different flooring types often mean different thicknesses. Differing thicknesses of the flooring mean you need shims to help level and create a seamless floor transition.
We installed shims underneath the floor transition boards to bring them up to the floor height of the bathroom. Otherwise, we would have some unlevelness and a tripping hazard instead of the smooth transition we wanted.
After securing the boards, we finished the walls and trim on top of the floorboards before moving on to finishing the new flooring.
Here’s a visual of the view from the attic closet into the bathroom just after installing the transition and trimming it out.
Deciding On How To Finish The Flooring Transitions
We had two schools of thought about finishing the wide floor transition.
Thought number one, paint it all white when we painted wall planking white. This would be the easiest option by far. Or thought number two, stain the new flooring to match the existing hardwood floor for a seamless look. By far the harder option.
Why did I think staining would be more difficult? Trying to get an exact match in the finish between the new eastern white pine boards and our circa 1781 old-growth pine boards sounded daunting. There’s no way to match the age and patina of 200-plus-year-old flooring when finishing new boards.
Even though the transition and the old floors are the same species, they are essentially different materials. There is just no comparing 200-year-old growth pine to the pine available on the market today.
Even with a gut feeling that the new boards would stick out like a sore thumb no matter what I did to try and match the older wood, I decided to go for it anyway. Glutton for punishment? Perhaps.
But I thought, even without a perfect match, the floorboards would look SO much better stained than painted. It would give just a little bit more depth to the bathroom and make it feel bigger.
Finishing Flooring Material
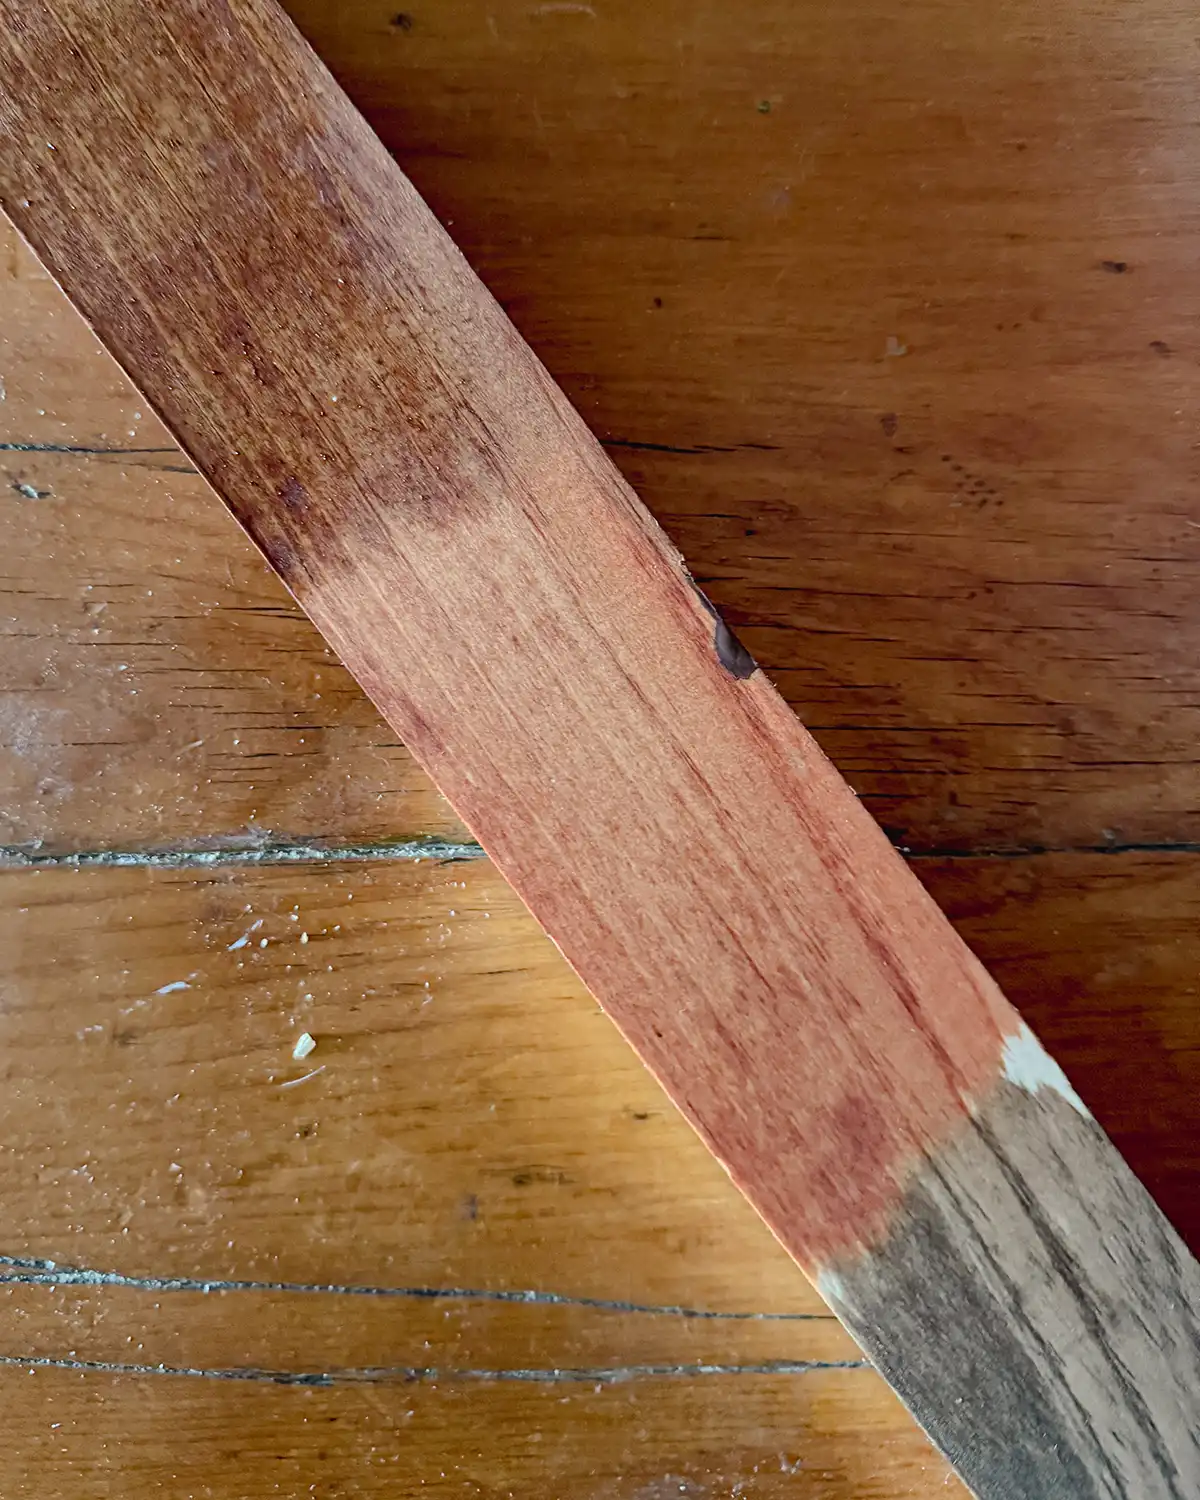
I’ll be honest, matching the floor stain was a lesson in trial and error. After nine samples tested and three trips to the local hardware store for more samples, I finally landed on a stain combo that worked.
Funny story. By my third trip to Aubuchon, AND having the same person ring up my purchases each time, the sales crew was onto my antics. On my third visit to the checkout counter in under an hour the cashier tells me, “It’s okay, I’ve had people come in five or more times for stain samples before they got a good match.” My response was, “Who says I’m done.” Although a good “Hold my beer” would have sufficed in the moment.
Old-fashioned trial and error is not one of the best ways to match wood stains. But I was having a moment of weakness…I mean…felt rushed to finish the project for the One Room Challenge. In retrospect, I wish I had ordered a Minwax Fan Deck or asked to borrow one from a paint shop. It would have eliminated my first few rounds of testing.
We landed on a layer of Minwax Gunstock which gave the floorboards a warm finish with shades of red. Then I layered on Minwax Polyshades American Chestnut to darken the stain until it matched the old floorboards.
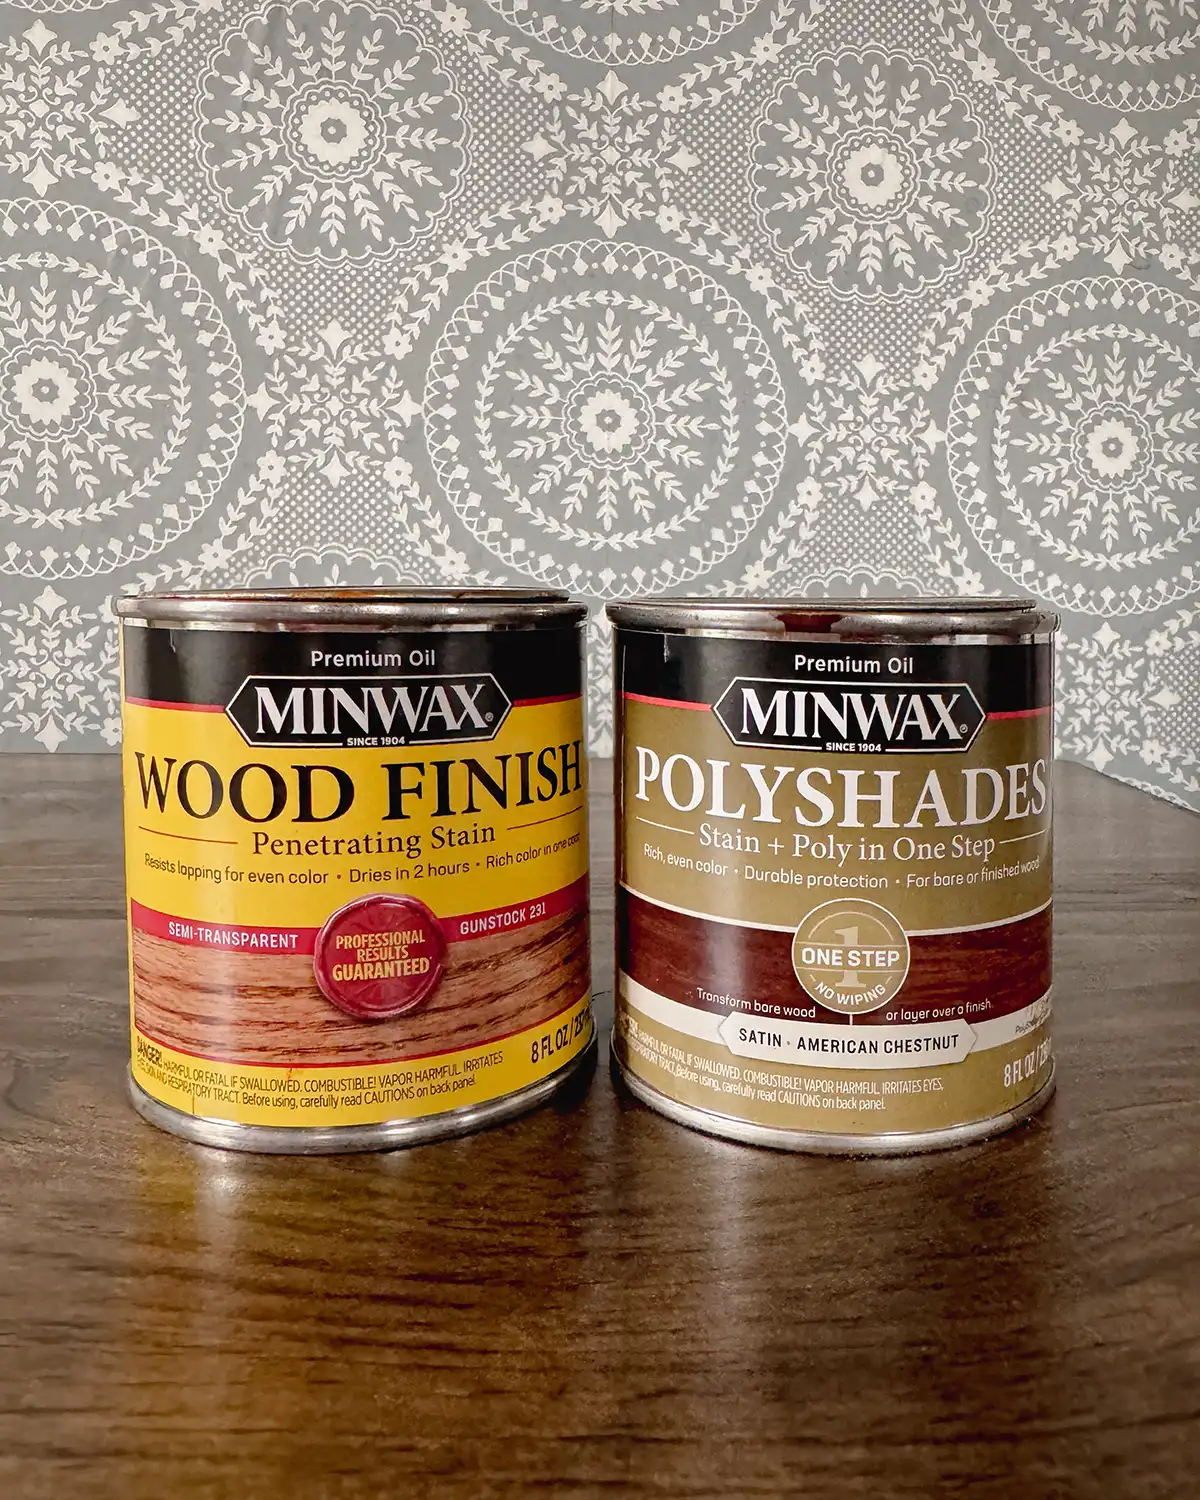
After prepping the boards by sanding the surface of the flooring for a smoother transition, I stained the boards, let them dry overnight, and then added a couple of coats of Minwax Polycrylic as a top coat.
Thoughts On Stain Matching
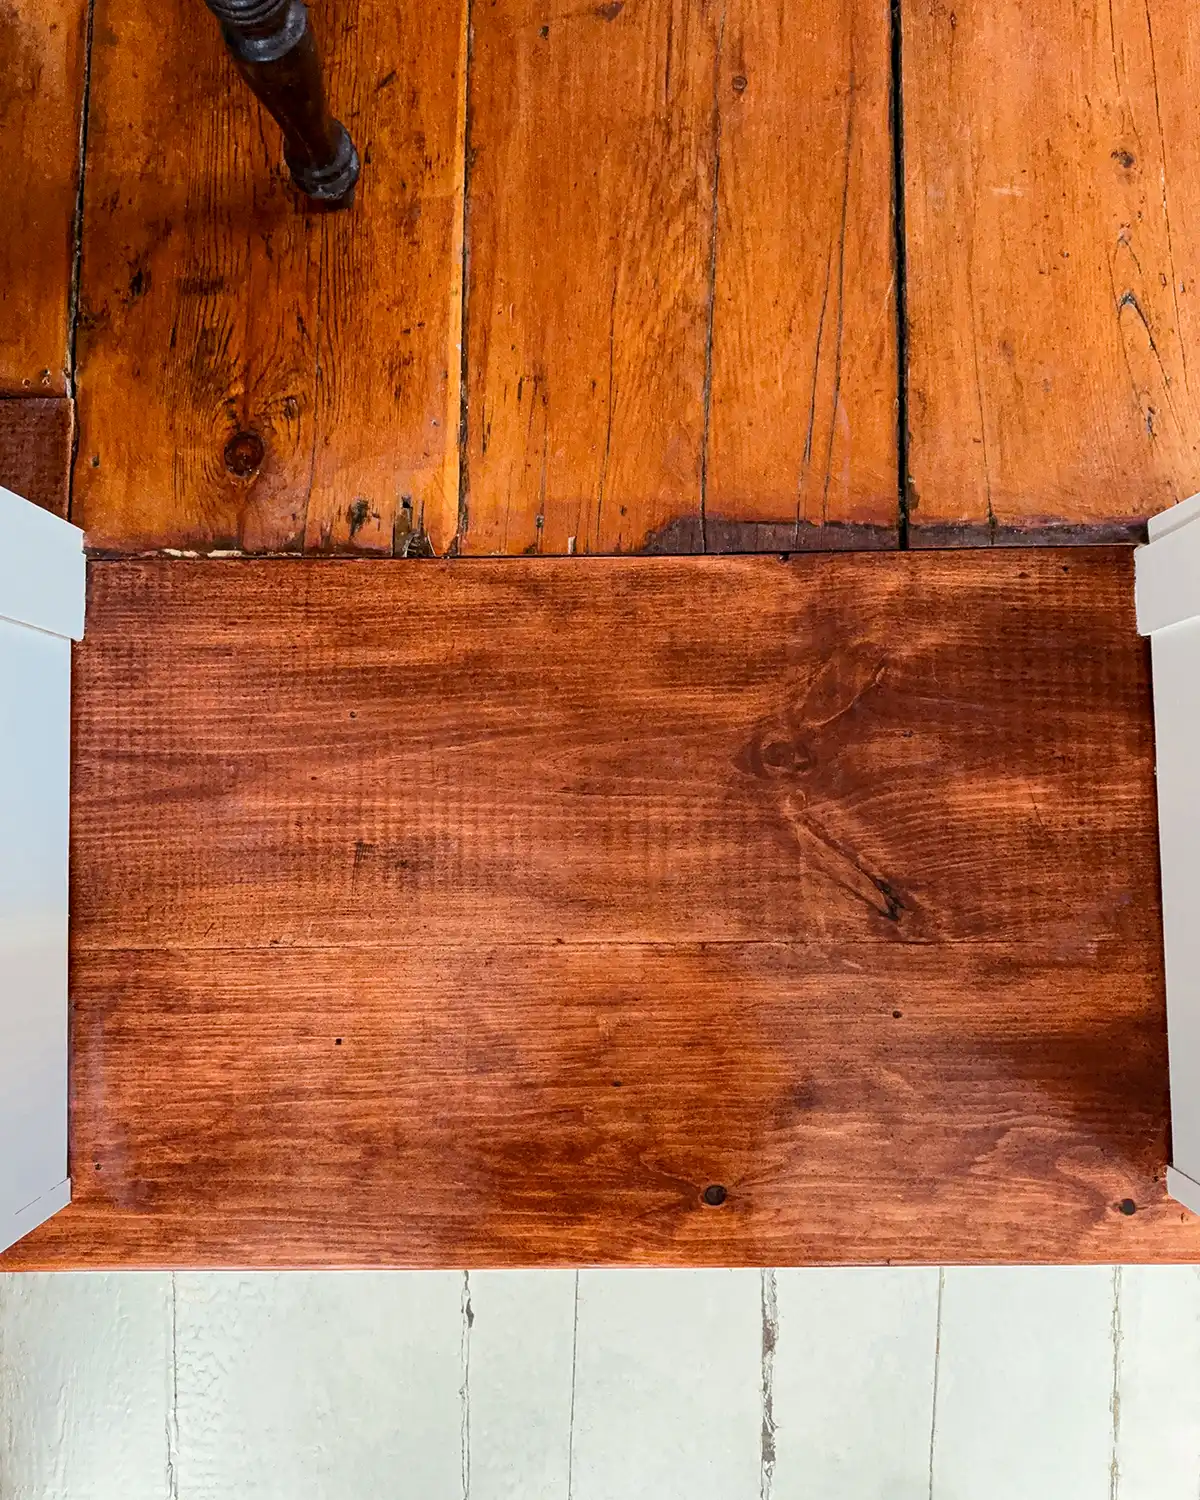
In-person and during the daylight, the stain on the new boards looks relatively seamless compared to the old floor. But at night, when the lights are on, the stain looks very different.
Here’s a shot during the daylight where the stained-to-match floor transition matches okay-ish.
Versus a shot of the floor at night when the stain doesn’t quite match:
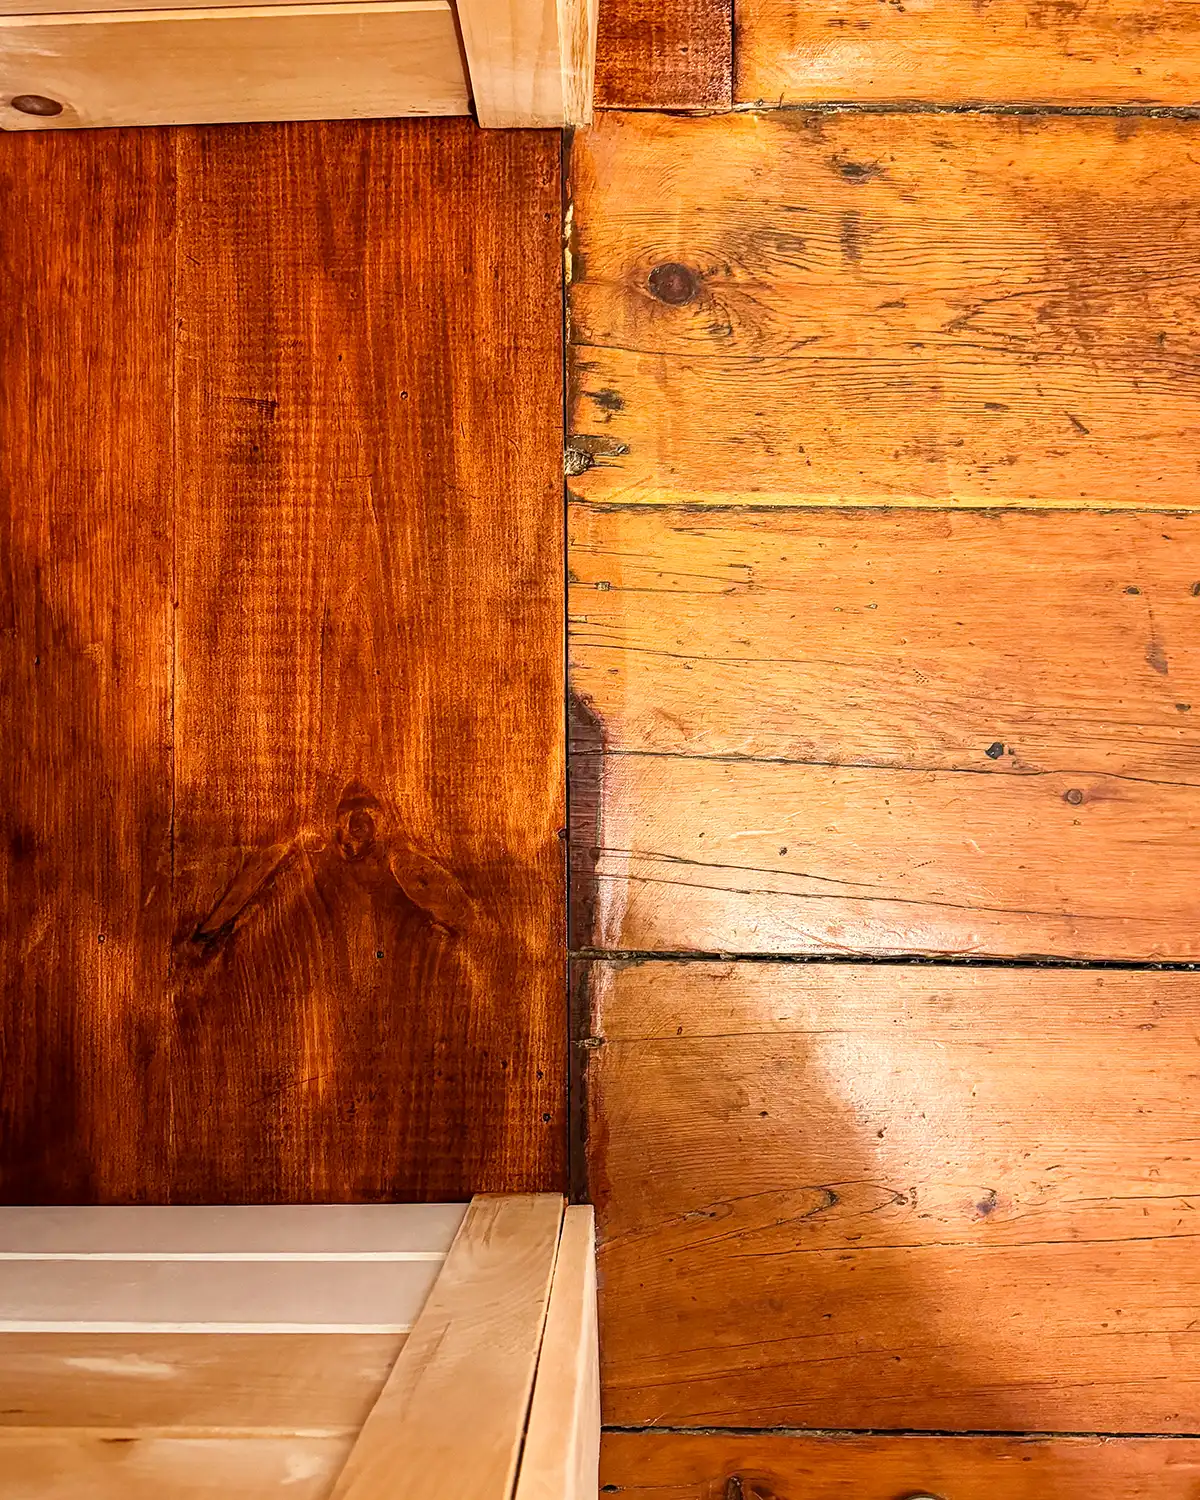
It’s “good enough” in my book and I know it will patina over time and with some traffic. It’s not one of the high-traffic areas in our home, but I do walk through here multiple times a day.
This was my first attempt at stain matching and I learned a few things that I would do differently.
First, I would probably take my time mixing stains to come up with a better match. I got a pretty good match in the two childless hours I had to test out stains, but it could be better. I’m thinking less reds and more yellows to get a better match.
Second, I didn’t test my color selection in different lighting. There may have been a different combo that matched better at night.
Third, I did not test how the poly would alter the stain shade. The match looked better before adding poly. It instantly intensified in color with the first top coat. Don’t be me. Test the poly on top of the stain as well. It’s a subtle difference but it’s still a difference.
It’s been four months since installing the bathroom to attic DIY floor transition and it’s holding strong. Somedays the match bugs me like a two-year-old wanting blueberries (true story), some days it’s more chill.
Regardless, I love the finished product and the seamless look of the DIY floor transition we built for the weird space between the attic and the bathroom. It’s built solid, no squeaking or rocking, and it’s become a favorite place for children to sit and wait for mom to get ready.