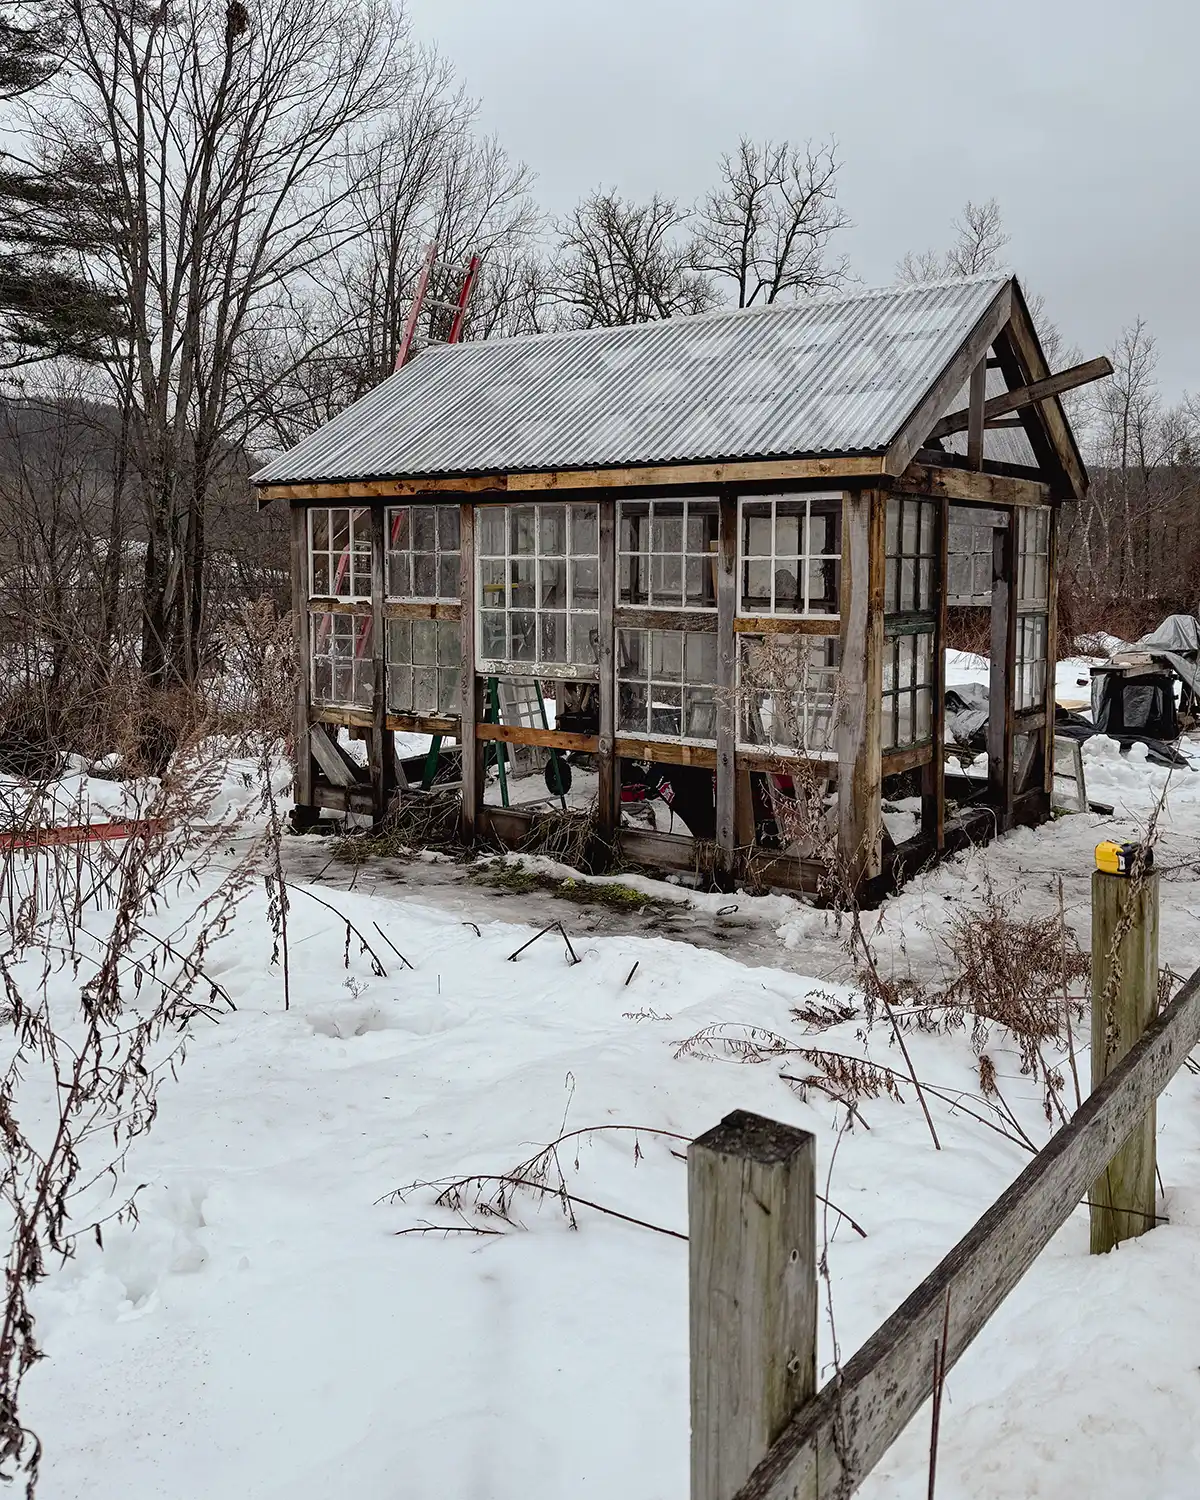
We hit a big milestone in the backyard DIY greenhouse project a couple of weeks ago and got the roof on. Huzzah for major progress! Today I’m sharing our step-by-step guide for how we installed the greenhouse roof, specifically how to install corrugated plastic roofing sheets.
We have never worked with corrugated sheets of polycarbonate roof panels before, nor have we ever built a greenhouse before. It’s been an exciting challenge to figure out how to build this greenhouse to fit our needs.
While this may not be the exact step-by-step instructions on how to install corrugated plastic roofing or the installation guide you need for your specific project, we’re sharing all the details on how we did it for our specific structure. We’ll also share the parts that we messed up (or went rogue) so hopefully you won’t make the same mistakes we did. Here we go.
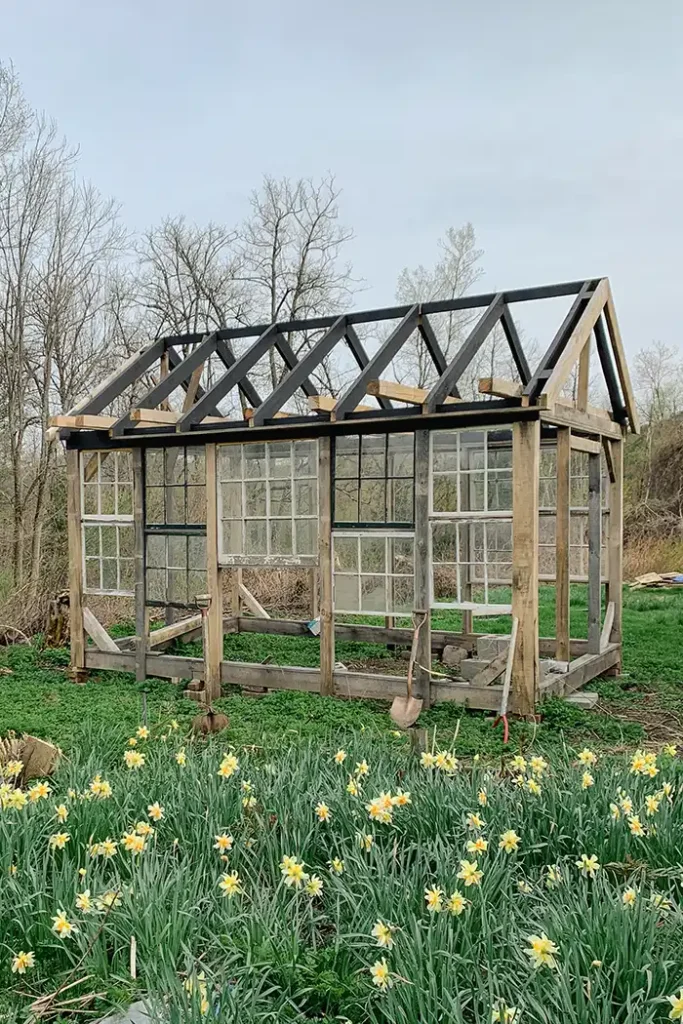
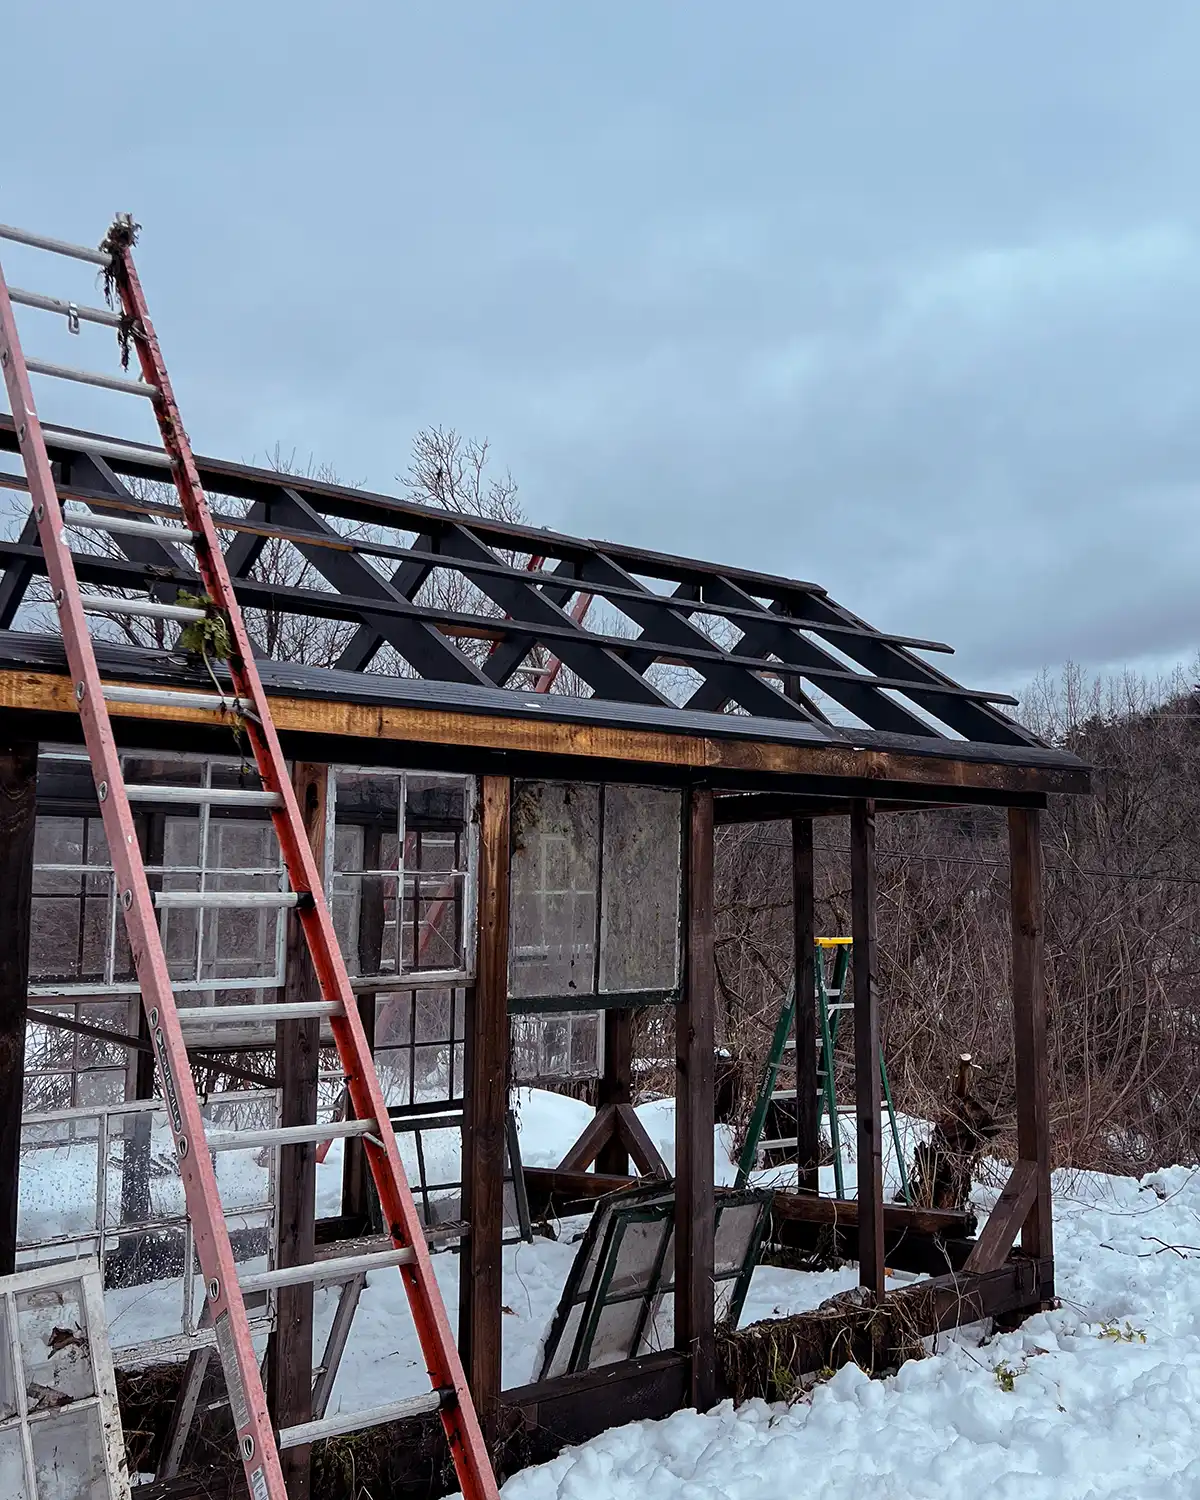
The Framed Greenhouse
We’re picking up this greenhouse building tutorial from the framed greenhouse structure stage. This means the sides are framed and the rafters are installed. You can catch up on our greenhouse building progress first with the greenhouse plans and framing post.
Also, note that the minimum slope for a roof of this nature is 1-1/2″ for every 12″. And now to install corrugated plastic roofing.
Supplies:
- Corrugated Polycarbonate Sheets (we used SunTuf 26″ x 8″)
- Corrugated Polycarbonate Ridge Cap (we used SunTuf 4′)
- Rough Cut Lumber (sizes 1″ x 3″, 1″ x 4″, and 1″ x 6″)
- Horizontal Wood Roof Closure Strips
- Drip Edge Flashing
- Foam Sealant Tape
- Roofing Screws with Neoprene Washer
- 2-1/2″ GRK Multi-Purpose Construction Screws
- 1/4″ Crown Staples (1-1/2″ Long)
Tools:
- Extension Ladder
- Saw Horses
- Circular Saw
- Fine-Toothed Saw Blade (140-tooth)
- Clamps
- Drill
- Tape Measure
- 1/4″ Crown Staple Gun
- Gloves and Safety Glasses
So let’s gather the necessary tools and get to work!
Step 1: Make Sure The Roof Is Square
In theory, each roof area should be square. In this step, let’s measure and ensure the roof is square.
To do this, we measured an X across each side of the roof to see if each diagonal length of the X was the same. On each side of the roof measure from the upper left (gable peak) to the bottom right (eaves) and then from the upper right (gable peak) to the bottom left (eaves). Repeat for the other side of the roof.
If the measurements are different, your roof isn’t square. Now is a great time to try and square up your structure before installing the polycarbonate roofing sheets.
Why is it important to square up your roof? The roof panels have to be installed with a specific overlap. If the roof isn’t square, the corrugated roof sheets can get off track and not cover your roof effectively.
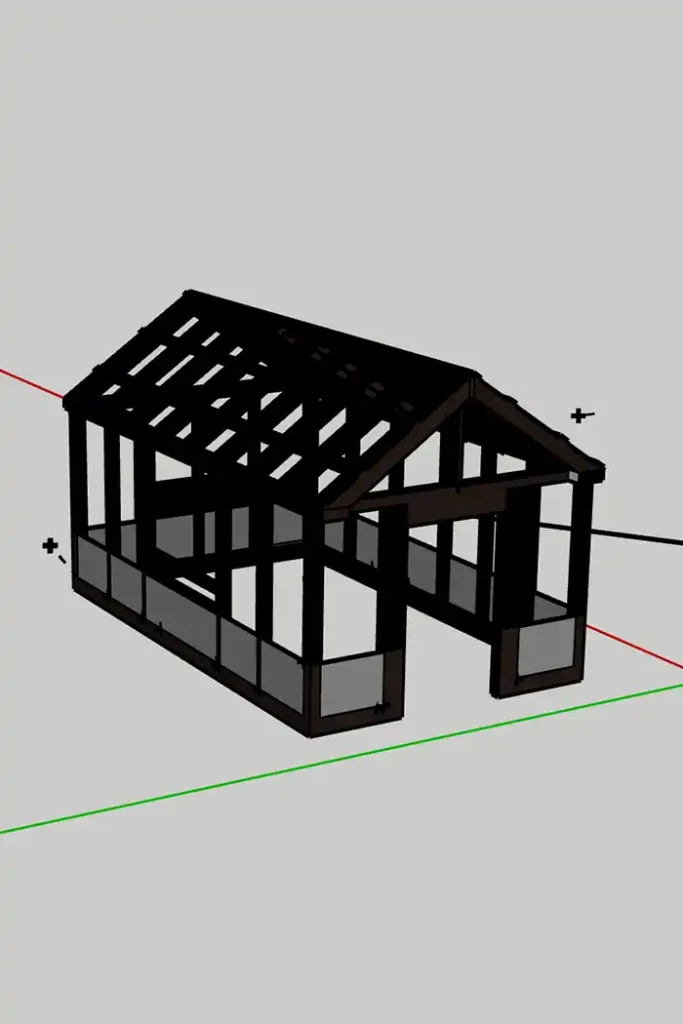
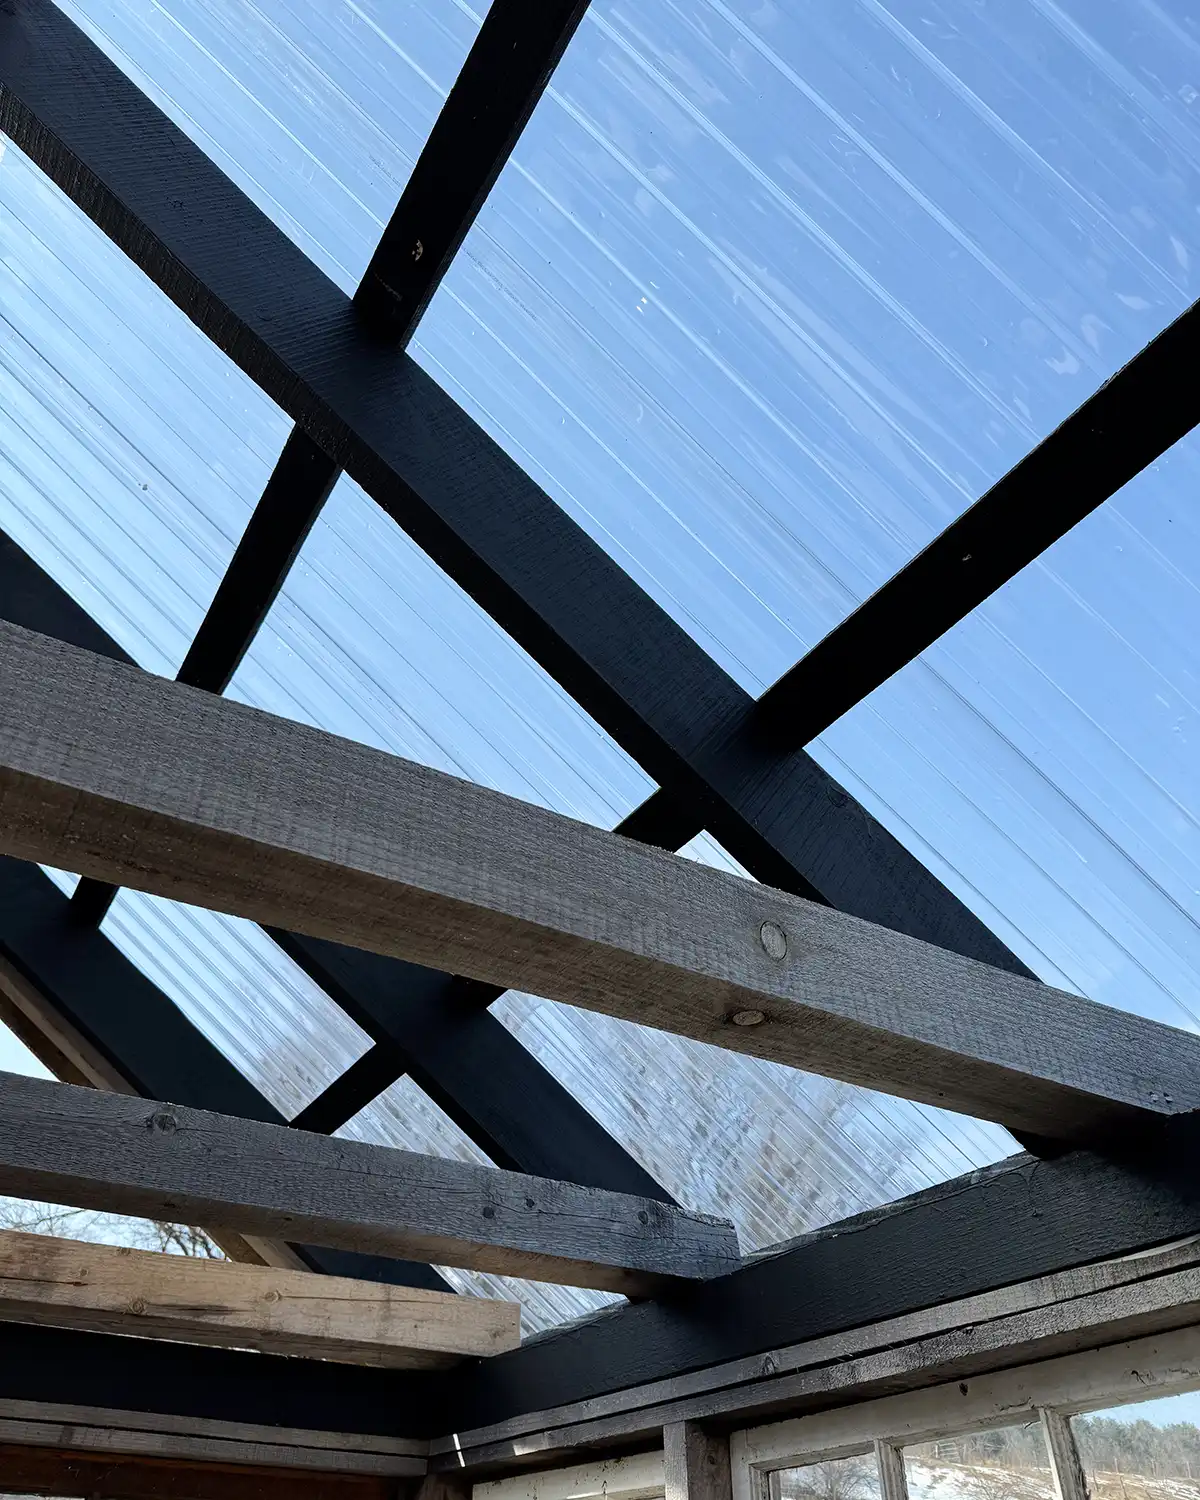
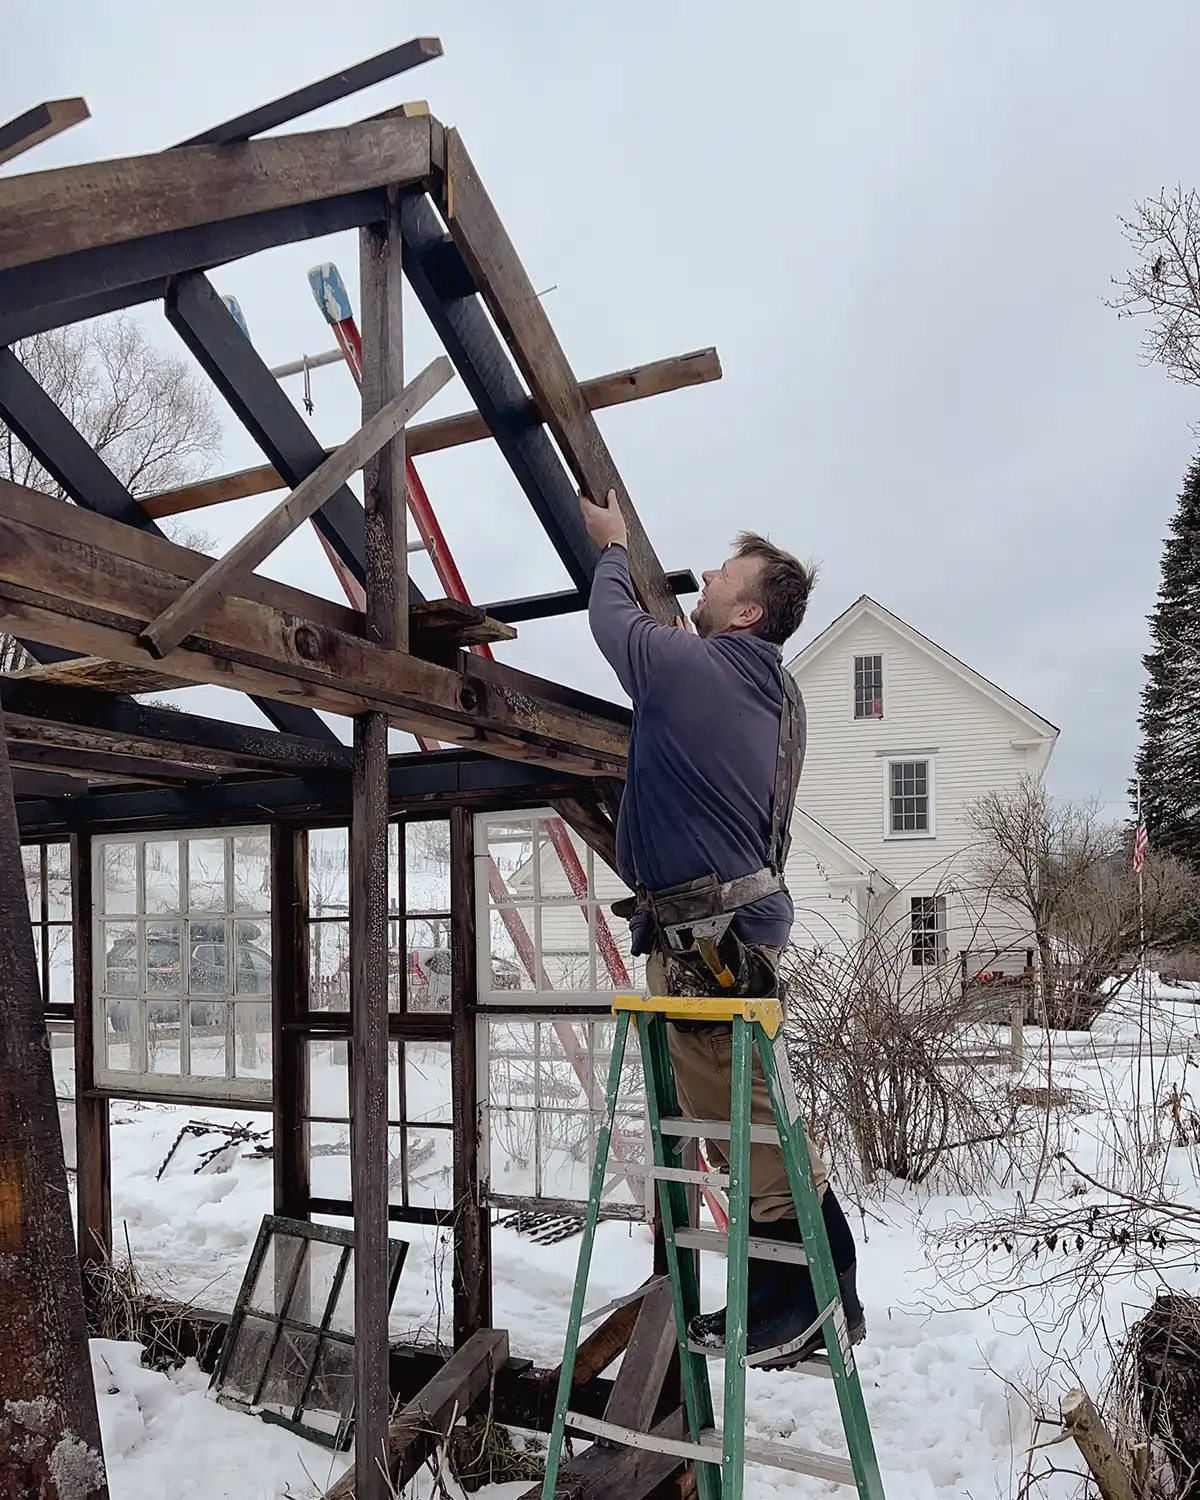
Step 2: Install Purlins
What Are Purlins?
Roof purlins are kind of like strapping. They are the horizontal pieces of wood that span the top of the roof trusses. Purlins provide framing and a place to attach roofing material. They’re also important as they support the weight of the roofing materials, snow loads, and wind uplift loads.
For our greenhouse project in particular, the purlins support the polycarbonate roof sheets and provide a place for the roofing to be screwed into the structure.
Here’s a view of the purlins spanning the rafters and supporting the polycarbonate roofing sheets.
Prep The Purlins
We chose to prep the purlins by cutting them down to size and taking them to our basement to prepaint. This isn’t a necessary step nor the best way to install them, but we chose this method because we were constructing the greenhouse during winter and couldn’t paint outside because of the cold temperatures.
The purlins are rough-cut lumber in 16′ lengths, which is the length of our greenhouse roof. There are four of them on each side of the roof for a total of 8 purlins.
How many you need depends on the size of the structure and the requirements of the polycarbonate sheets you use.
Attach Purlins To Trusses
With the purlins pre-cut and pre-painted, each one was screwed to the rafters using 2-1/2″ GRK multi-purpose construction screws. The spacing we used was 21″ in between the purlins. To determine the number of purlins and the spacing, a load support chart usually comes with the polycarbonate sheeting to help you determine what your structure needs.
The purlins are overhanging the roof in the pic below but were later cut to the right length.
It’s also important where the top and bottom purlins are attached to the top of your rafters.
The top purlins should be about two inches down from the ridge so the edge of the roofing material will line up. This is great spacing for a winter installation since it leaves space for the plastic material to expand in the summer. If installing in summer, factor in temperature changes and remember the plastic roofing will later shrink so close the expansion gap a little more.
It will be interesting to watch the thermal expansion of the panels this summer, especially on the side with direct sunlight.
Also, our project’s top and bottom purlins are wider than the ones in the middle. The top is 1″ x 4″ and the bottom is 1″ x 6″ while the middle purlins are 1″ x 3″ rough cut lumber. This provides more space for nailing into, especially with the bottom purlin to attach the drip edge.
The bottom purlin should be placed right on the edge of the eaves.
Importance Of Installing Purlins Correctly
When installing corrugated roofing sheets the purlins must be installed perfectly. If just one is off, like the top purlin next to the ridge is too far up, or if they’re not perfectly parallel to the eaves, the corrugated sheets won’t fit into the roof closure strips installed on the purlins.
If purlins are installed correctly, the rest of the project comes together much easier and the corrugated plastic panels will line up.
Step 3: Add Blocking On Gable Rafters
The next step is to add blocking on the gable rafters to make an even surface to attach the drip edge. The purlins make for an uneven end rafter so add the blocking in between the purlins.
You can see in the photo below where the blocking needs to go, between the purlins along the gable end rafters.
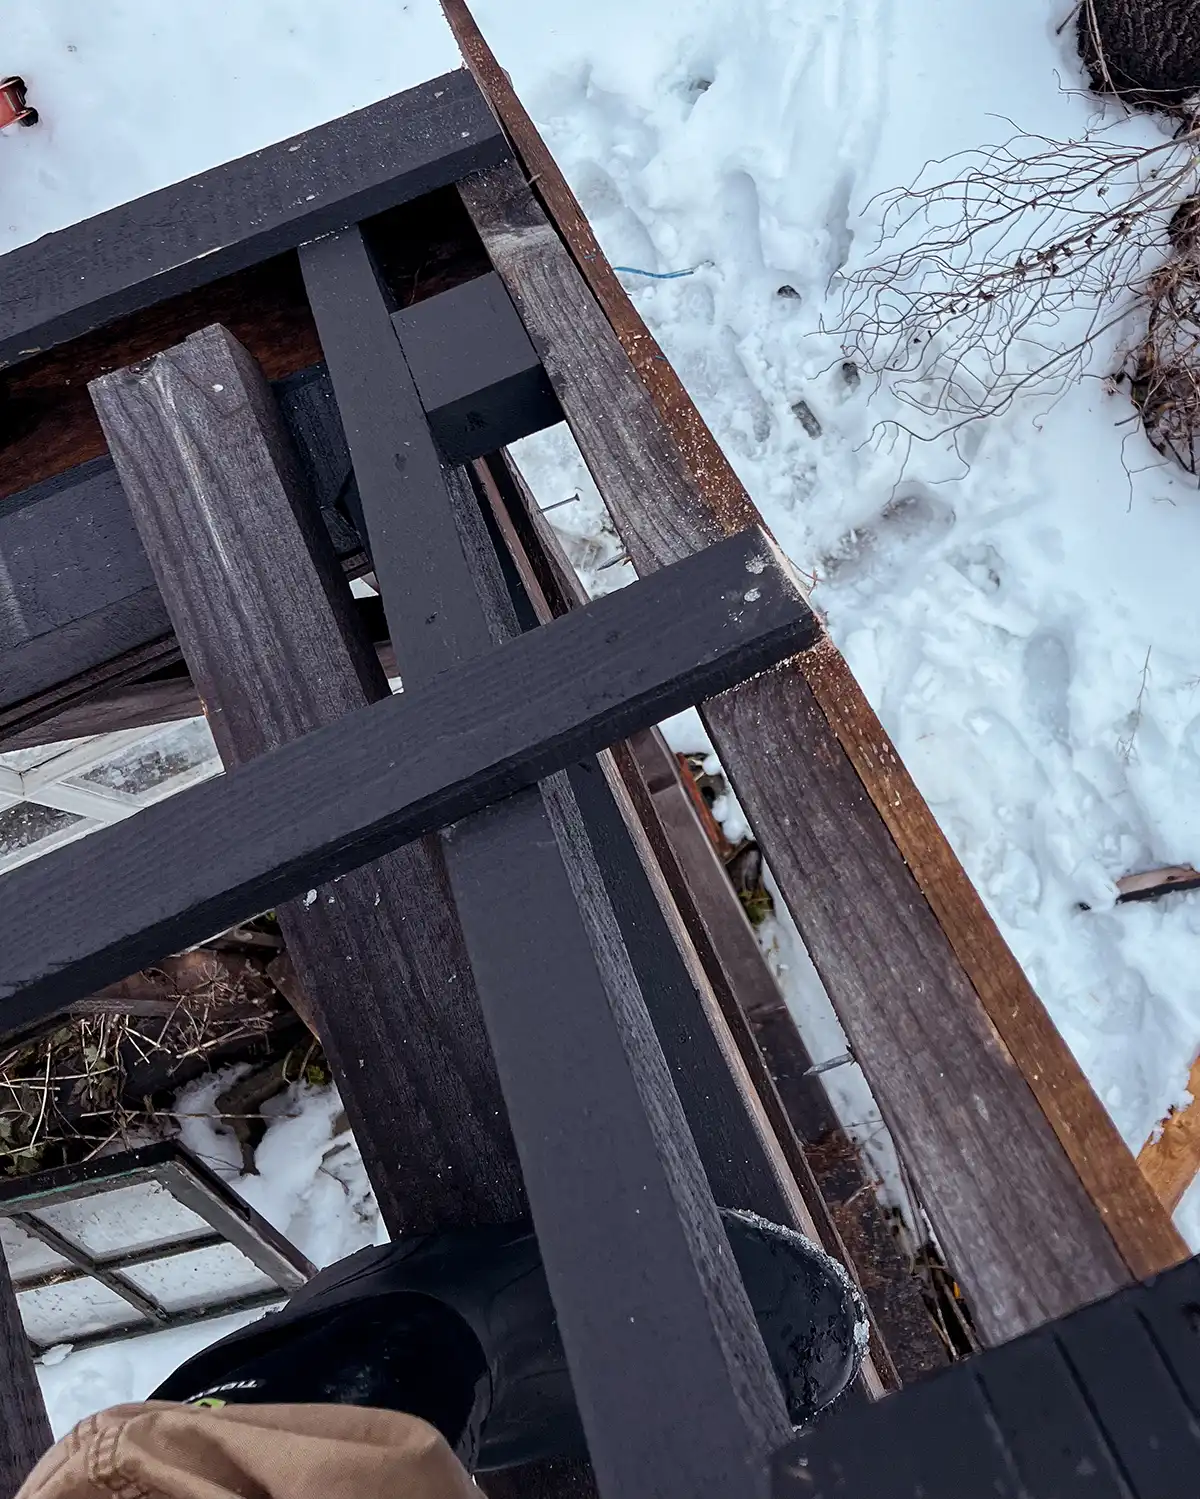
Cut down the same 1″ x 3″ rough-cut lumber to the right length to fit the gap between the purlins. Screw the blocking into the rafters using the same 2-1/2″ GRK multi-purpose construction screws.
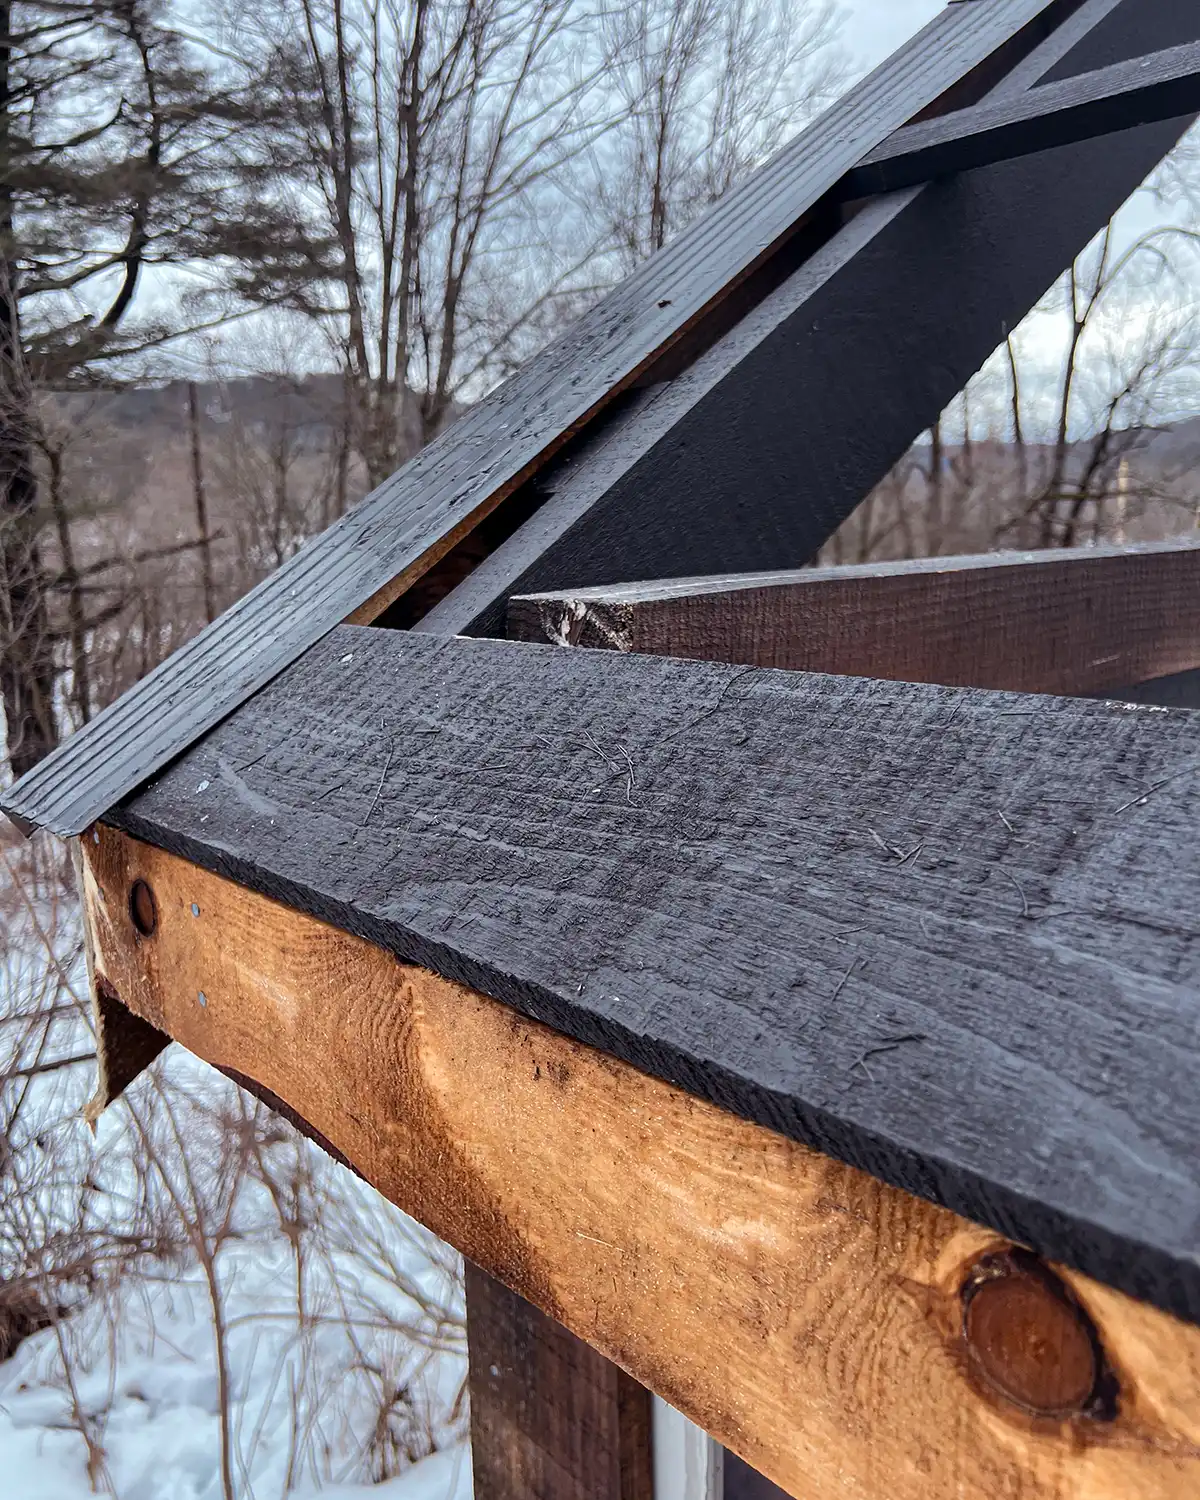
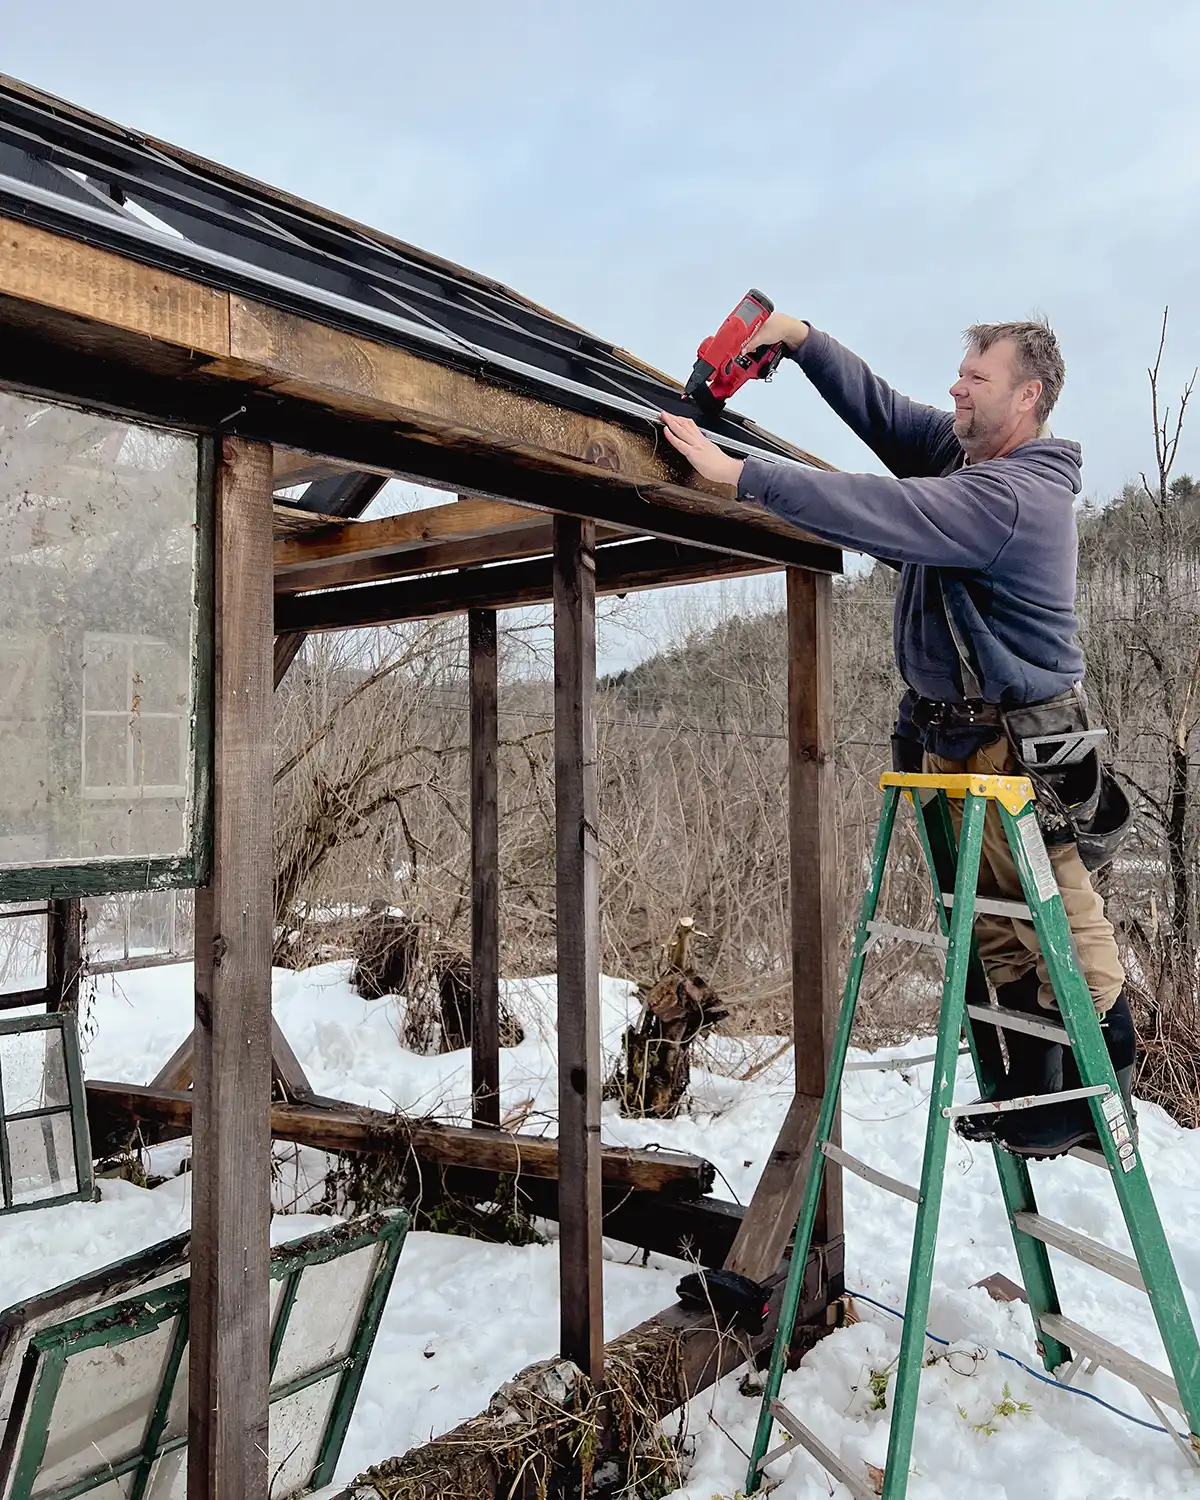
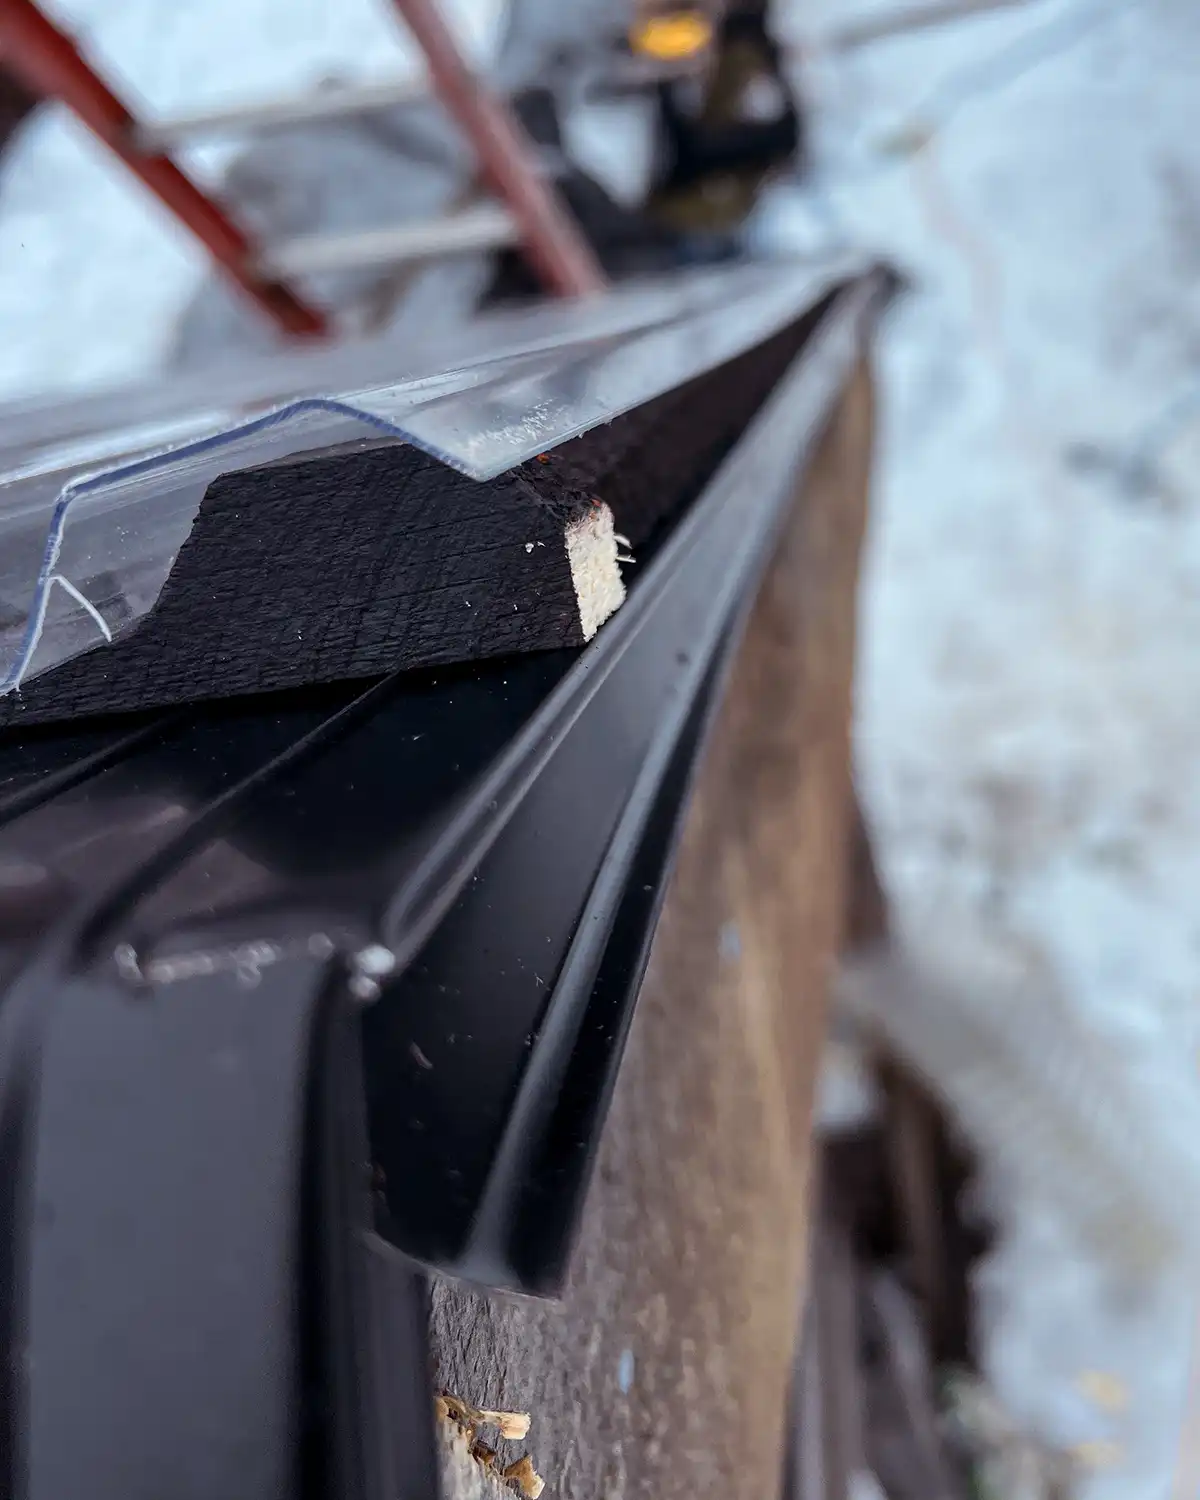
Step 4: Install Drip Edge
The next step is to install the drip edge, which helps protect the roof’s edges from water damage by guiding water away from the structure.
For our greenhouse project, the drip edge is installed along both eaves and the gable ends. It essentially goes on top of purlins along the eaves and across the purlins and blocking along the gables.
Here’s the drip edge installed on one of the gable ends.
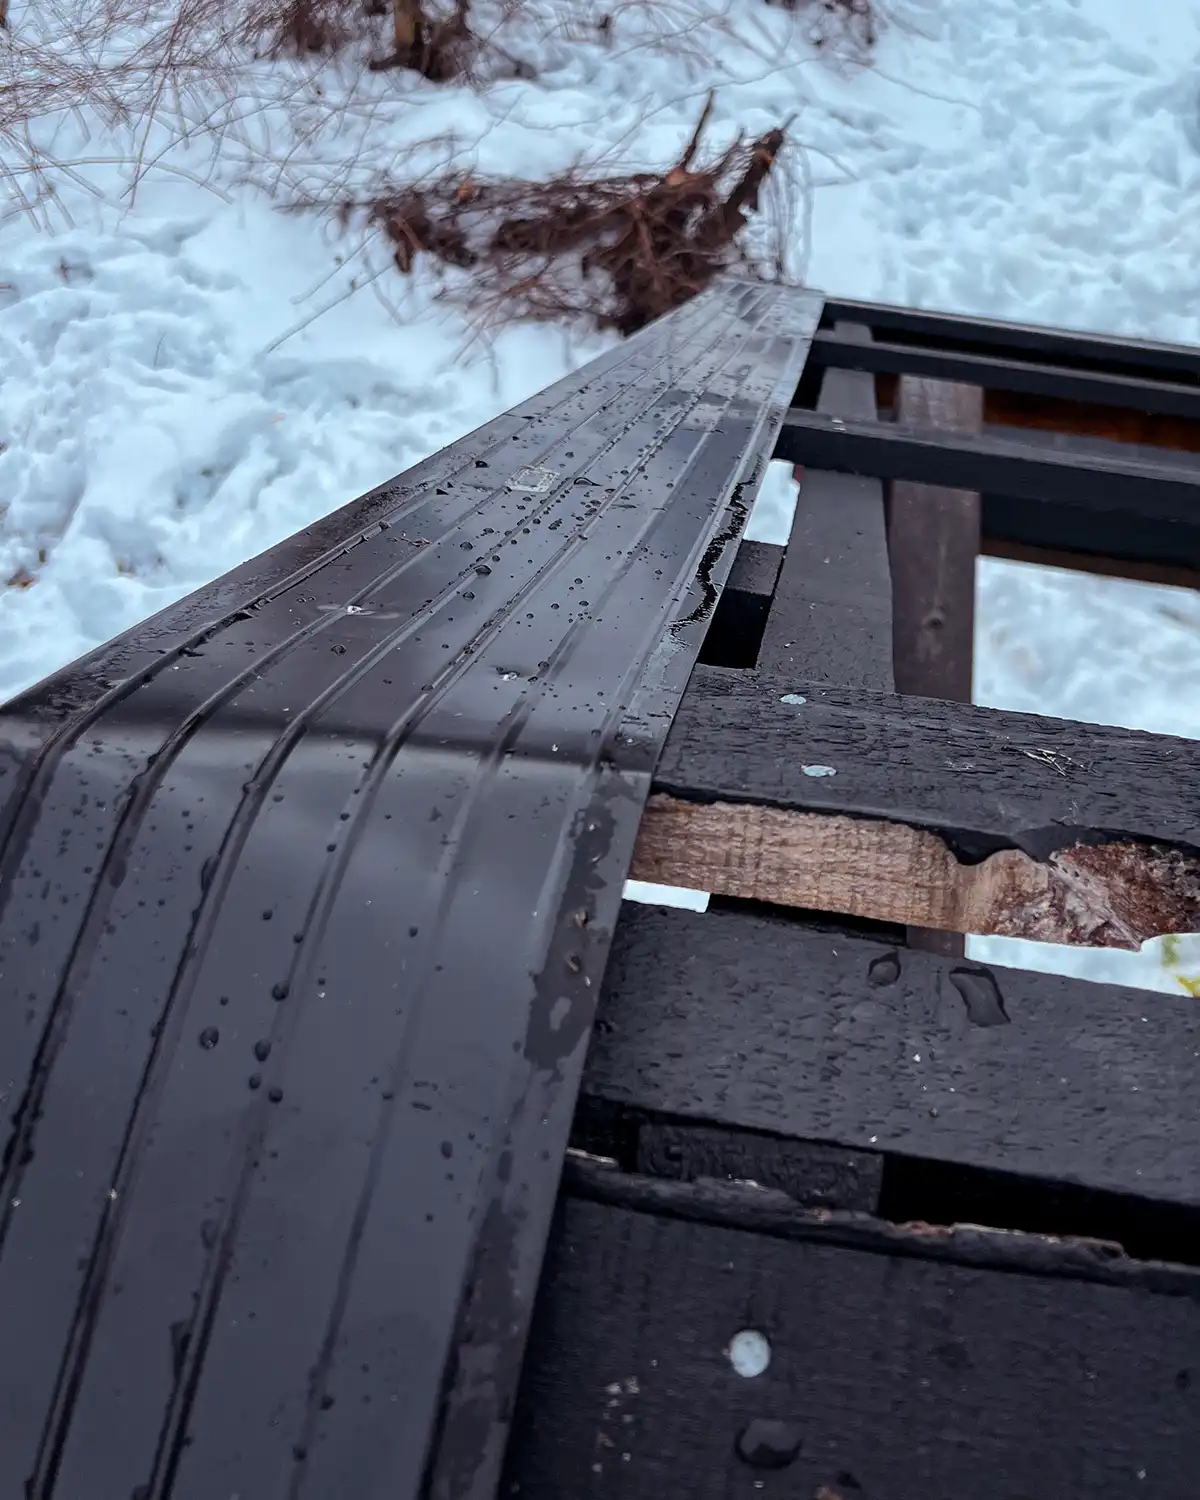
To install, lay the drip edge along the edges fitting it tight against the structure underneath. Using 1-1/4″ GRK cabinet screws and a cordless drill, screw the drip edge into the purlins/blocking with screws about an inch from the edge. Place screws about every foot.
Later when attaching the roofing, the screws will be placed a little higher up helping seal the drip edge down a little tighter.
Alternatively, to save money since GRK screws can get expensive, a stapler (like Colby is using in the pic below) could also be used. Just make sure you use staples long enough to securely attach the drip edge.
Keep attaching the drip edge until it’s installed completely along the eaves and gable ends.
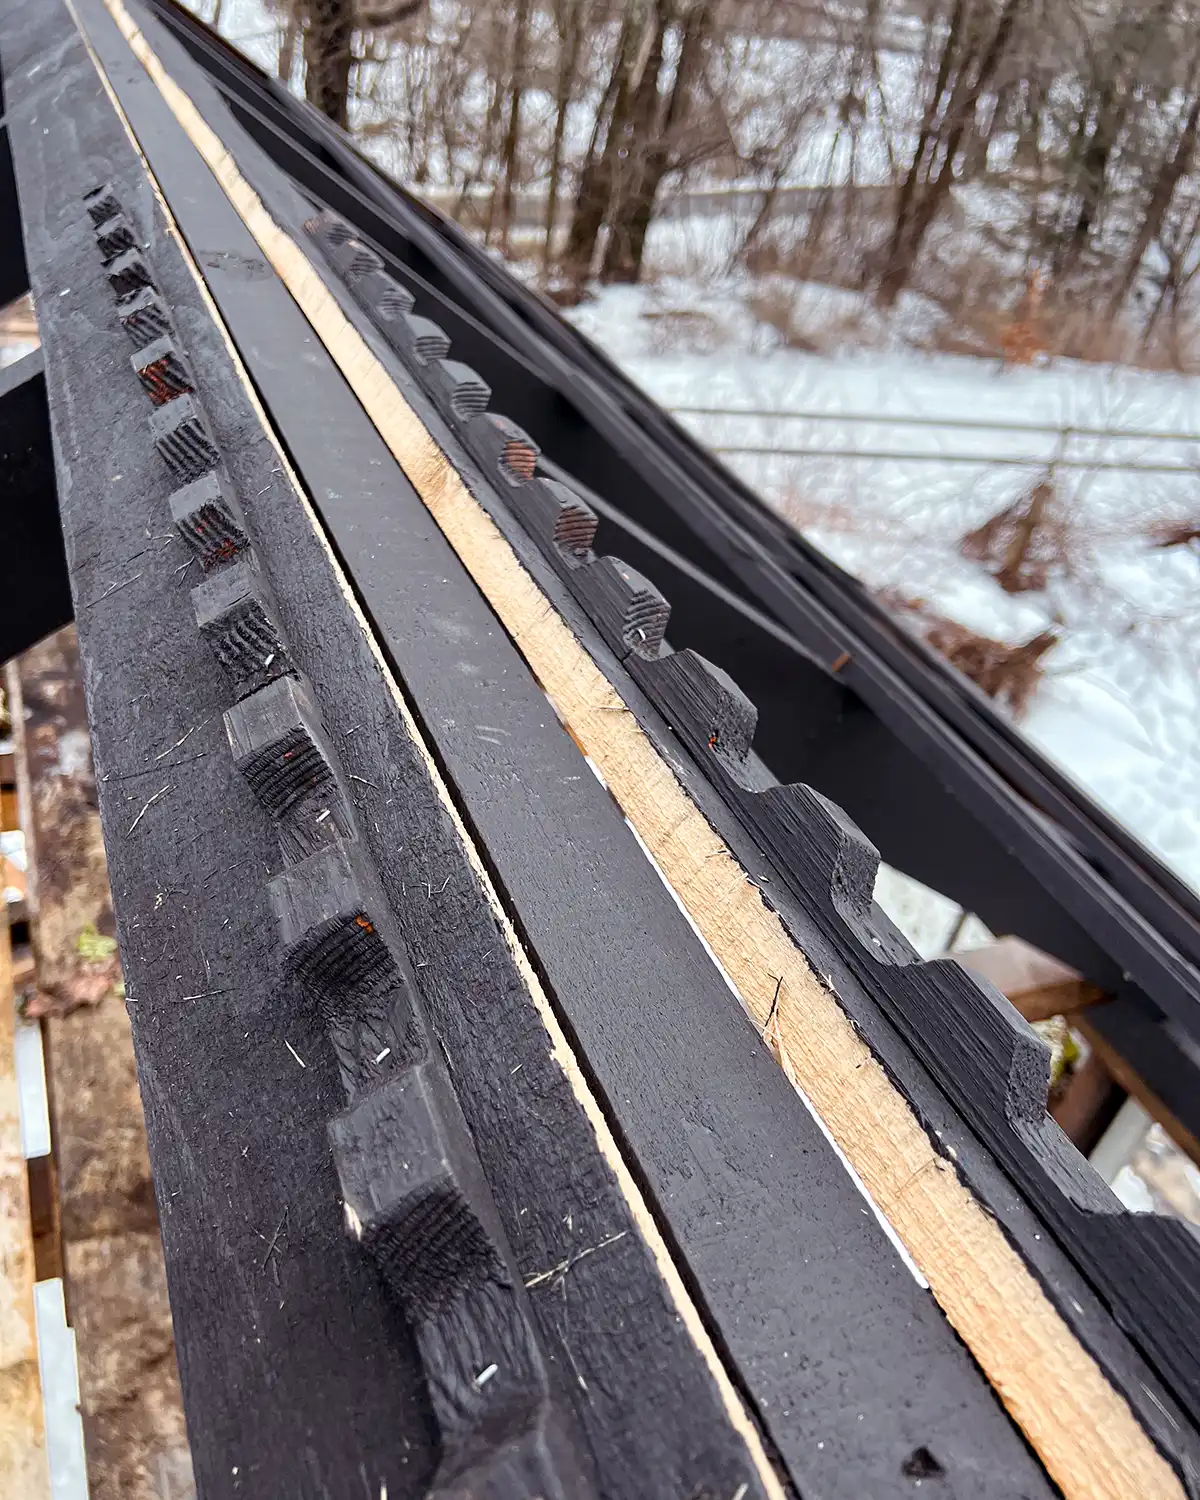
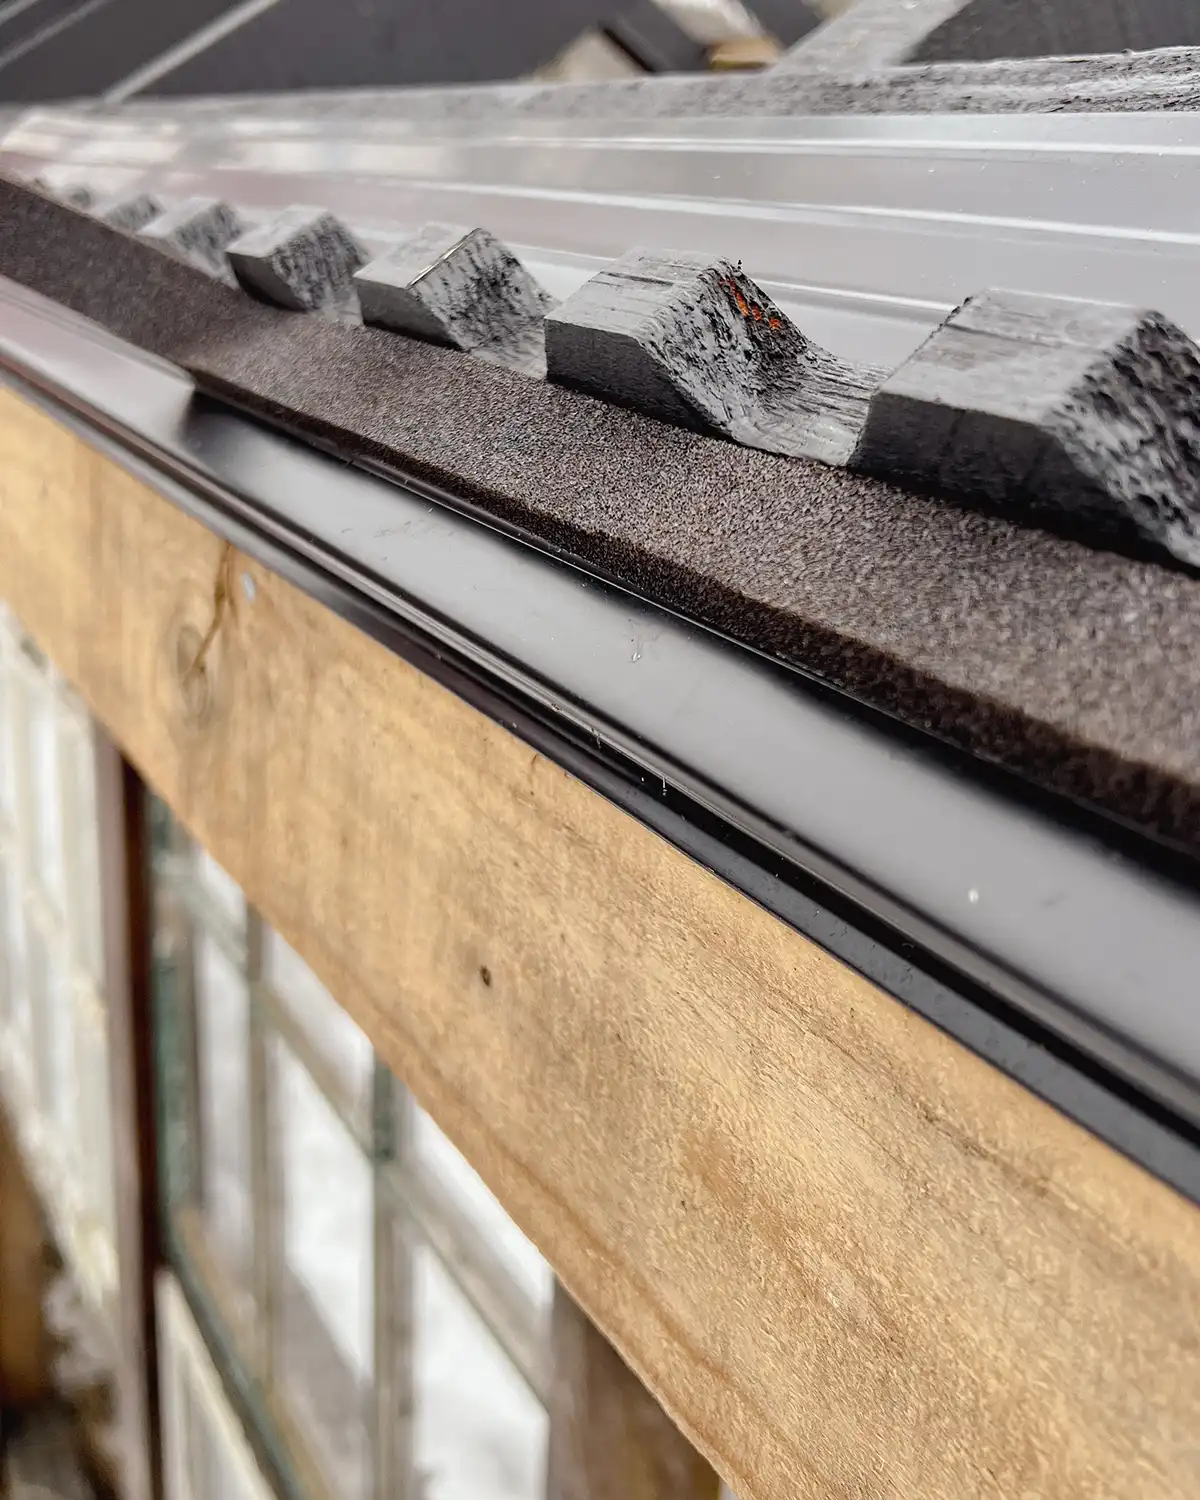
Step 5: Add Horizontal Wood Roof Closure Strips
The wood roof closure strips are necessary materials that attach to the purlins to support the corrugated sheets. It’s important to get the closure strips that match the specific corrugated roofing sheets you’re using.
So for our project, we used SunTuf corrugated roof sheets and closure strips specifically made to fit that brand of corrugated sheets. There’s a required size for each manufacturer.
To install the closure strips, we stapled them along the purlins using a staple gun with 1/4″ crown staples. Alternatively, you can also screw them down using flathead wood screws.
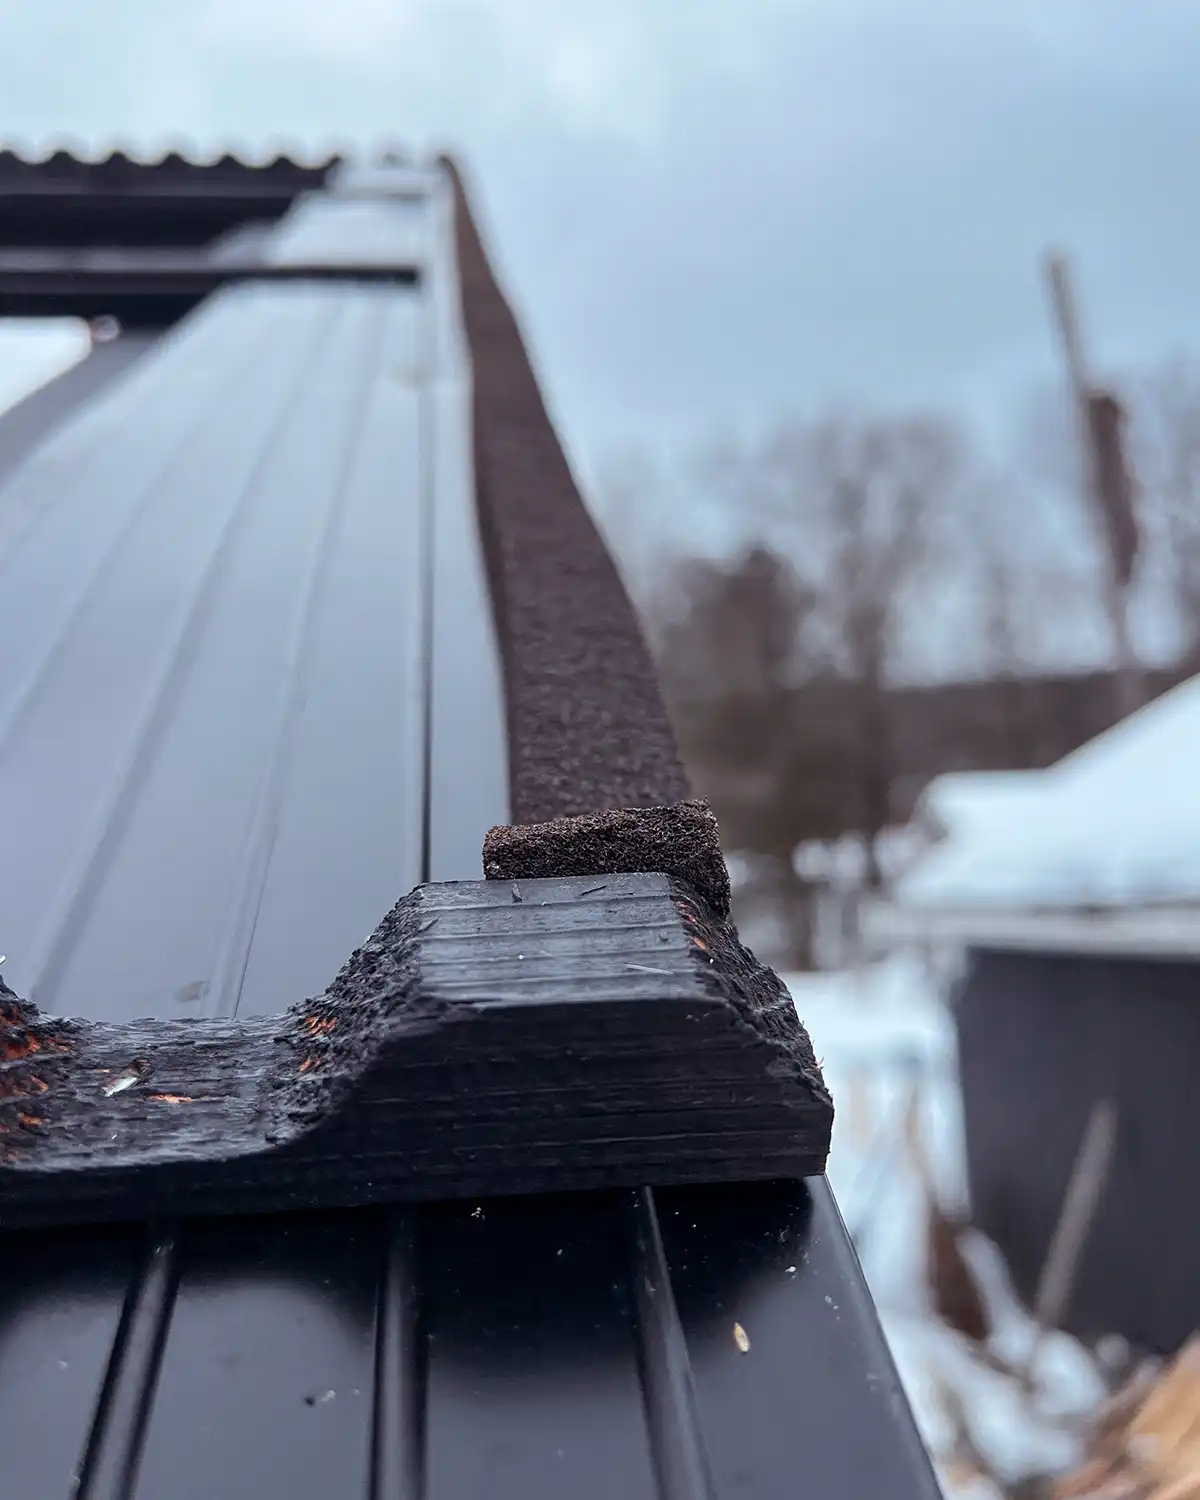
Step 6: Install Universal Seal Tape
Next up, installing universal seal tape, which is a gap filler. The stuff is neat in that it expands after it’s installed. It’s kind of like those mattresses that come in a box.
Universal seal tape is a gap filler and can help seal any voids between the polycarbonate panels and the rest of the roofing structure. Here it is installed on the gable edges.
Colby was on a mission to close up every gap in this greenhouse to keep bugs out. Me, I’m like it’s a greenhouse and its intended use is to function as garden space, so eh…so what if there are a few cracks? It’s so funny the different things we obsess over.
Installing universal seal tape is incredibly easy. Unroll it and attach the self-adhesive side along the edges of the drip edge that was just installed. Here it is installed on the eaves.
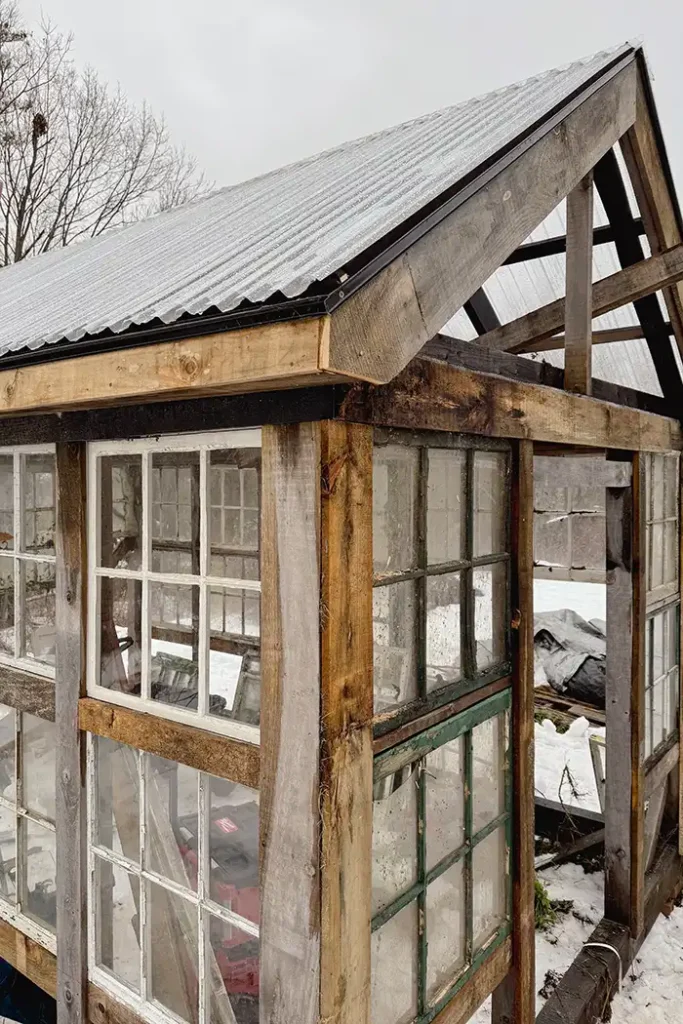
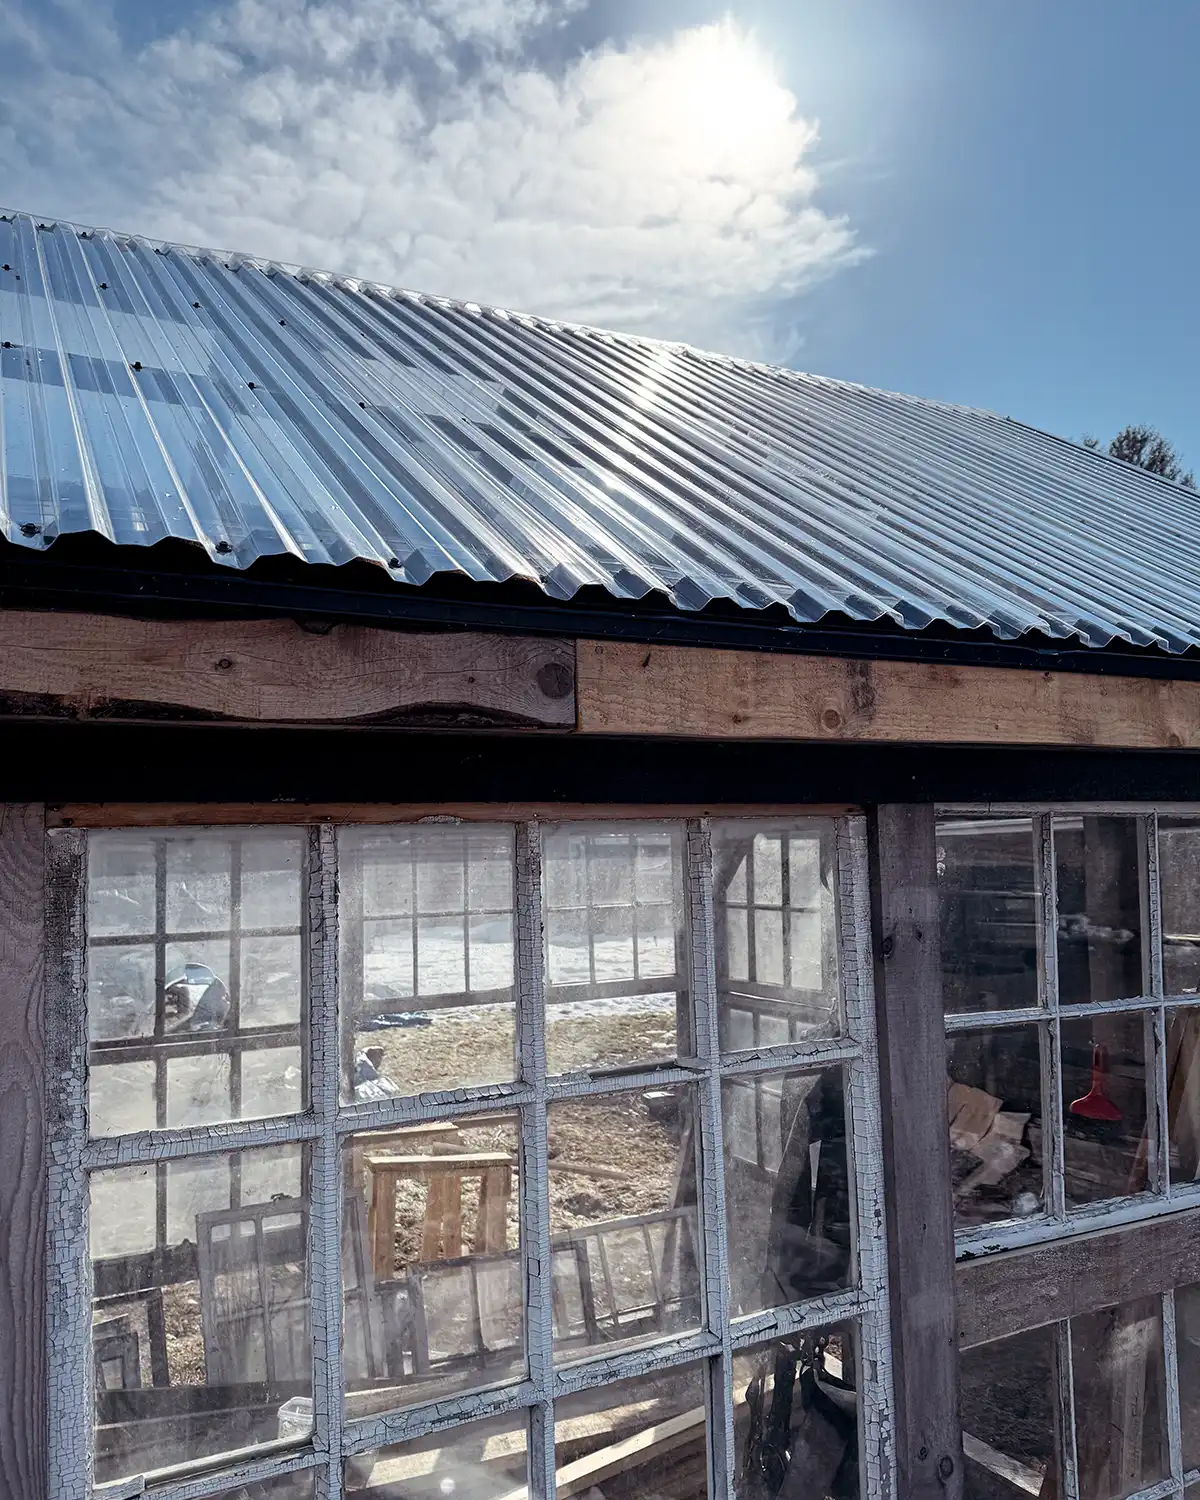
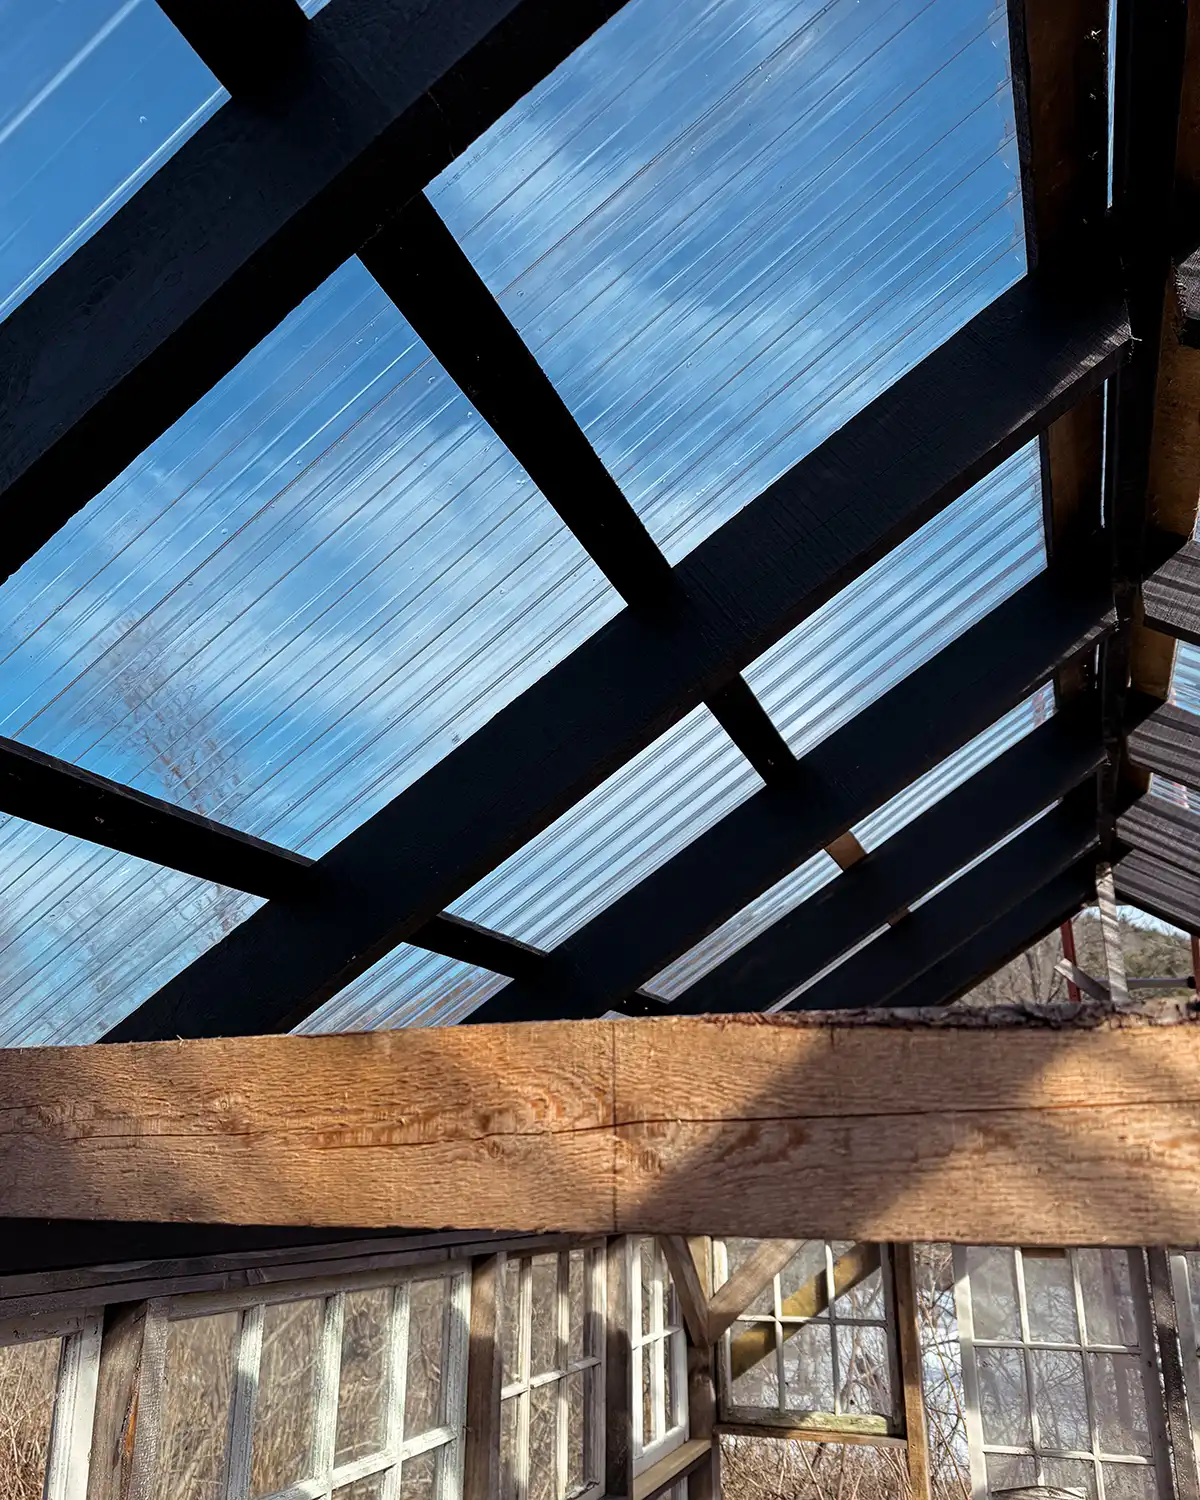
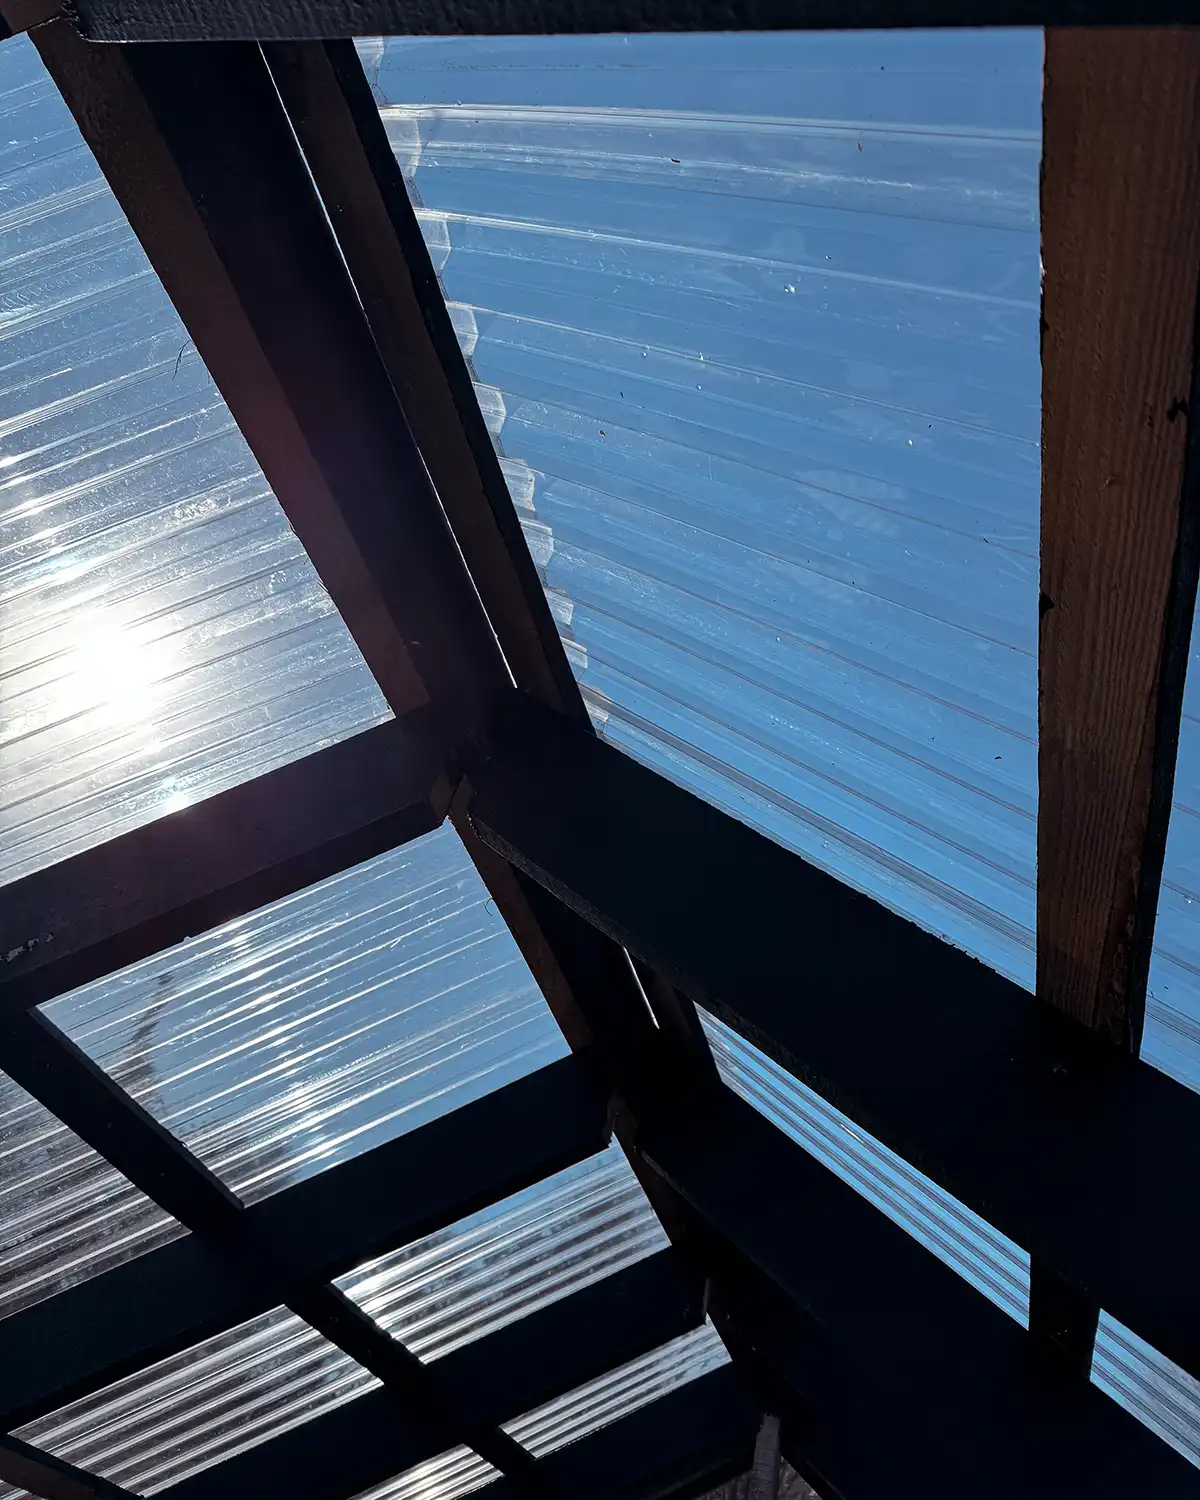
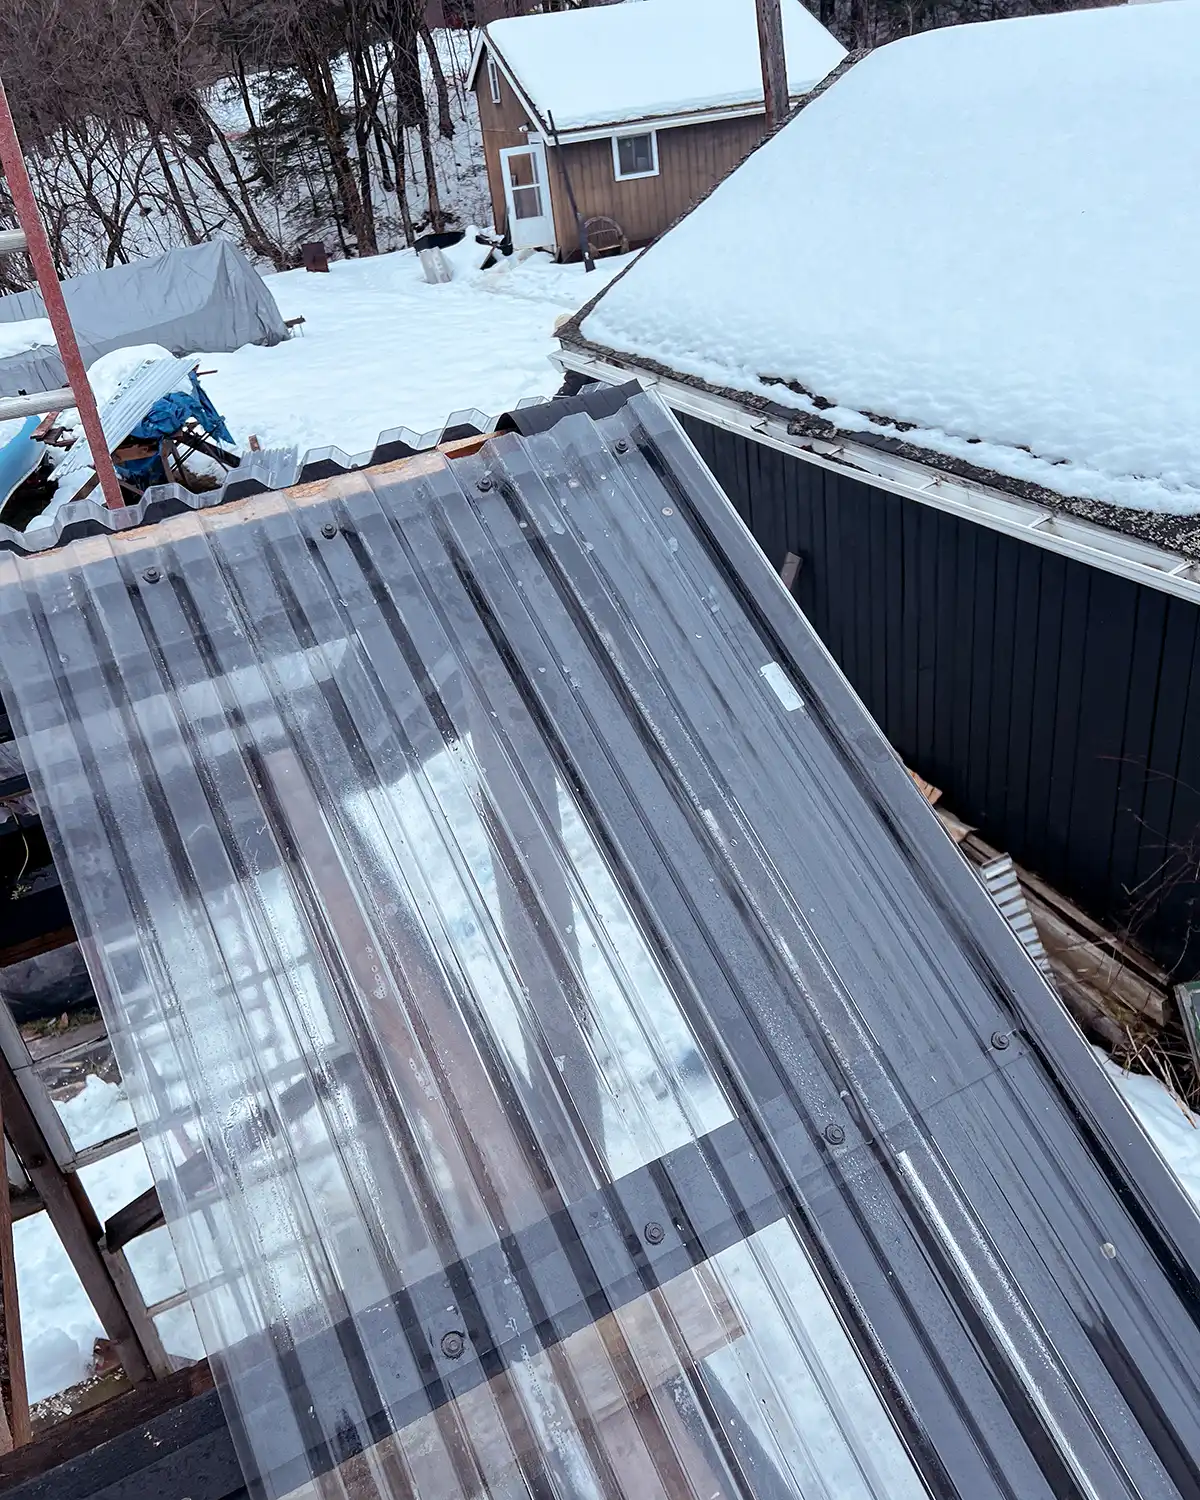
Step 7: Install Plastic Roof Panels And Ridge Cap
Now it’s time to get those corrugated polycarbonate sheets installed on the roof. It’s about to look like a real roof!
Prep The Panels
Before we started installing the plastic panels, we had to prep them.
Start by removing any protective films and stickers from the surface of the panels. While the protective film removal was simple, sticker removal was not. We successfully removed the stickers with some Goo Gone spray adhesive remover and a scrub brush.
Then we generally cleaned the panels ensuring they were crystal clear for all our plant babies in the soon-to-be greenhouse.
Cut The Length Of the Panels
To determine the cut length of the panels, measure from the top of the top purlin to the bottom of the bottom purlin. Essentially, it’s the ridge to the eaves minus a couple of inches on either end.
The only necessary cuts we needed to make was trimming the length with straight cuts. When we designed the greenhouse, we accounted for the width of the sheets and the corrugation overlap.
To cut, place the first sheet across saw horses, cutting a single panel at a time. You can also clamp the entire sheet down if it’s wobbling. A high RPM circular saw fitted with a fine-tooth blade (we used a 140 tooth which worked well and was an excellent choice) is the best tool for cutting the plastic sheets. There’s something about having the right tools for the job that makes a project so much easier and better.
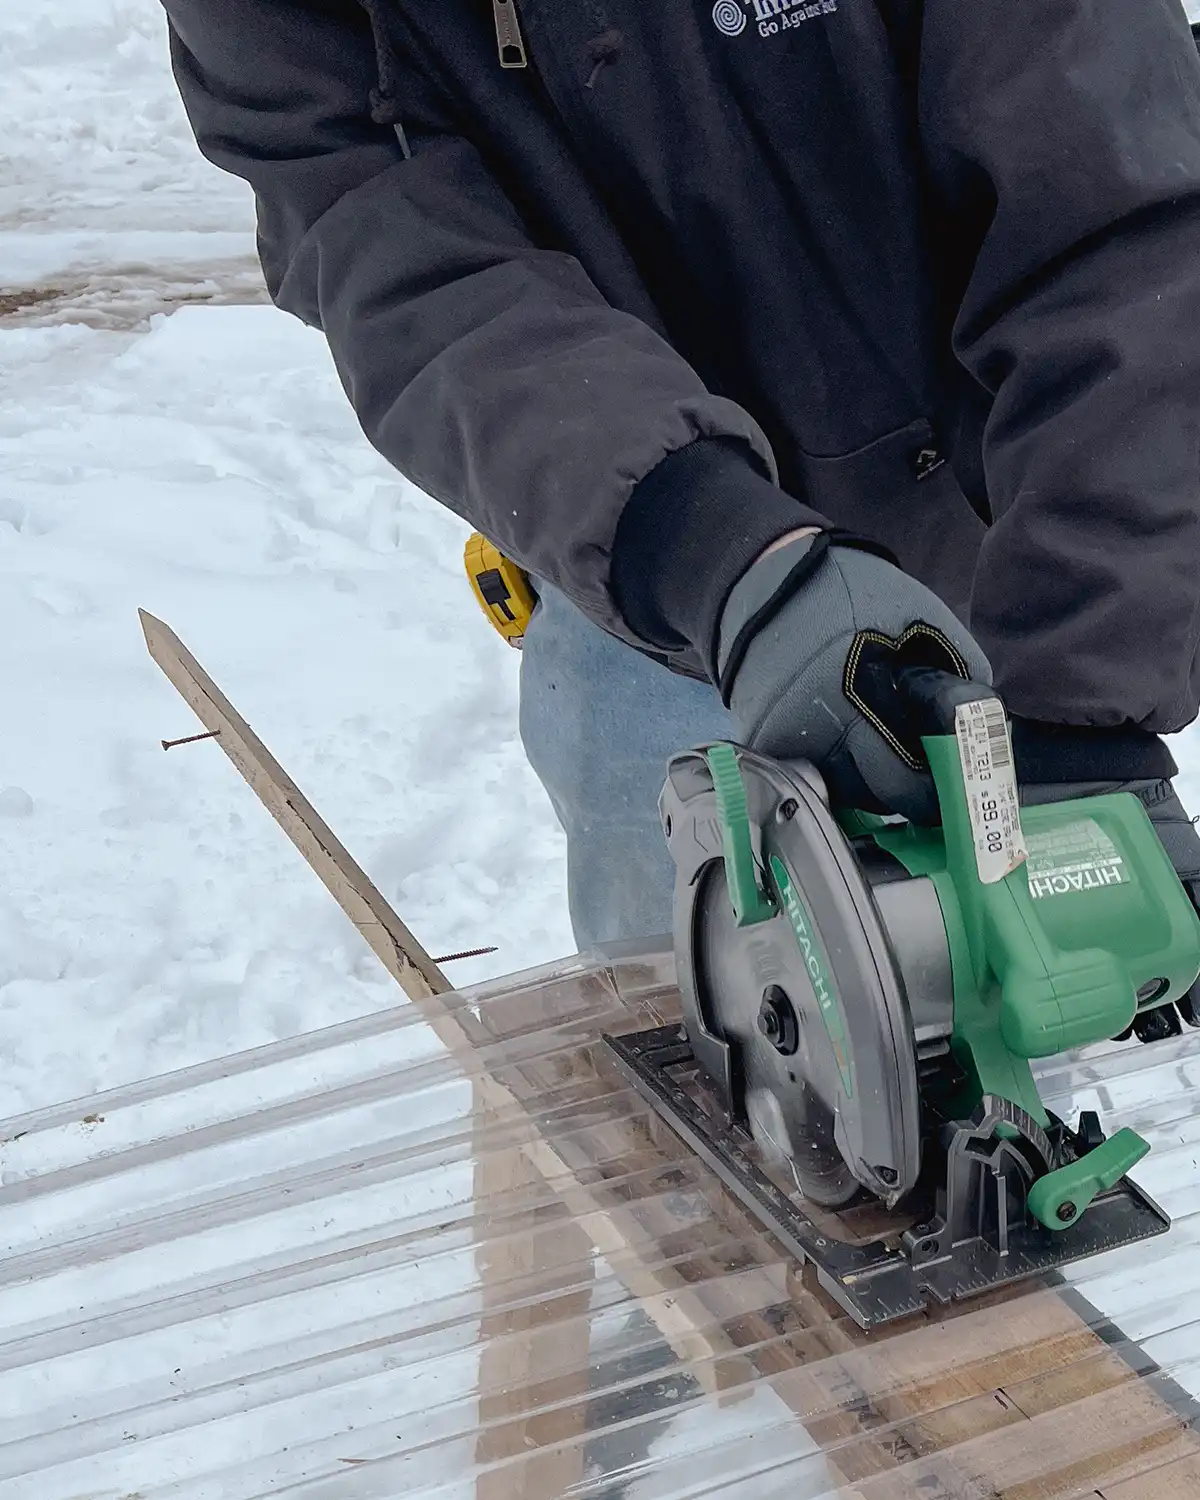
If you need to make special cuts you can use a pair of tin snips or a fine-toothed handsaw.
Cut slowly using a high RPM saw and don’t force the tool along for the cleanest straight cuts and best results.
Also, take the necessary safety precautions. Best practices for cutting plastic panels include wearing gloves and safety glasses.
Install The First Sheet
The polycarbonate roof installation process is straightforward. Be sure to check the detailed instructions that came with your product just to be sure.
First, we placed a panel in the correct position, fitting it to the closure strips.
Let’s talk about the screws for a second. The type of screw you use for installing panels matters because you want the screw hole to be watertight. We used roofing screws with a steel-backed neoprene washer for a water-tight seal. These types of screws are ideal in polycarbonate roofing system installation. Of the necessary supplies, choosing the right screws might be the most important.
The next step is to pre-drill holes in the polycarbonate. Pre-drilled holes are important because you want to have a little extra space for thermal expansion but not so much that the neoprene washer won’t cover the hole. Overdrilling the hole by 1/16″ is what was recommended in our instructions.
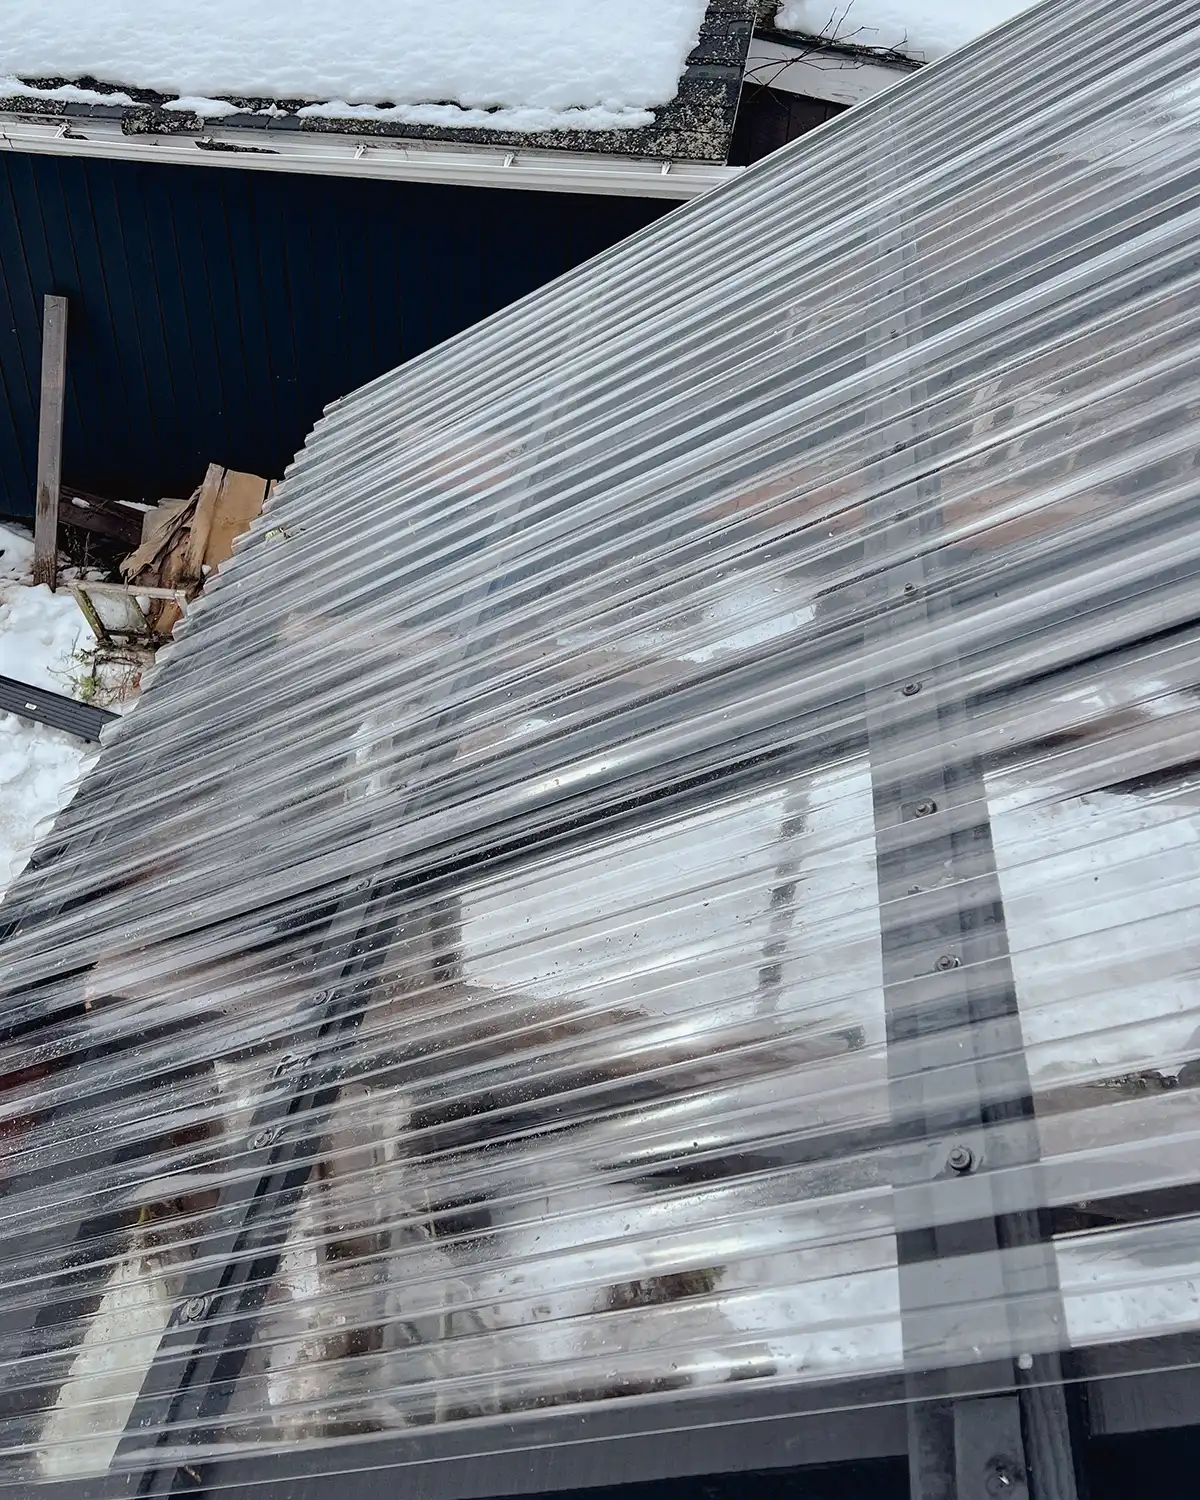
Screw the panels into the purlins using the screws with sealing dome washers every other ridge. Be careful not to overtighten as that can dimple the material and have a detrimental effect on the efficacy of the panels.
Wait to screw down the last corrugation until after the next panel has been overlapped.
Note…the instructions for our panels didn’t state whether to screw down the panels in the channels or the ridges. But when writing this post, I watched an installation video and they showed the screws on the ridges.
Colby chose to screw down the panels in the channels because he felt like it was a tighter fit. When screwing into the channels, the screws go through the closure strip and into the purlin. He felt this was more secure than screwing into the ridges where the screw wouldn’t reach the purlin.
I’ll update this post later with how the roof is holding up. But we are having a 40-50 mph day today and the roof is solid.
Install The Second Sheet
Lay the second panel into position, making sure it overlaps the first panel by at least one corrugation.
Screw down the panel in the same fashion as the first one, making sure to screw down the overlapping panels for a tight fit.
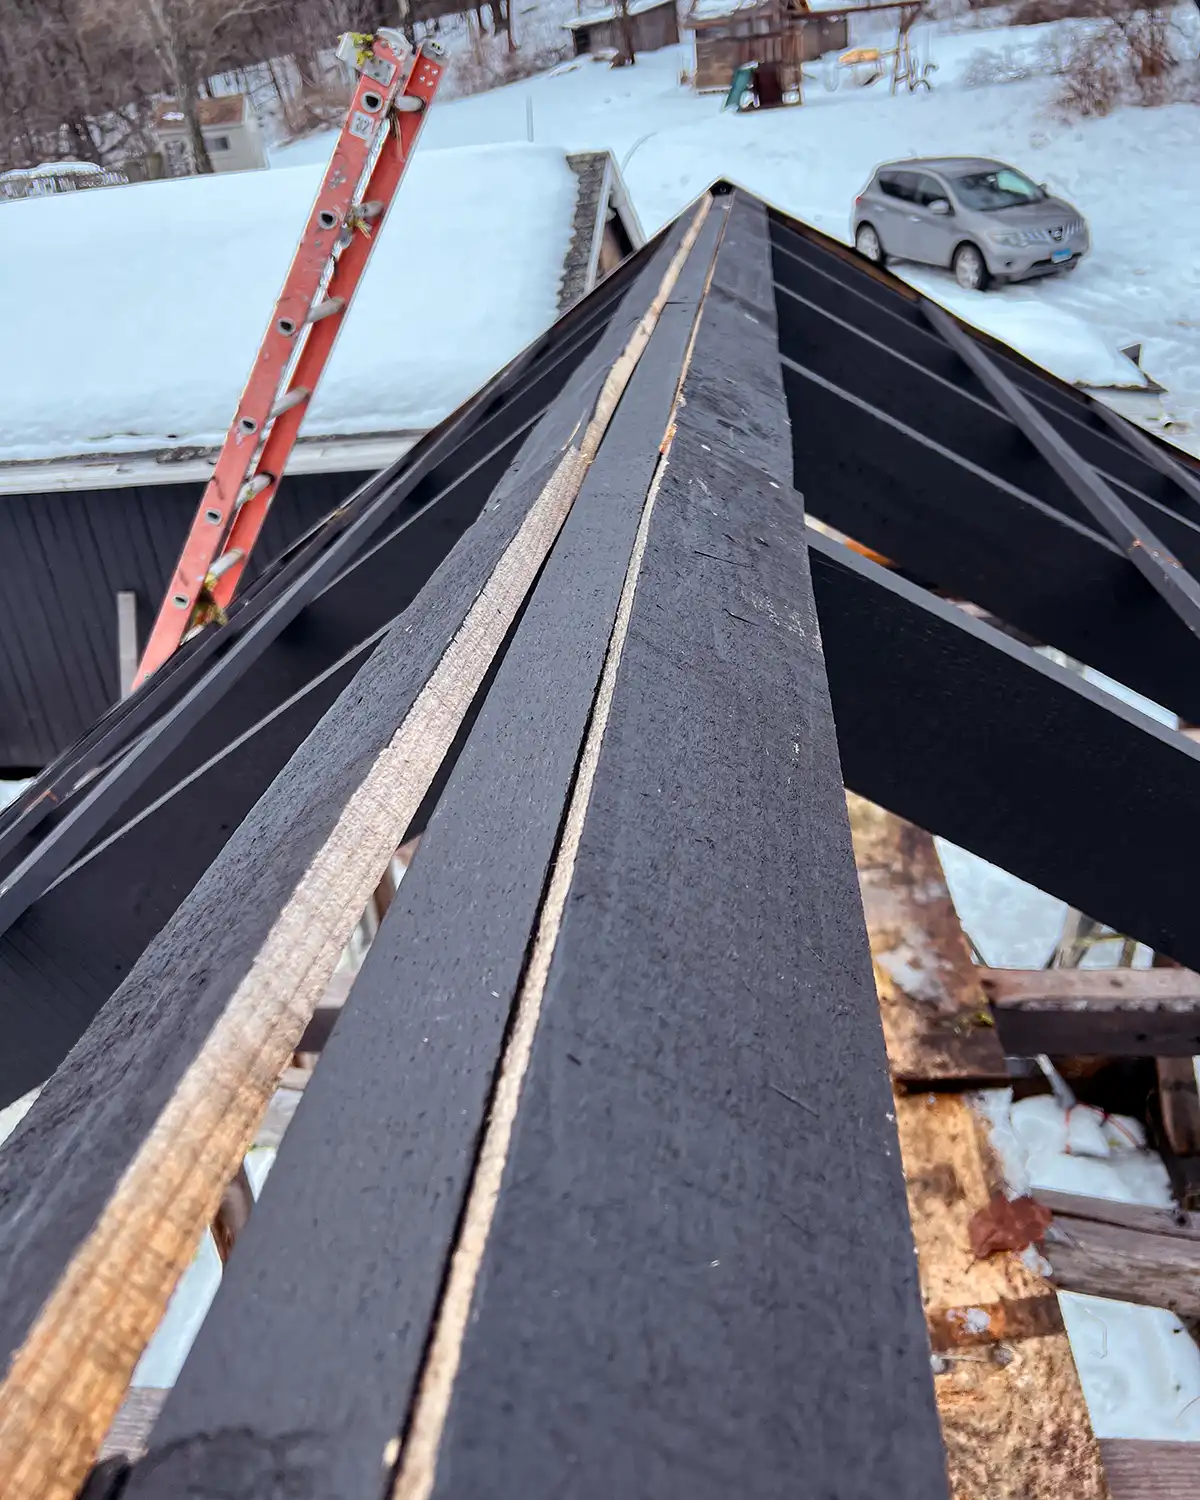
Install The Ridge Cap
Since we couldn’t walk on the polycarbonate roof, it was important to install the ridge cap as we went, every couple of sheets. After the first two panels were installed on each side, opposite each other, the first ridge cap piece was attached.
To install, the polycarbonate ridge cap was fitted to the first few sheets on either side of the roof. Then, it was screwed down using the same fasteners every other corrugation.
You want to make sure that the ridge cap overlaps the panels plenty to keep water from seeping through. In the winter panels shrink and in the summer they expand. Be sure to accommodate for temperature changes when installing.

Continue Installation Process
Keep on installing the panels and ridge cap until you get to the end of the roof. The further you go, the more ease of installation. Make the final cut if you need to and install the last piece.
While technically no additional waterproofing measures are required, we did check it out during a rain storm in case of any leak. I’ll update this post if we do adjust for leaking or decide to take additional steps.
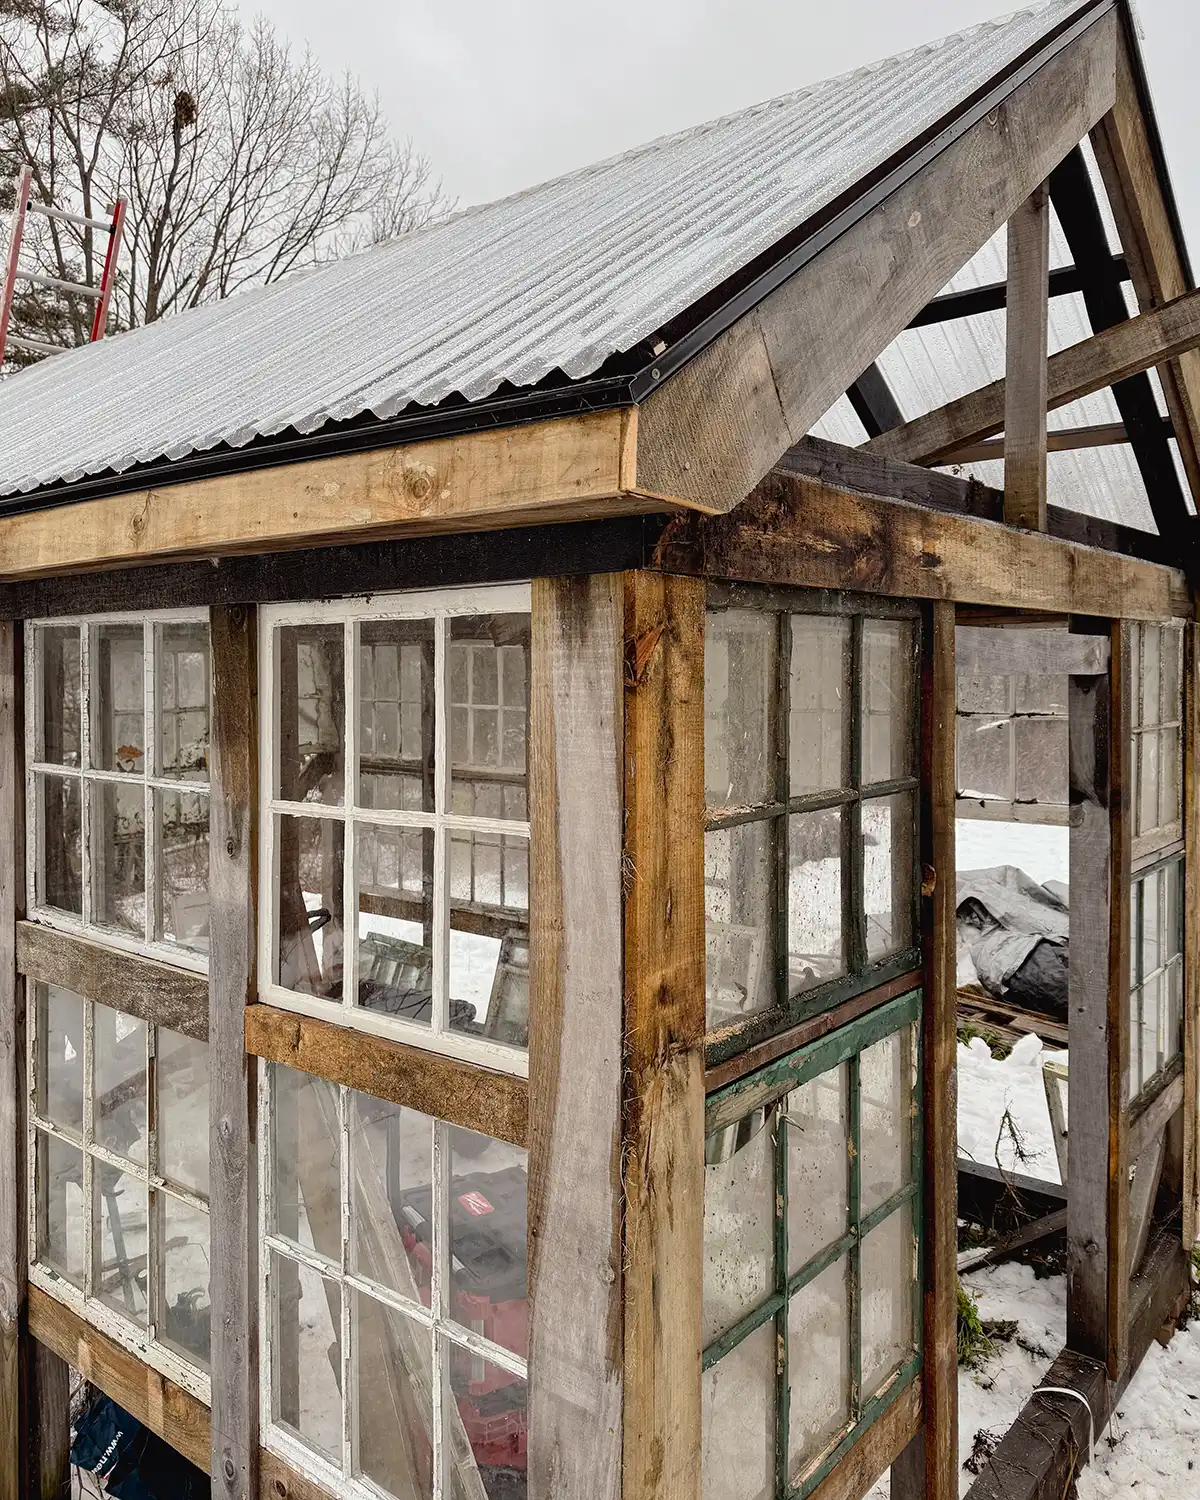
And there you have it, a completed greenhouse roof and our tutorial on how to install corrugated plastic roofing.
A Note On Building Codes
Just a quick note on codes. This post is a recap of how we installed the polycarbonate roofing sheets based on our research and manufacturer recommendations. Our town doesn’t have building codes for us to abide by. This isn’t common. Always follow your municipality building codes and check in with them about permits, inspections, and requirements.
Next Steps For The Greenhouse
Now with this roofing project behind us, our next DIY projects include installing all the glass windows on the greenhouse sides. Then it’s onto attaching all the siding below the windows.
Once those steps are complete, it’s on to finishing the gables. I’m still undecided on louver vents or no louver vents. I feel like every day I change my mind!
Then it’s Dutch door building, painting, and all the final touches to get this greenhouse functional with plant babies basking in the sun. I’m already amazed at how much natural light is in the structure even though the panels are UV resistant. We get the benefits of UV protection without a significant reduction in light.
It will probably be a few weeks before we can get back to greenhouse building. We’re in that weird springtime season here in Vermont where one day it’s snowing and the next day it’s fifty degrees and the yard is muck. But stay tuned!