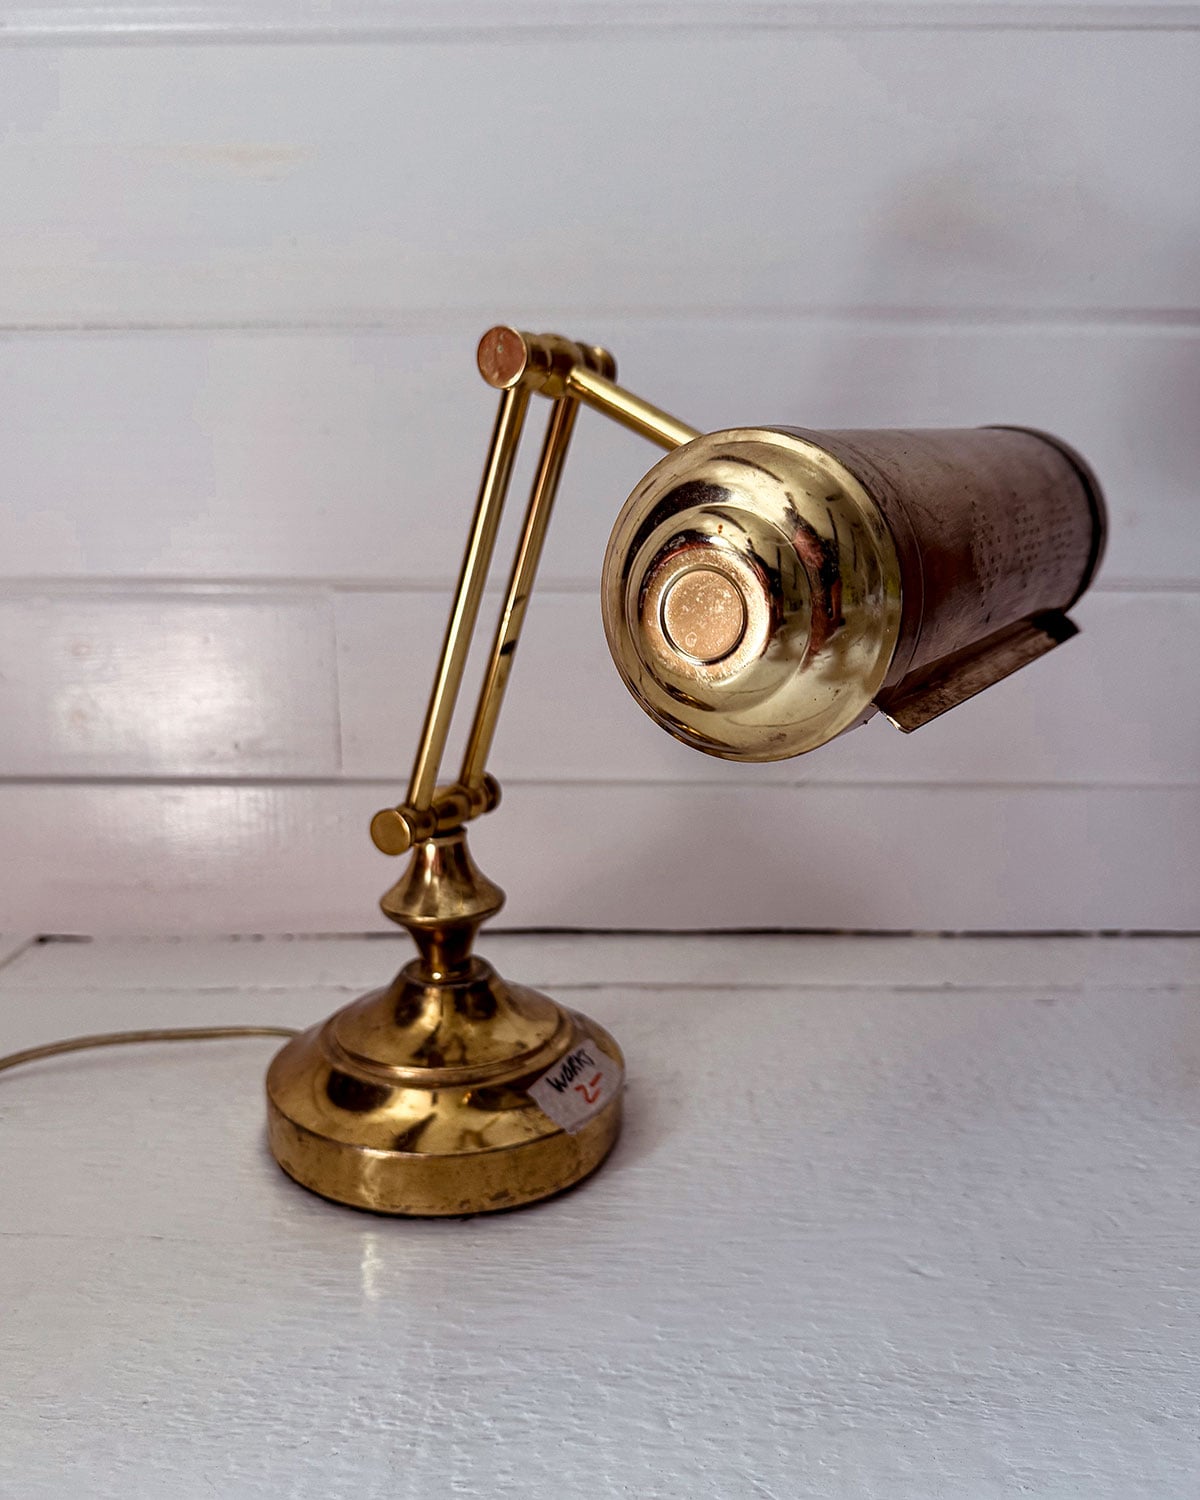
This summer, I came across an adorable task lamp at a local thrift store that was begging for a makeover to take it from basic, bright gold to a finish that felt a little more aged. Enter the rub in buff DIY lamp makeover. It’s one of, if not THE easiest way to update a finish you don’t like. The result:
I don’t have a ton of experience working with Rub N Buff. I know, I know. I don’t deserve to be a card-carrying member of the DIY club. Take it away! But I’m trying to learn more and figure out methods that work well. Let’s just say one of my DIY goals is to become a pro at Rub N Buff.
So when I found a table lamp at the thrift store for a great price, only $2, one that was the perfect shape and style to add some light to my writing desk, it felt like a no-brainer for experimentation and learning. It also helped that I dropped it immediately upon carrying it over our threshold and broke the bottom of the lamp. It’s even wonkier now, so it’s the perfect thrifted lamp to refinish and learn Rub N Buff application methods.
Here’s the before shot of the thrifted lamp.
How To Refinish A Lamp With Rub N Buff
In just a few simple steps, you can upgrade outdated lamps with Rub N Buff for a finish that fits your home. Simple refinishing DIY projects are some of the most satisfying because they are often budget-friendly and can be completed in an afternoon. Let’s get to it and refinish this lamp.
Give The Lamp A Good Cleaning
First thing, give the entire lamp a good cleaning. Scrub it down with your favorite cleaner, wipe it with a clean cloth, and let it dry. I tend to treat every thrift store find with the same basic cleaning method, but you don’t want to skip the cleaning step for refinishing projects.
Prep The Surface
While it’s not necessary, it is helpful to rough up metal or smooth surfaces before applying Rub N Buff. I use either a medium-grit sandpaper or a liquid deglosser to do the job.
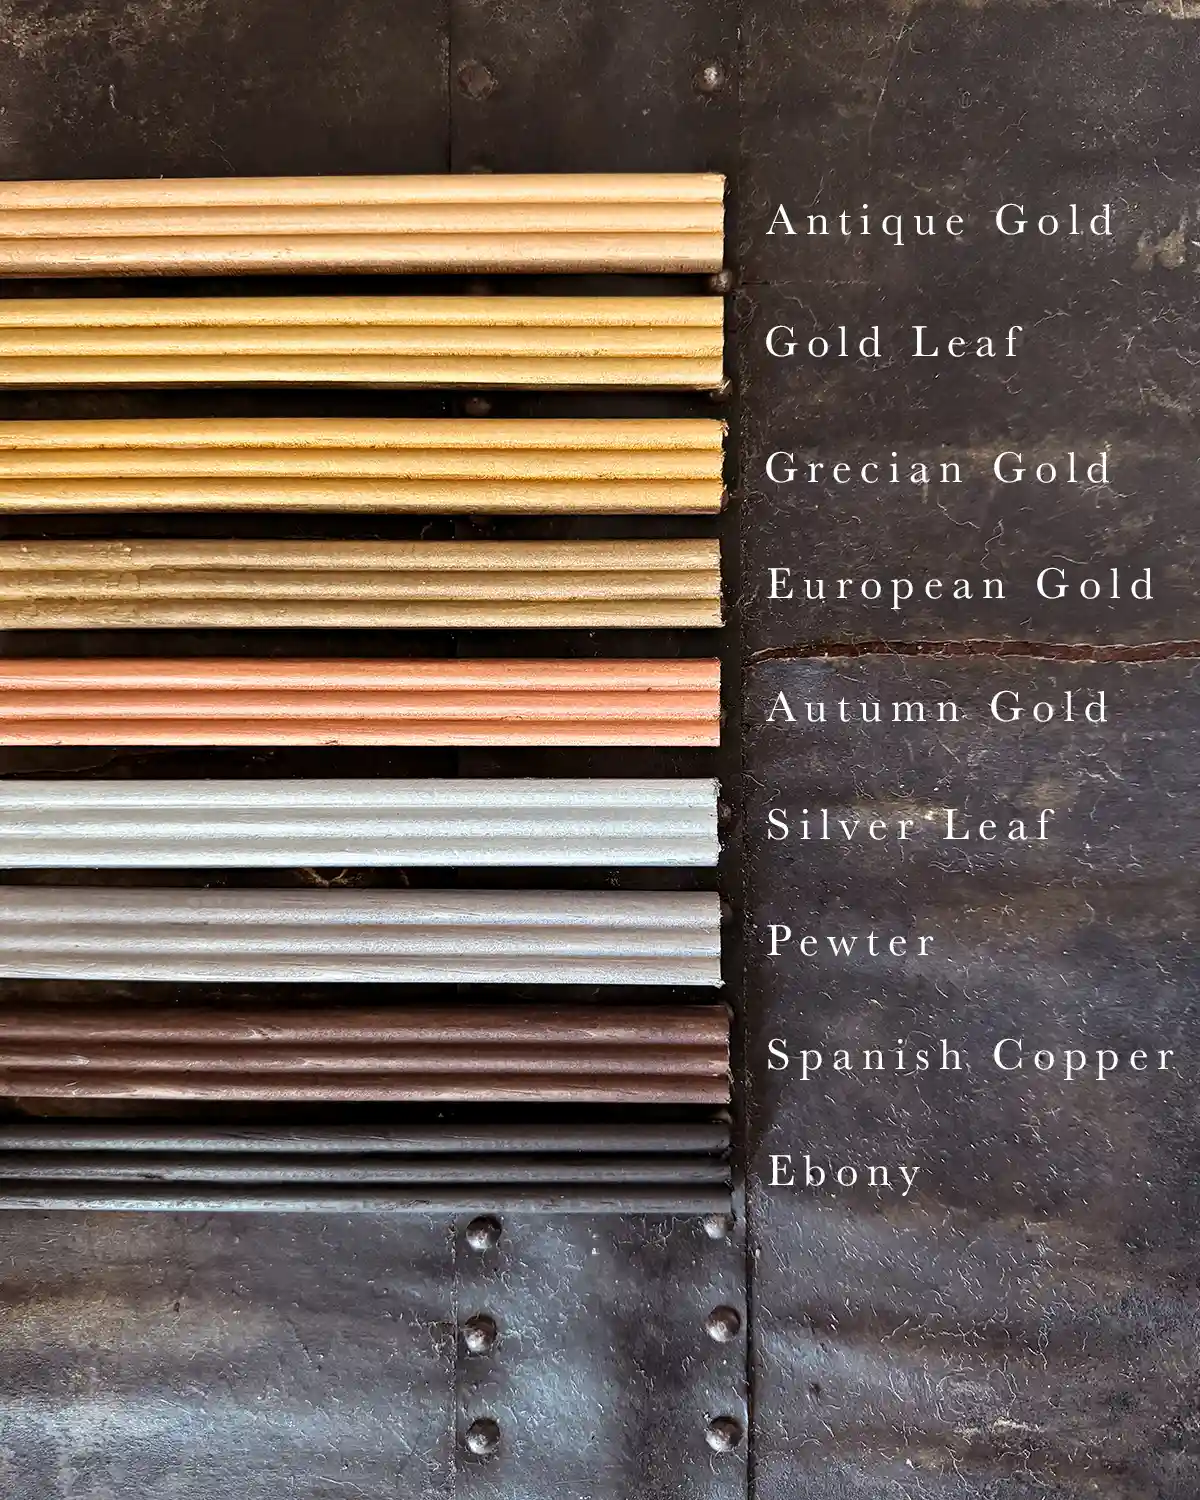
Choose A Color
I have an aversion to traditional, shiny gold. I’m not opposed to gold finishes, I just prefer them aged. So I picked Gold Leaf Rub N Buff. The new shade is similar in color to the lamp, but the finish yields more patina than the lamp’s existing finish.

Shameless plug to use our Rub N Buff color comparison guide for help choosing just the right gold. I tested ALL the different colors of Rub N Buff to compare and contrast the shades. I’ve used those swatches several times to help choose a color for projects.
Apply The Rub ‘N Buff
The next step was to apply the Rub N Buff to the lamp. This is where I experimented to determine what I liked and didn’t like in terms of application methods.
Applying With A Lint-Free Cloth
I started by applying a thin layer of Rub N Buff with a lint-free cloth. This was my favorite method when applying to wood or when I refinished the keeping room mirror.
When applying to the base of the lamp, it went on smoothly, but it didn’t cover the entire surface. There were quite a few bare spots where the wax wouldn’t adhere to the metal. If I waited about 30 minutes to an hour, the wax dried enough to apply a second coat. Each coat had better and better coverage and yielded a smooth finish.
Applying With A Paint Brush
I also tried applying the Rub N Buff with a paintbrush. It was super helpful to get into the nooks and crannies of the lamp, but I hated how it worked on the larger surfaces. It showed the brush strokes and clumped up quite a bit.
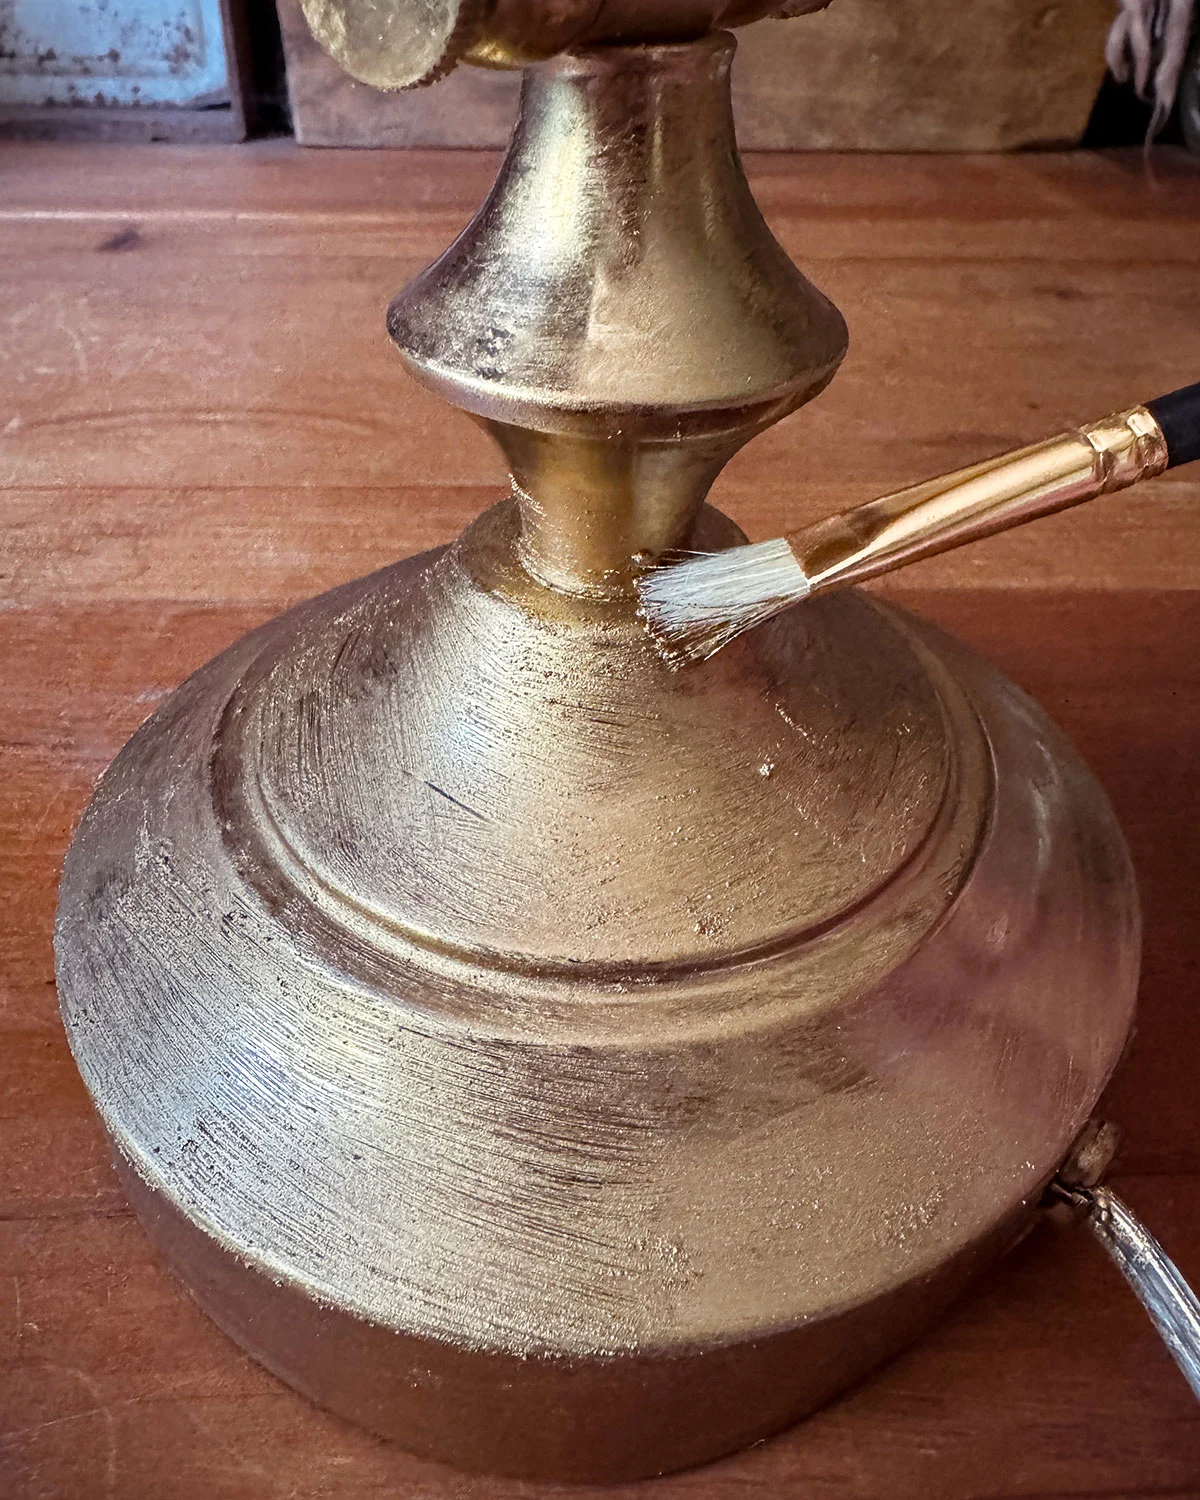
Do you see all the clumps and the brush strokes? I didn’t love this about using a brush.
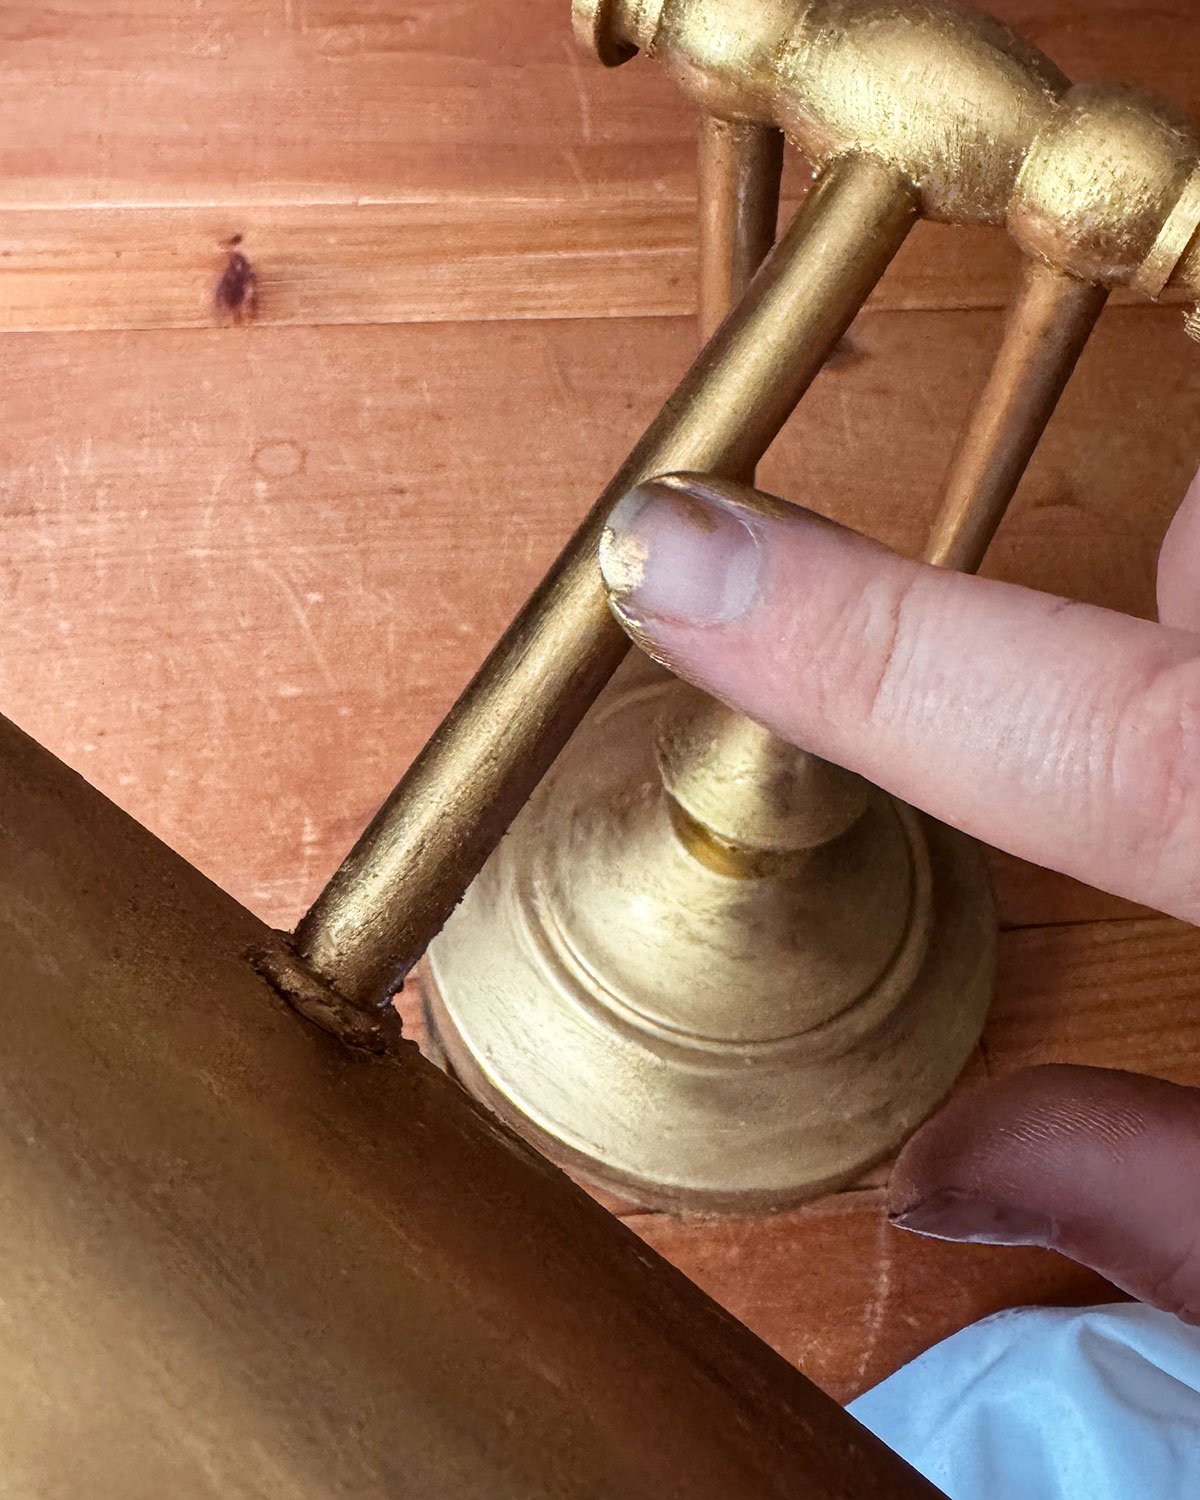
After letting the wax dry for an hour, I tried to buff out the brush strokes and clumps, but they didn’t come out very well. I had the best success smoothing the clumps using my finger and occasionally a damp paper towel once the finish dried more. Later, I tried smoothing clumps after about 20 minutes of dry time, and it worked better.
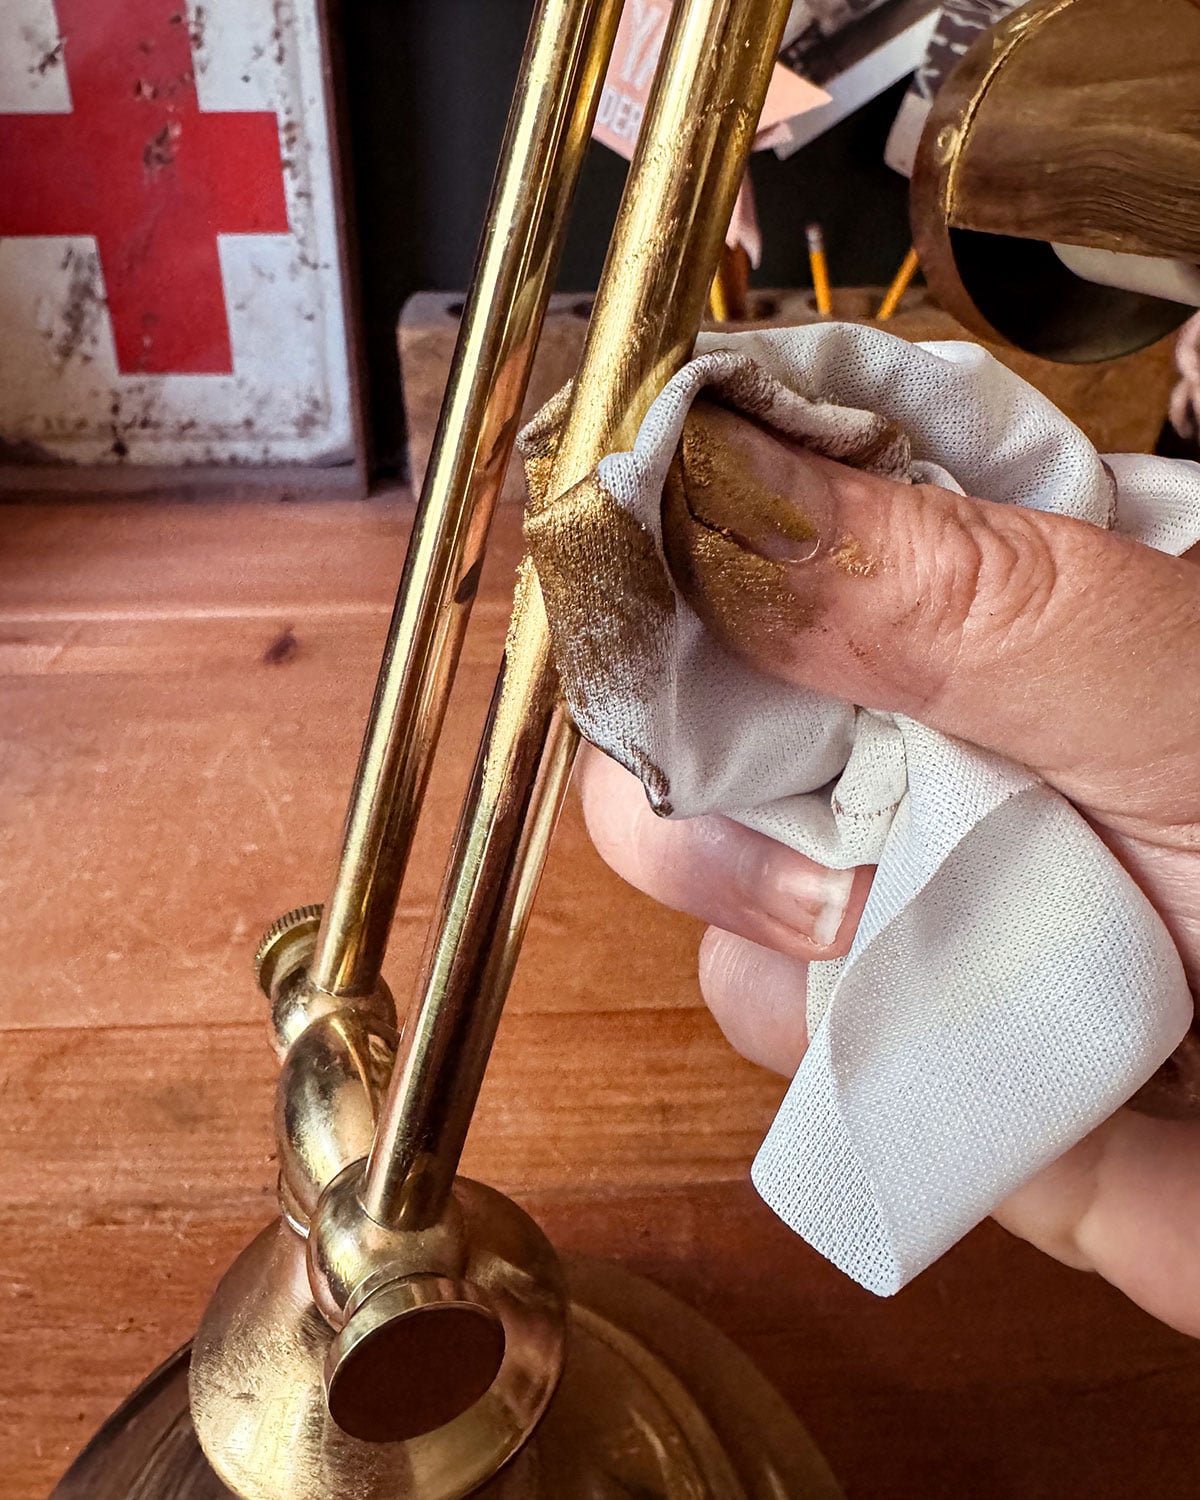
Applying With A Finger
This is by far my favorite application technique, and next time I work with metal, I’ll start this way. I just didn’t like how hard it was to clean the gold finish off my fingers at the end.
Do you see how smooth and even the Rub N Buff goes on when applied with a bare finger?
This method of Rub N Buff application works best with super-thin layers and building up the finish just a little at a time. If I tried to get better coverage with one coat, the material clumped or wouldn’t adhere to the original finish of the lamp. It’s also easier to adjust the pressure and get a smooth finish this way.
The TL;DR for applying this way, use a small amount of product and apply light pressure, layering until you get the desired finish.
Buff The Lamp
In the end, I wasn’t 100% happy with the finish, and I honestly considered sanding it all down and starting over. I thought the lamp looked great from a distance, but up close, it had so many imperfections that I didn’t like it. But I decided to power through and move on to the final step of the Rub N Buff lamp makeover process, buffing the finish.
I usually like to give projects 24 hours of dry time before buffing, but I was hoping I could rub out some of those imperfections. About two hours later, armed with a lint-free cloth, I buffed and buffed and buffed some more.
While I couldn’t make the finish completely smooth, especially the sections where I used a brush, I could live with the finish.
DIY Lamp Makeover Cost – $12
All in all, the total cost for giving new life to an ugly lamp finish (at least ugly according to me) was $12. That’s $2 for the thrifted lamp, $9 for a tube of Rub N Buff (and it only used about a third of the tube), and $1 max for the lint-free cloth.
Now THAT is a budget-friendly makeover. Similar lamps to mine cost $50-$75 on Amazon. And don’t get me started on how much Pottery Barn lamps cost (although I LOVE them). They clock in around $300, which is a week’s worth of groceries around here.

Finished Table Lamp Makeover
I love a simple makeover like this. You know, the type where you take an object that has a great shape and simply give it a new look. Thrift store finds, combined with a little creativity, can give you beautiful objects for your home in an affordable way. Plus, it’s fun!
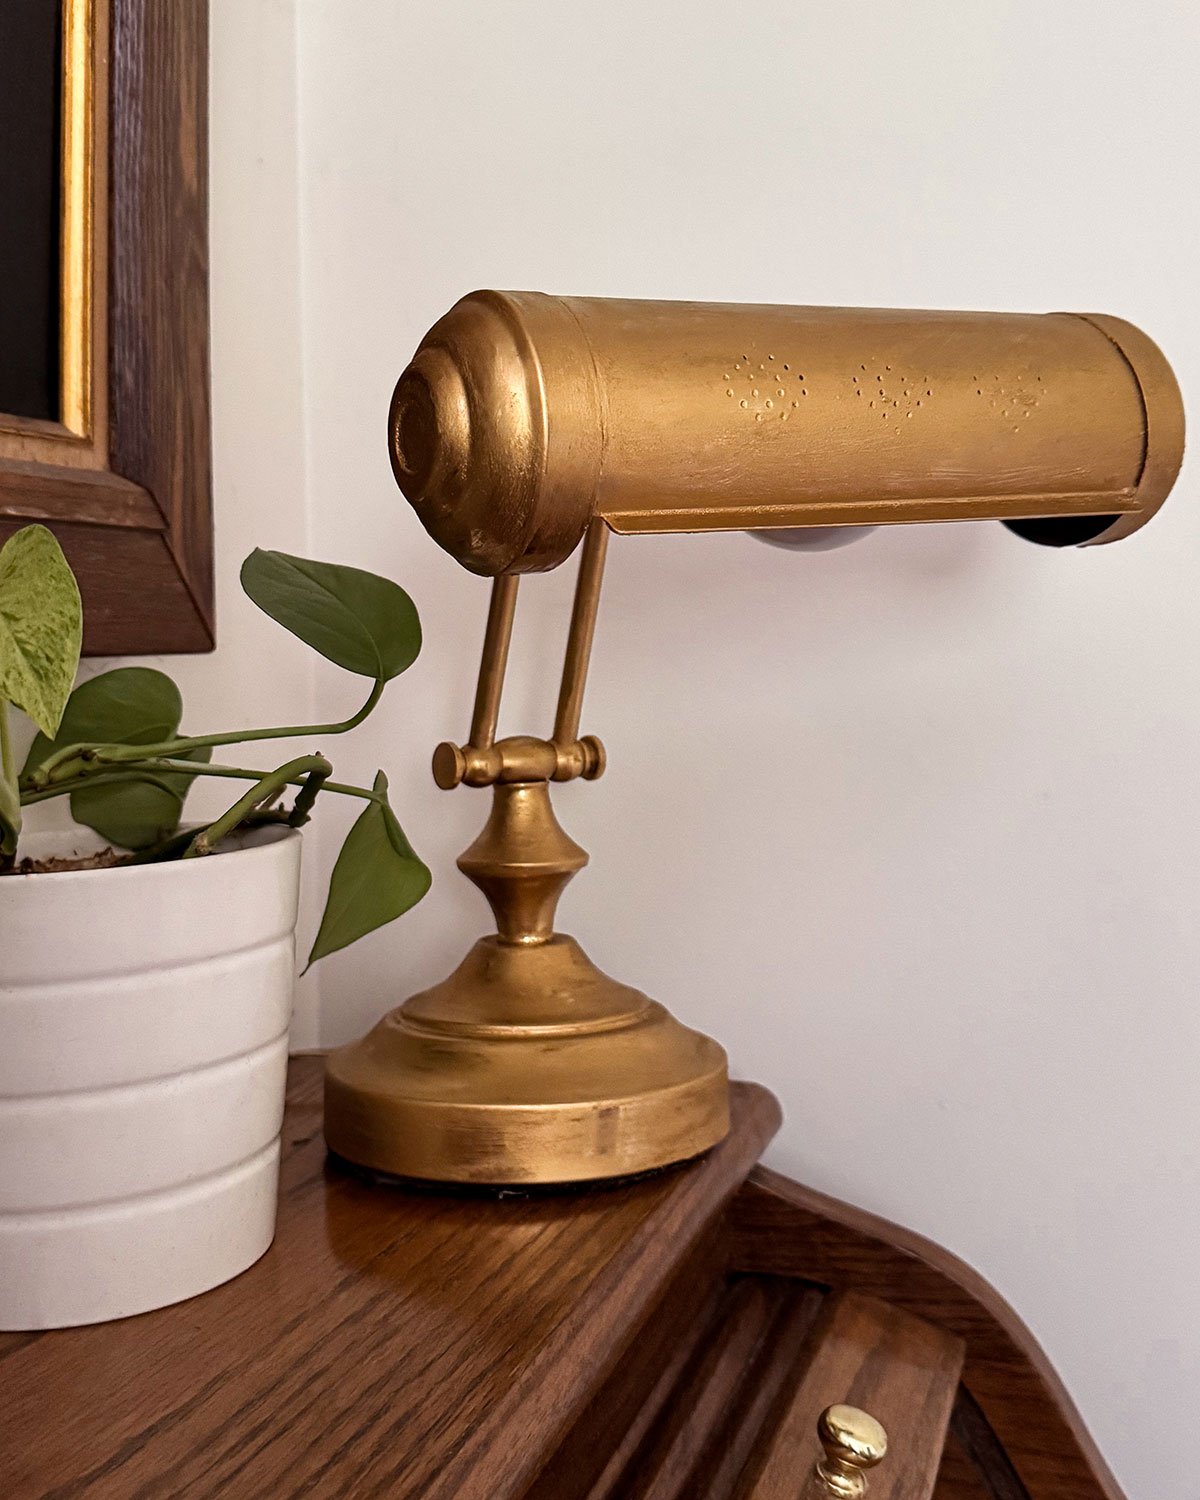
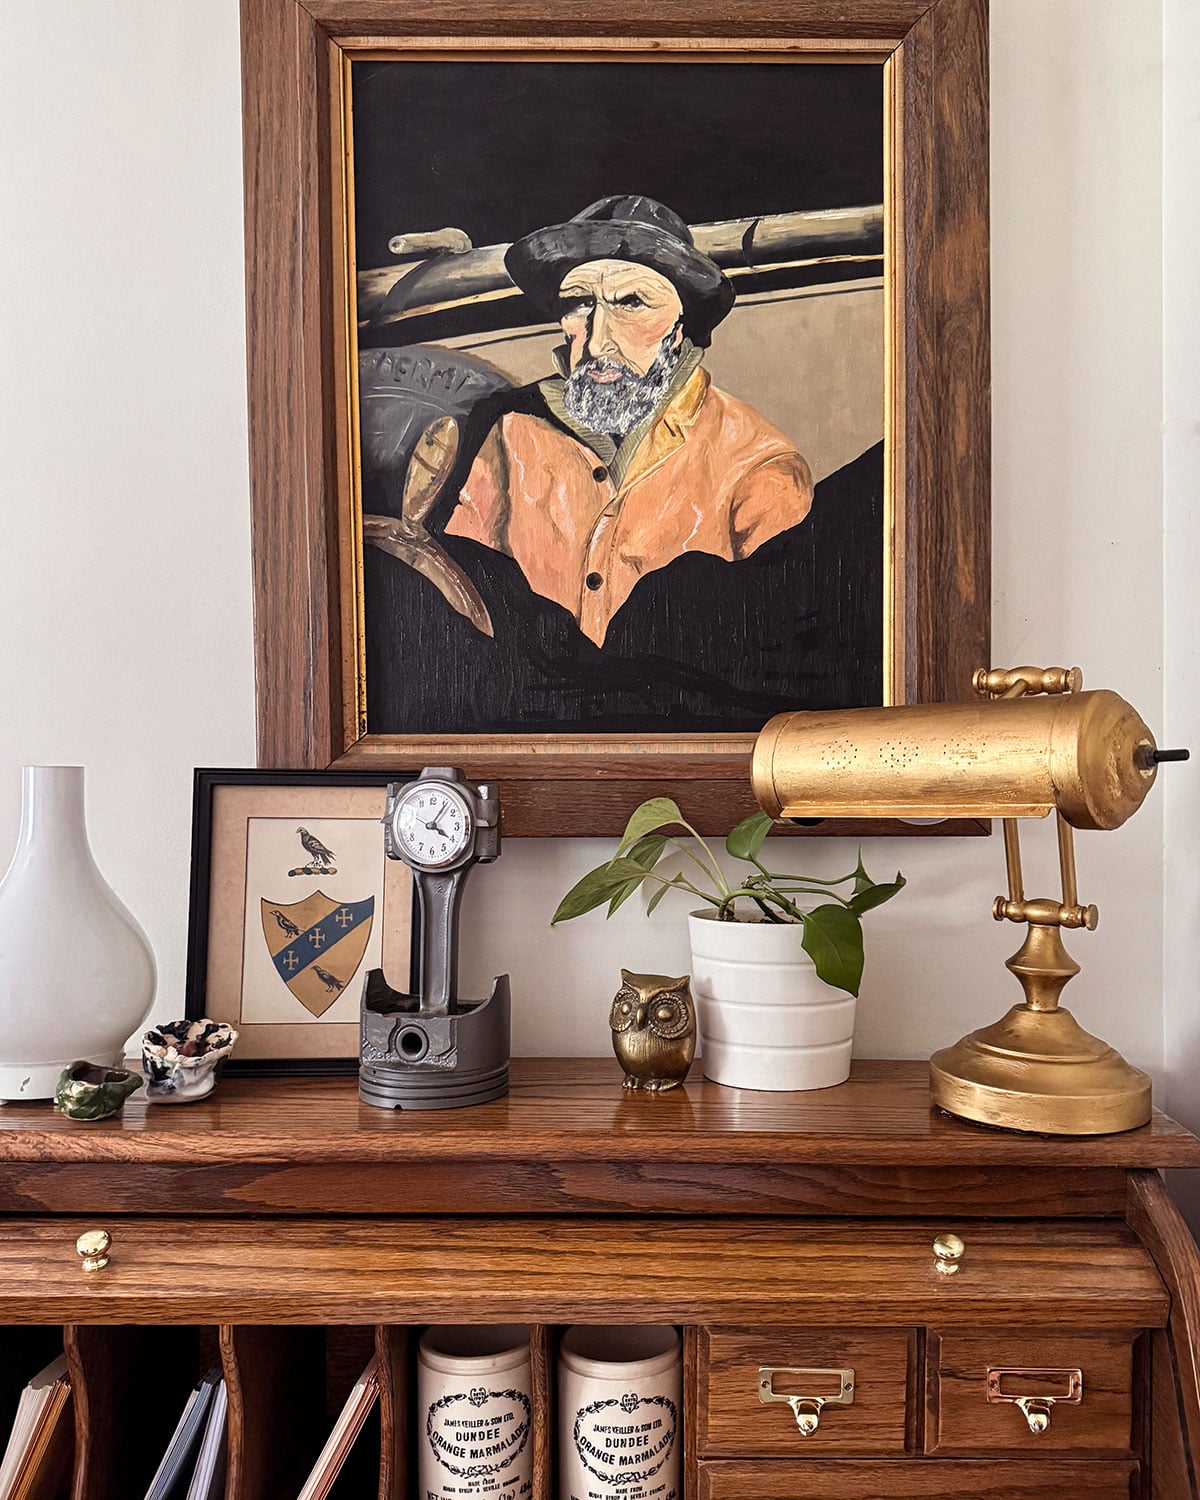
One more picture of my new beautiful lamp set up on my writing desk for good measure.

Adding a lamp above my desk has been on my short list of updates for this space for a while. It’s been so hard to see at night, which is when I work the most out here.
I may have to clean out and REALLY organize the desk next. I organized it once when we first moved into our home, over ten years ago, and it’s no longer working well for me. I would love to store my morning journals here, along with all my blog work supplies, which are currently all over the house. Give a mouse girl a cookie lamp, and she’ll want a glass of milk organized desk.
But until then, at least my desk is fully illuminated now!