Look for the blue moon folks we have made some progress on the playground renovation project. Seriously. I have the pictures as evidence. Want to see?! We’ve only wanted to do this project for four years, but we finally planned it out this past spring and made the first round of progress this weekend.
We kept looking for a free weekend in our summer schedule to kick off the playground project but all our weekends have been jam-packed. So when some travel plans fell through this weekend, it was the perfect opportunity to get to work.
I’ll share full tutorials on how we did the things we did after the playground is finished. So consider today’s post a project diary full of updates, challenges, and the sweet stories of the progress.
The Before
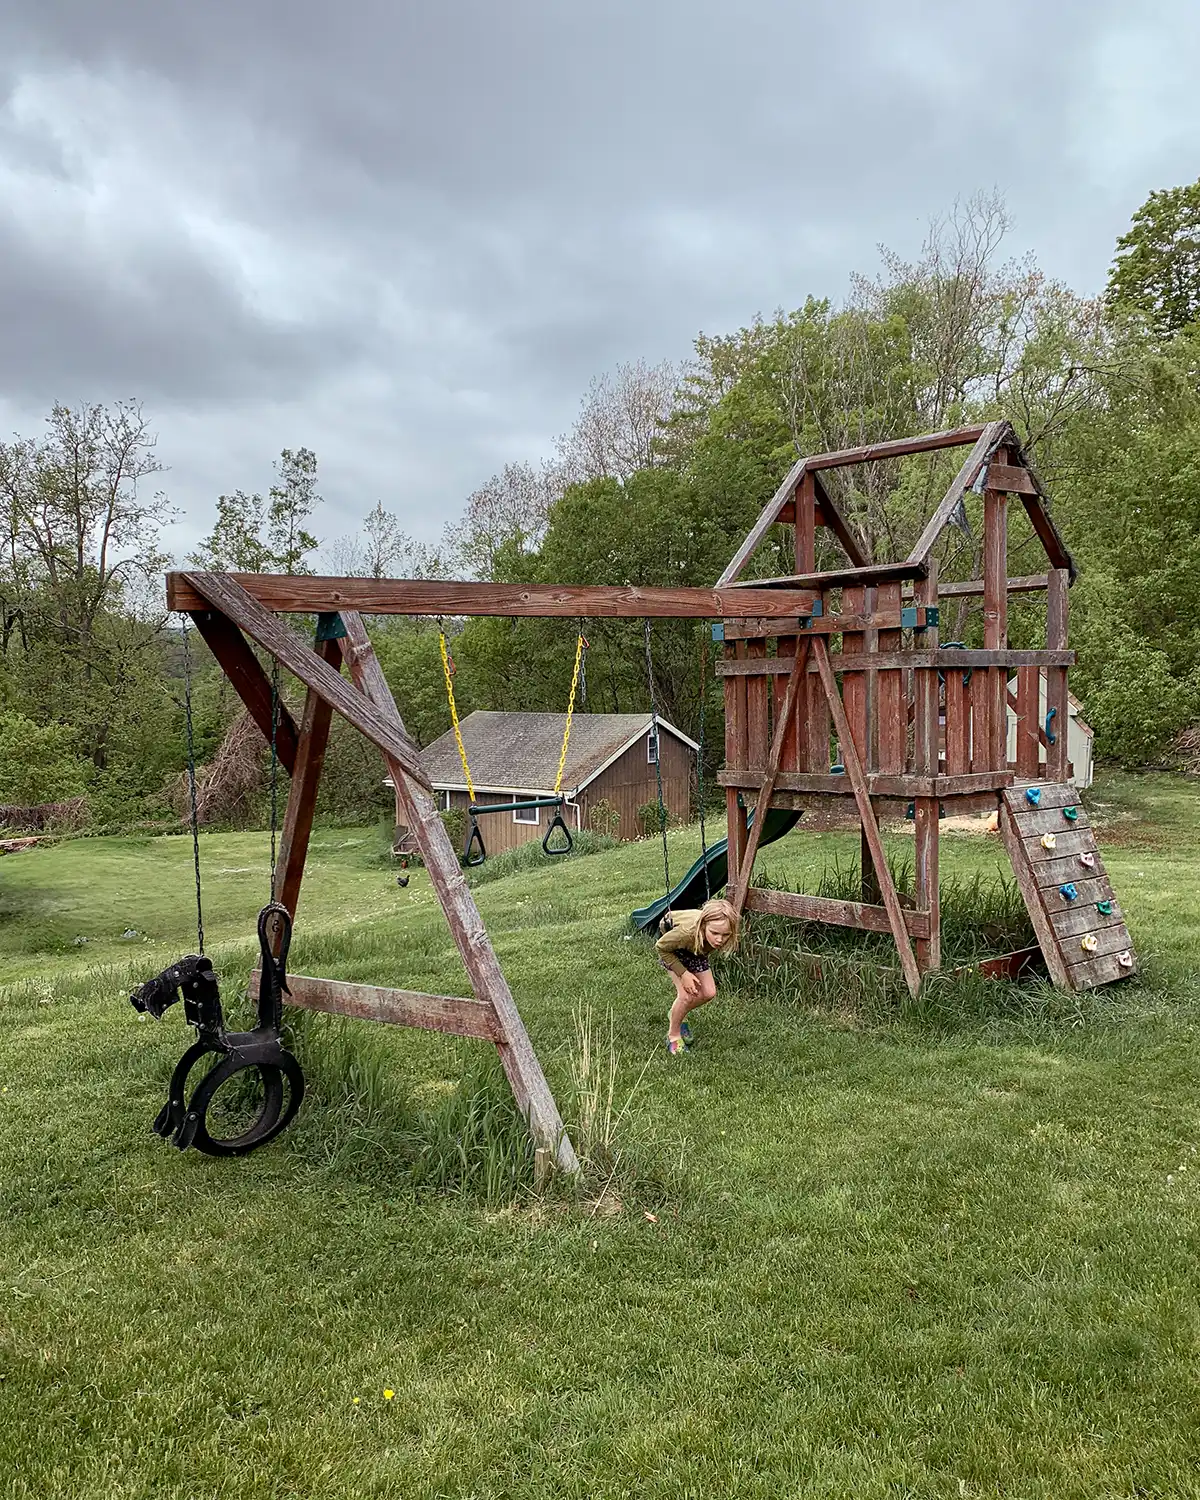
Before we dive too far in, let’s first recap the before. Which, shocker doesn’t look any better than the current state of the playground. But as I keep reminding our kids, it’s going to look worse before it starts looking better.
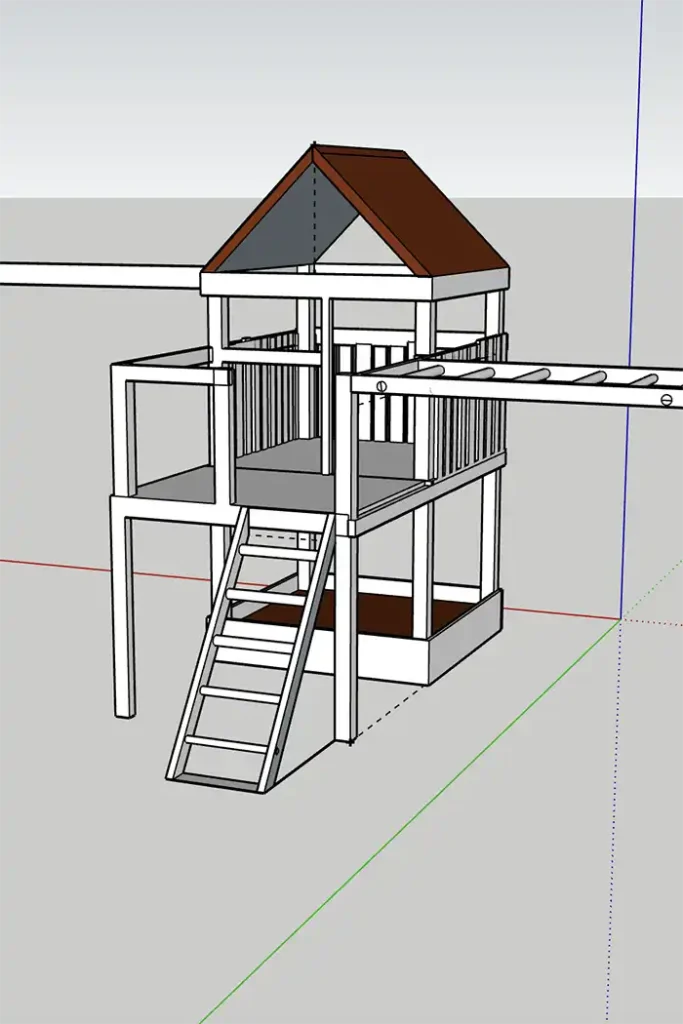
The Plan
And let’s recap the playground renovation plans. The Readers’ Digest version of the playground reno plans are to replace the rotten parts, add swings (they’re all currently broken), extend the deck, add monkey bars, and set up a sandbox underneath.

The Unassembling
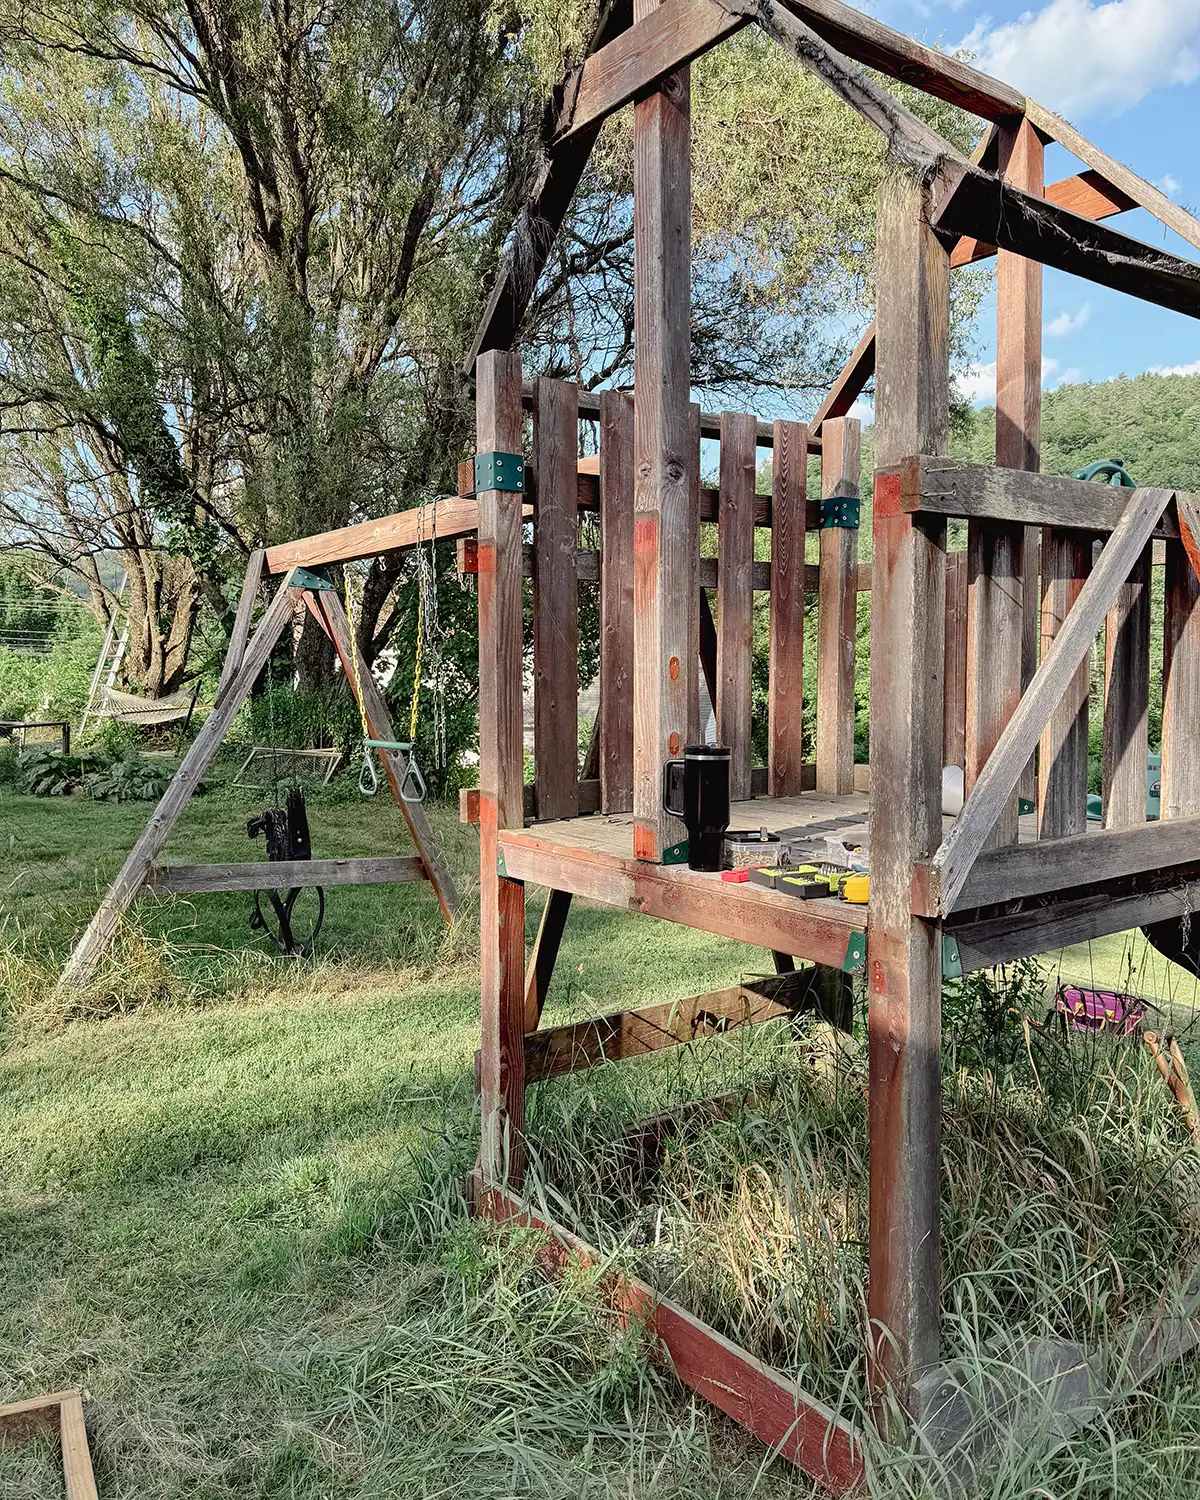
The first step of the playground project was to unassemble. So off came the rock wall and off came the deck railings to make room for the extension.
Some may refer to this part of any project as “demo day.” But for us, it was more like “demo five minutes.” It was the quickest demo process of any project we’ve completed.
It was simply unscrewing the parts we didn’t need and saving them in the scrap pile for later. Which came in handy…stay tuned.
Saturday Progress
The logical first step in putting the playground together again was to build the deck extension. It’s the playground hub and something we could finish over the weekend that the girls could play on. Who needs a ladder when the best way to climb into a playground is UP the slide? Hashtag all kids everywhere.
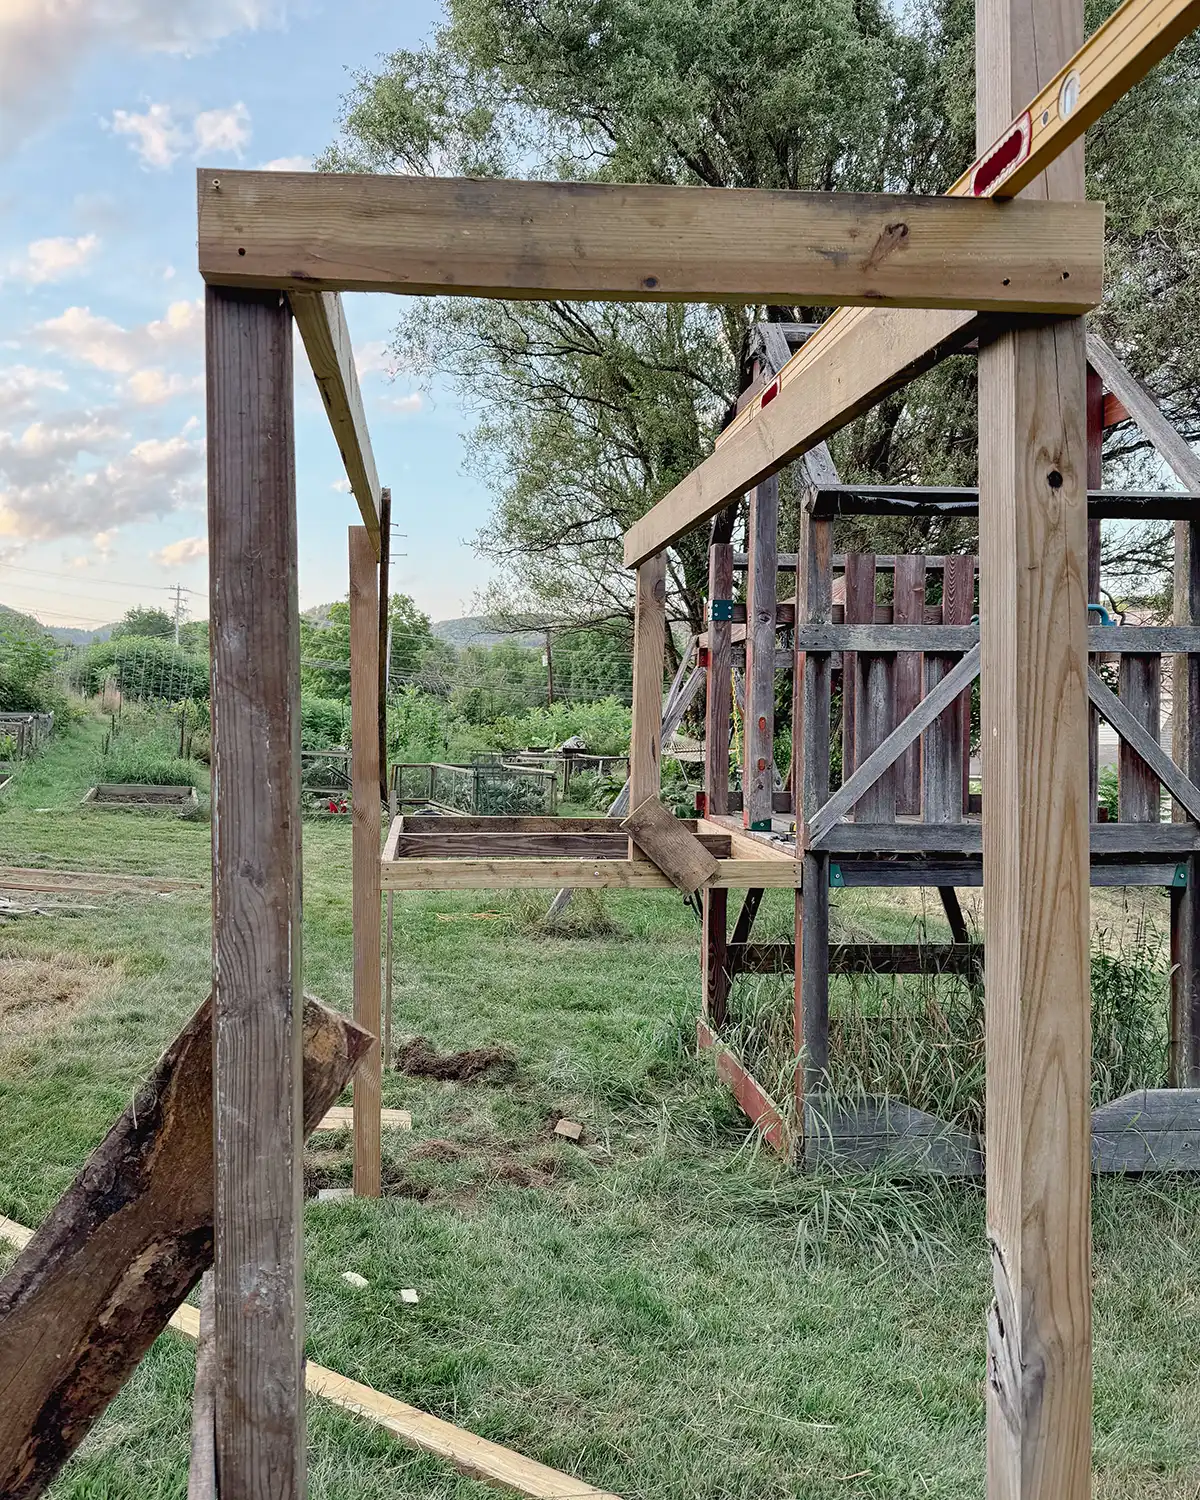
Framing The Deck Extension
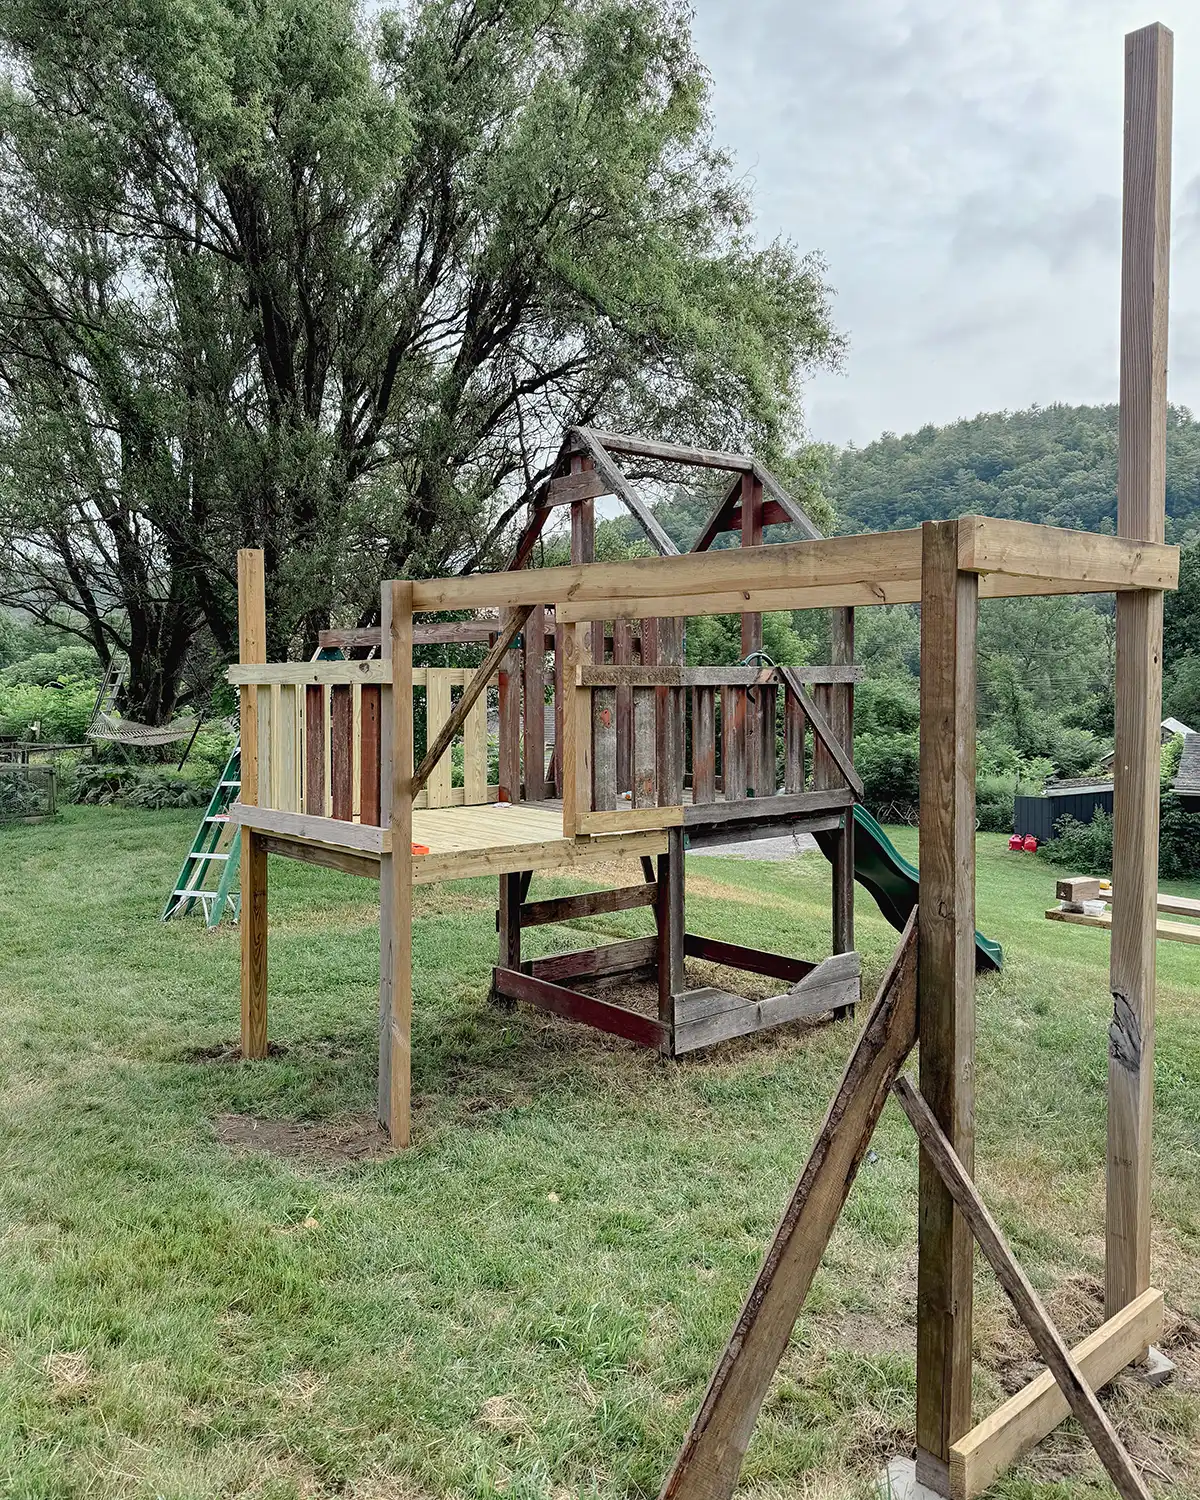
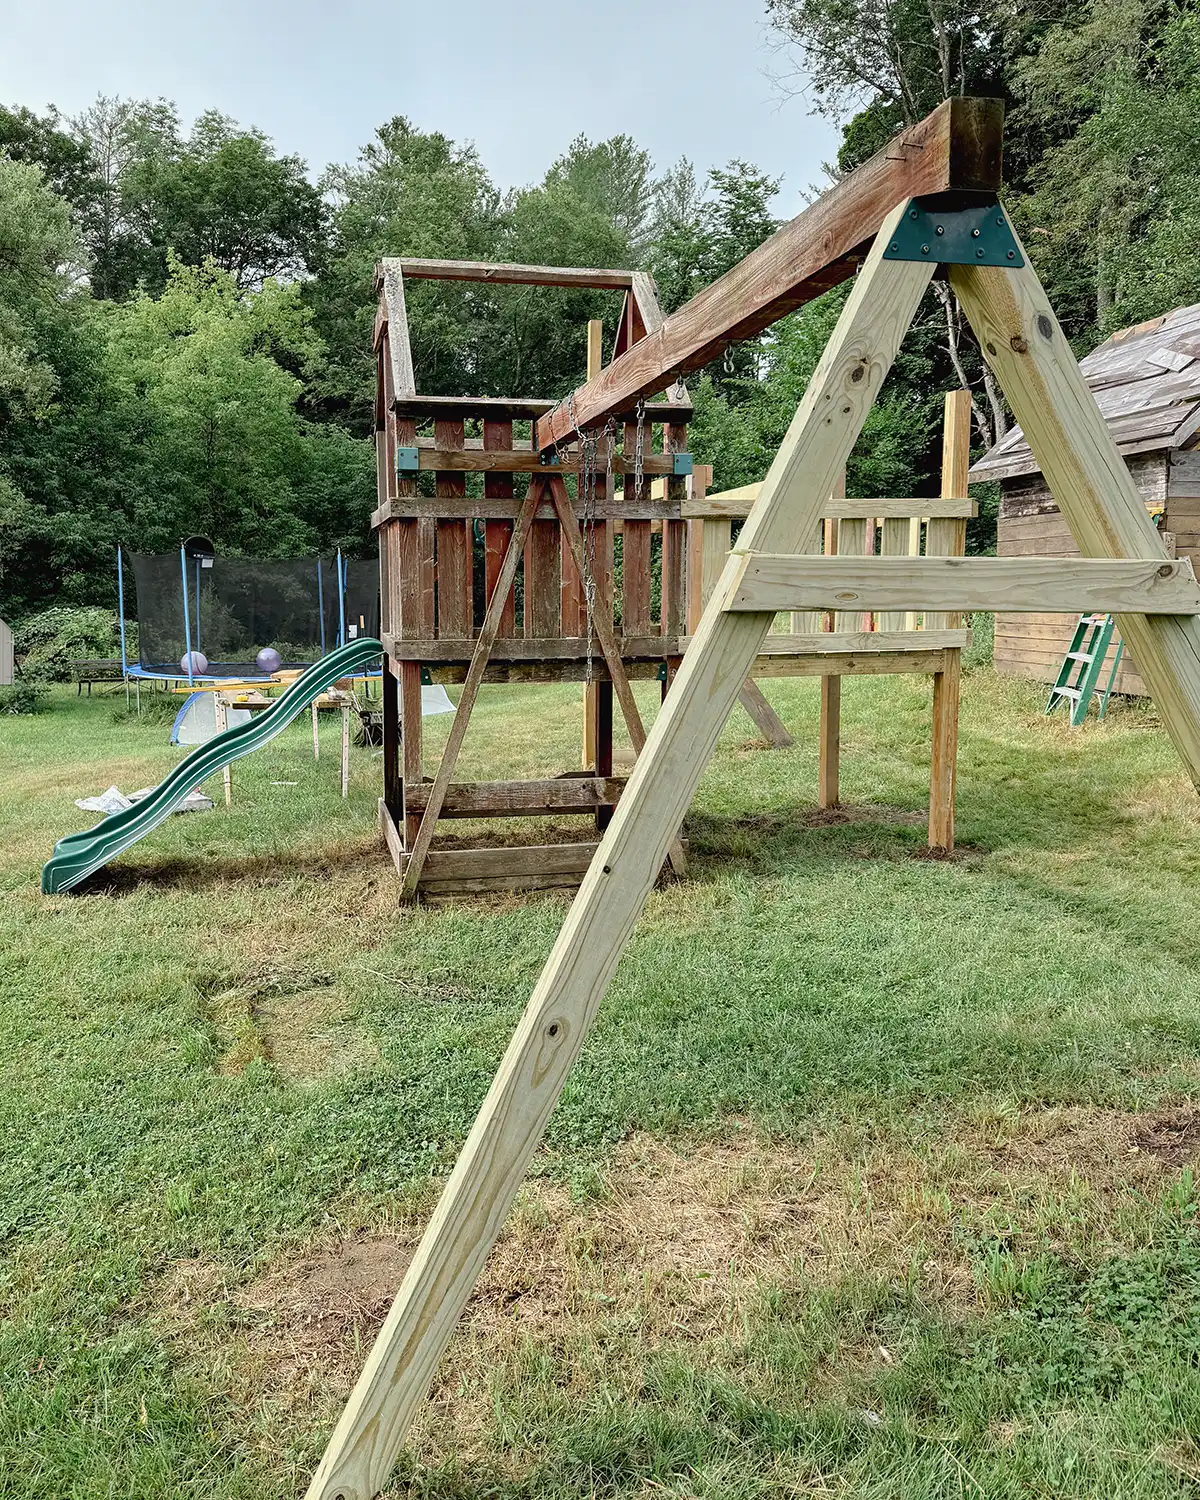
The first thing we tackled was framing up the deck and adding posts.
For the deck extension, we had planned to double the size of the deck. The old deck would be under a new roof/awning and the deck extension would be an exposed area. The new section would also be a landing pad for the new monkey bars.
After designing the playground on paper, we thought we might want to shorten it if it felt too big in person. But alas, adding another almost 5′ x 5′ deck fit just fine and felt okay. It gave the girls a large amount of deck play space, per their request when we planned the project.
We had some materials left over from other projects that we used to get the building process started. The posts were supposed to be used with the greenhouse and kitchen garden projects, which we still haven’t gotten to. We might as well put them to use for the kids’ playground.
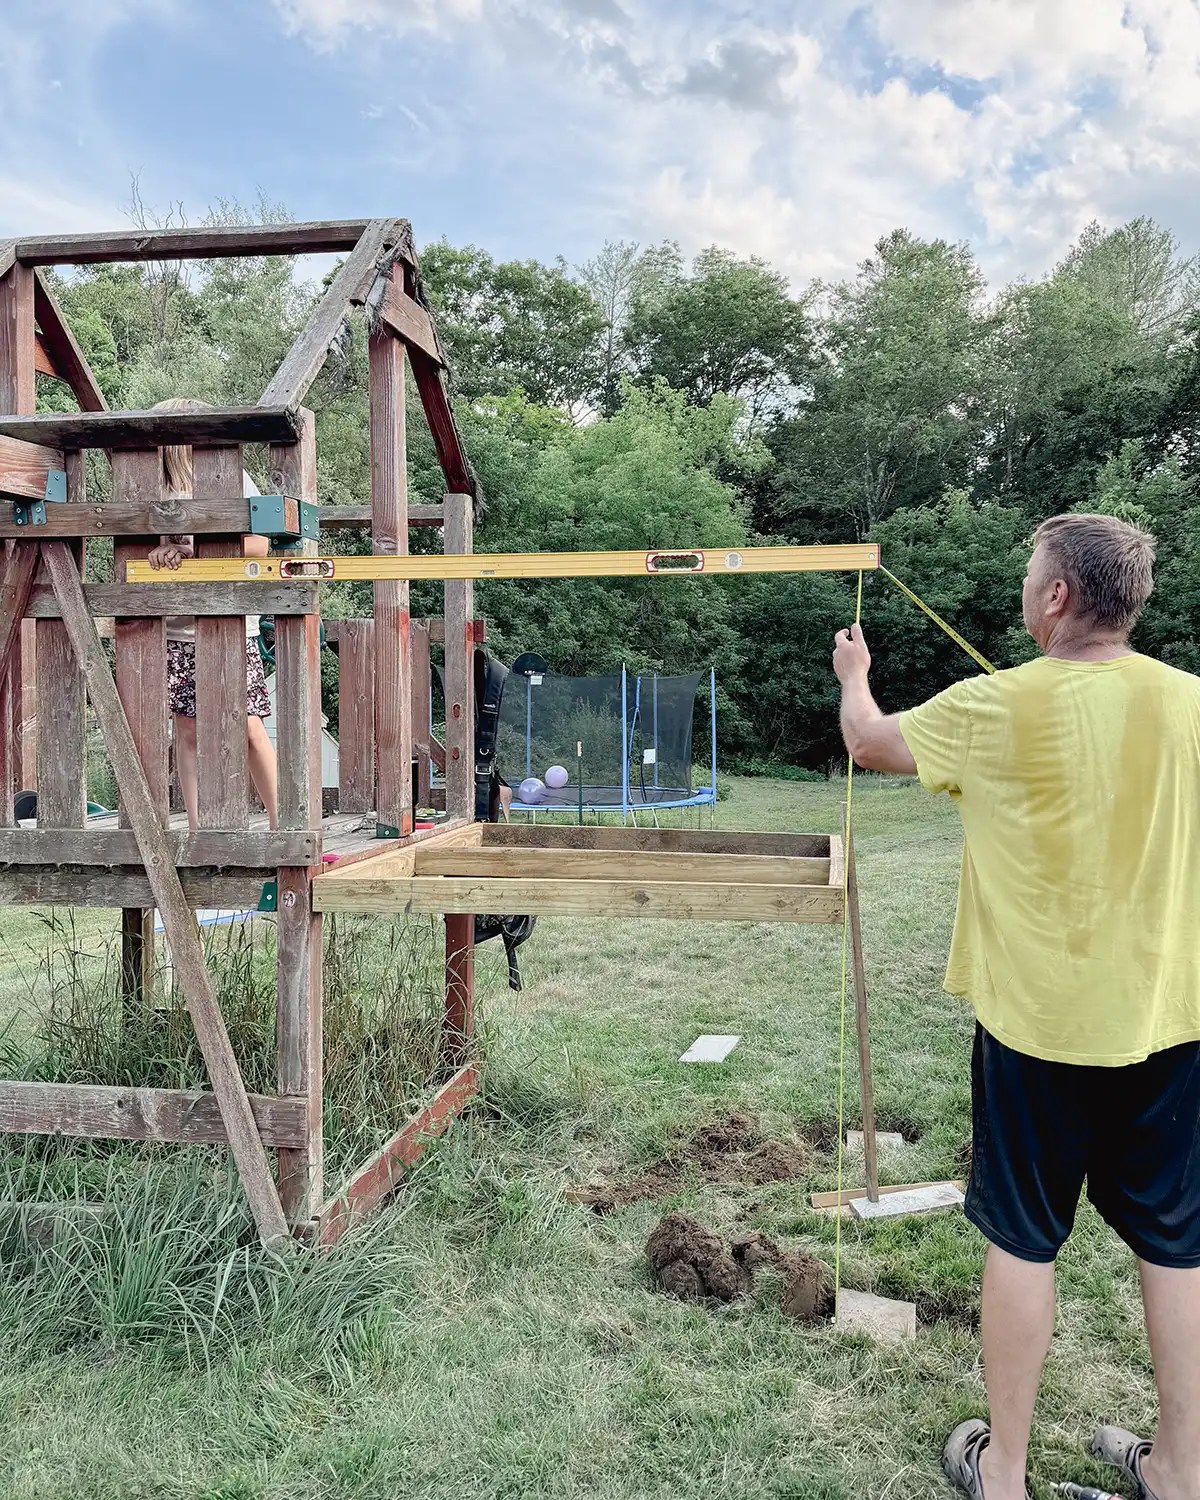
Framing The Monkey Bars
After framing the deck and getting the posts level and supported (we dug down a little bit and put cement blocks underneath for extra sturdiness), we decided to frame the monkey bars.
While we framed the monkey bars on Saturday night, we did playground research the next day and made some adjustments. Stay tuned.
After getting the monkey bars framed we were (1) in need of materials and (2) had two overstimulated and tired girls who needed to go to bed. It was 8:00 pm-ish.
Making A Materials List
Before packing up for the night, we stepped through our plans, checked out our wood inventory, and made a materials list.
Things we needed:
- Deck boards
- Deck balusters
- Pipe for monkey bars
- Replacement posts for swing set framing
Sunday Progress
First thing Sunday morning we bribed the girls with a morning spent doing the playground circuit AND ice cream. The perfect summer vacation day! I even twisted their arm to get them to visit Home Depot with us, which isn’t their favorite UNLESS we find a race cart!

Playground Research
Since we kept waffling about how to build the monkey bars, we decided to do a little playground research. Initially, we thought about buying monkey bars from Amazon and screwing them into the wood, but the widest bars we could find were 22″. They didn’t seem wide enough.
What we researched at the playground:
- What spacing between the rods? Rowan confirmed 12″ apart.
- What size pipe would be most comfortable in kids’ hands? 1″ to 1-1/4″ was the verdict.
- How high should the bars be off the ground? 6.5′ to 7′ won out
- Do we want wider monkey bars? Short answer…yes. While Rowan wanted them SUPER wide like the 4′ wide ones at one of her favorite playgrounds, we compromised with 27″.
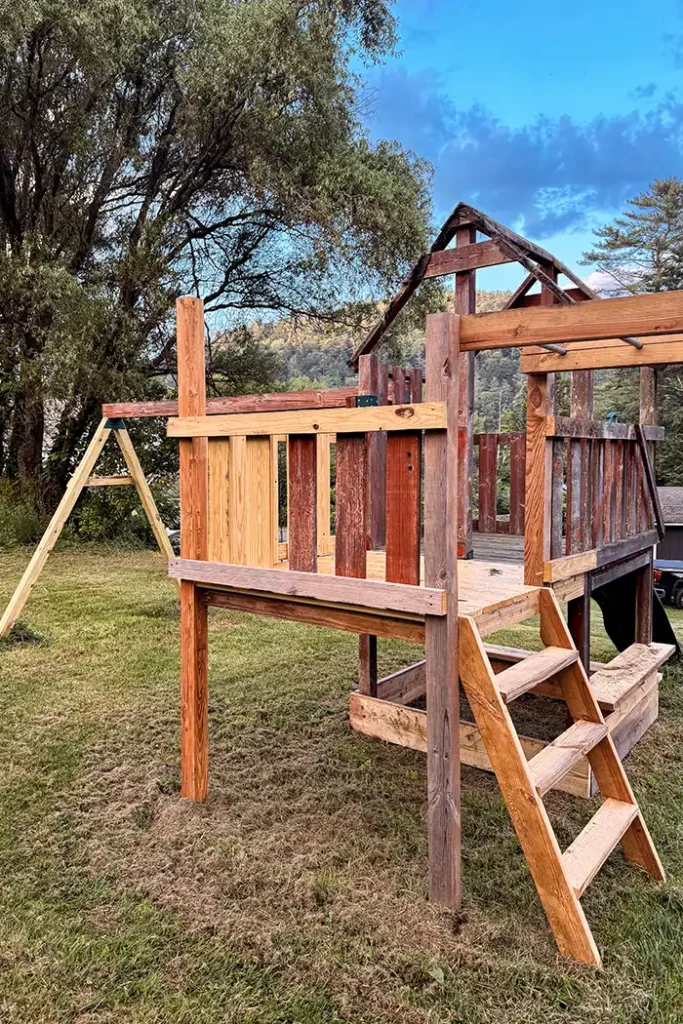
Finishing Building The Deck
Armed with a truckload of lumber and bellies full of ice cream, it was back home to get back to work on the playground. The first order of business was finishing the deck.
The deck boards went on.
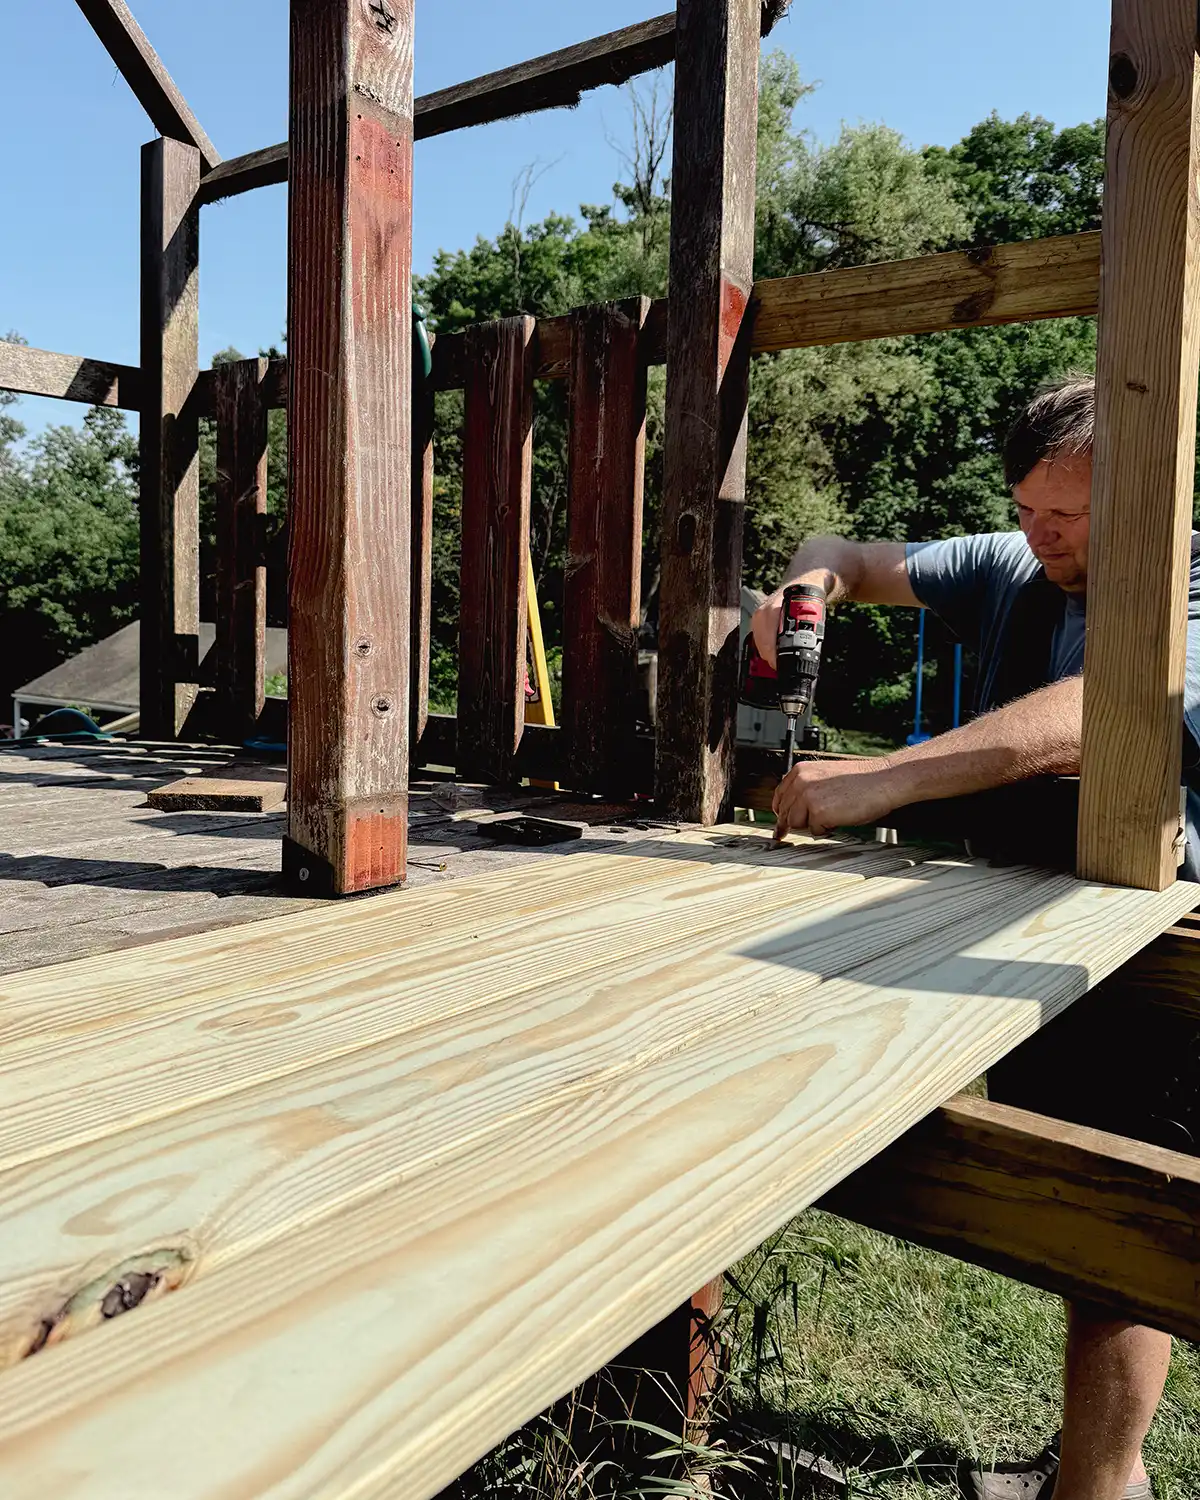
The railing went up.
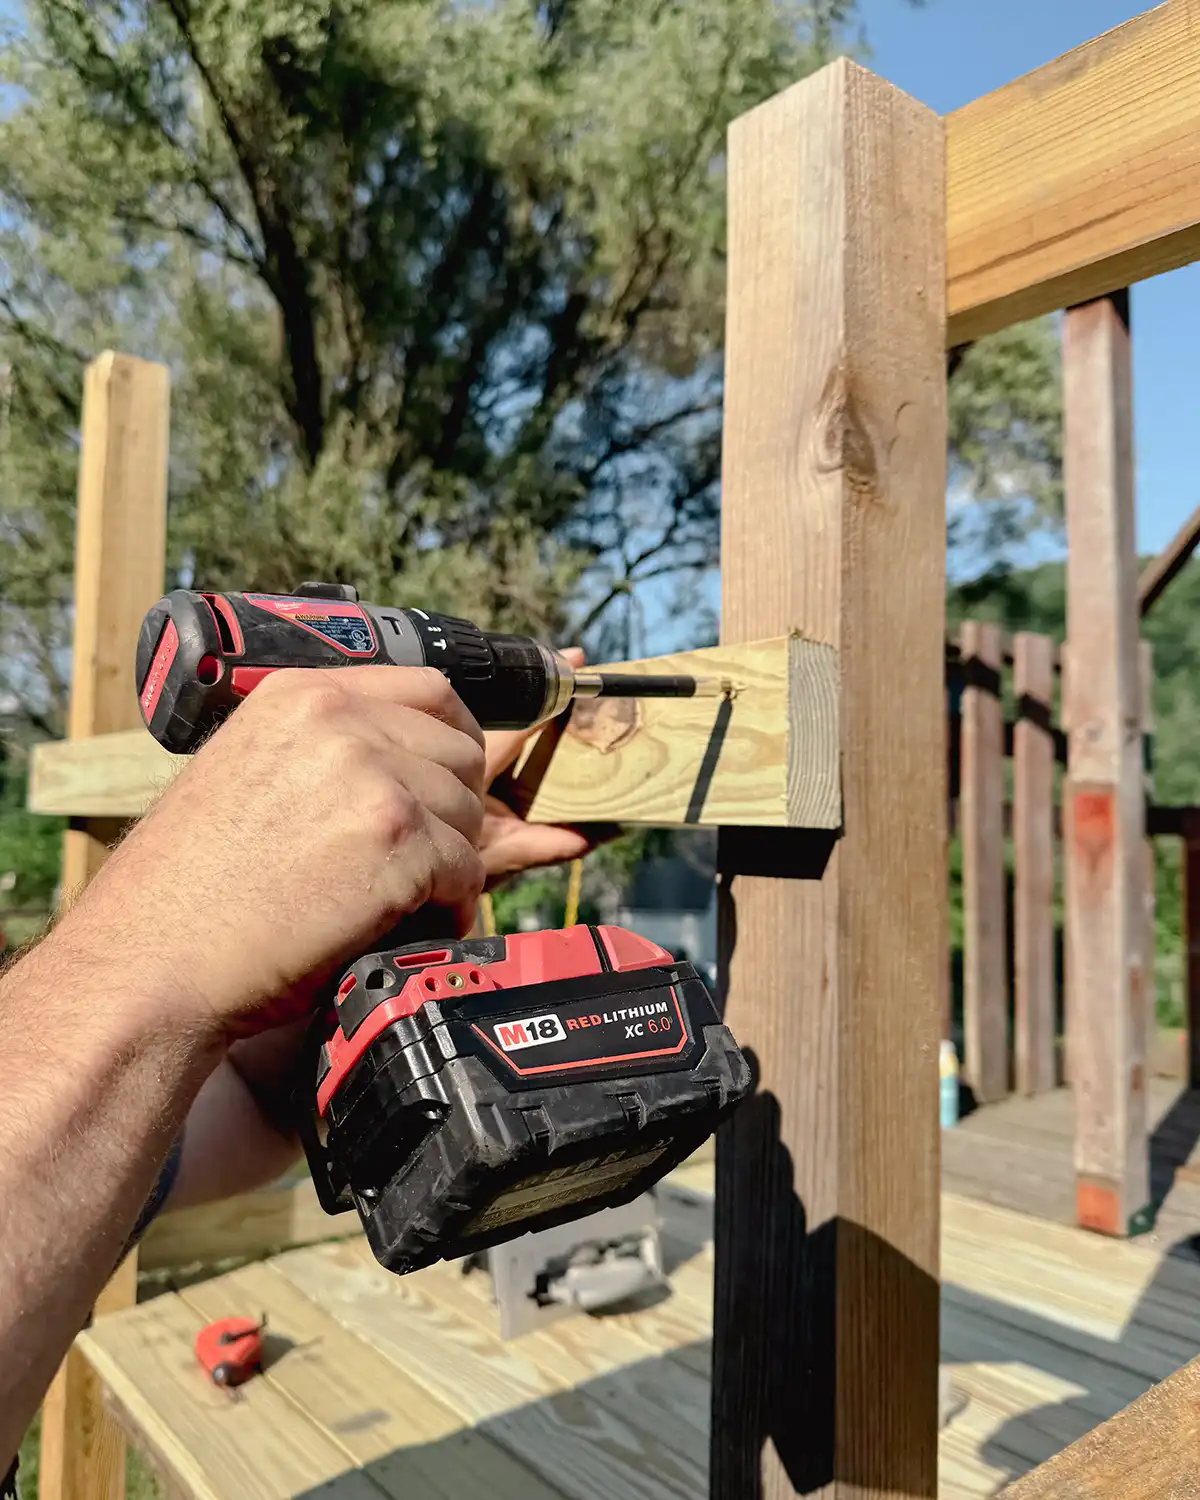
And the balusters were nailed on. Colby didn’t quite have enough new wood for the balusters, since we made an in-the-moment decision to have just one opening instead of two. But more on that in a moment. He’s the king of repurposing and found that the boards for the rock wall were almost the exact size he needed.
Replacing The Rotten Supports
One of the unglamorous parts of this project was the need to replace a few rotting boards. The main culprits were the end supports of the swing set.
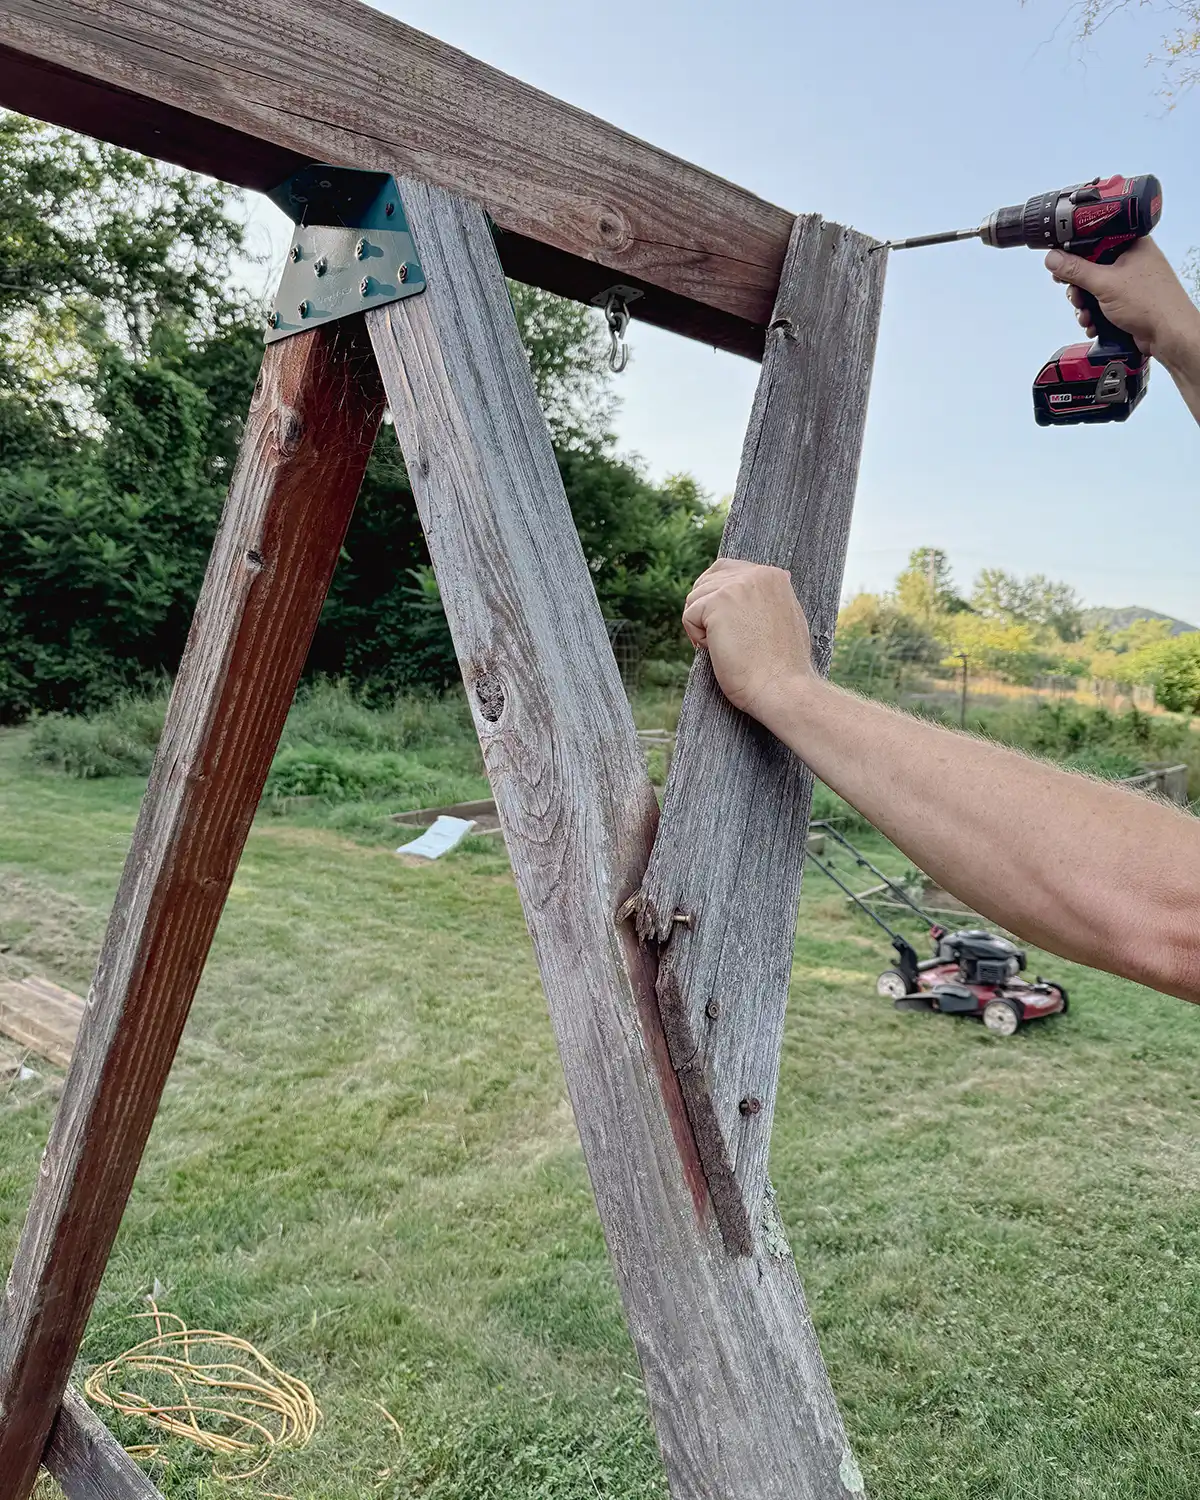
It worked out well that we had to replace the two end legs of the swing set since we wanted to move them anyway. Mostly to make room for the tire swing.
A pair of fresh, non-rotted posts for swing set stability and safety. Check.
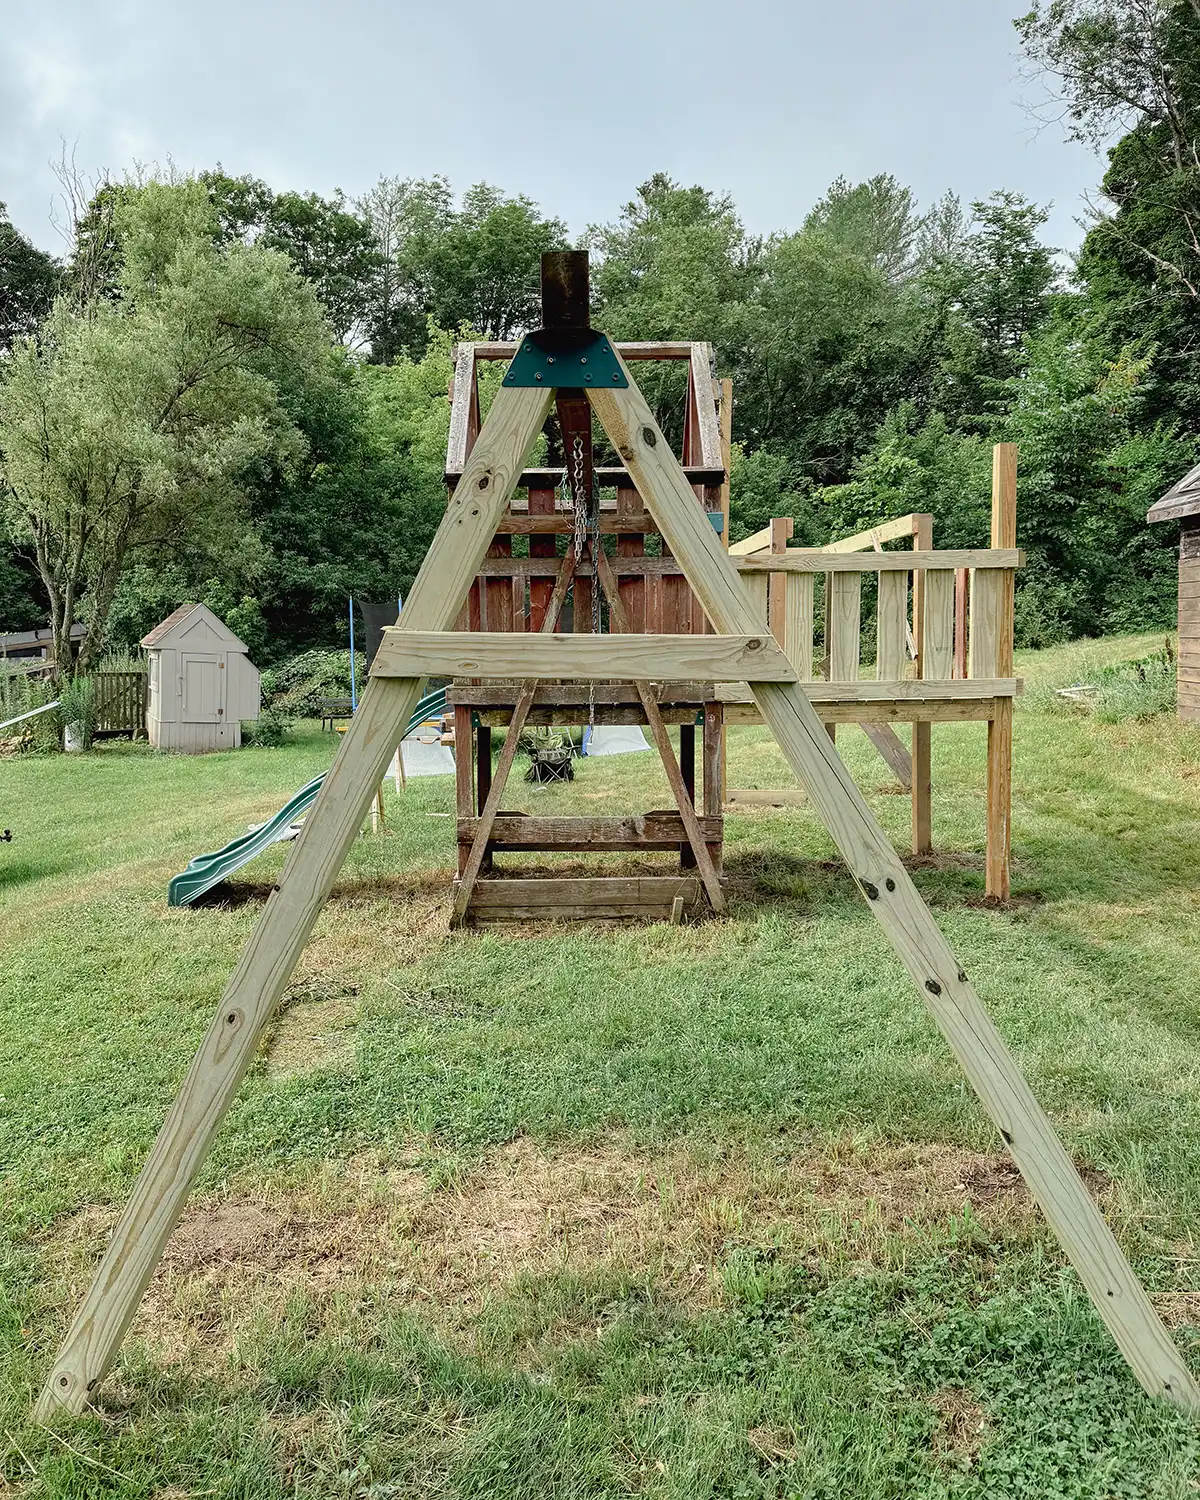
We still have to figure out the bracing for the new legs. We don’t think this is enough bracing to keep the swing set steady while kids are swinging. But before we attach more, we want to test drive the swings to make sure any bracing we add doesn’t get in the way. But alas, another project for another day.
And that’s where we left the swingset on Sunday night.
The Change Orders
We’ve already made quite a few changes from our original plan which is on par with how we work. We always go in with a plan but a loose plan. As with every project, there are just some things, once you see them in person, which don’t make sense. It’s always okay to change them, especially when you’re DIYing. Hiring out is another story.
Beam Supports
This one is minor and we’re still in the process of figuring it out. We originally planned to push the support legs attached to the end of the swing set to the edge. But when we replaced the rotten boards, the hardware to attach everything made it so the legs had to set in a few inches.
A picture is worth 1,000 words here.

Please note…the bracket is not completely attached. MANY screws are missing. A new box of screws is on the list for our next Home Depot run.
It would be a tight fit to fit two swings, a trapeze swing, and a tire swing on the swing set. We think it will all fit and be fine but we won’t know until we get everything hung and the kids test out using swings.
Tire Swing Bracket
The original plan was to attach a wooden post perpendicular to the swingset beam to create a bracket for the tire swing since it attaches in two locations. But then we learned that these brackets already exist. One tire swing bracket was added to my Amazon cart. So much easier.
Sandbox Cover
In our original plan, we wanted to build a wooden sandbox cover that folds into a bench seat. Here’s a video of the sandbox cover on Pinterest.
When prepping to build the sandbox and cover, we saw how it would lay out with our smaller, 55″ square sandbox under the playground. It felt like the benches would cover up too much valuable sandbox space and not leave enough room to play.
Here’s where the sandbox will go for reference. Right where one year ago Rowan is standing.

Which leads me to…
Sandbox Bench & Bar
Instead of a wooden sandbox cover that turns into a bench, we’re building a small bench under the slide, outside of the sandbox. In addition, we’re adding a small raised table/bar to the sandbox on the monkey bar side.
We’ve played at playgrounds with a similar feature and our youngest gravitates toward it. It’s been a doctor’s office, queen’s room, ice cream stand, and more. Here’s to appeasing Queen Bea.
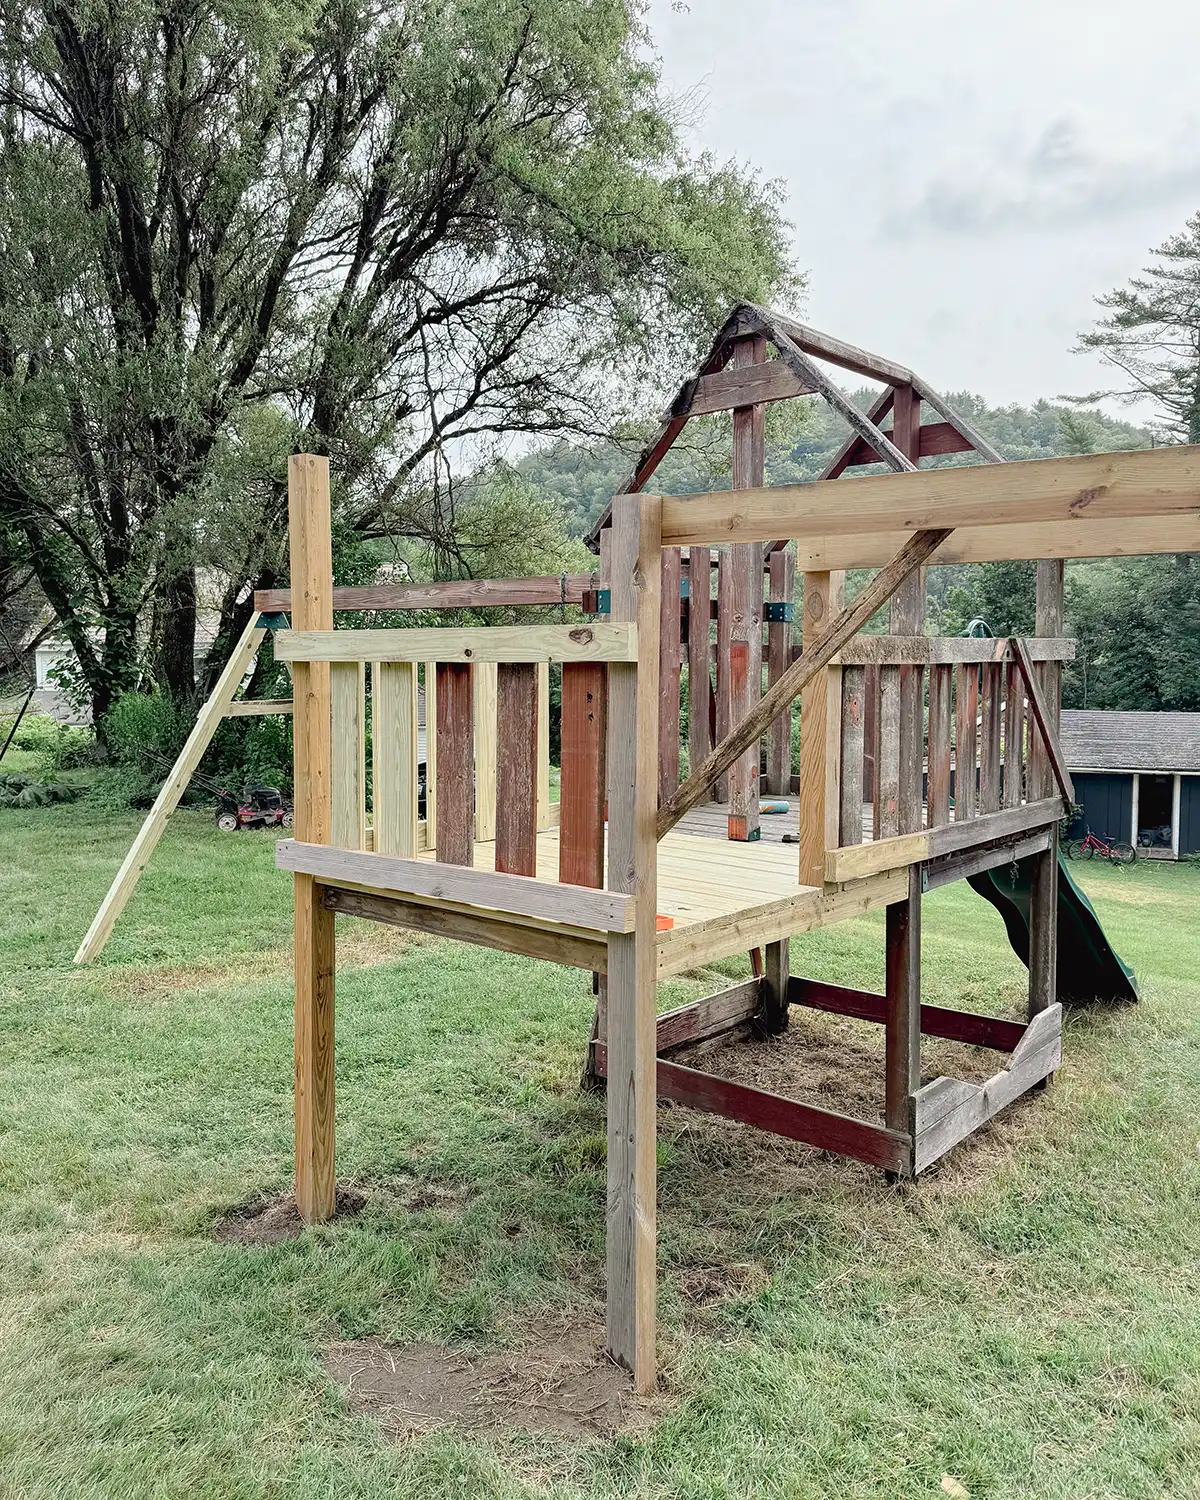
Ladder Location
Another change was moving the ladder to the new deck from the back (where the rock wall was) to where the monkey bars connect with the deck. This whittles down the number of openings on the deck from two to one.
Originally, we thought the ladder made the most sense where it was before. It wouldn’t be in the way of the monkey bars.
But when we saw the two openings, it felt like a safety hazard. Narrowing it down to one opening by the monkey bars felt much, much safer.

Ladder building project on deck…pun intended. Get it? Like baseball on deck but it’s a ladder attached to a deck?!
Monkey Bar Width
Original plan with the monkey bars: build them the width to use monkey bars from Amazon. The largest we could find was 22″ wide.
When we framed the monkey bars, 22″ wide felt too narrow. Colby agreed, Rowan agreed, and I agreed.
The size we landed on was 30″ bars, cutting down large galvanized pipe, with 27″ exposed. The ends of each pipe will go into the framing.
The pipe, while it says 3/4″ is the inside diameter of the pipe. The outside diameter is 1-1/16″. Rowan tested it and said she liked the size of it in her hand.
Playground Renovation Next Steps
I always love talking about the next steps when I’m writing project posts. Selfishly, I love a list. And more selfishly, I love giving myself those checks for tasks complete!
So here’s what we’re thinking for the next steps:
- Build a sandbox bench and bar
- Make a ladder for the deck
- Cut the pipe and finish the monkey bars
- Prep for painting
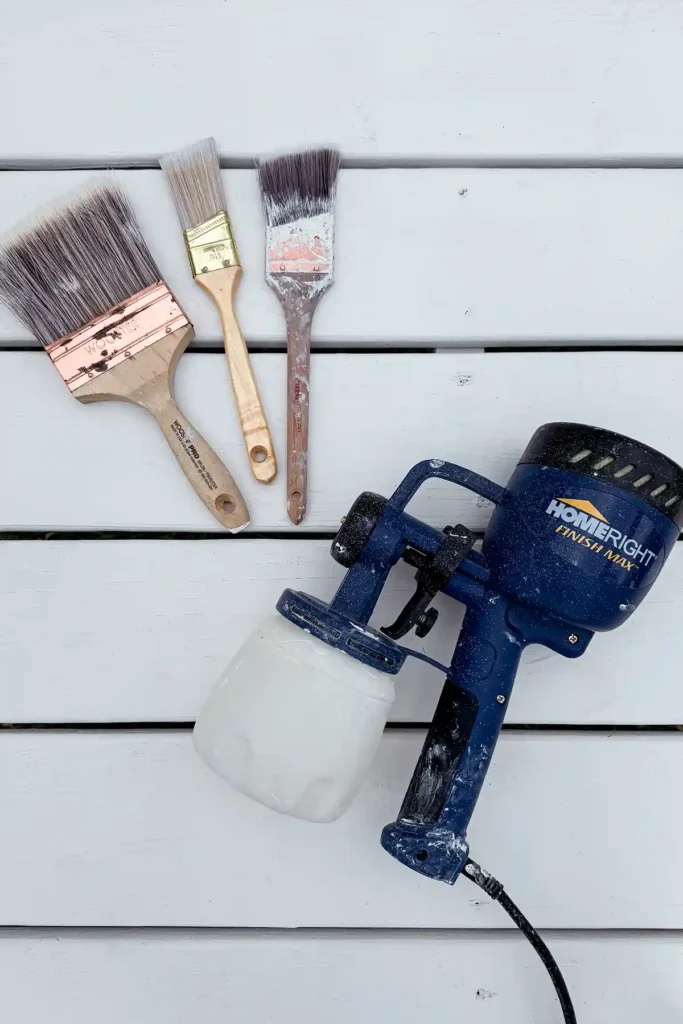
- Paint the playground (paint brush vs. sprayer post)
- Make a fabric awning roof
- Attach the swings
- Fill the sandbox
- Final touches and accessories
- Let the kids loose to wreak havoc on their updated playground
Project Stats
I thought it would be fun to keep track of a few project stats as we go along. Some helpful, some a bit off the wall.
Total Working Time So Far
Saturday: 5:00 pm to 8:00 pm
Sunday: 3:00 pm to 7:00 pm
Total Time: 7 hours
Trips To Home Depot
One
It was a trip for more framing lumber for deck boards, deck balusters, 2 x 4s for framing, 4 x 4s for posts, and galvanized pipe for monkey bars.
Amazon Orders
Two
Order #1: Swings
Order #2: Tire swing bracket
Trips To Playgrounds For “Research”
Three
Favorite Kid Comment
The general sentiment of our kids is that they are OBSESSED with the playground progress. As Rowan has been telling us, the playground hasn’t been very fun for her lately. I’m not surprised since the only working part of the playground has been the slide and she’s almost the same size as the slide!
So…my favorite kid comment so far comes from our seven-year-old. Drumroll, please. “Dad, I’m going to need the playground done by Tuesday for my playdate.” Dying! We started this project on Saturday night and by Monday morning the deck was about the only thing done-ish.
Settling Into A Project Routine
The best part of this project is that we’re settling into a project routine and found one that works. We’ve been struggling this summer to find the time to work on things.
It’s been hard for me to tackle projects during the day while watching both kids (one of which we’re in the throes of potty training). On the weekends, we prioritize adventures, quality family time, and camping. It’s been squeezing out projects and other fun things like mowing.
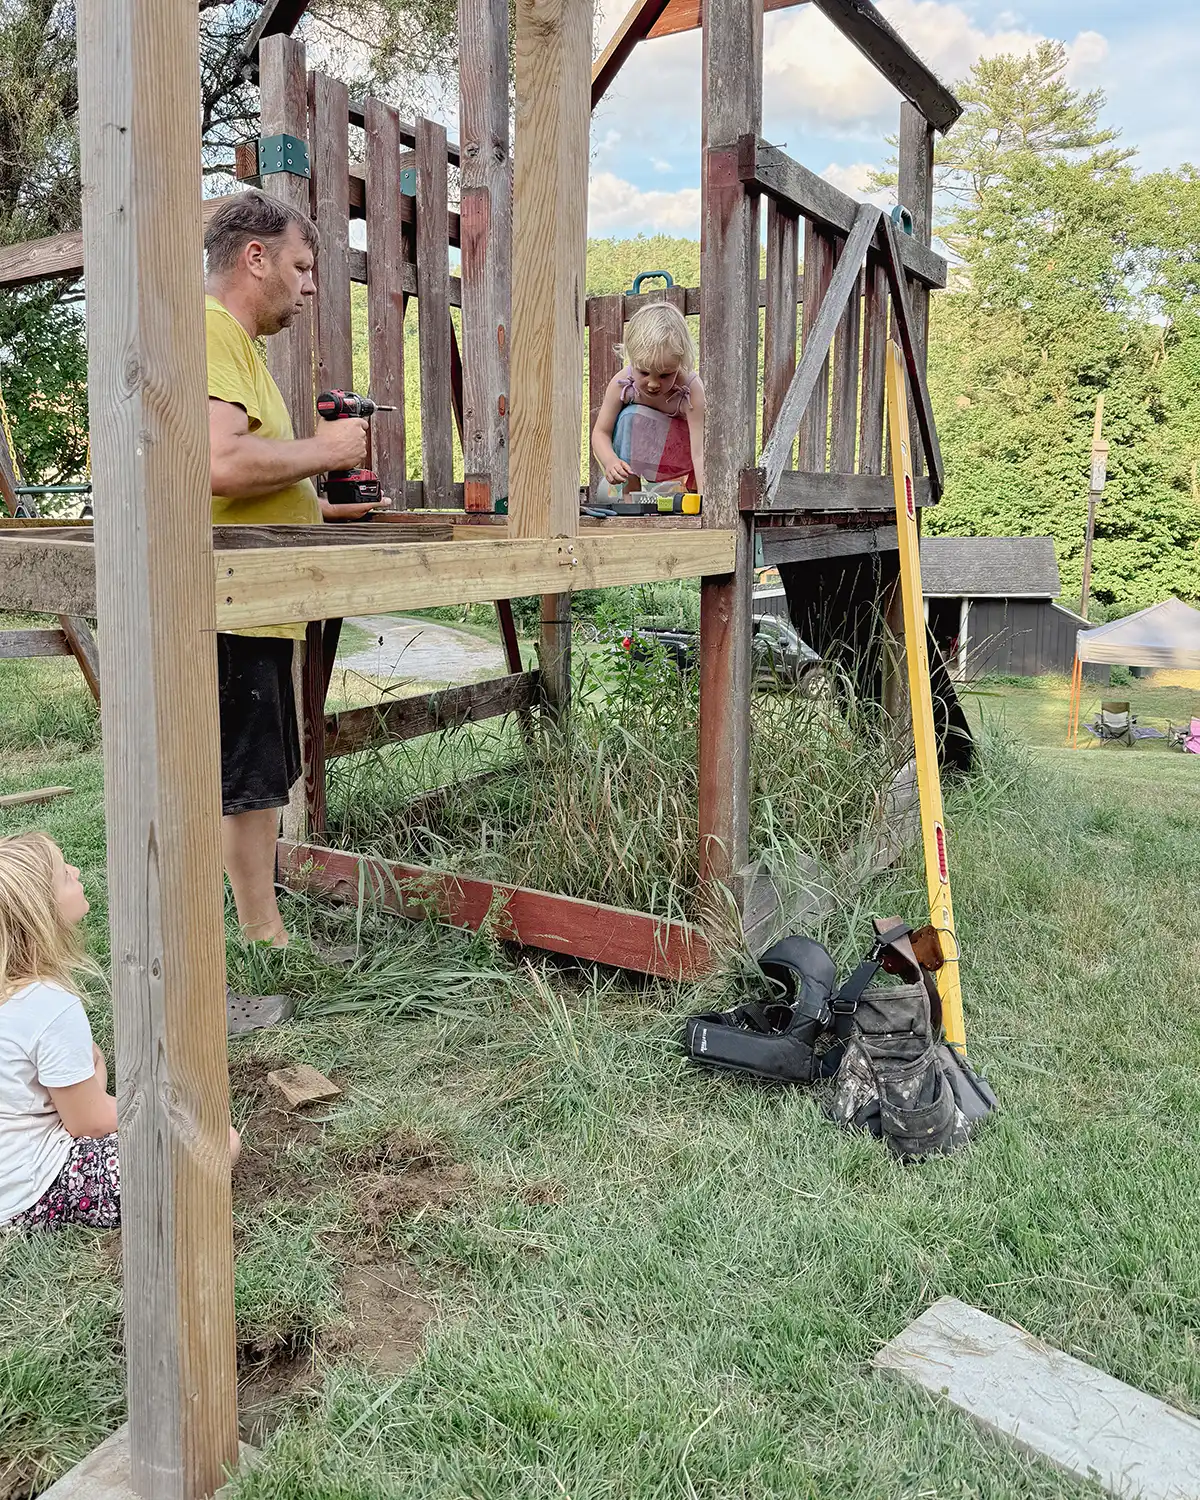
But the late afternoons and early evenings on the weekends seem to be the sweet spot for a few hours of project time. One of us works on the project, the other in the garden, and the kids play or help us with our respective tasks. Win-win!
Pssst…Stay tuned for more updates. We have another project weekend coming up this weekend and here’s hoping we get to painting! Although, I’m highly considering a large project paint sprayer purchase. I’m still waffling.