When we inherited an old, wooden playground a few years ago, we knew it needed a total makeover. It was in pretty rough shape. And one of the makeover tasks I was a little uncertain about was the roof. After much deliberation, we did a DIY playset canopy replacement using outdoor fabric.
I LOVE how this DIY project turned out. It looks so much better than a replacement tarp or those ready-made replacement canopies that you can order. Most basic, wooden swing sets come with some sort of canopy tarp but they don’t last forever and need replacing.
And while the playground doesn’t need a roof, we decided it would be nice. Especially as a rain protector for sudden showers or to block some sun on hot summer days.
Ours has already been through its first wind and rain storms and has held up well. We’ll see how the winter months go since we can get some harsh weather conditions that time of year. But so far so good.
Playground Roof Deliberations
Before I dive into the step-by-step instructions, here’s a quick recap of the roofing options we weighed.
Option 1: Order A Replacement Canopy
The easiest and most logical choice was to determine the playground brand, measure the canopy size, and search for a replacement. Since our playground is pretty standard in size, we figured there must be stock sizes available that will fit our playset right out of the box. After all, its previous owner placed many swing set canopy replacement orders over the years. I’m sure I could figure it out.
I did a little research and found tons of new tarps ready-made to cover a playground roof. They ranged in price from $35 to $150, most with free standard shipping, with varying degrees of quality. This would do, but I wasn’t feeling it.
I like custom and creating spaces, playgrounds included, that feel just a little more special than a standard option. I explored a few custom playset tarps from Etsy but those were out of budget.
Option 2: Make A Replacement Fabric Canopy
My favorite option was to make a replacement canopy. I did so much searching to see if others had done this and how it turned out but couldn’t find much. Spoiler…we eventually chose this option.

I researched fabric options and found quite a few outdoor fabric options that were waterproof, mold and mildew retardant, and offered some sun protection. This was my first choice but…
Option 3: Shingle Roof
Colby wanted to shingle the roof area of our wooden play structure. He argued that it would be more durable and that we wouldn’t have to replace it in the future. He’s not wrong. Playset canopies tend not to last.
The Decision
We ultimately decided that shingles were out, but fabric was in. It was a design decision mostly. Plus shingling a playground roof felt like overkill.
In full disclosure, I worked with a fabric company, Fabric Wholesale Direct, for this project. They provided free fabric of my choice in the length x width I needed in return for sharing this post. All opinions and fabric choices are mine. I was not paid to write this post.
Here’s a pic of the playground before we got started:

Fabric Research
Let the fabric research begin. There are so many outdoor fabric options out there. The most important factors I was searching for in a waterproof fabric included:
- Ability to withstand light rain to heavier storms
- Some UV protection
- Mold and mildew resistance
- At least 55″ wide (the roof size)
- Flexible
I scoured their site for something similar to waterproof canvas swing set tarps but in a color other than green or blue. Why are these the only colors available for affordable play ground vinyl canopies?!
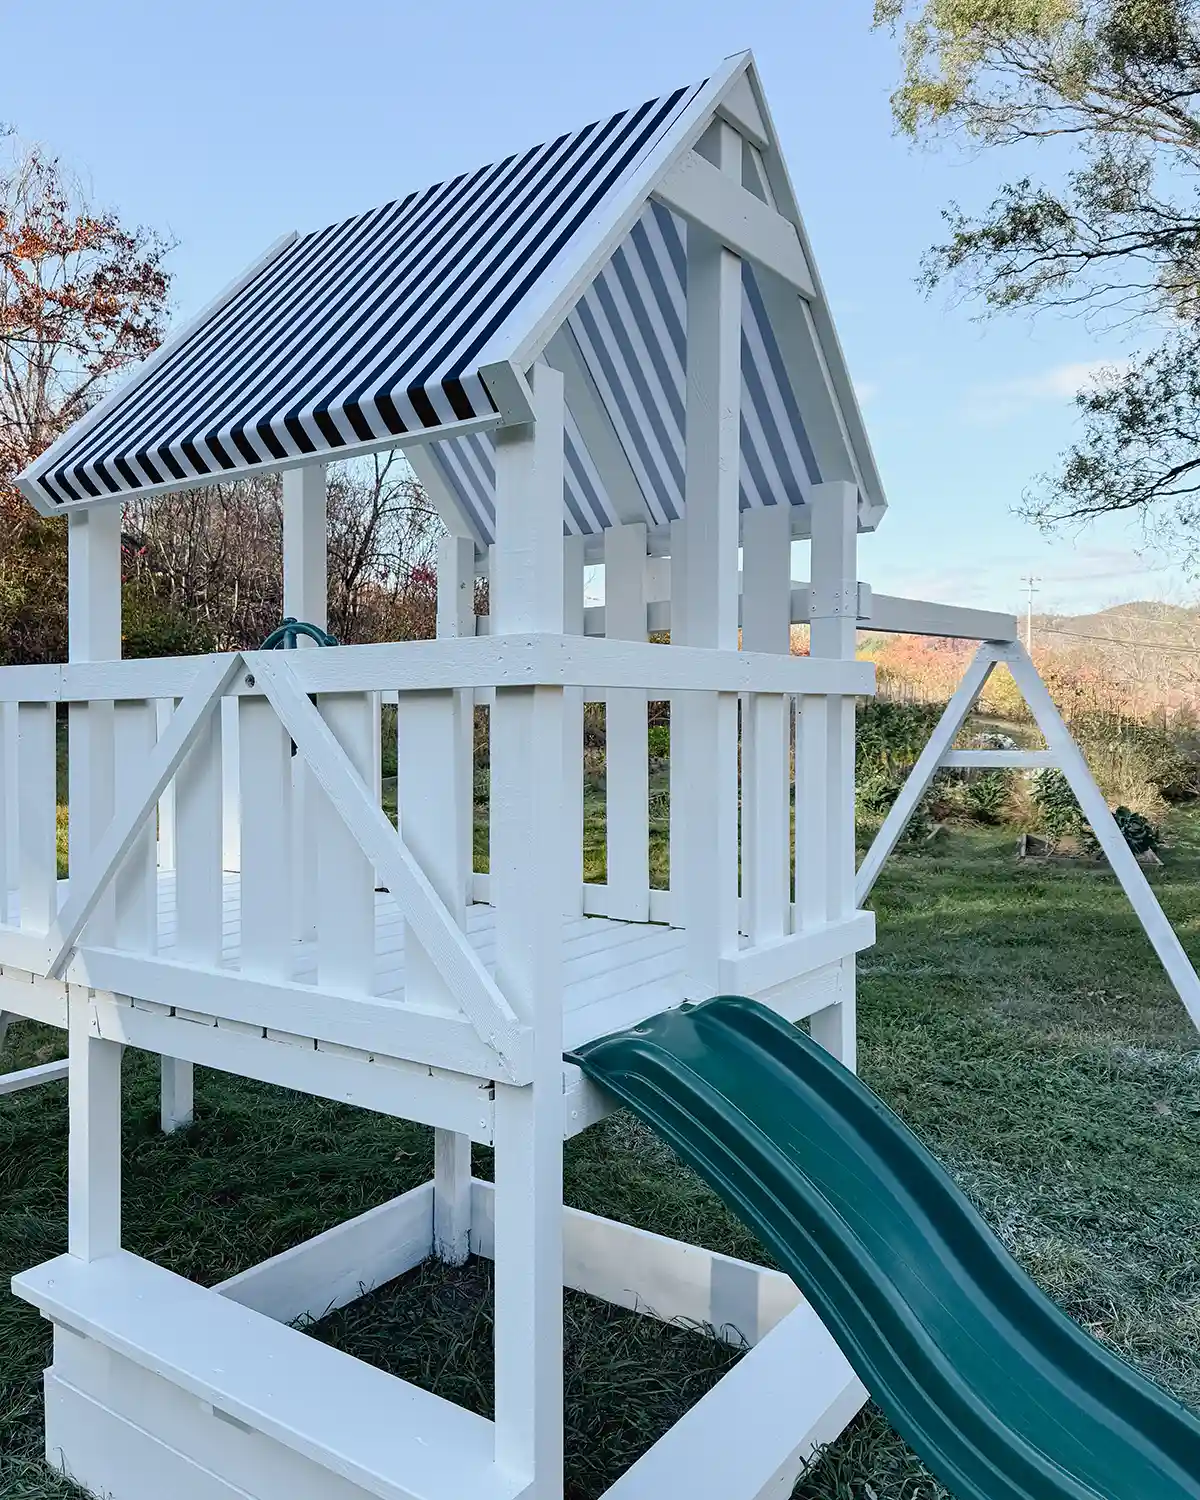
I had my heart set on a stripe to mimic those vintage-looking, striped shop awnings. The pattern gives old-fashioned soda shop vibes and I am here for it.
My choice was the Ottertex® Waterproof Canvas in black and white stripe. It checked all the boxes. So I ordered 4 yards of fabric.

The product description mentions that it is UV resistant for up to 500 hours, after which the fabric may start to fade. They suggest purchasing lighter more natural colors instead of vibrant colors. I chose to take my chances with the black and here’s hoping it will still look great after many hours of sun.
When I unboxed the fabric I was impressed with its high quality, thickness, and how quickly the wrinkles came out after spreading it across our dining room table for a few days.
How To Install The DIY Playset Canopy
Now let’s go through the easy installation process, which went smoothly and quickly.
Supplies
- Outdoor Waterproof Fabric (Fabric Wholesale Direct)
- Staples (Home Depot)
- Pine Scrap Wood
- Nails (Home Depot)
- Primer (Home Depot)
- Paint (Benjamin Moore – White Dove)
- Wood Putty (Home Depot)
- Fine Grit Sand Paper (Home Depot)
Tools
- Staple Remover (Home Depot)
- Needle Nose Pliers (Home Depot)
- Tape Measure (Home Depot)
- Scissors (Amazon)
- Stapler (Home Depot)
- Stepladder (Home Depot)
- Long Level/Straight Edge (Home Depot)
- Utility Knife (Home Depot)
- Circular Saw or Table Saw (Home Depot)
- Crown Stapler (Home Depot) – nail gun or just hammer and nails work well too
Prep The Playground Structure
If you have an old canopy (or remnants of an old canopy like we did), the longest part of this project will be in the prep work. Mainly, removing all the old staples.

Remove the old canopy, pull all the staples (a stapler remover tool and needle nose pliers are very helpful), make any repairs needed to the wood, fill any holes, and touch up the paint. Or in our case, paint the entire structure.
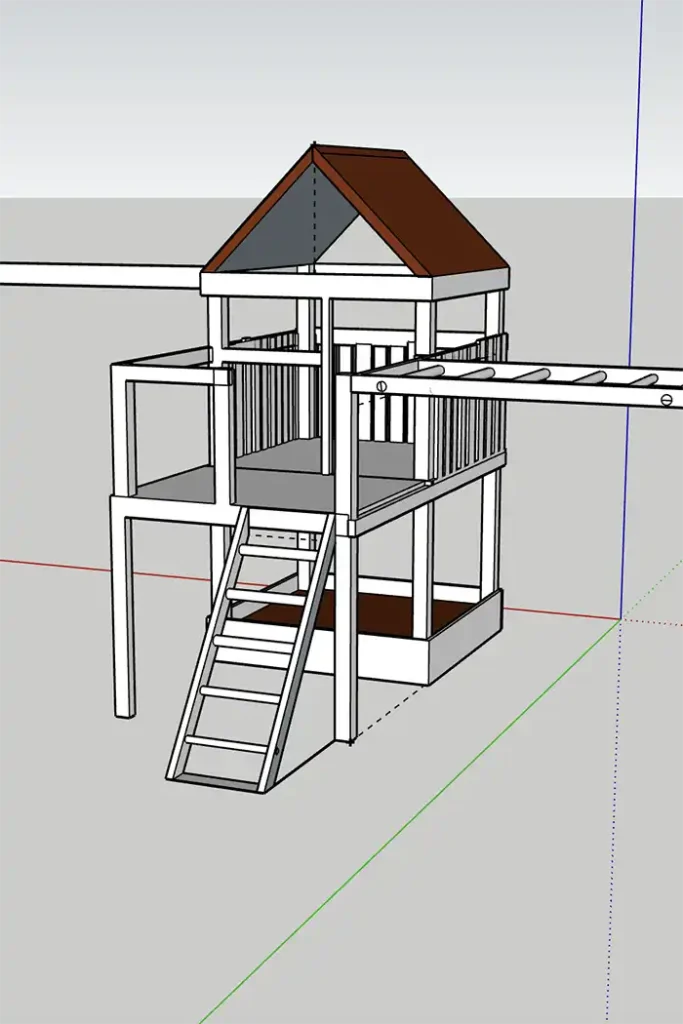
We also decided to add some support beams to the roof. Just a couple of boards in the middle of the roof for additional support in the winter. Our kids play out here all year round and we don’t plan to take the canopy down in the winter.

Measure And Cut
Start by measuring the width of the playground roof.
Accurate measurements are important so measure the width at both the bottom and top on both sides. Thankfully, our playground roof framing measured 55″ wide at each spot. But you never know if it’s un-square and has different widths.
The fabric I ordered was 60″ wide including the selvage (raw edges), about 59″ wide without it. I laid the fabric on the table and trimmed the selvage off both sides along with a few stripes. Don’t worry about getting the perfect width at this point. Cut it so it’s just a bit wider than the playground roof. There’s one more trimming step after it’s installed.

Attach Fabric With Staples
When outside, first measure and mark the center point on the framing of the playground roof. This would be on the boards where the roof’s eaves are.
Take the fabric and flop it over the roof so it lays out where it should go. Line up one end of the fabric with the framing of the roof.

Find the center point of the fabric, line it up with the center point on the playground, keep the end level, and place your first staple. Straight through the fabric and securely into the wood. We started on the left side.

Next step, pull the fabric tight to the right side and staple it in the framing. One side of the fabric roof is tacked on.
Now go to the other side of the playground roof and pull it taught. Make sure each side is lining up with the framing and covering the roof properly. Find the center point of the fabric, line it up with the center point of the other roof eave, and staple. Add two more staples on this side, one on the left edge and one on the right.

Right now you’re fabric should be taught, covering the entire roof structure, and secure. Inspect the fabric and how it’s lining up. Make any adjustments you want to ensure it’s super-taught and lined up perfectly.
Once you’re happy, apply more staples. We opted for about one every three to four inches.
Trim The Fabric
If you have a lot of extra length, roughly cut it off. It’s much easier to work with a smaller overhang.
Take your level or straight edge, line it up where you would like to cut, and using a utility knife with a sharp blade, cut the fabric.

Repeat on all the edges until you have nice clean cuts.
I feel like you could stop here, and initially, I thought I would. But it didn’t feel finished and I also worried about high winds getting between the fabric and the wood play structure and ripping the fabric roof right off.

Enter the trim, stage left.
Add Trim
We scoured our scrap wood pile and found a few pieces of pine that would work as trim pieces. We cut the pine down to 2″ for the pieces parallel to the stripes and 3/4″ for the perpendicular pieces. I pre-primed and painted them, cut them to the right length, and installed them.
The trim pieces are installed right over the staples and are nailed to the wooden structure. I used a crown stapler but a regular nail gun or hammer and nails works well too.

To finish, fill the holes with wood putty, let the putty dry, lightly sand, and cover with paint. Voila!
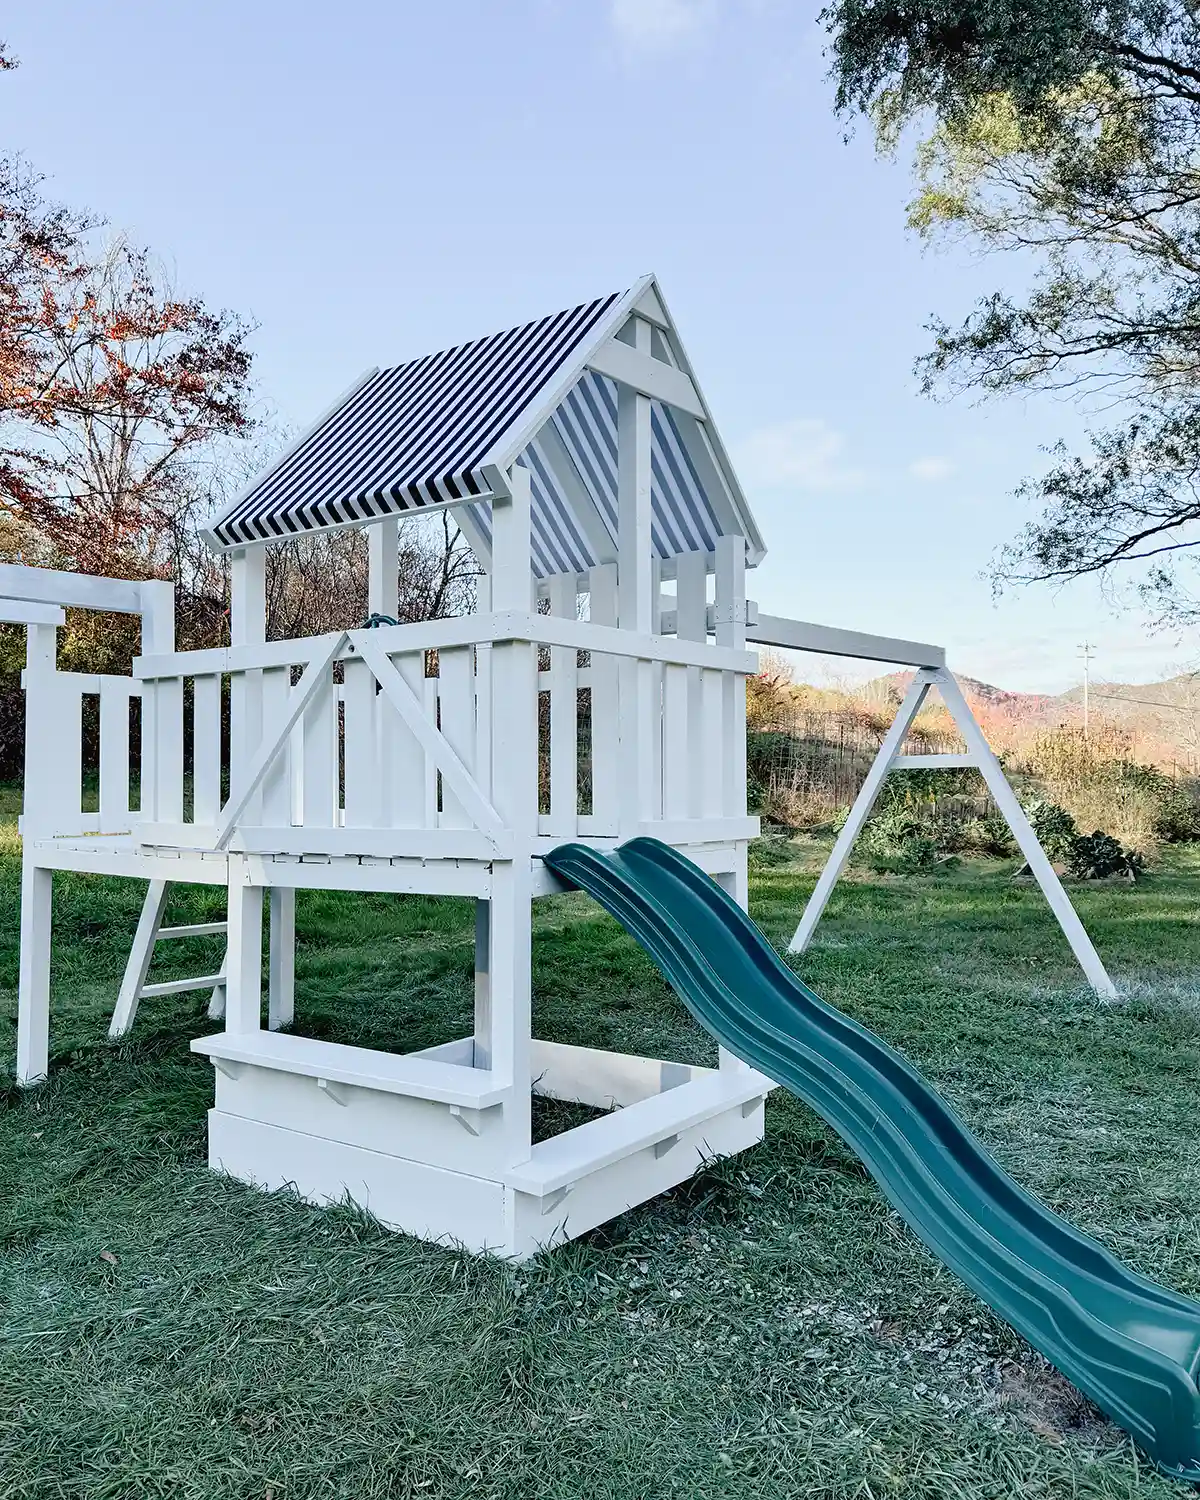
This was such an easy way to add a roof to the playground without needing a sewing machine or doing heavier construction. I love adding decorative elements like this. The end result: a playground focal point.
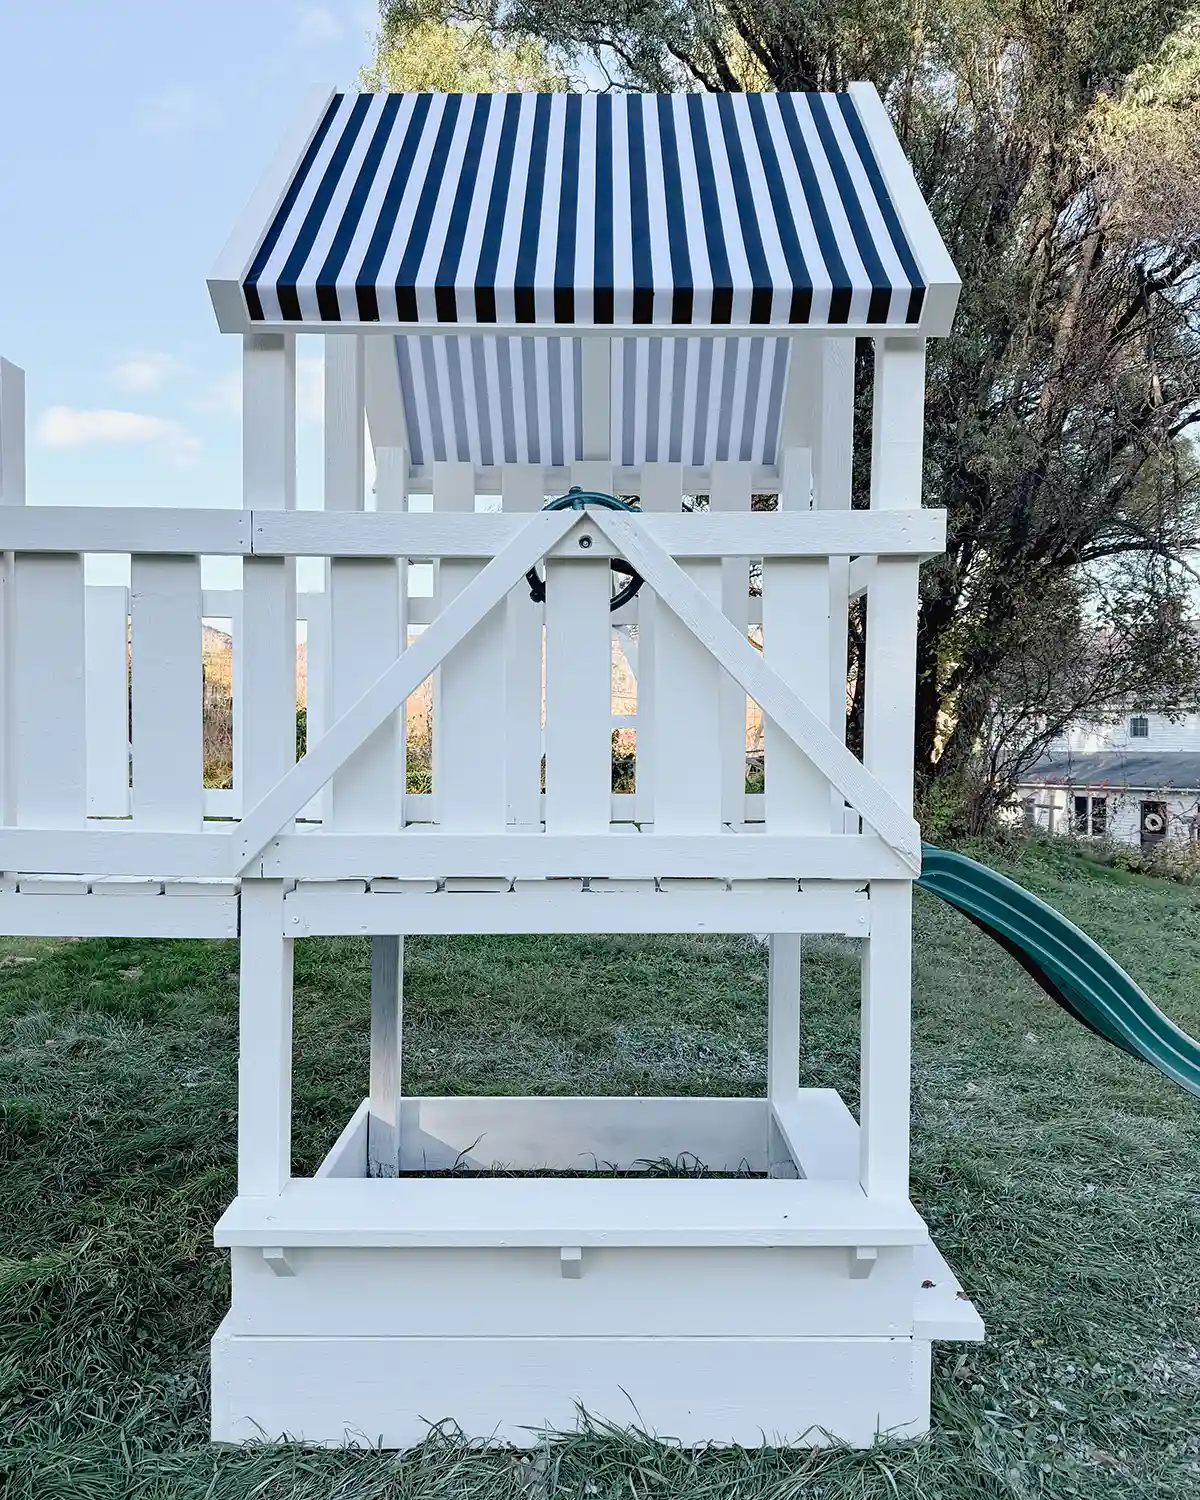
Finished Swing Set Canopy
We made and attached the DIY swing set canopy while the kids were at school. When they came home later that night, they were so surprised! It’s the perfect cozy hideaway to encourage my children’s imaginations during outdoor free play.
However, my eldest, always the thoughtful and meticulous one, proclaimed that the new awning would not keep out rain because the sides were still open to the elements AND there were gaps between the deck boards. Hashtag kids.
They’re already playing on the deck area under the beautiful canopy and having so much fun. The newness hasn’t worn off yet. Although, it’s been tricky because I’m still in the process of painting the playground and keeping them away from wet paint has been tricky. But more on painting later.
Let’s put this playground DIY canopy through the ringer with a Vermont winter full of all the weather. From snow to frost to rain showers.
We’re now another step closer to creating a backyard haven for the kids. Now, we need to finish painting the playground and re-hang the swings, and then we’ll move on to the playhouse for more children’s fun! Happy building, everyone!
Pssst…Have you ever made an outdoor canopy? This was the first time I worked with outdoor fabric and I’m already scheming up another outdoor project or two to use it on. Maybe I’ll try making a shade cloth for the greenhouse? Or maybe I’ll use some of the scraps to make a mini awning for the playhouse. Swoon.


Great article on replacing the play set canopy. A great solution for replacements is hard to find, since all play sets are different sized. We have found that in the northern states with snow, vinyl holds up very well to the elements of nature.
How is the canopy holding up? My concern ia the white turning green or brown.
Okay, I have some updates about the canopy. It held up great for almost a year. I noticed mid summer this summer that it was starting to fade and now, after all the summer sun, it’s looking more brown than black. It doesn’t look great right now. The fabric is still holding up, it hasn’t torn or blown off, but the color is disappointing. I might replace it and shingle it next summer. I’ll try to update the post this week with pictures if you want to check back.