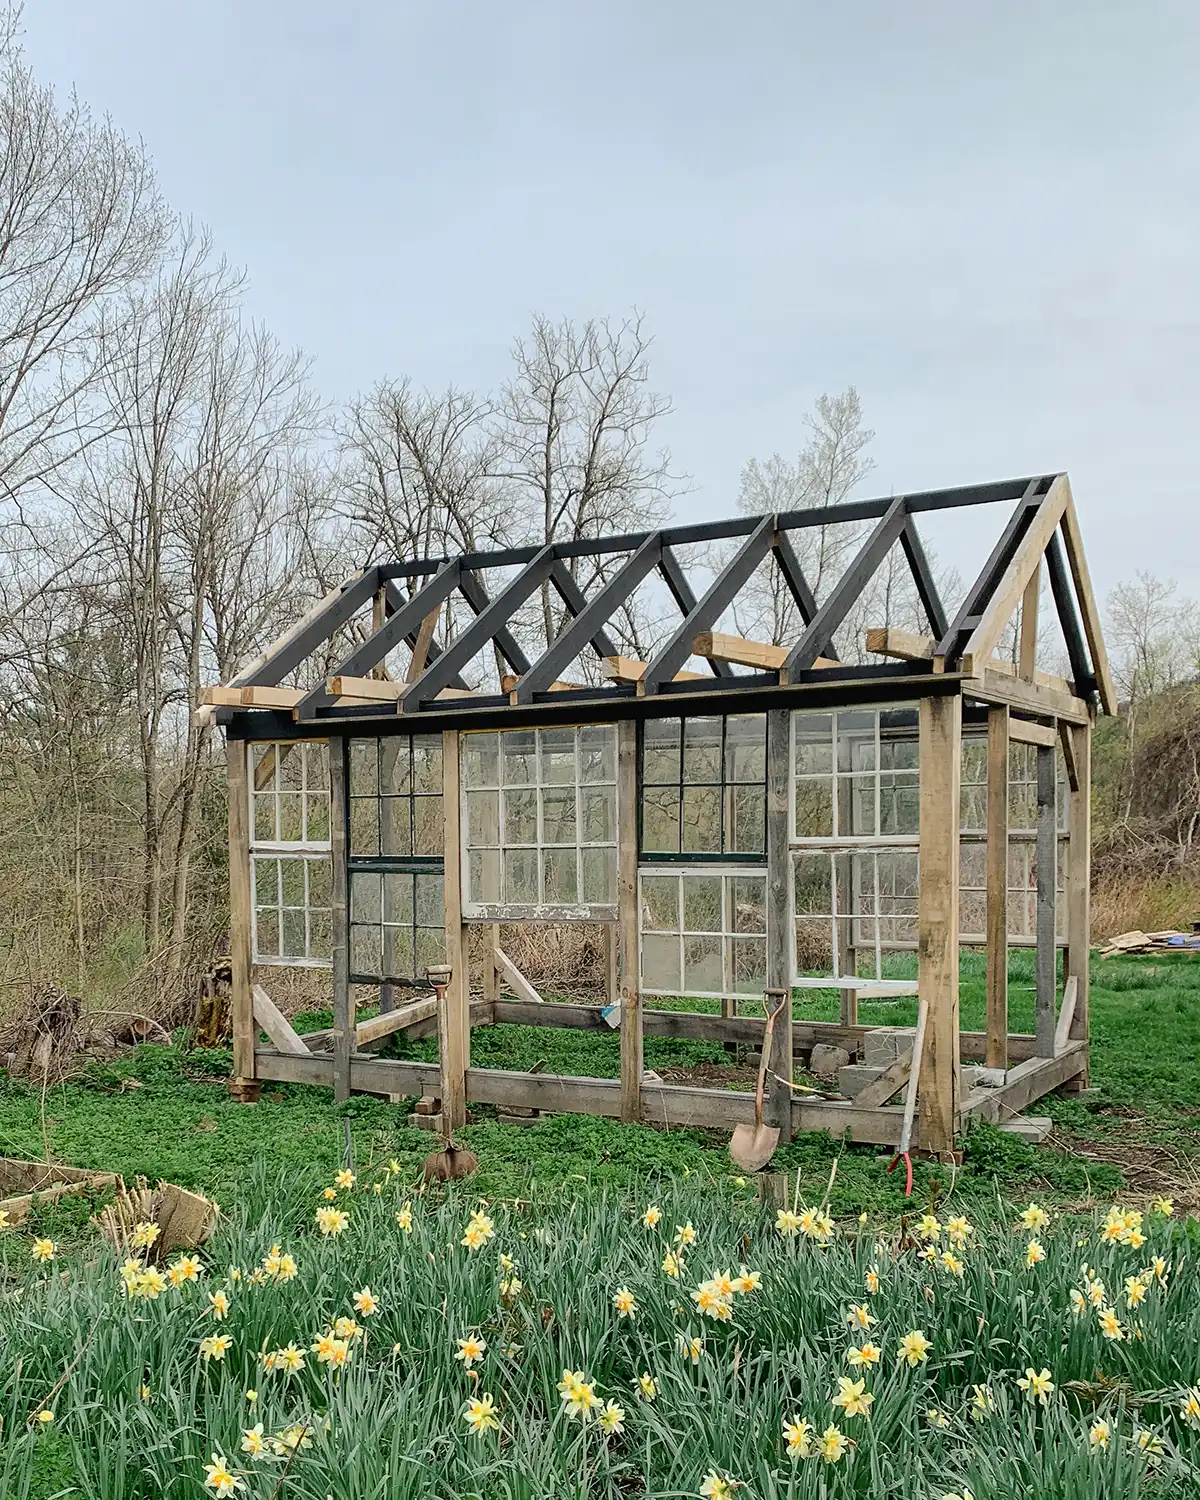
In the early spring, as the snow was melting, our recycled window greenhouse, which is currently under construction (current greenhouse construction punch list), sank more than six inches at one end. Before we could trim out the windows and add the final siding, the first step was to jack up the greenhouse, add better footers, and level the entire structure. Here’s how we jacked up and leveled the greenhouse.
A word before we begin this post. This is how we did this project. In our location, there are no building codes or zoning. If you’re in the process of building a greenhouse, shed, or another outbuilding, this post may not be for you. Follow your local building codes.
Also, note that Colby and I completely disagree with how the greenhouse footers should be built. I wanted to pour concrete footers using sonotubes. My reasoning, the greenhouse has sunk every single spring, some years more than others. I don’t want to jack up the structure every spring, especially when I’m using the greenhouse year-round.
Colby, who would be doing this work, did not want to use poured concrete footers. He preferred to dig down and stack concrete blocks meant for load-bearing walls. He reasoned that we may not keep this greenhouse forever. Maybe someday we would move it, replace it, or do something different with this spot of land. He didn’t want to deal with removing poured concrete later.
He also convinced me that he could create better footers using the blocks, that next spring this won’t happen, and that this is how Vermonters have been supporting sheds for generations. Okay…I’m sold…kind of. But if the greenhouse sinks again, poured concrete footers are coming in.
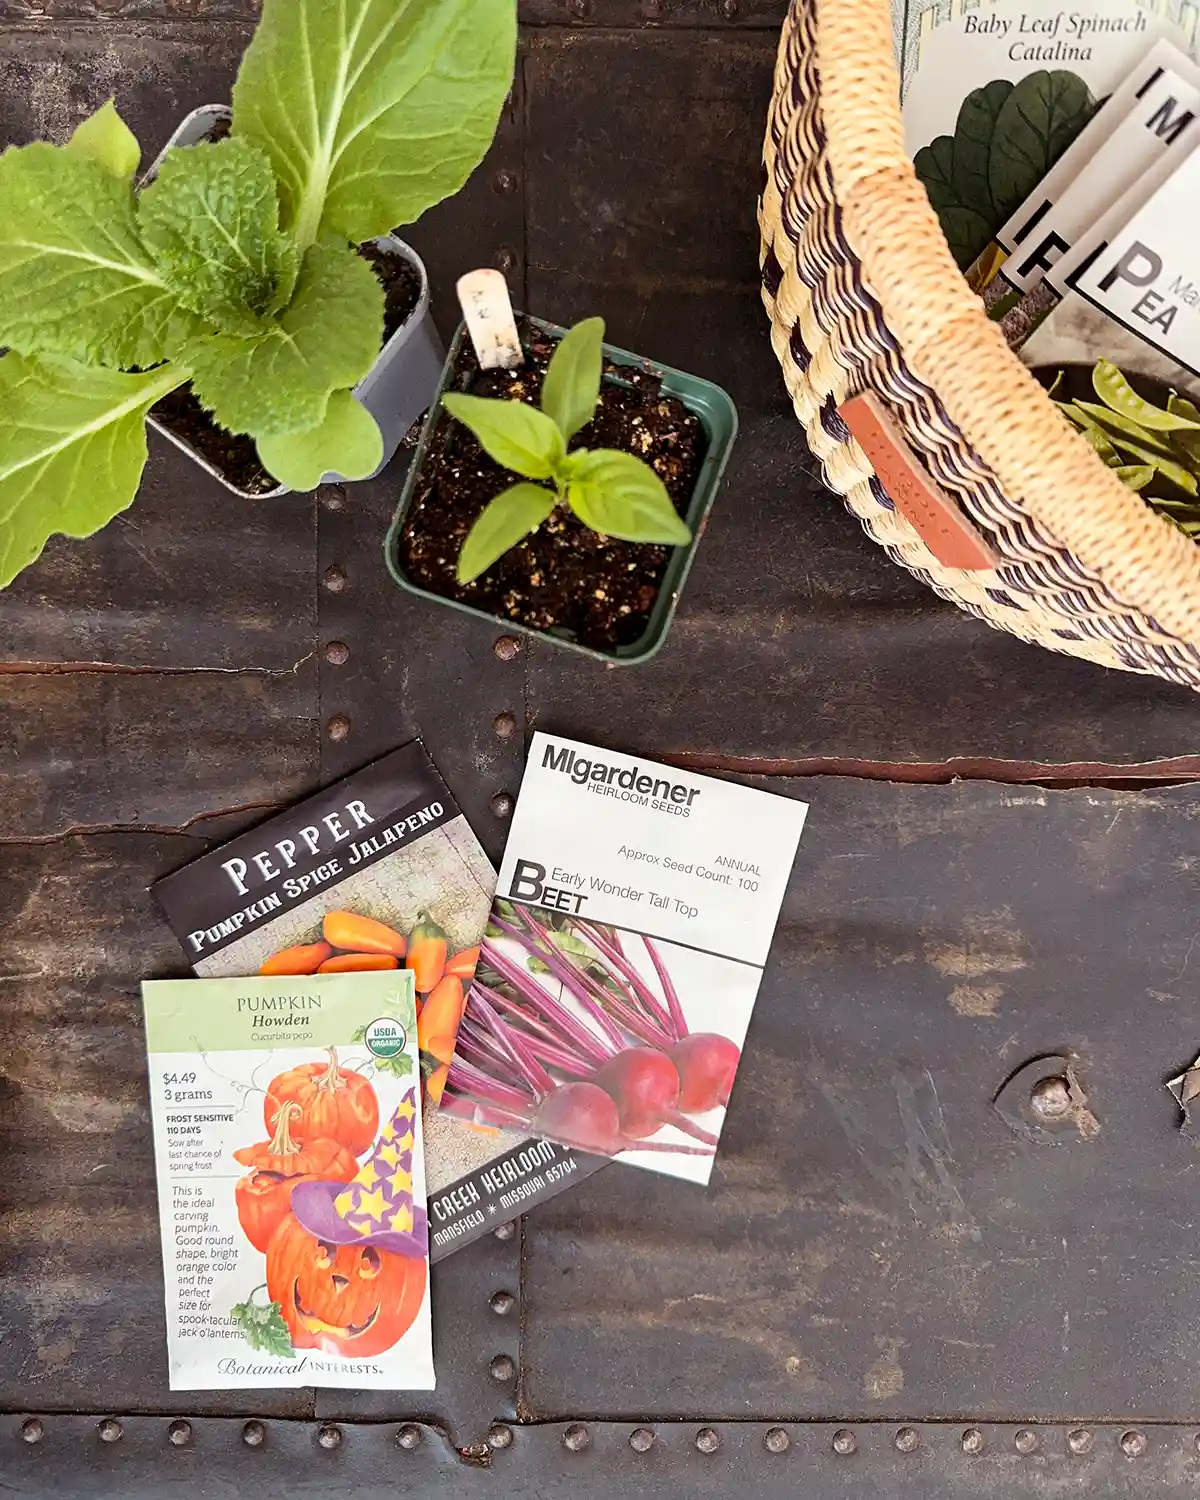
The Original Greenhouse Supports
For the last couple of years, the greenhouse supports have looked like this. Sinking and tipping more and more each year.
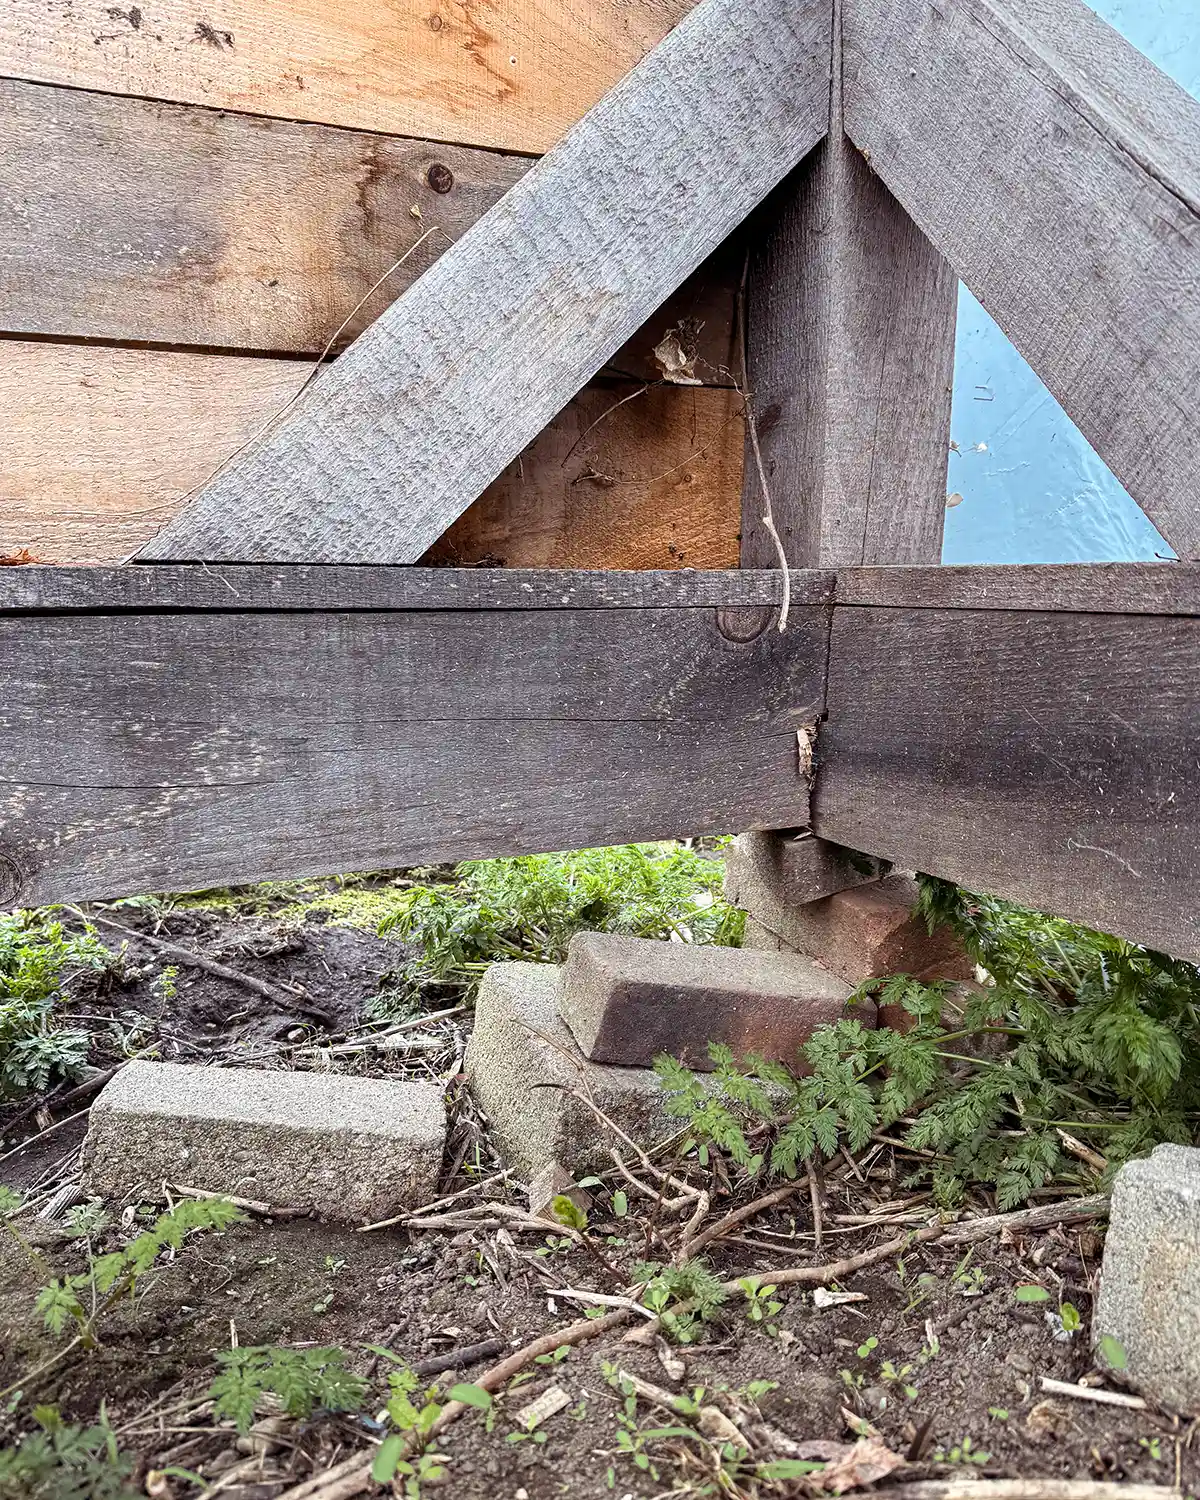
Underneath the smaller bricks is just one level of concrete blocks meant for supporting load-bearing walls. The smaller bricks were “temporary” to help shim and level the structure. The intention was to replace them later with larger concrete blocks. But one thing that held us up was figuring out how we would be finishing the bottom of the greenhouse and critter-proofing it. Depending on how we did that, it would drive the size and placement of the concrete holding up our greenhouse structure.
This spring was a particularly wet spring, and the greenhouse slid even further down. Our yard slightly slopes here from the door of the greenhouse towards the other gable end. While the snow was melting fast and furious, it was like a river running through here, which isn’t our normal slow melt spring. During the melt, the brick stacks started tipping, sinking the greenhouse further. It was time to dig out and replace the footers.
Also, we finally diagnosed (we think) a weird plumbing issue in our home where the kitchen water has been draining out this way, not in the other direction toward our septic. Old house problems. All that water may have been draining right here, hence why it’s always so wet.
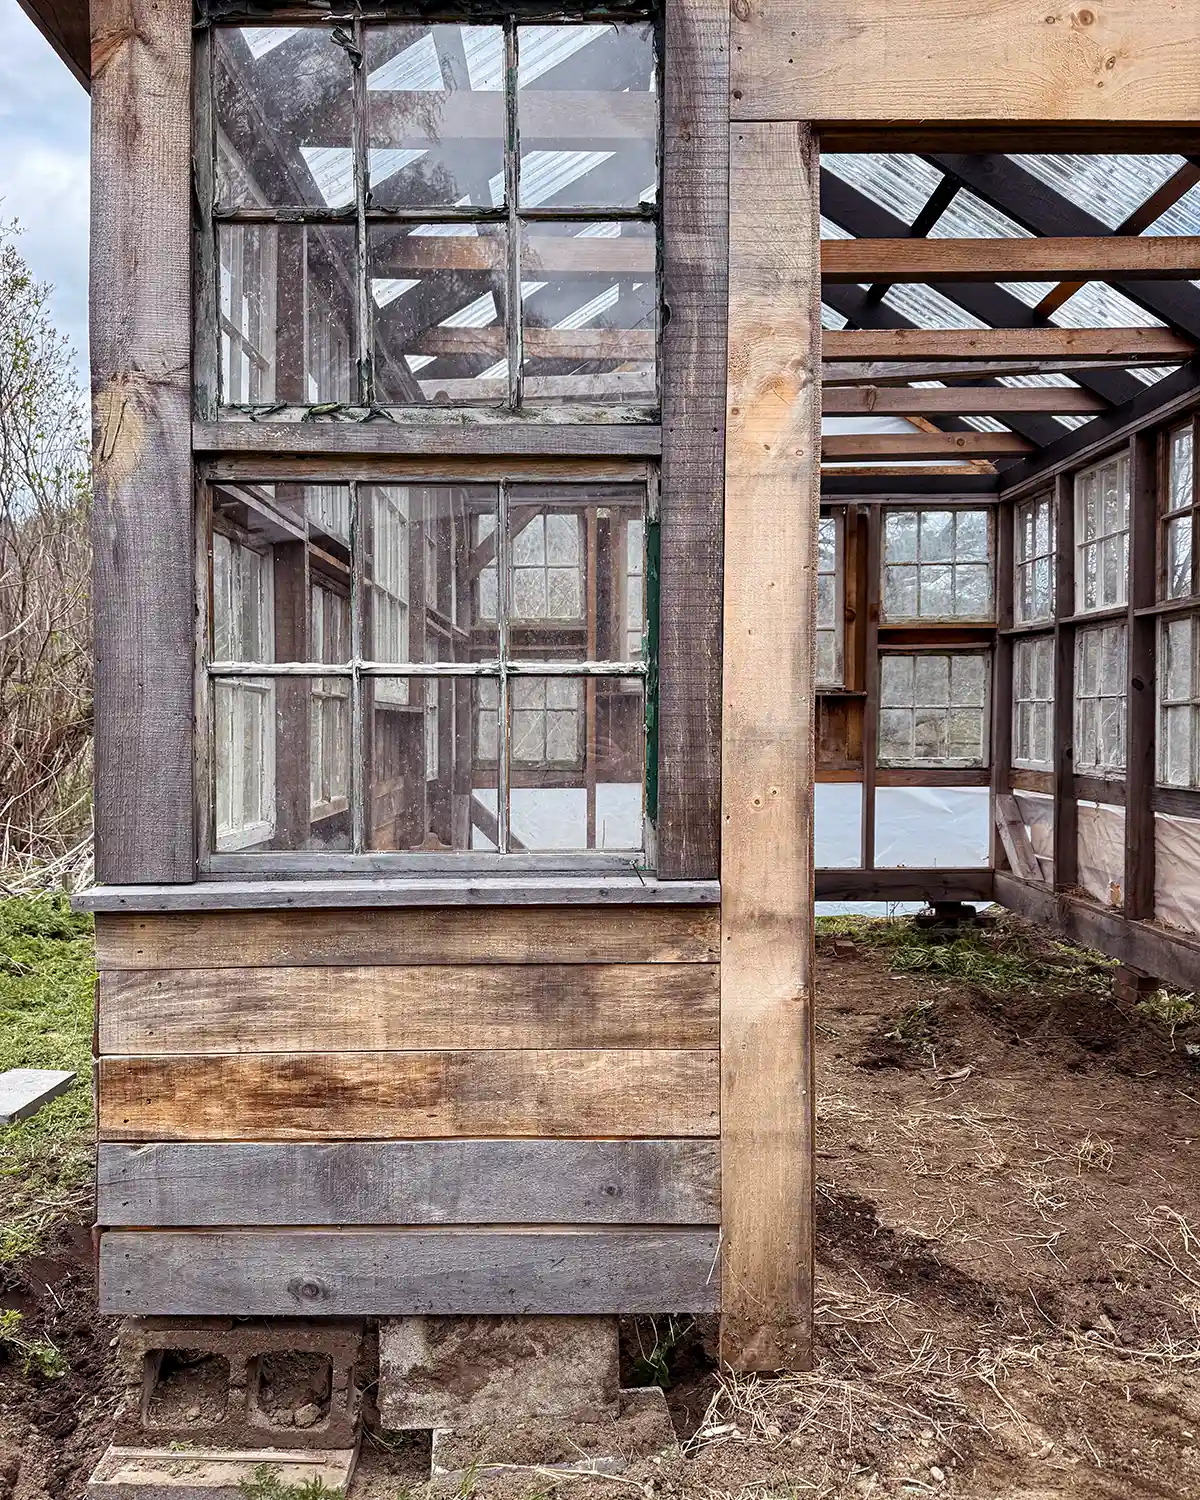
The plan for finishing the bottom of the greenhouse is to bring the siding on the outside as far down as possible. Then, on both the inside and outside bottom, underneath the siding, attach pressure-treated wood boards that are dug down into the earth some. Essentially, the boards will enclose the footers, so we want to be sure the greenhouse is solid and secure before doing so.
Checking For Levelness
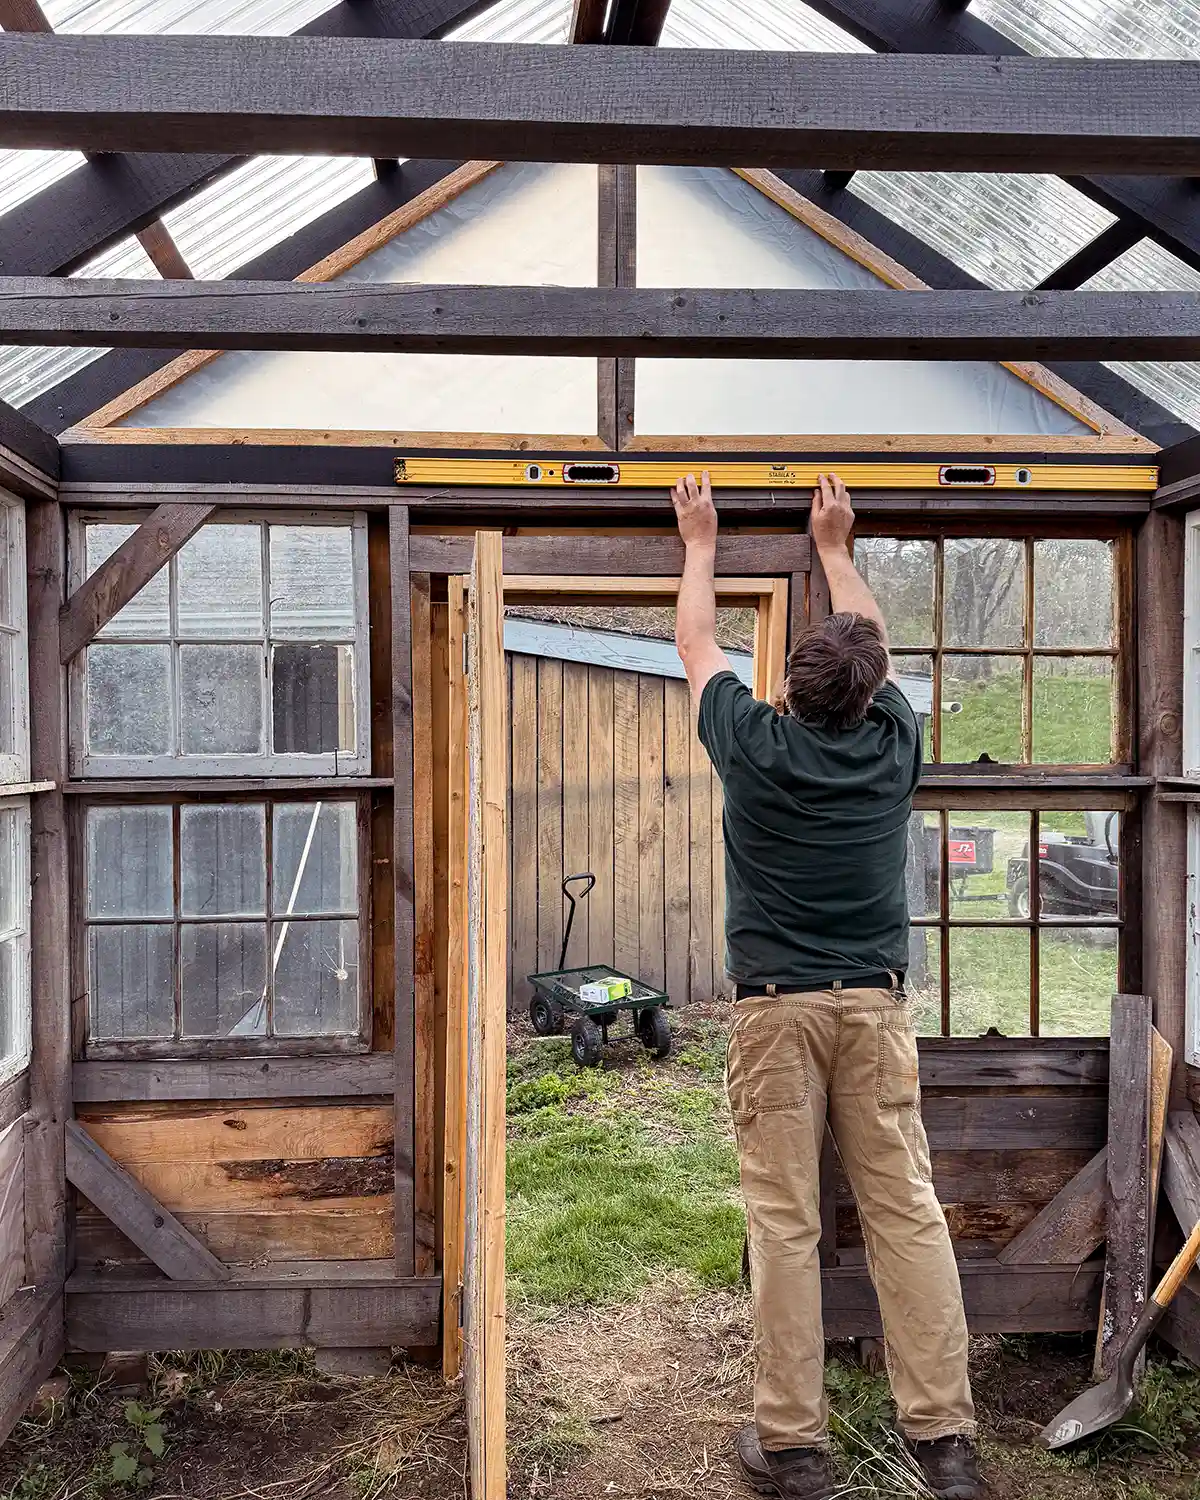
The first step to leveling the greenhouse was to check and see how unlevel it is, which sides are too low, and by how much. To do this, using a 48″ level, place it on the framing. Check above the door, the other gable end, and each side. This will give you an idea of where to work, jacking up the structure.
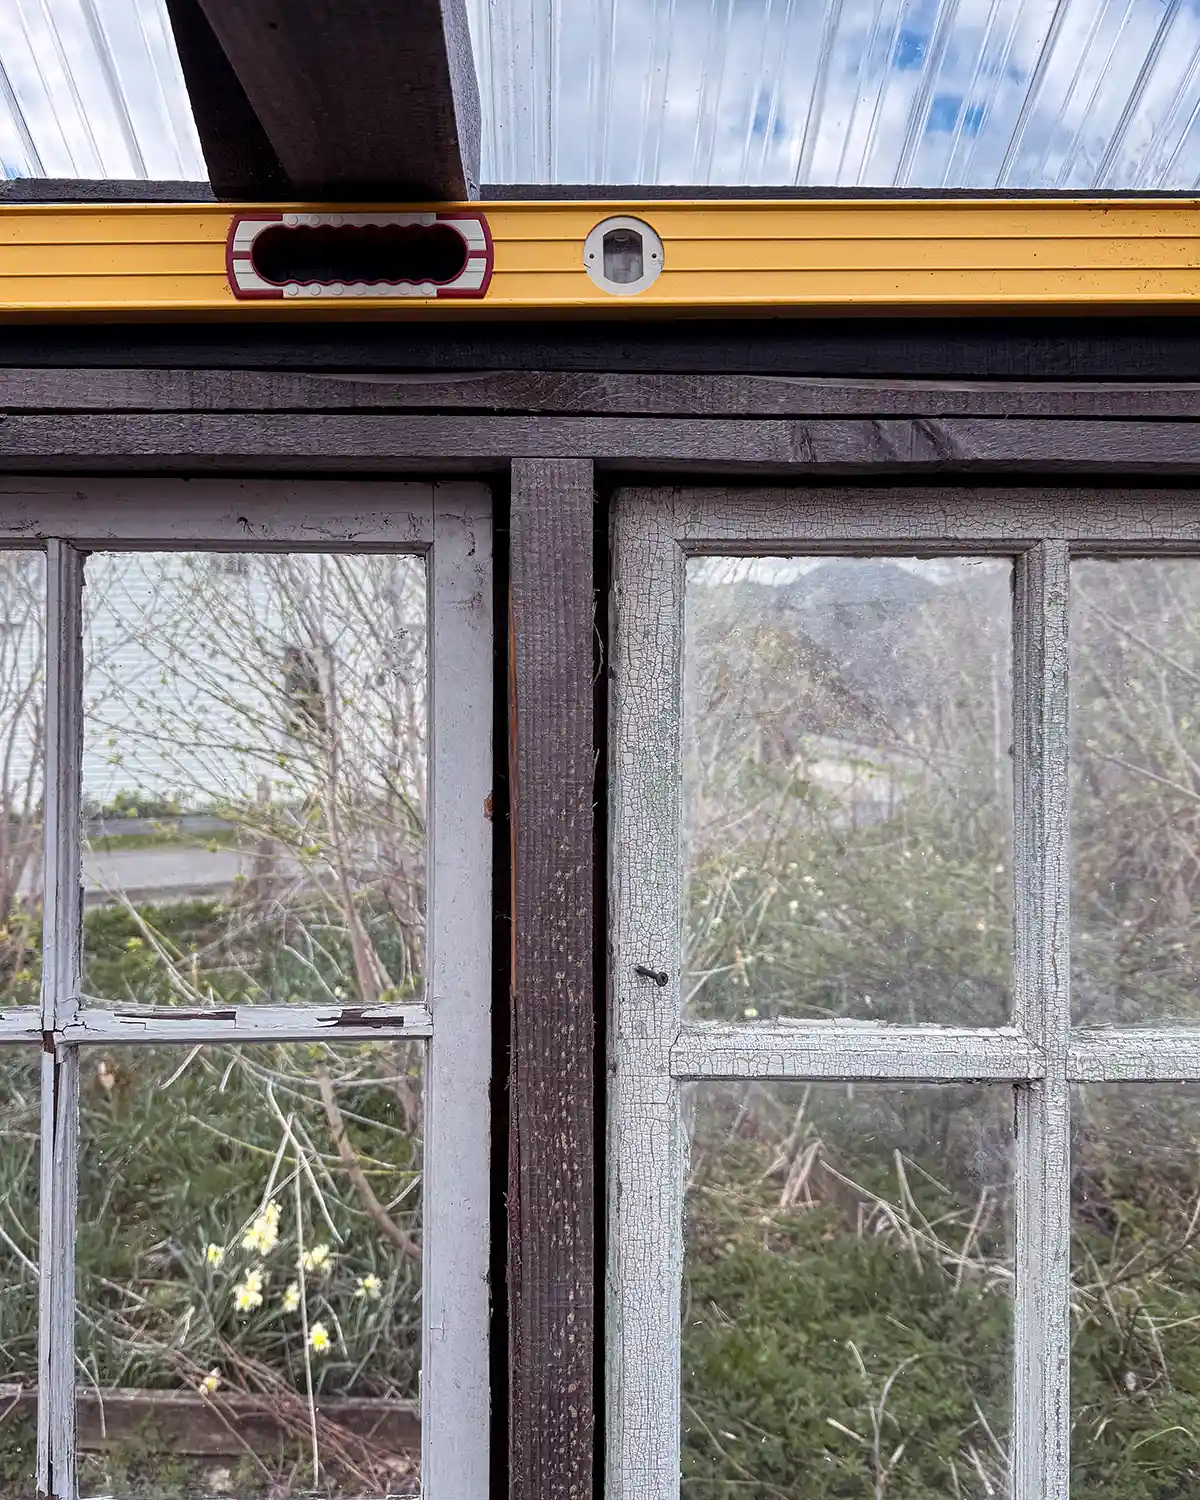
After doing this, we learned that the gable ends were just slightly unlevel. The longer sides of the greenhouse were a different story. One gable end of the greenhouse was 6-8″ lower than the gable end with the door, which is what we expected just from looking at it.
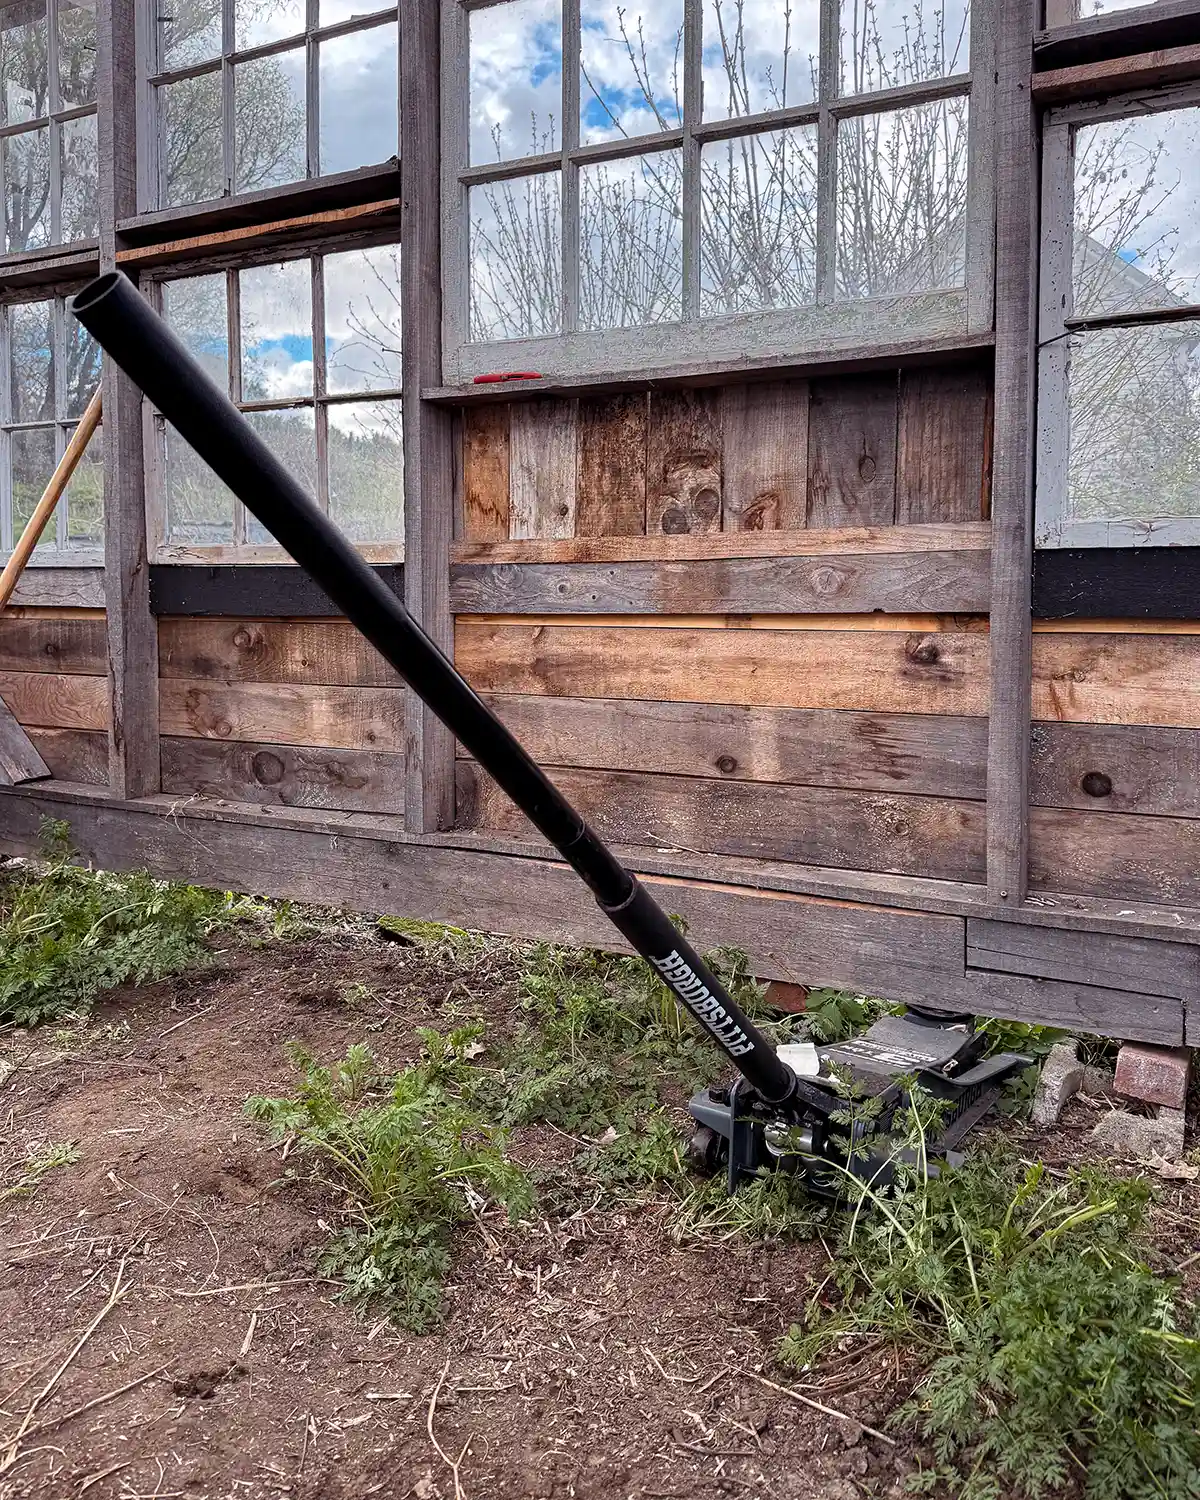
Jack Up The Greenhouse
The next step was to start jacking up the greenhouse using a hydraulic floor jack. Since our structure is a DIY window glass greenhouse, we had to be careful about jacking. We didn’t want to jack one side too much, causing the structure to twist or break windows. The process looked like jacking one side a little bit, shimming it with some bricks, then jacking the other side a little bit, shimming with some bricks, lather, rinse, and repeat.
During the process of jacking up the sides and shimming, keep checking for levelness on all sides. Keep jacking/shimming until your level declares that every side of the greenhouse is level.
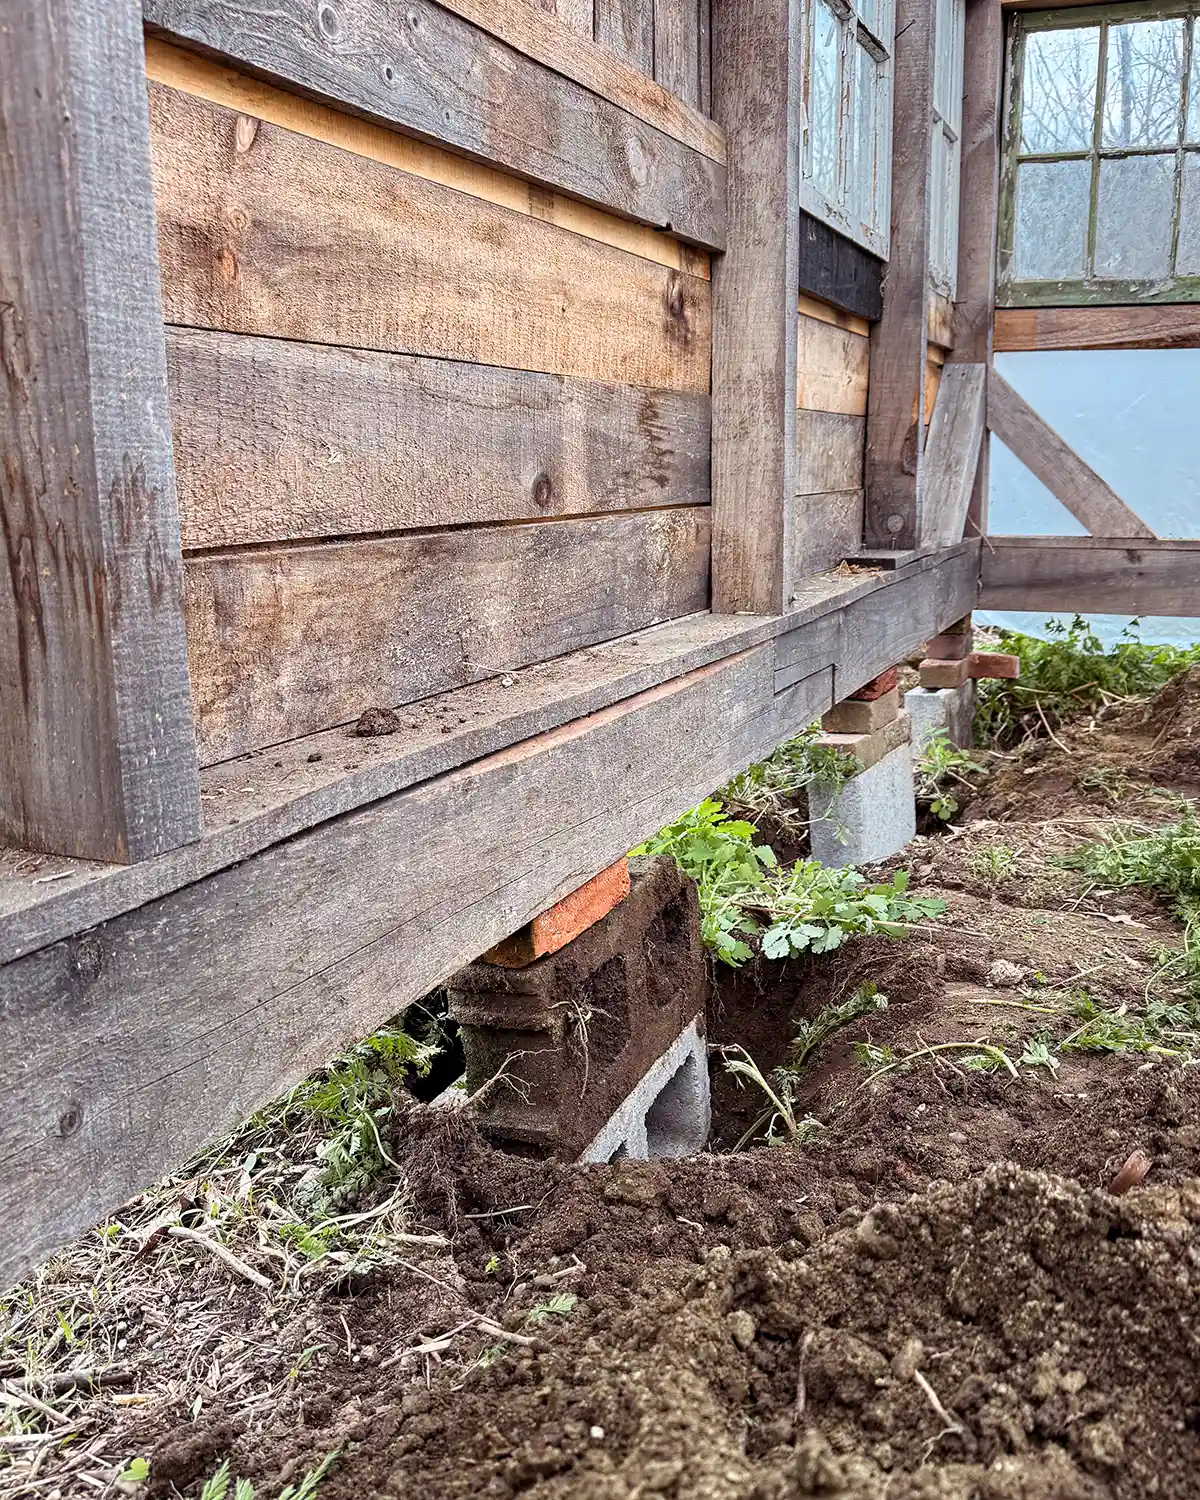
Replace And Add Footers
Once the structure was level, we dug out underneath the base framing all the way around the building. Where the footers would go, we dug down even deeper to stack the concrete. We decided on five concrete block footings on the longest sides and three on the shortest sides. On the side with the door, there are four. One at each corner and one at each side of the doorway.
Each footer is composed of three large concrete blocks stacked below the earth and then shimmed with the narrower bricks. We ran out of concrete bricks and used regular bricks for a while since we had those on hand.
To do this, we made sure that the ground at the bottom of the holes where the concrete blocks were going was level and stable, which is essential for ensuring the stability of the greenhouse. There’s also a layer of gravel underneath the blocks for drainage, since that’s been a problem in the past.
If you’re tackling a project like this, also think about safety and building codes. Some codes require certain methods of anchoring or attaching a structure to the footings to help protect it from sliding off the concrete or falling during a windstorm. You may need to attach the greenhouse to the concrete using masonry screws.
We opted not to attach them since, after we install the bottom boards and fill around the footers with gravel and dirt, the structure will only be a few inches off the ground. You can’t really tell in the pics how much we dug down around the greenhouse since it kind of looks flat, but there’s alot of backfilling that needs to happen.
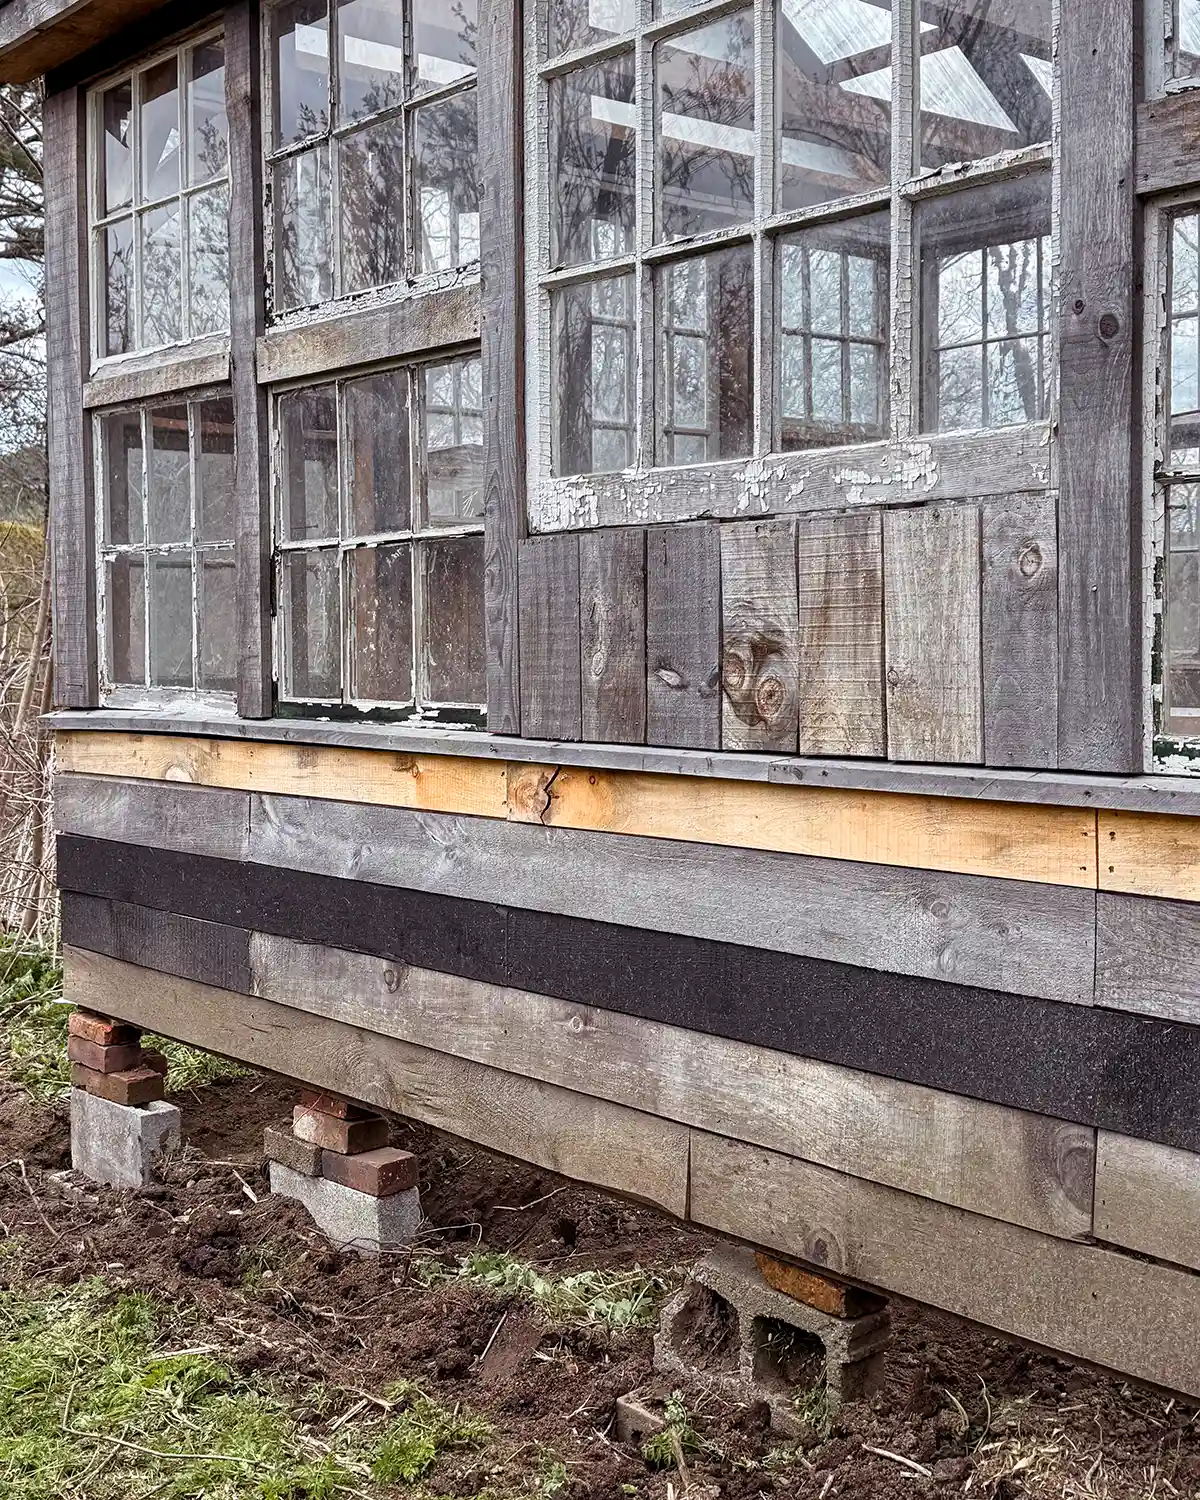
Here’s a shot of the footers from the outside, where you can see better how the concrete blocks line up with the siding.
Sometimes, while you’re doing this work, you’ll learn the hard way that your bottom concrete bricks aren’t quite level. Enter Exhibit A below.
As the top brick layer was being slid in below (the one right next to the door), you can see how it fit on one side but didn’t fit on the other. In this case, we had to remove the bricks, dig down just a little bit more, level the base brick with a combination of digging and gravel, and restack them. It can be alot of trial and error. Patience was essential for us.
Now that the greenhouse is level, our next steps include:
- Attaching the bottom pressure-treated boards, encasing the footers, and going deep enough to help keep critters out of the greenhouse
- Installing the remaining siding, including one, maybe two, more levels down
- Backfilling around the greenhouse using a combination of gravel to help with drainage and dirt
- Finish trimming the interior
- Finish repairing windows
- Paint!
Since we’re currently having one of the coldest springs we’ve ever had here in Vermont, with hard freezes every night and only a couple of weeks until Memorial Day, this would have been the year a greenhouse would have been ideal. The number of hours I’ve spent trucking plants outside, inside, outside, inside, etc. has been unbelievably! At least we’re still chugging along. Maybe this is the week the siding reaches completion.