In the words of Rhino the Hampster (from the Disney movie “Bolt”), “Let it begin, let it begin, LET IT BEGIN!” Begin what, you might say?! Halloween decorating! Halloween season is one of my favorite holidays for decorating, and this year, all I want is paper bats everywhere. In the dining room, our home office, the girls’ room. EVERYWHERE! Just consider me the Oprah of paper bats. You get paper bat decorations and you get paper bat decorations.

Anyway, in this post, I’m sharing how to make paper bats for Halloween decor, along with a printable bat template (or three covering a few different sizes) in case you want to make your own Halloween DIY paper bats this season. These bats are easy, and it was surprisingly less time-consuming to tackle this project than I thought it would be. Let’s dive in and get to working on this simple Halloween craft.
One last thing, if you’re here just for the free printable template, you’ll find a few options at the bottom of this post. Insert scroll here.
How To Make Paper Bats
Supplies
- Black Cardstock (Michael’s)
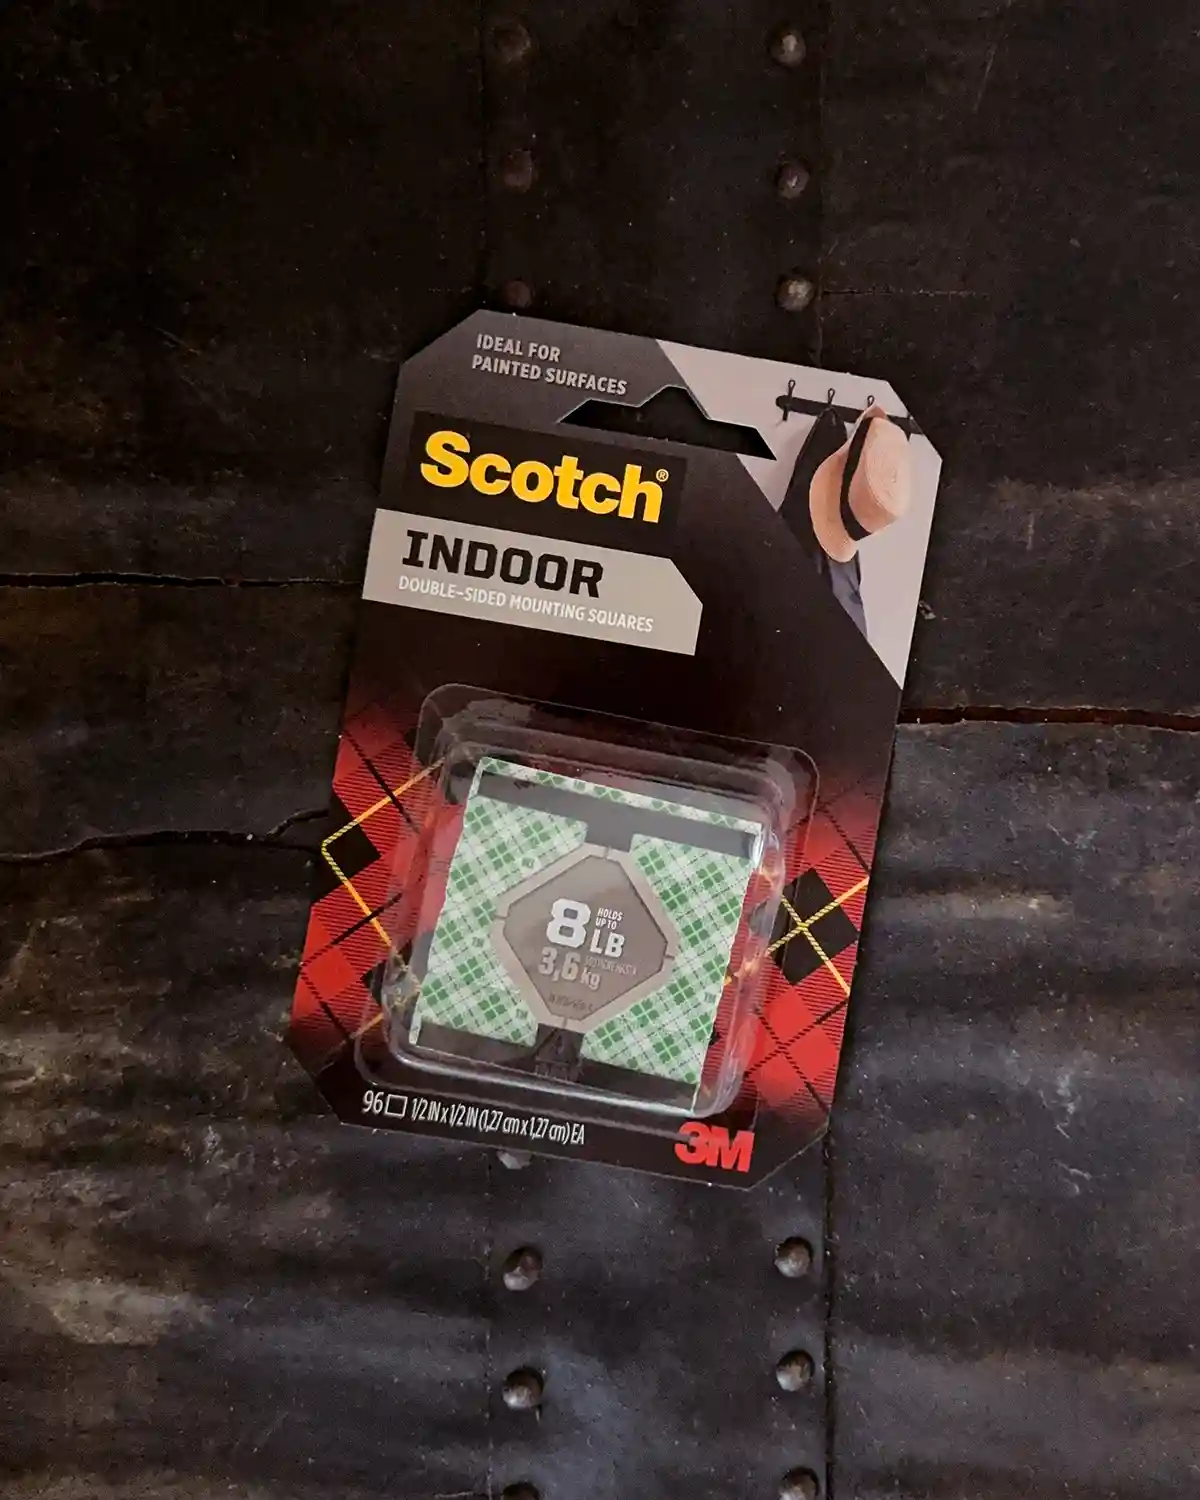
- Removable Mounting Squares (Staples) or Mini Mounting Squares (Staples)
- Bat Template (at the bottom of this post)
Tools
- Scissors (Target)
- Sharp Pencil (Staples)
- Scoring Board (Optional) (Michael’s)
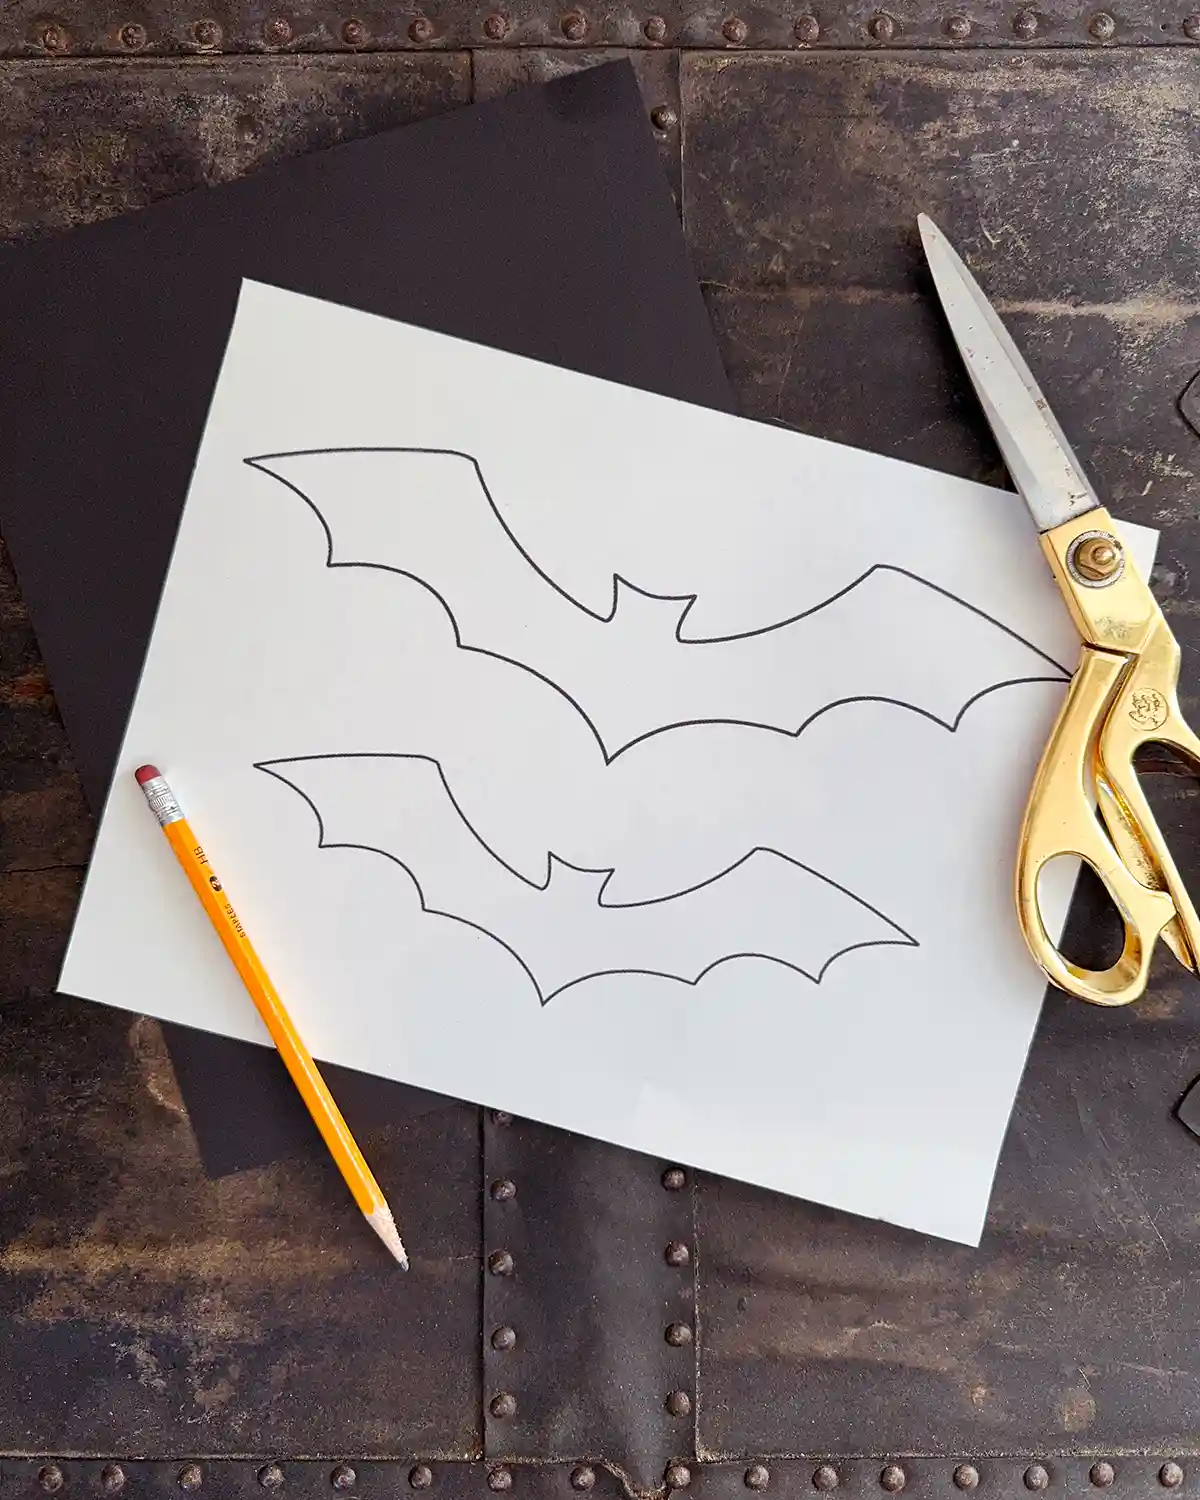
Step One: Make Your Bat Template
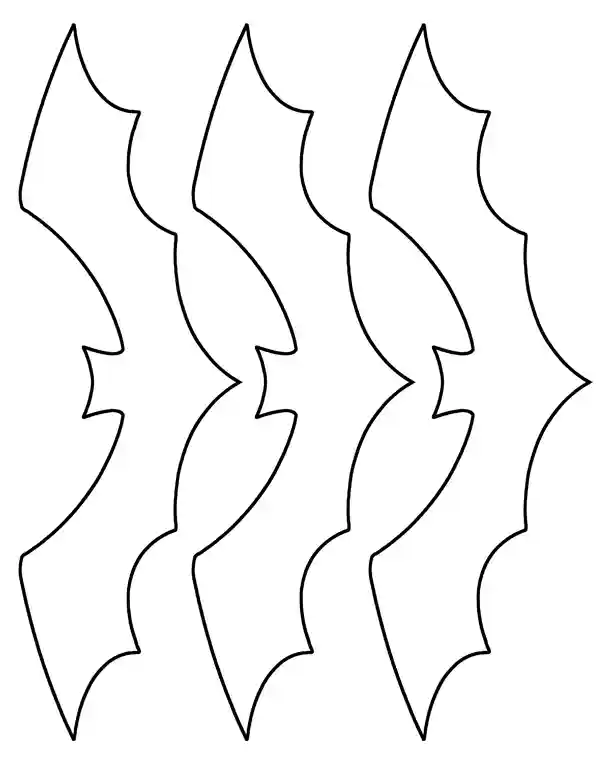
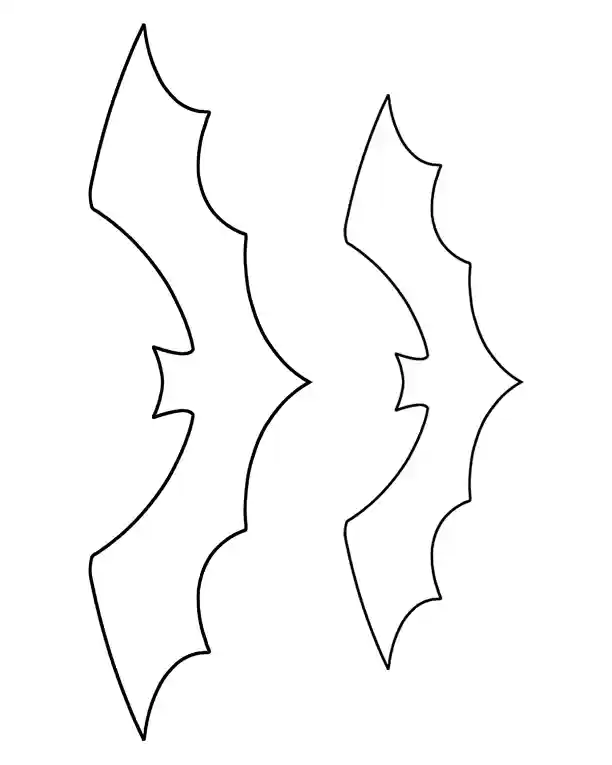
Choose one of the free printable bat templates at the bottom of this post and print it out on white paper. There are three template options featuring simple bat outlines. One with three large 10″ bat templates on it, one with five small 8″ bat templates, and one that has one large and one small bat shape.
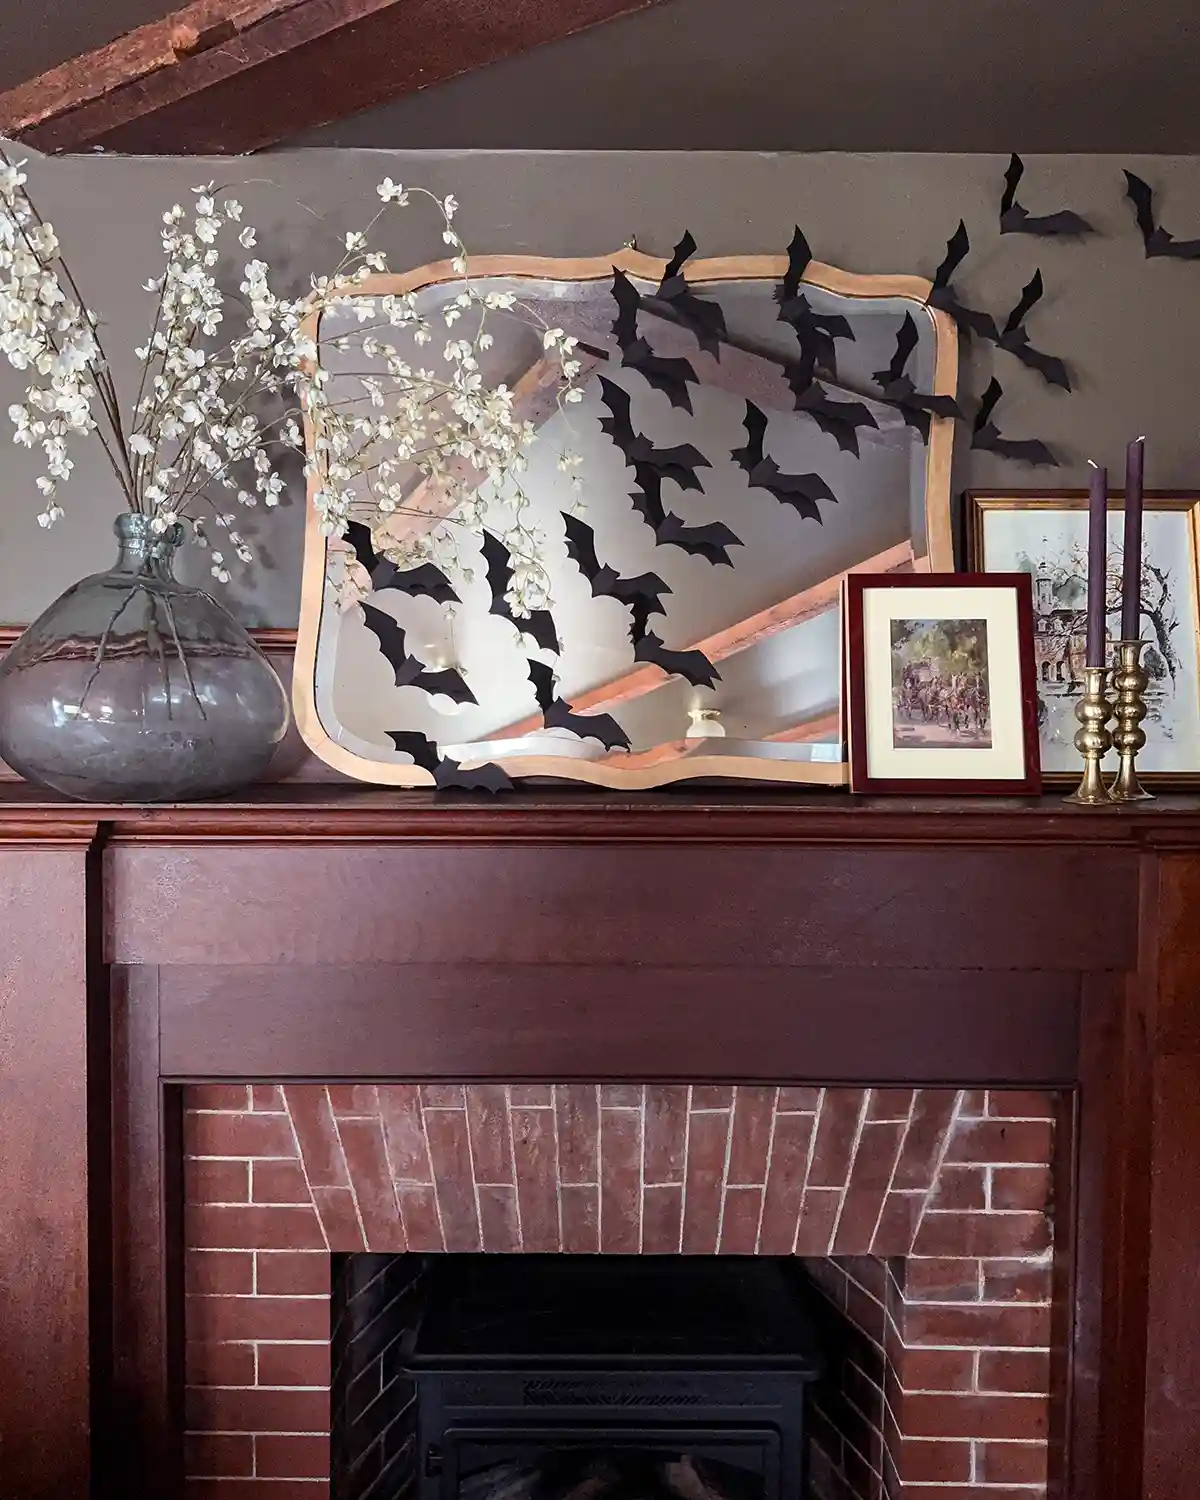
For reference, I used the larger 10″ bats for the dining room and the smaller 8″ bats above the fireplace mantle.
Once you print out your bat stencils, cut them out and you’re ready to start tracing.
Step Two: Trace The Bat’s Body
The next step is to trace the bat’s body on the black card stock using a basic, number two pencil. The beauty of using a pencil on black paper is that you can clearly see the lines.
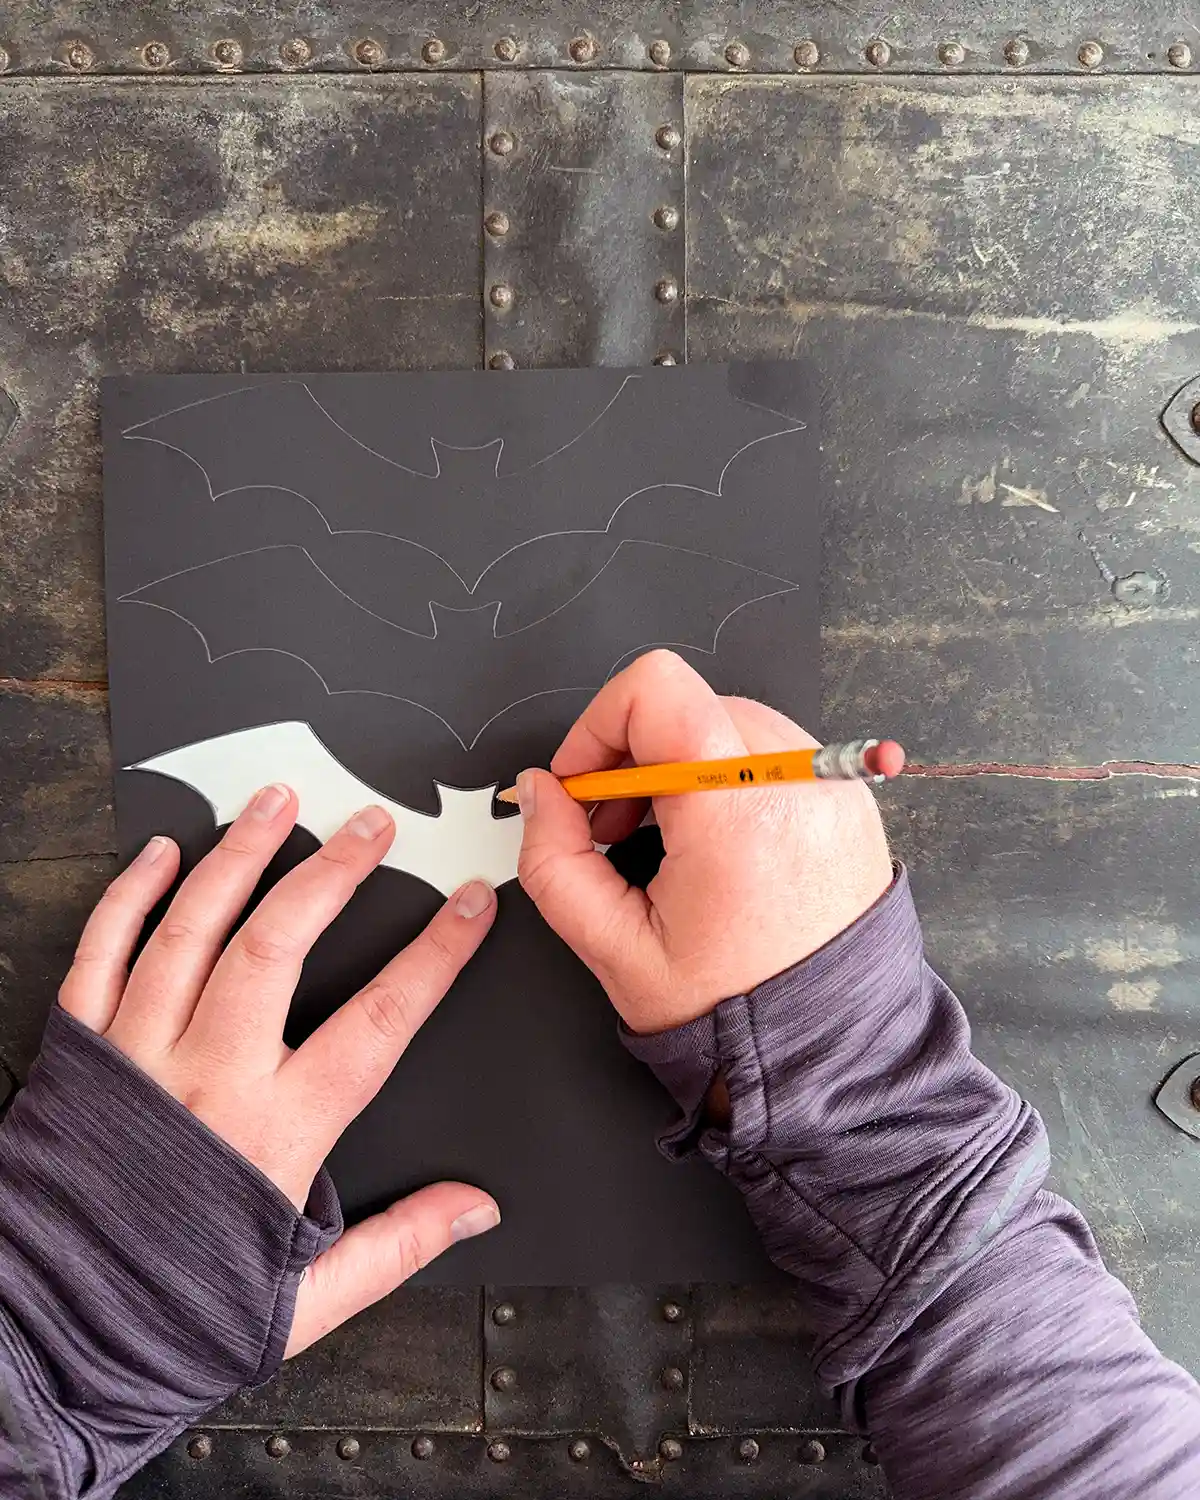
A sheet of 8.5″ x 11″ black cardstock can be used for three of the larger bats (paper in landscape mode) or five of the smaller bats (paper in portrait mode).
It took me about thirty minutes to trace 33 large bats and 20 small bats. This ended up being enough to cover one larger area in my dining room with the larger bat cut outs and the space above the mantle with the smaller bats.
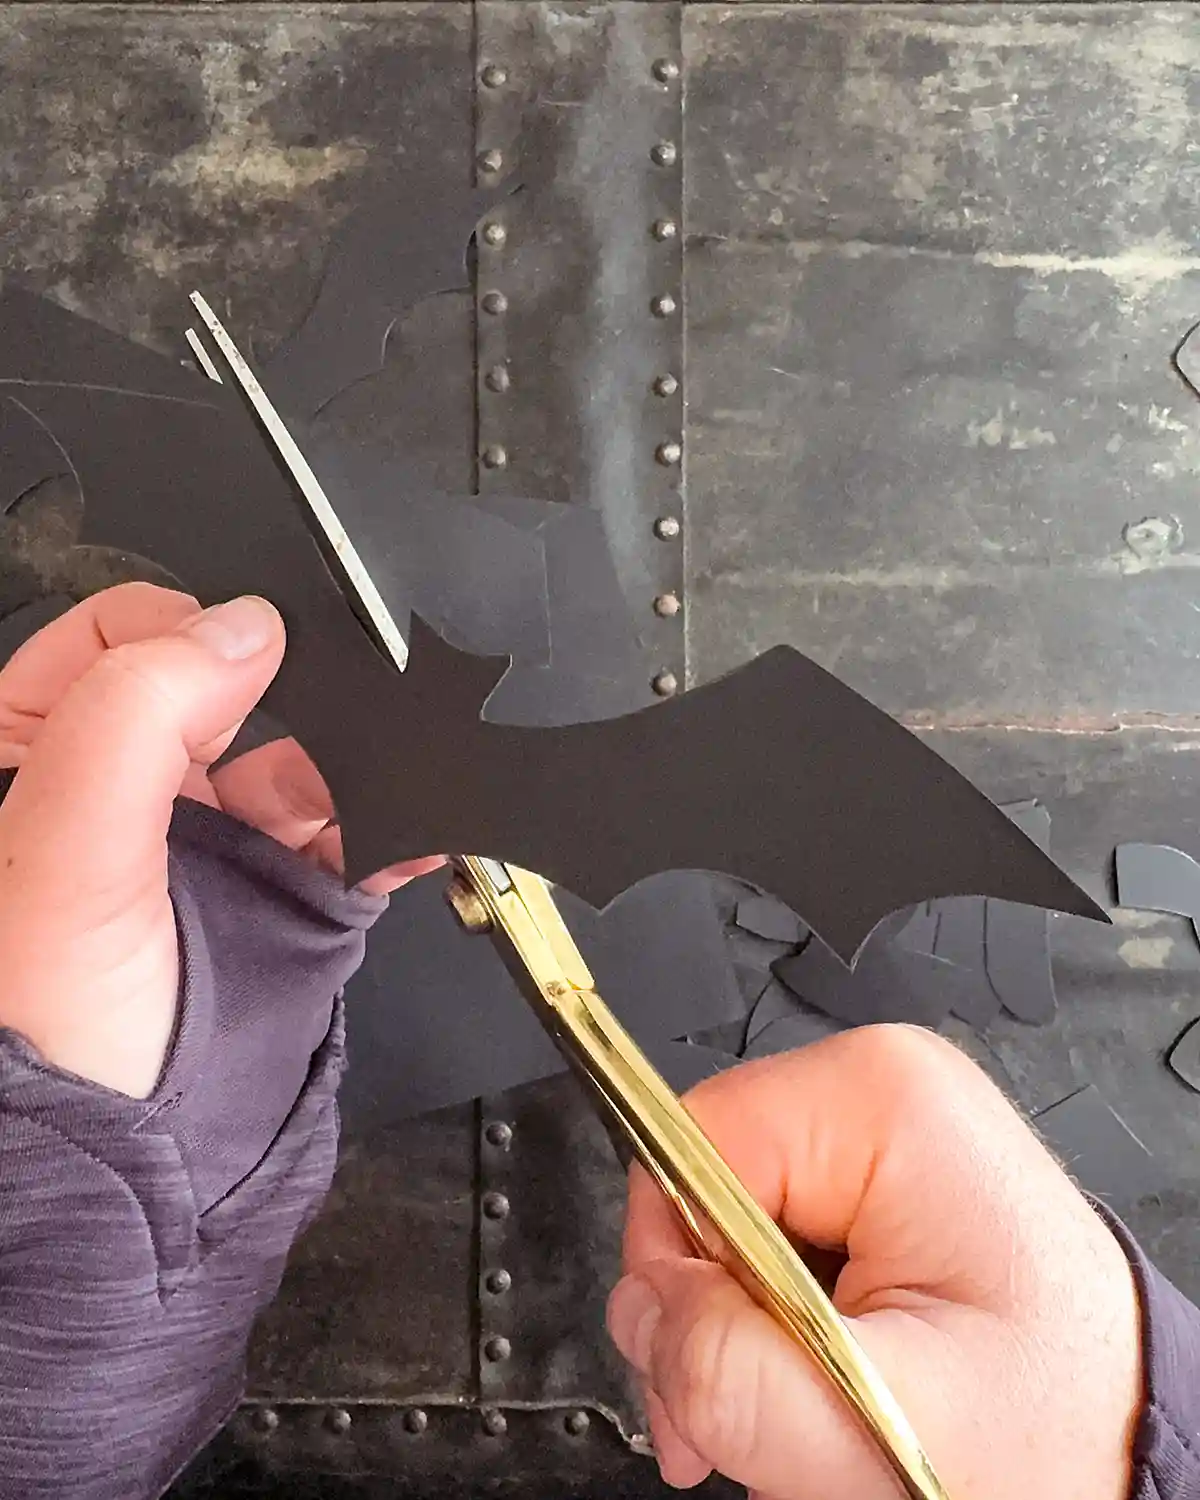
Step Three: Cut Out The Bats
This is where a pair of sharp scissors can come in handy. Using the scissors, carefully cut along the pencil markings on the paper. If it’s hard to see where you’re cutting, sit with your back to a light source. The extra light helps show where the pencil line is on the black paper.
I used a normal, larger pair of scissors to cut out all the bats, which worked. But a smaller pair of craft scissors would have been easier to manipulate, especially with the smaller bats.
I managed to cut out all of the bats while watching the Red Sox win their last game of the regular season. So about three-ish hours. But during this time, I was also fetching snacks, making lunch, wiping noses, repairing MagnaTile houses, and being the default parent for the afternoon.
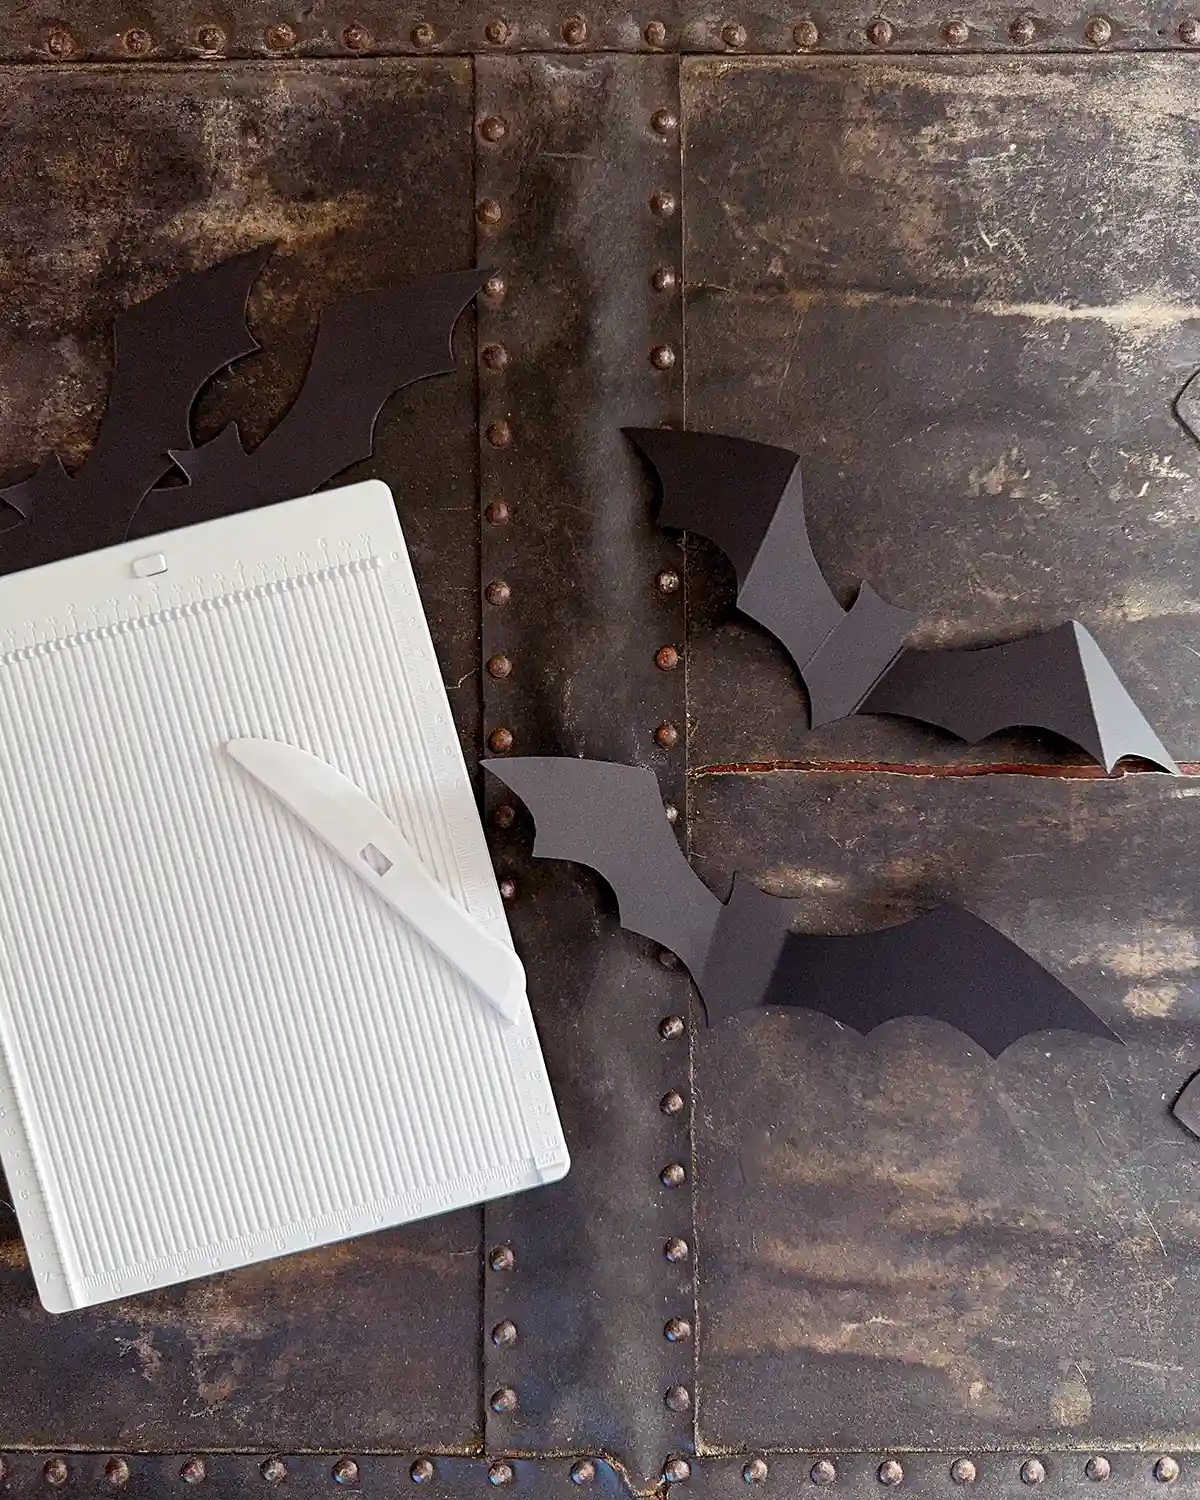
Step Four: Fold The Wings
There are a few different ways you could fold the wings on these bats. The simplest is to fold each wing in towards the body of the bat. This will give a slight illusion of the paper bats flying after they’re hung on the walls. This is what I did for our bat display.
There are other creative ways to fold the bat cutouts. Another simple option is to add a second fold, folding the wings backward slightly. When you’re folding the wings back, do it from point to point on the wings. If you have a scoring board, this step is a whole lot easier.
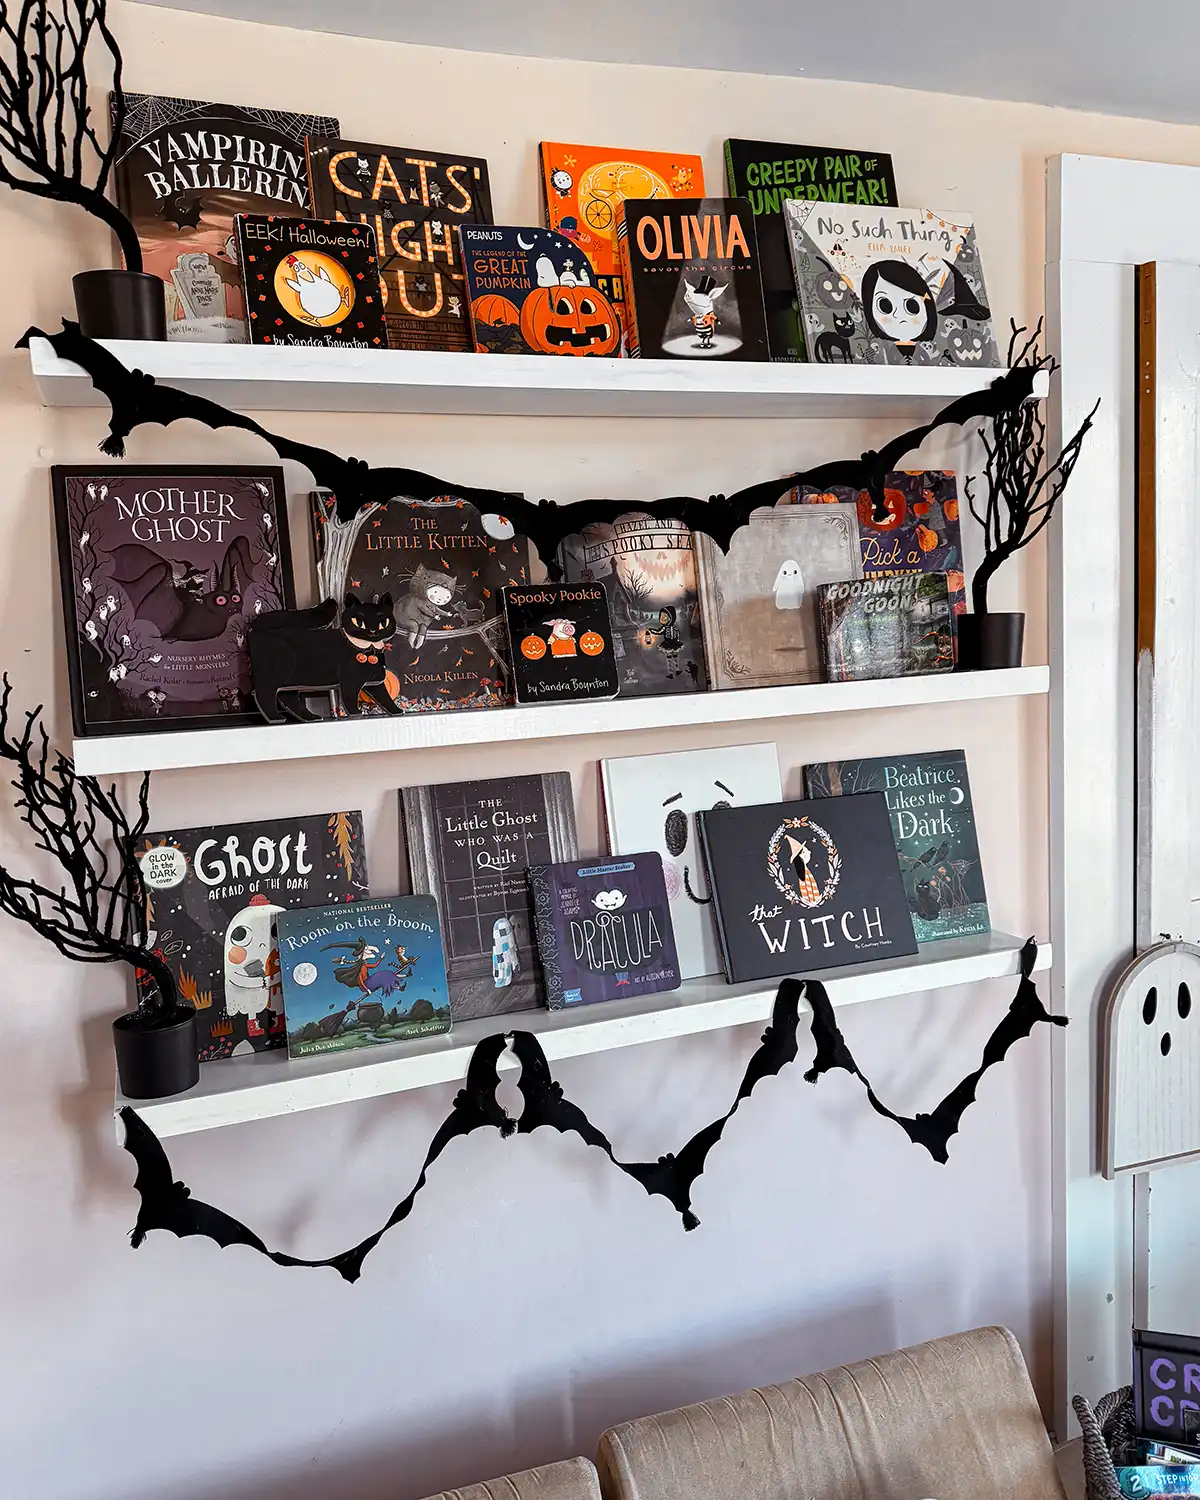
Here’s a visual with a few different ways of folding the wings. The bottom bat is how I folded the bat wings for my Halloween decor, just folding the two wings in toward the body. The top bat shows two other potential fold options, a different one on each wing.
Step Five: Hang The Bats
This step was so much fun to do with our girls and the perfect task for young kids.
To hang the bats, I attached one small Scotch mounting square on the back of each bat. I used these more permanent mounting strips because I did not want the bats to fall. I was worried about not being able to peel the adhesive off the wall/mirror after, so I lightly placed each mounting strip and bat, barely pressing down at all.
So far, so good. We’re three days in, and I’m able to move the black bats around and even tested peeling the adhesive off the paper bats, and it came off easily. Fingers crossed it remains this easy after hanging on the wall for a month. Will update if we experience adverse adhesive removal reactions.
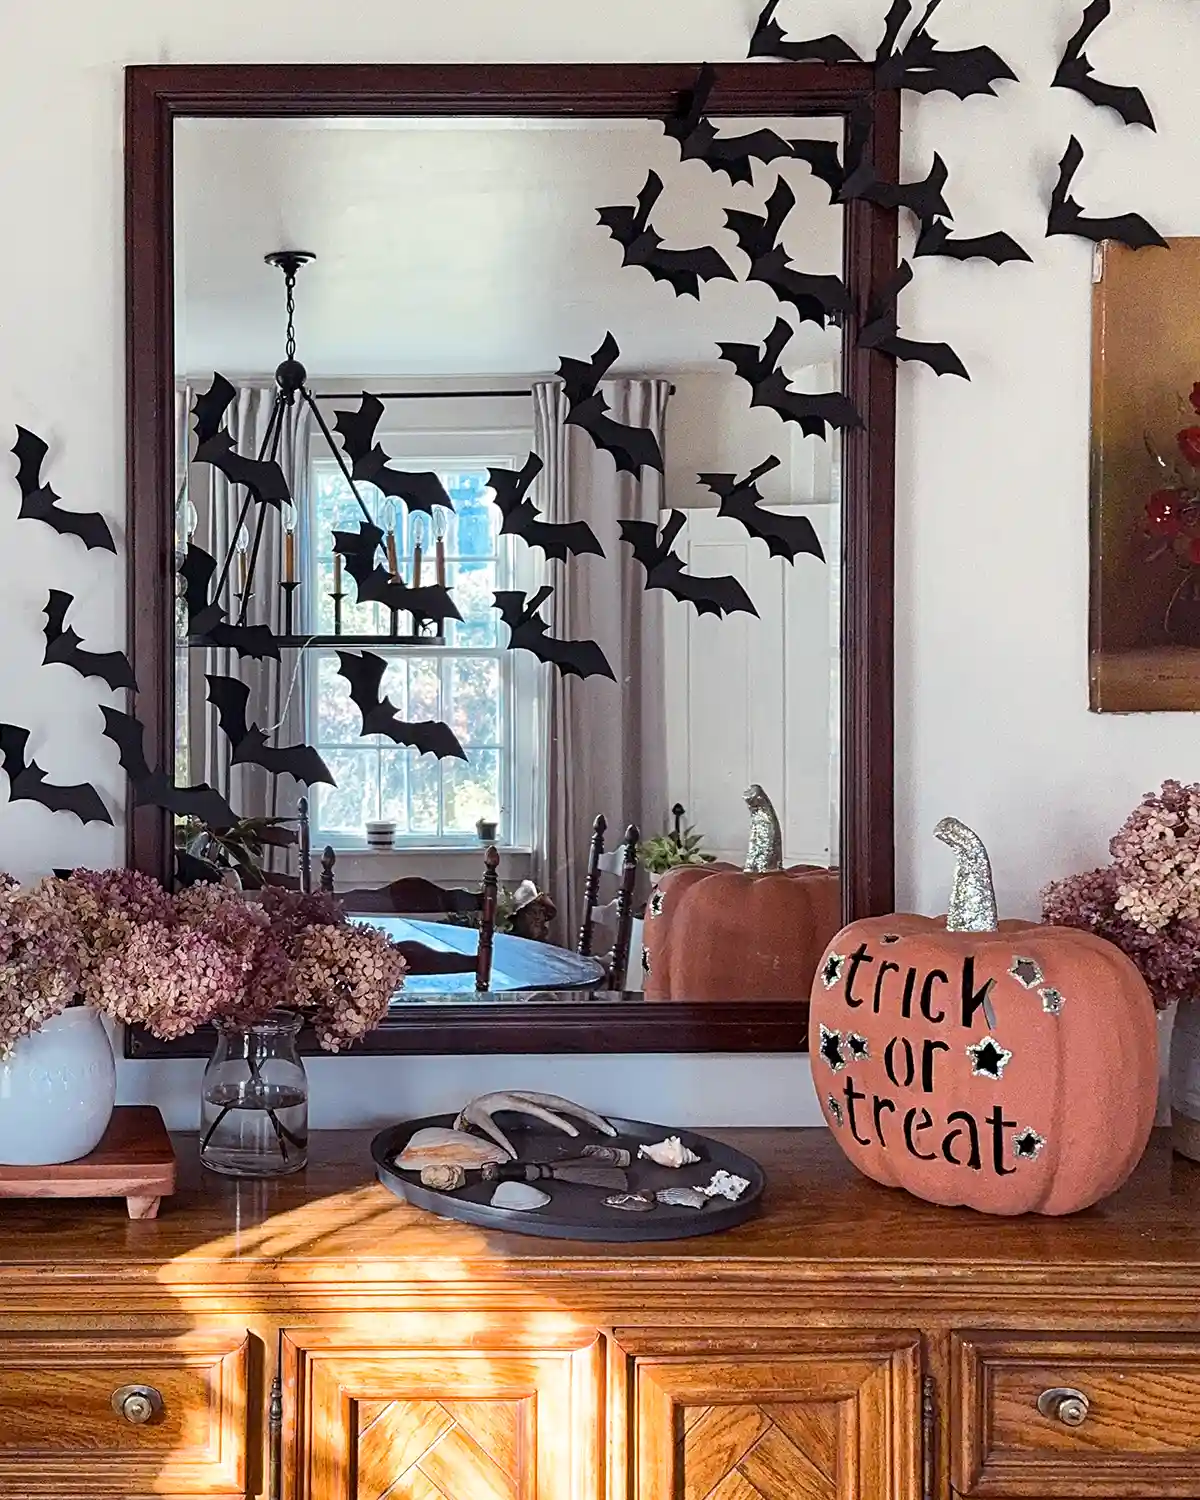
The kids helped me place the bats on the walls and the mirrors in a way that looked like they were flying “through a cave,” according to my 8-year-old. Our 4-year-old just proclaimed how spooky things were getting over and over and over again.
Step Six: Enjoy Your Spooky Decorations
With your bats hung, sit back and enjoy your spooky Halloween decorations. Personally, I don’t think they’re that spooky, but I suppose to young children they might be.
This has been one of those easy and inexpensive craft projects that really brings some spooky spirit into our home in a basic way. It’s not a huge skeleton that you’ll need to store or a blow up Frankenstein, and it can easily be added to existing decor. If you’re hosting a Halloween party, cover a wall for a spooky touch or swoop bats around a doorway for a dramatic entrance.
Total Cost Of Our Own Bat Display
The total cost for us to tackle this decor project was $10, and it decorated two spaces in our home. That’s $5 for a pack of cardstock (which I have enough sheets leftover to make hundreds more bats) and $5 for a pack of mounting squares. Not too shabby.
It helped that I was able to make a DIY bat template, which I turned into free bat printables below for you. Because YOU get a bat template and YOU get a bat template. An extra cost may have been incurred if I didn’t have enough printer ink or wanted to purchase a scoring board to make fancy or more precise folds. But even then, the scoring board that I have cost a whopping $5 and is more than sufficient for folding paper bats for Halloween.

Printable Bat Templates
And now for printable templates. There are three different ones below with various sizes of bats. The download link for each of the free bat template printables is for a PDF format of the file.
The Small Bat Template has five 8″ bats on it. The Large Bat Template has three 10″ bats. Then the Mixed Bat Template has one large and one small bat on the sheet.

Happy Halloween Decorating
And now that we have begun and broken the Halloween projects seal, let the Halloween crafts continue! I have so many ideas, many of which I’ve been wanting to do for a long time, so we’ll see where we end up. I’ve been itching to make gravestones for years. Maybe that’s next. Or some simple ghost crafts for the girls’ room. But definitely some more bats!
Happy Halloween season!
Pssst…An alternative to the Oprah and Rhino quotes was channeling Pedro Cerrano from the movie Major League with his “Have to wake up bats” quote. But I’m in my Disney movies with kids era so Rhino the Hampster it is.