Today’s tutorial is all about how to build a DIY playground deck. For our project, we are modifying an existing play structure and extending the deck for our specific project. Depending on your needs, you may need to make modifications to this tutorial if you are building from scratch or renovating your backyard playground. Let’s get to it.

How about one more deck shot that’s a little more pulled back so you get the full effect?

But first…this “how to build a playground deck” tutorial is the first in a series of DIY backyard playground building and renovating posts. We started this project last year and we’re slowly working our way through the how-tos. Step-by-step instructions for building a playground ladder, monkey bars, sandbox, and more are coming soon. So stay tuned.
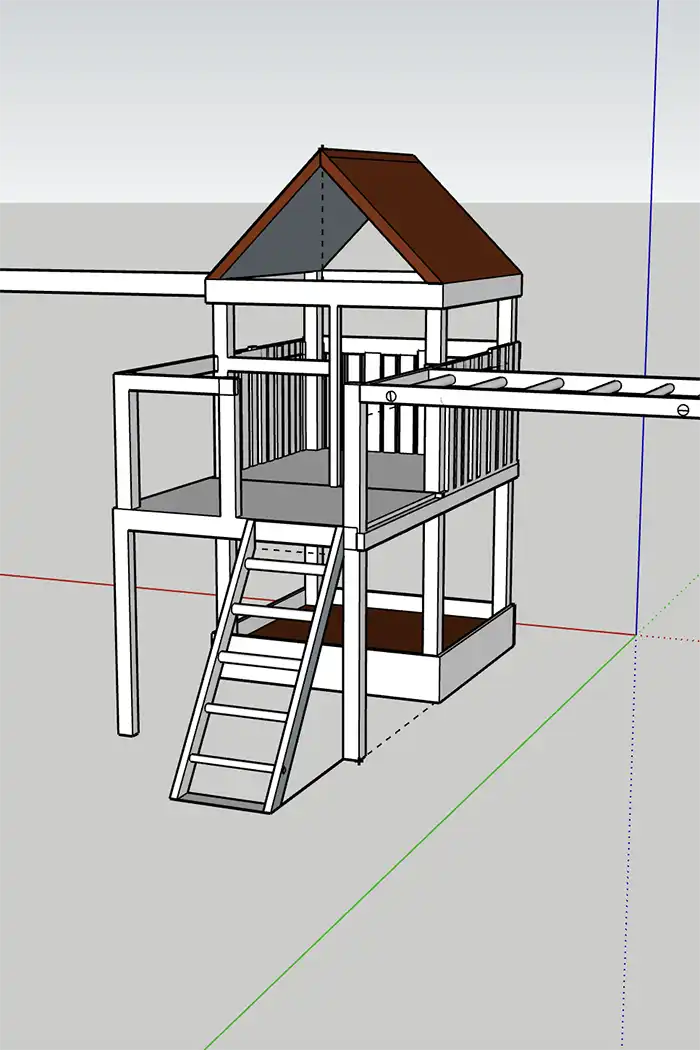
DIY Playground Deck Tutorial
These are the tools and materials that we used to build our 52″ x 52″ playground deck extension. Depending on the scope of your project, you’ll need to adjust this list. But it gives you a general idea of a materials list to help calculate costs and budget for this type of project.
Supplies
- 4″ x 4″ Pressure Treated Wood Posts (Home Depot)
- 2″ x 4″ Pressure Treated Wood (Home Depot)
- 5/4″ x 6″ Pressure Treated Decking Boards (Home Depot)
- 3-1/8″ GRK Construction Screws (Home Depot)
- Cement Blocks (Home Depot)
Tools
- Circular Saw (Home Depot)
- Cordless Drill (Home Depot)
- 24″ Level and 48″ Level (Home Depot)
- Shovel (Home Depot)
- Carpenter Square (Home Depot)
- Tape Measure (Home Depot)
- Multi-Tool (Home Depot)
Step One: Make A Plan
Make a plan for your playground deck. You should always make a plan before going into any project, even if it’s a super rough plan. Spoken from experience, it saves you time and money and makes for a better project.

Before we bought a single board or repaired a single piece of rotten wood on our playground structure, we made a playground renovation plan. This included specific measurements for adding the playground deck.
You don’t have to go full-on SketchUp like we did, although the design program can be helpful. But sketch it out on paper, maybe even designing to scale using graph paper.
So measure, mark out your deck size, think about what will go on the deck, and determine the details of your project.
Step Two: Go On A Lumber Run
Armed with your plan it’s time to go on a lumber run. I love a lumber run. Perhaps it’s the chemical smell of pressure treated wafting in the air and affecting my brain, or more likely it’s a signal for the start of the project which is my favorite. Bonus…take your kids along. Kids love the lumber yard…and a race cart!

Take your list of materials to your local lumber yard. Not only should it include the wood you need but also any fasteners you plan to use. For our project, we used all-purpose GRK construction screws for the entire thing.
A word on wood, mostly because this is where I messed up and didn’t think ahead. For outdoor projects, we typically use pressure-treated. It tends to be more resistant to rot and decay than traditional wood. Naturally, this is what we picked up.
But pressure-treated wood isn’t paintable, well, not at first. You have to wait for the wood to weather and start absorbing moisture before you can paint it. I had intended to paint the playground all along but because we used pressure-treated wood, I waited a year for some boards to weather (thankfully it’s wood we already had from another project) and six months for the new wood to accept paint. Even then, it was iffy.
So consider your deck finish before selecting the wood. If you’re planning to paint the deck, skip the pressure-treated wood and save yourself a lengthy waiting period to paint.
Step Three: Demo And Prep For Deck
For those renovating an existing playground structure, in the infamous words of Chip Gaines, “It’s demo day!” Here’s the before:

The demo for this project was fairly simple. It was a matter of removing the old deck railings, balusters, and climbing wall. During the demo, we also took some time to repair holes in the wood and replace some rotting pieces.
Here’s the playground after removing the parts we no longer needed:
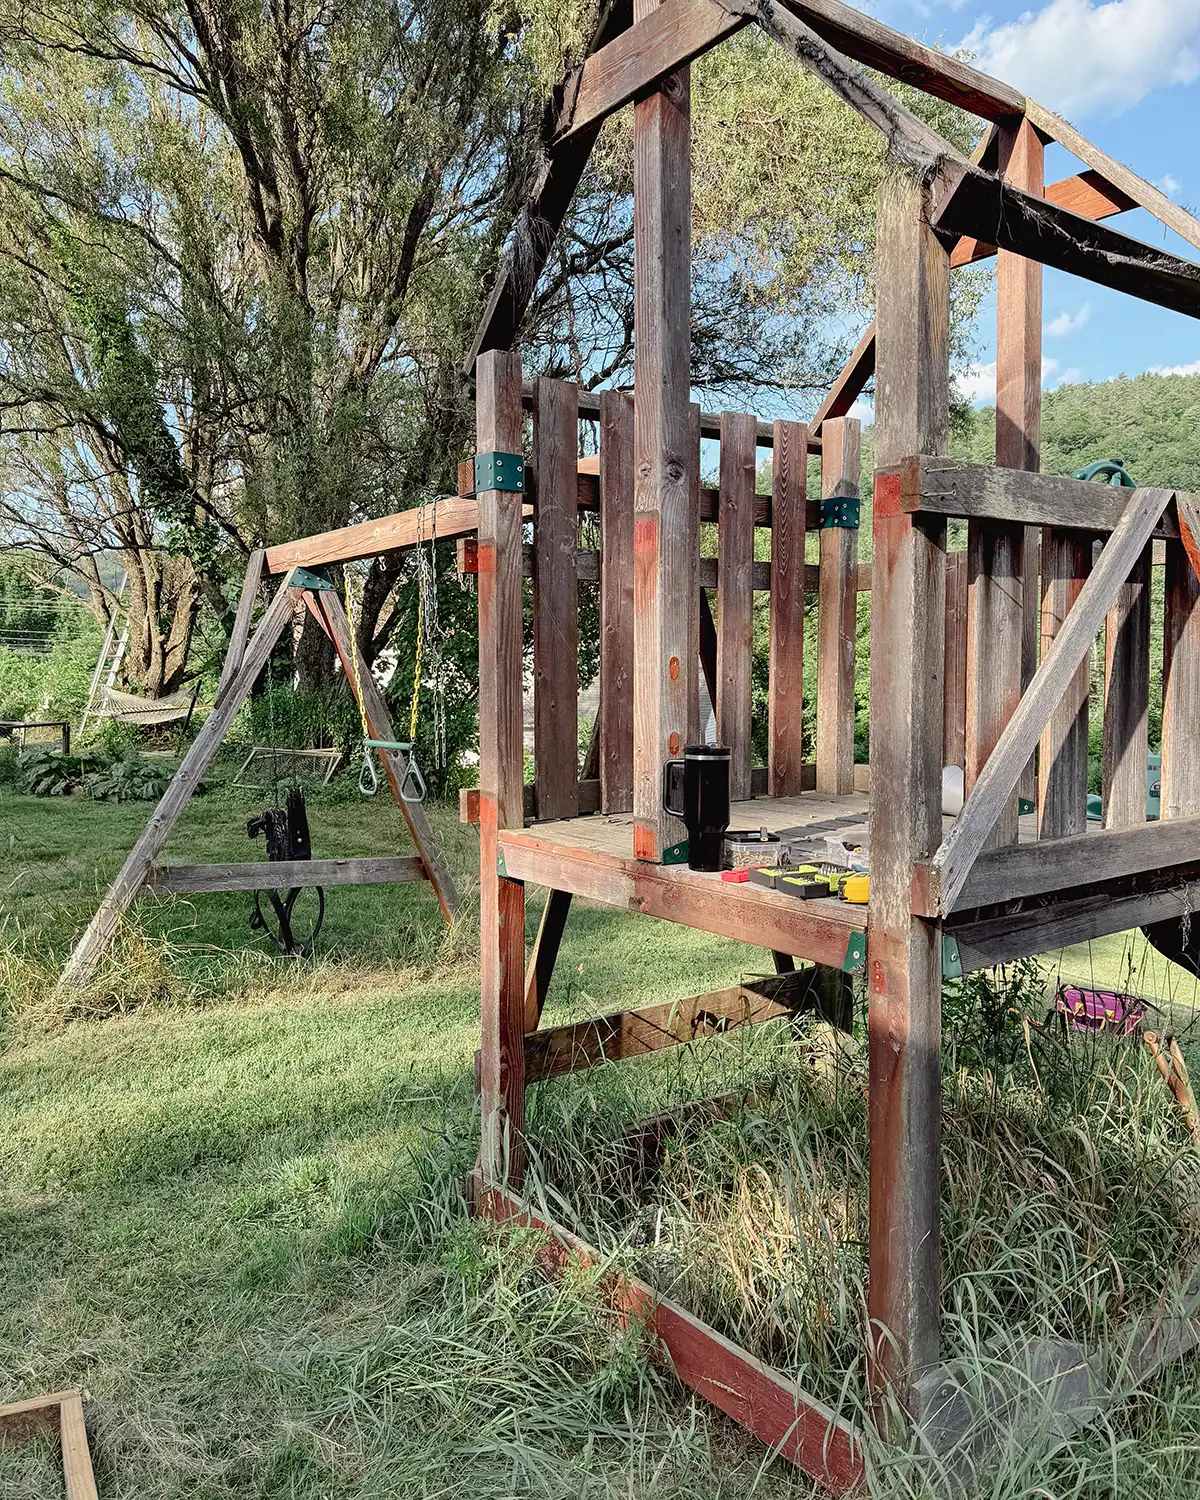
Fun fact…the day we started working on this project was also the day Google Maps updated our home. So picture Colby’s truck parked next to the playground, wood piled everywhere, construction supplies scattered, etc. It’s not pretty.
Extra fun fact…at our last house Google Maps updated on the day we hosted a yard sale. You could legit see me negotiating a sale price on a pair of slalom skis with an older gentleman.
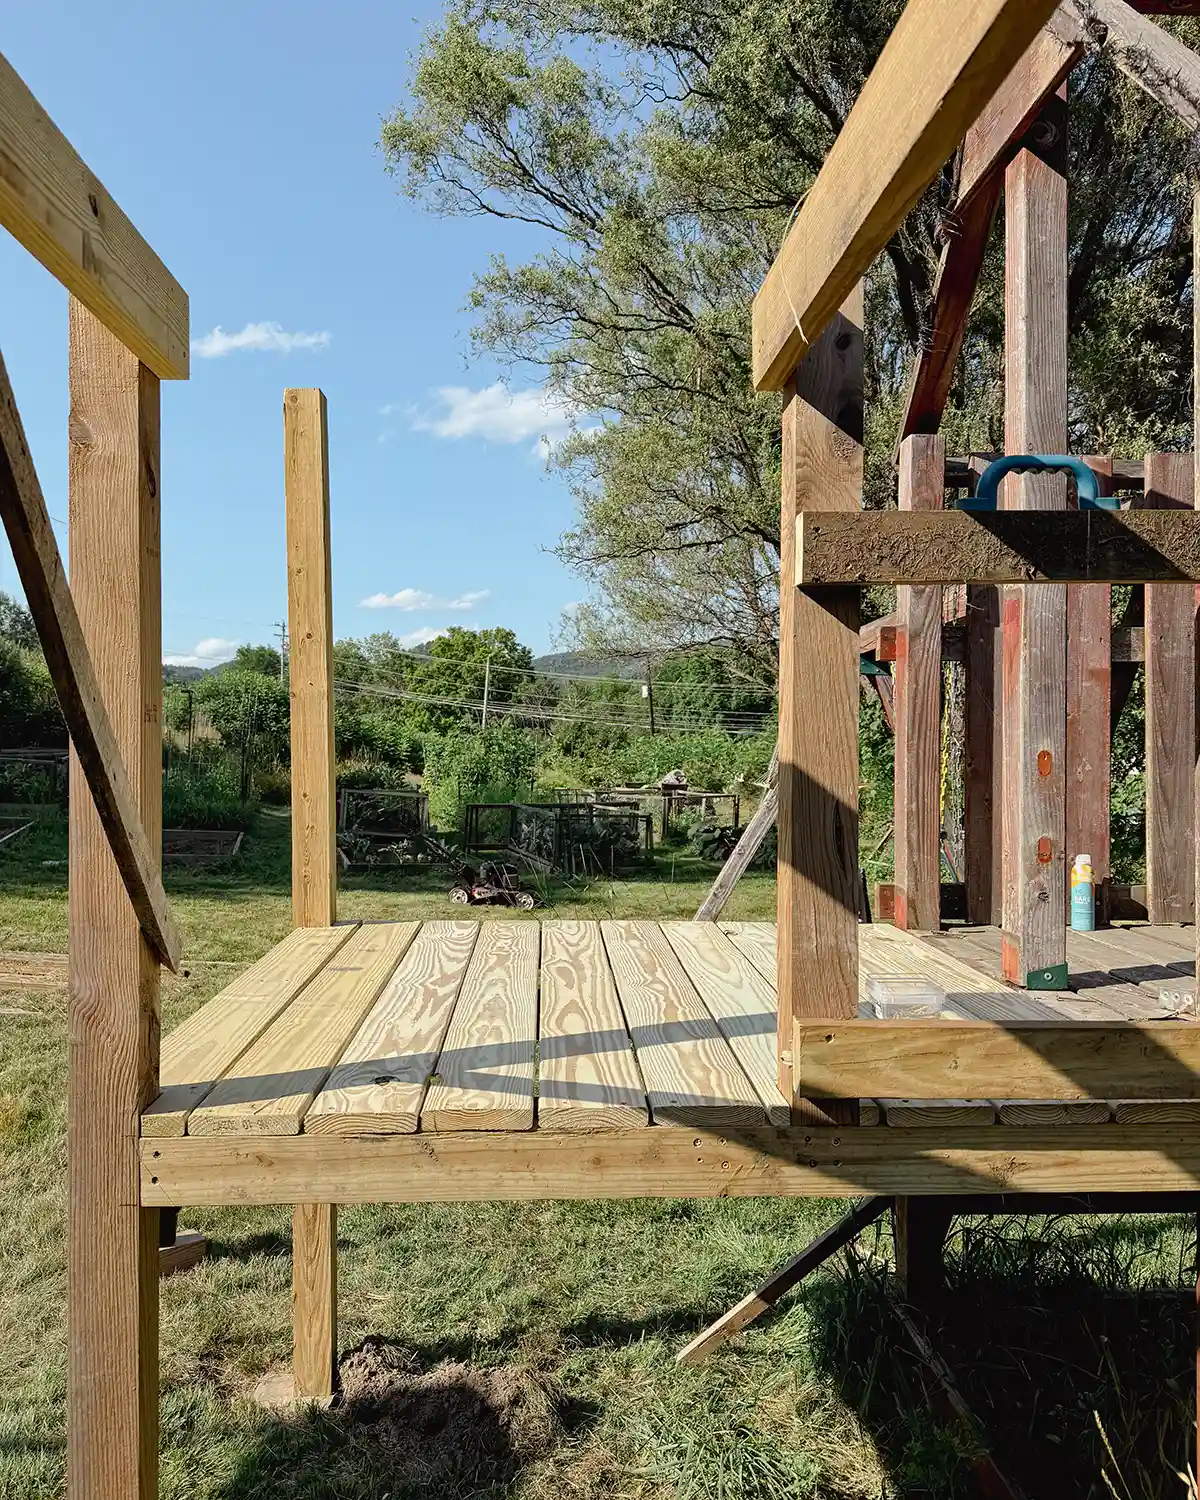
Step Four: Build Deck Framing
Next up, we built the frame for the deck. It’s basically a square with a board running through the middle for extra support for the deck boards. A joist. This piece will be the underside of the deck, attached to the posts and the existing deck.
We used 2 x 4s to construct the 52″ x 52″ box, the size and materials are the same as the existing playground deck. We planned to double the deck’s size. These boards are screwed together at the end with construction screws.
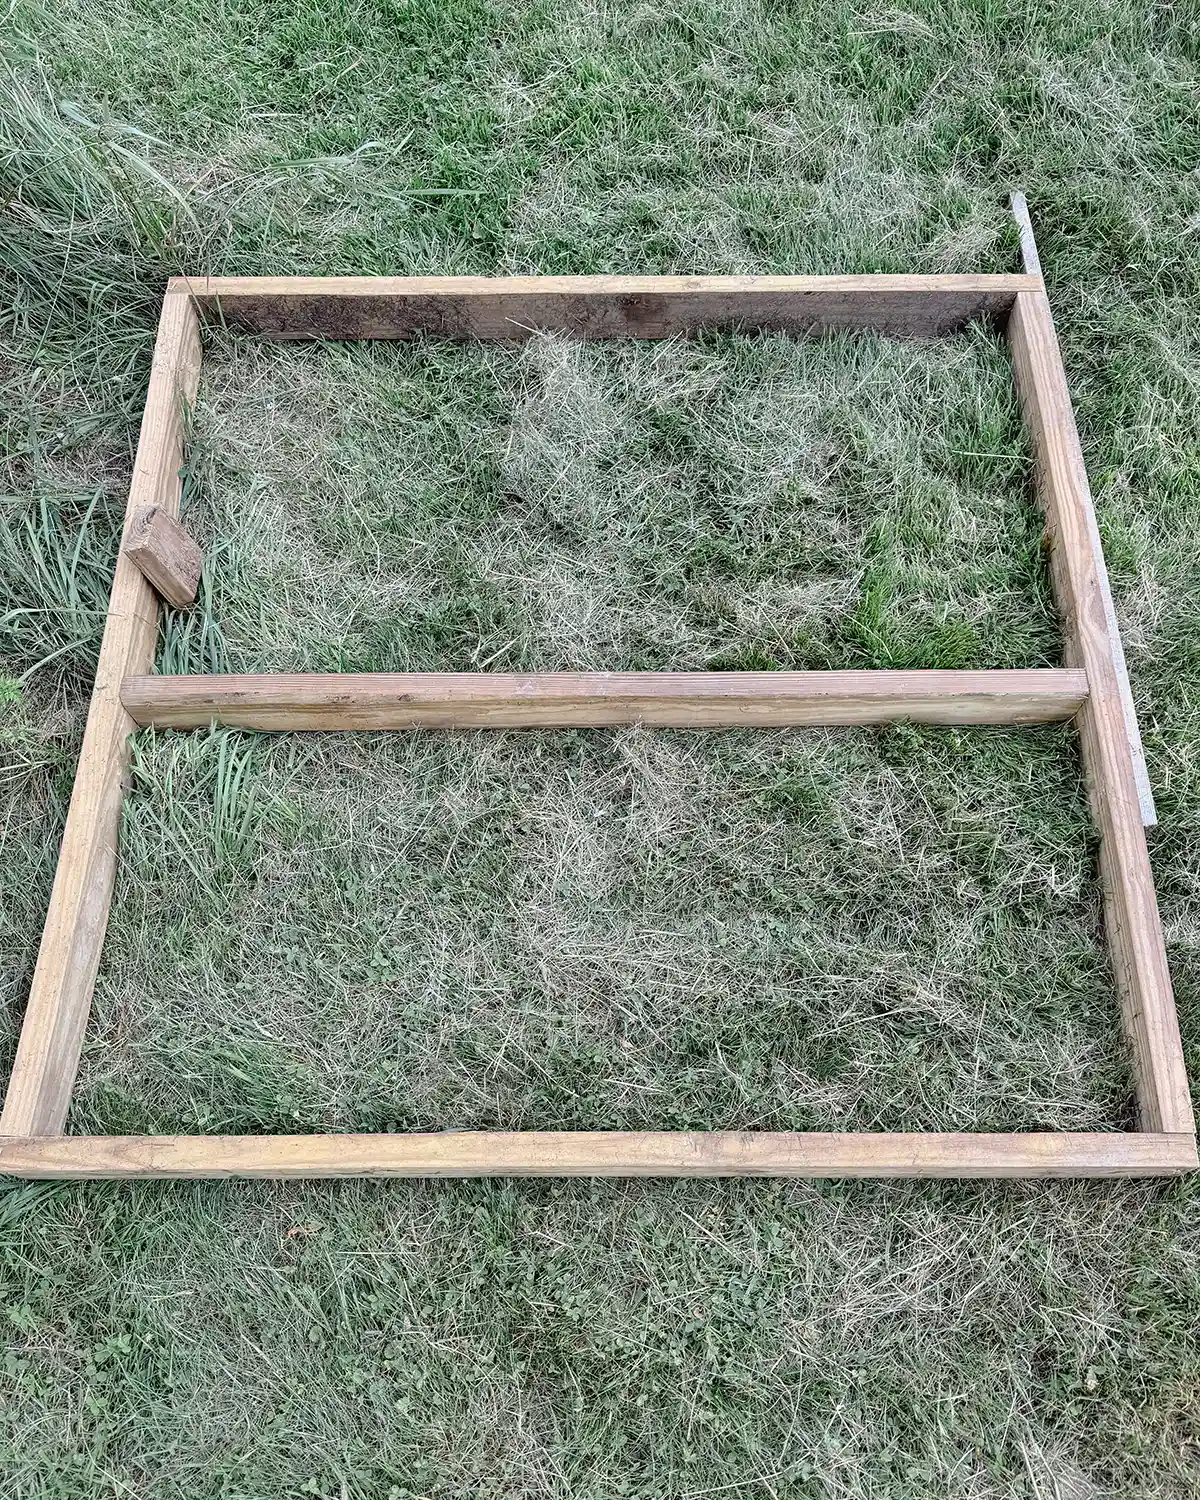
Hot tip. The spacing between the joists of your deck framing depends on the thickness of your deck boards. For our playground project, we used 1″ thick deck boards so we were comfortable with two-foot spacing between the joists. If we had used a thinner, 3/4″ thick deck board, we wouldn’t want to go beyond 16″ between the joists.
Step Five: Attach Deck Framing
Because our deck is small, we could build the frame/joists first and then lift them to attach to the existing playground structure. I wouldn’t recommend doing it this way for any larger deck. Or if the deck height is taller than chest height.
To help attach the deck framing to the existing playground structure, we built a support to hold one end while attaching the other end of the frame. Before attaching, use a level and make sure the framing is level in multiple directions.
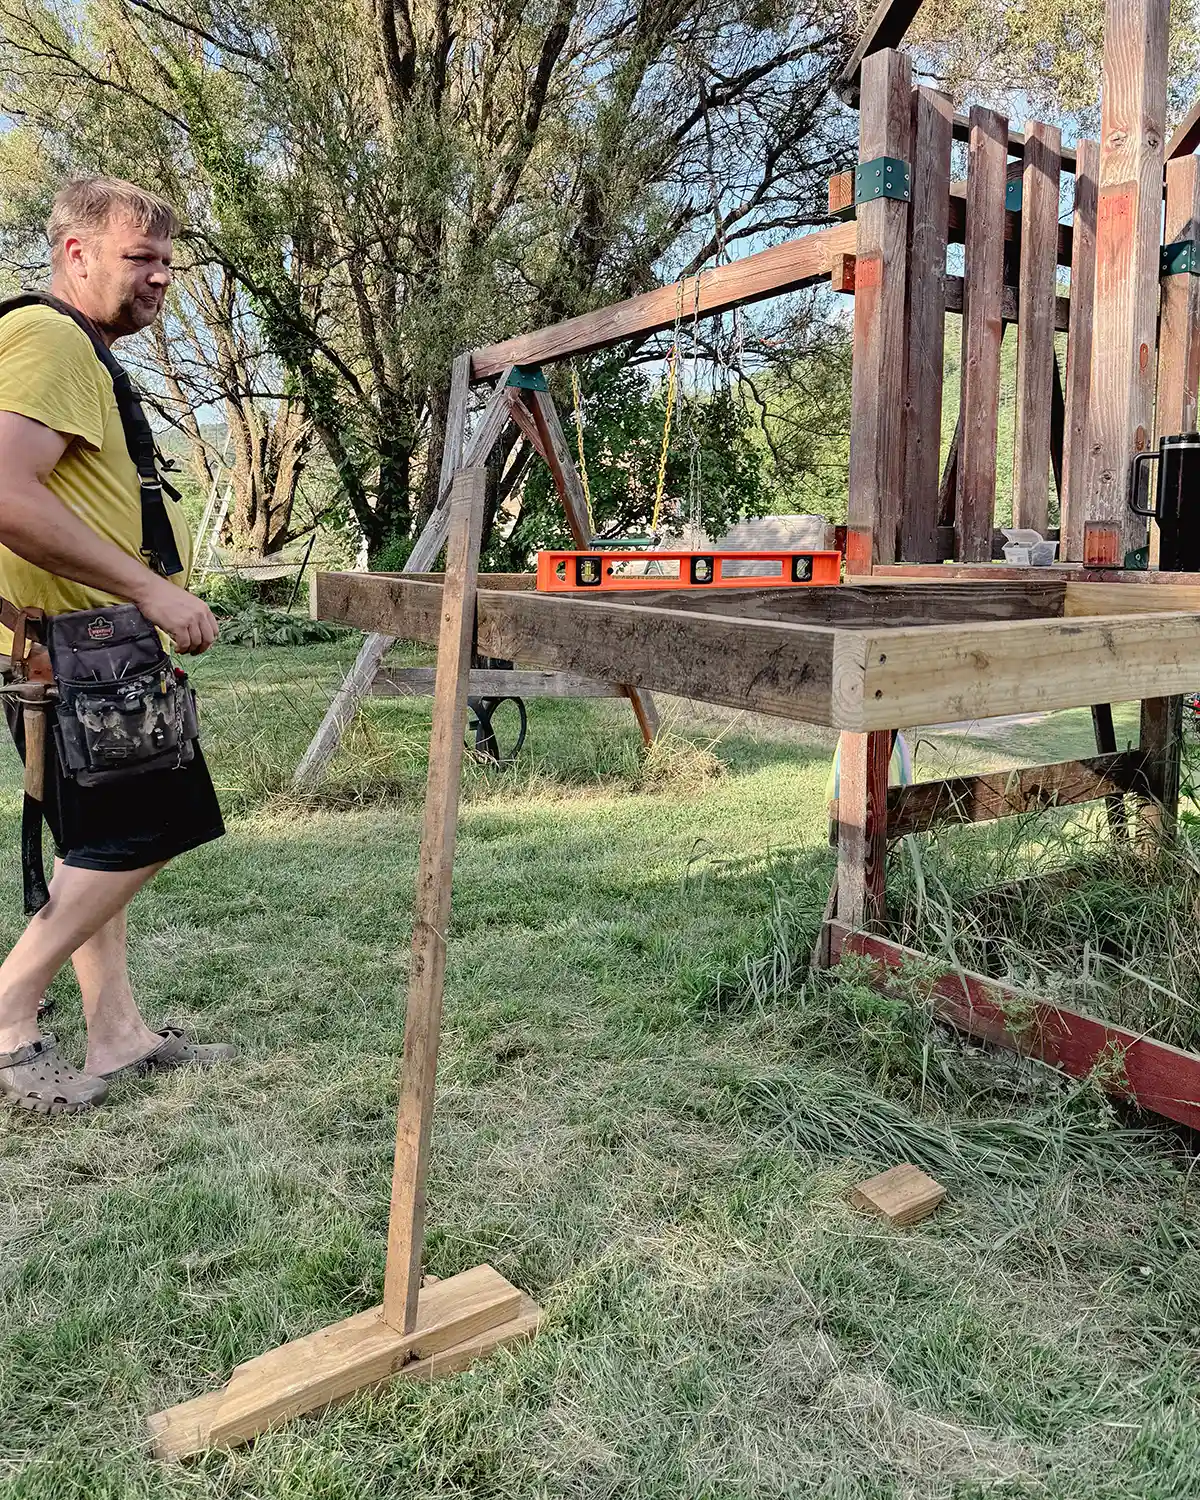
Secure the deck framing to the existing playground structure using construction screws. We screwed it in with just one screw in the middle at first, allowing us to pivot or adjust for levelness. Once we were happy with the location of the framing, we added several more screws on each side. I believe it was 9 screws total across the 52″ board.
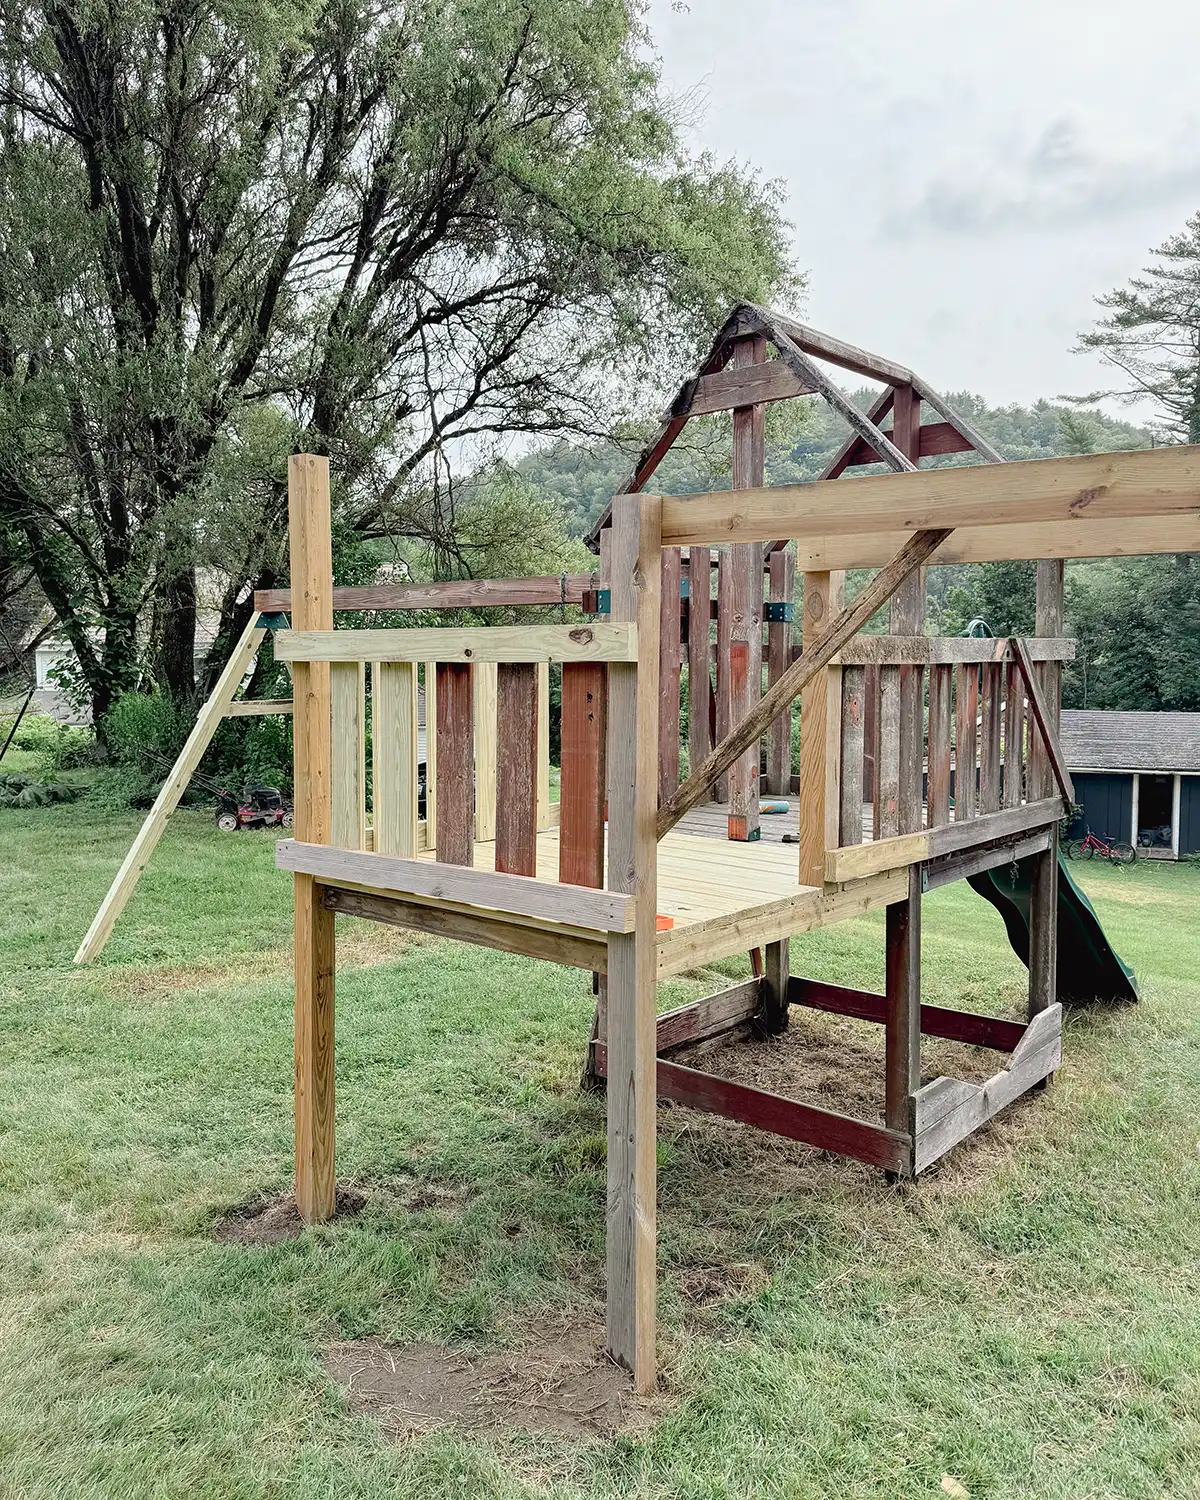
Step Six: Attach Deck Posts
Normally when building a deck, the posts are the first things installed. That’s because you typically dig below the frost line, pour concrete footers, and insert the posts. But with our playground deck, the structure sits on top of the ground. Thus, we chose to install the deck posts after the deck framing since the ground is unlevel.
We dug down into the earth and placed cement blocks that we had on hand as an even surface for post support and to serve as a cement footer. This wasn’t necessary but it did help support the structure while we built it. Burying the cement footer meant a child wouldn’t fall and crack their head on it later.
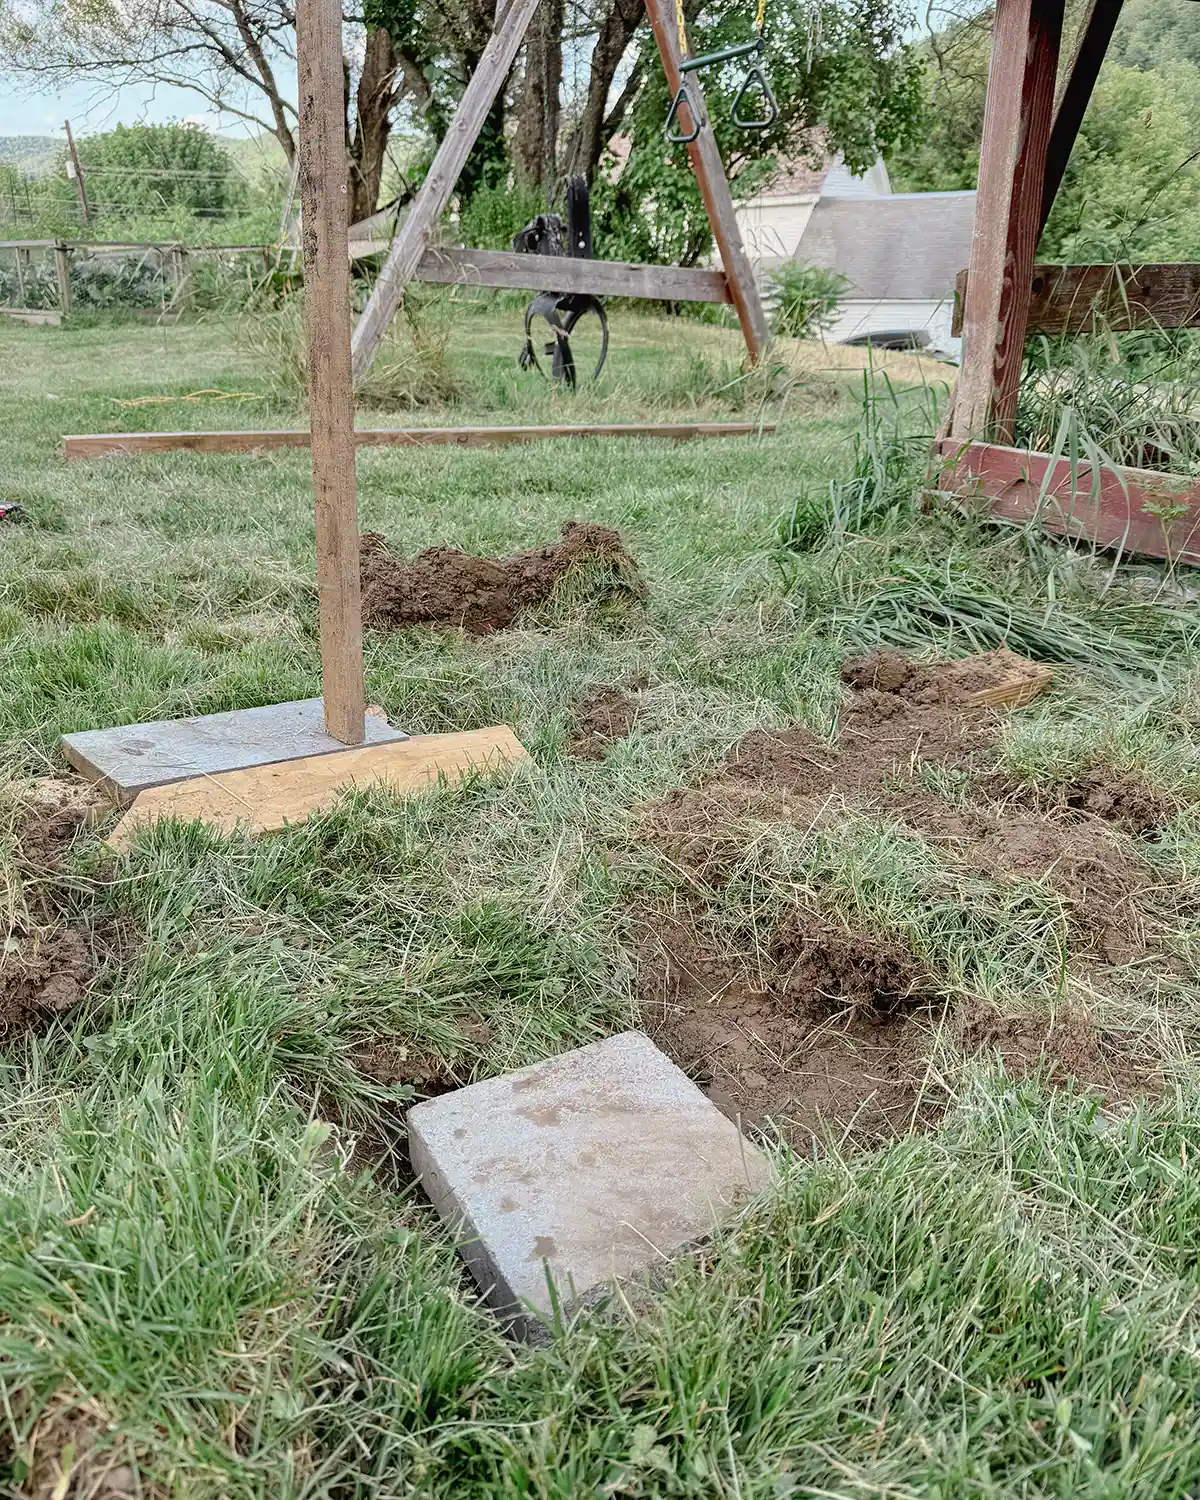
After digging the holes, we measured how high each of the posts should be with the help of a larger level to make sure the new playground deck would be even with the old one.
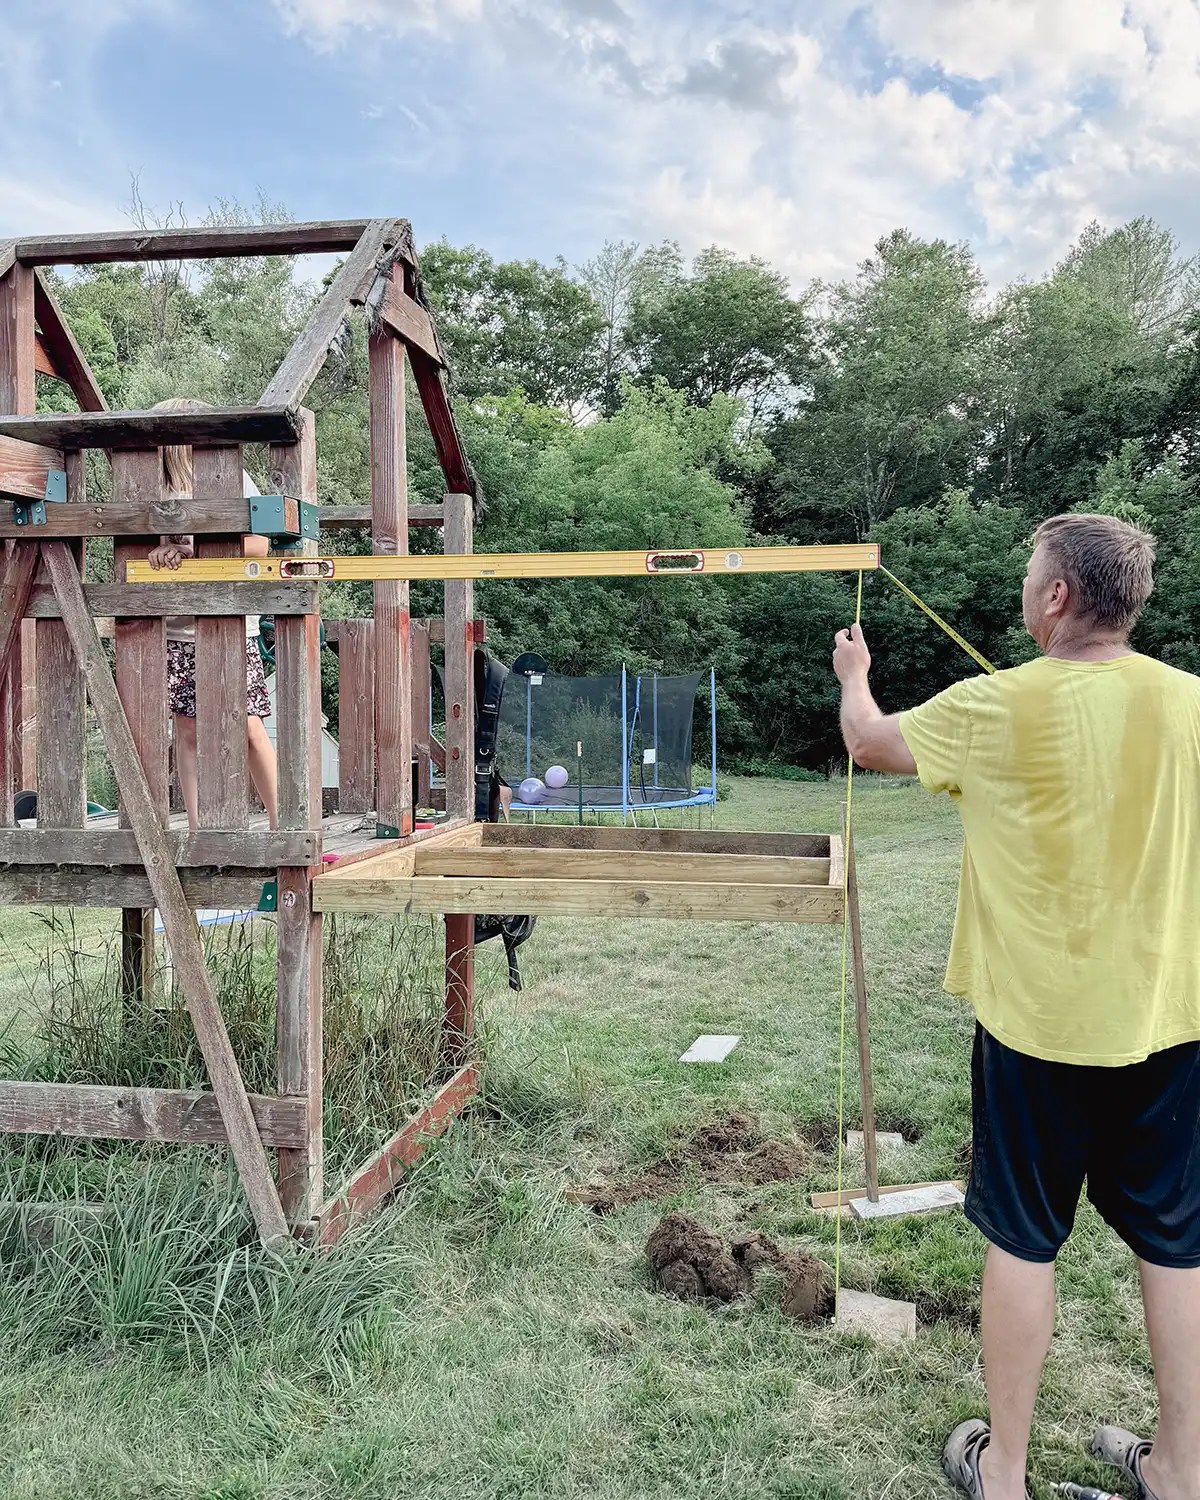
And then cut each post down to size. The posts were placed on the outside edge of the deck, checked for vertical levelness/adjusted as necessary, and screwed into the framing.
For this step, we attached the posts to the deck framing by first screwing through the deck framing into the post using 2-3 screws. You don’t see the screw holes from the outside that way.
We also attached posts for the monkey bars at this time but that’s another post for another day. ALSO also, we did originally have the deck ladder under the monkey bars but later decided to move it. See playground update #3. Hence why the finished pics look different than the in-progress pics.

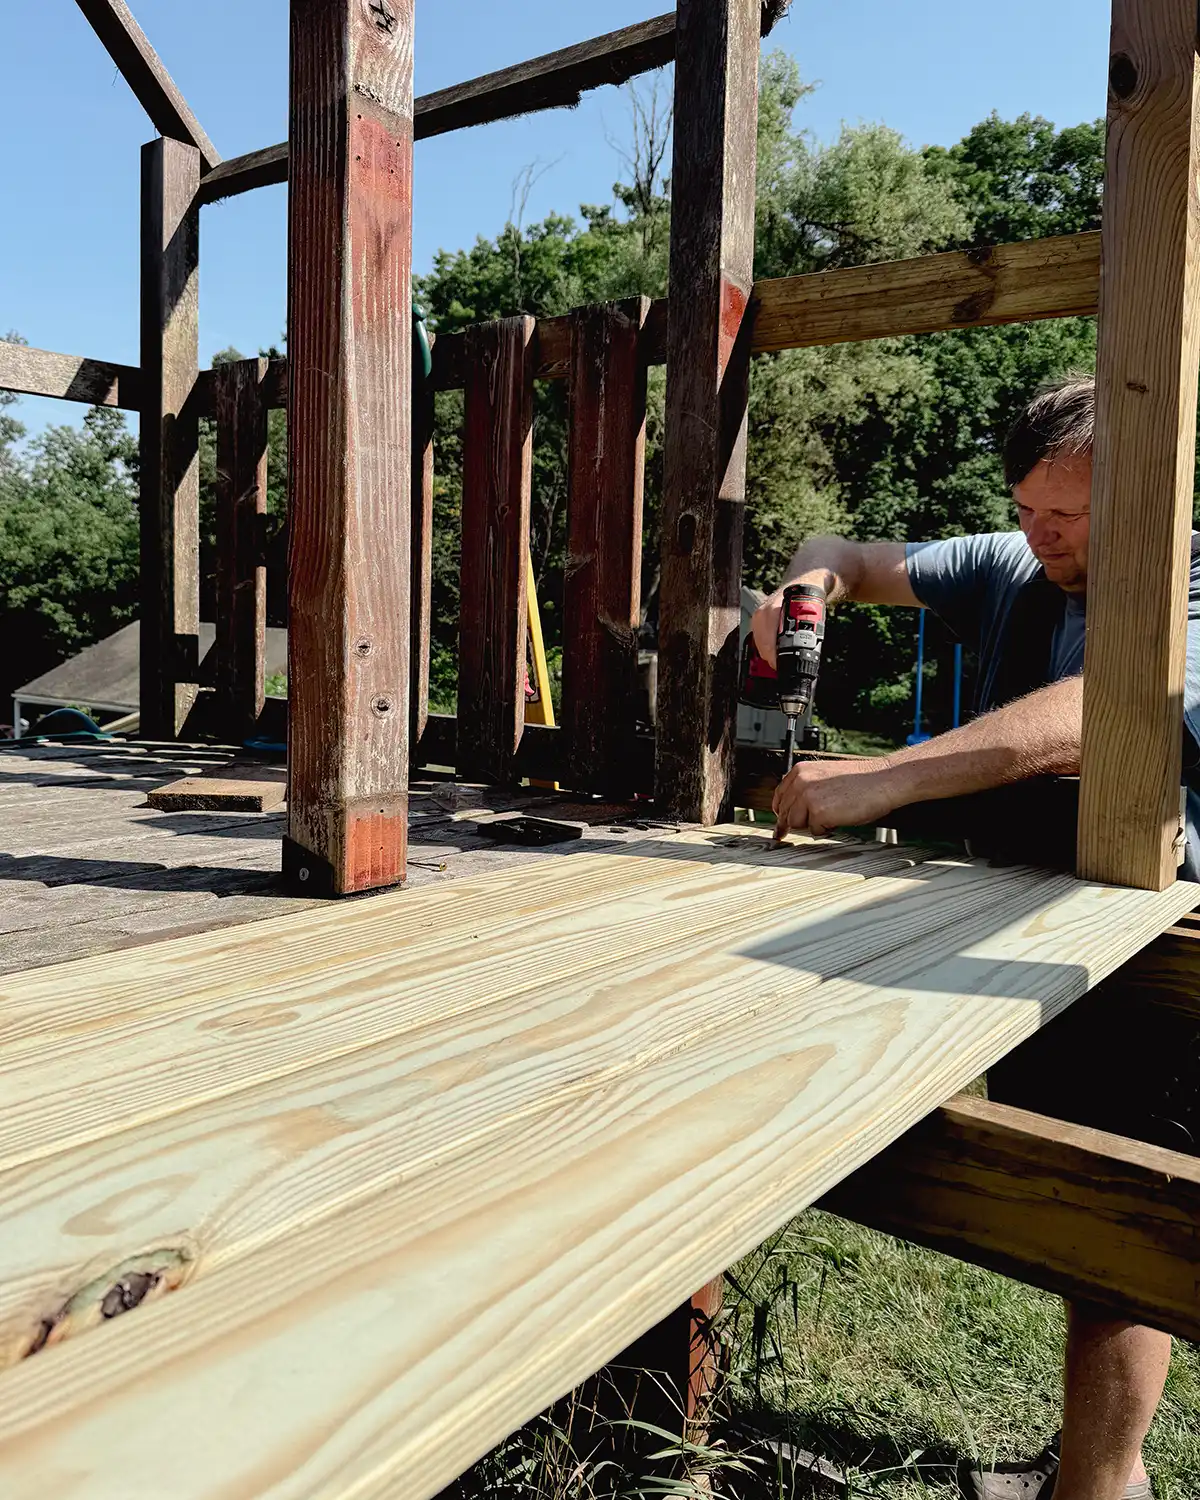
Step Seven: Install Deck Boards
The next step was to install the decking boards. We used 5/4″ x 6″ pressure-treated deck wood which measures 1″ thick and 5-1/2″ wide. Deck boards are special in that they have slightly rounded corners.
To install the deck boards, first measure the total length from the outside edge of the framing to the other. Measure and mark the length on your deck board. Using a carpenter square, draw a straight line across the board. You could also use a straight edge but a carpenter square helps keep lines square and corners at a 45-degree angle. Cut using a circular saw.
Lay the board across the deck framing so the boards go perpendicular to the joists (never parallel to the joists). Screw through the boards straight down into the framing using carpenter or deck screws. Two screws into each board at each joist location are enough to keep the boards from twisting. For example with our project, each board is screwed down six times, with two screws on each side and two in the middle.
Depending on your project you may have to make a notch to go around another post. We had to do this where the posts for the monkey bars were attached to the deck. You can make the notch using a circular saw or a multi-tool can be handy if it’s a super small cut. I think using a multi-tool is the easiest way to make a notch but it’s less clean. Colby prefers the circular saw.
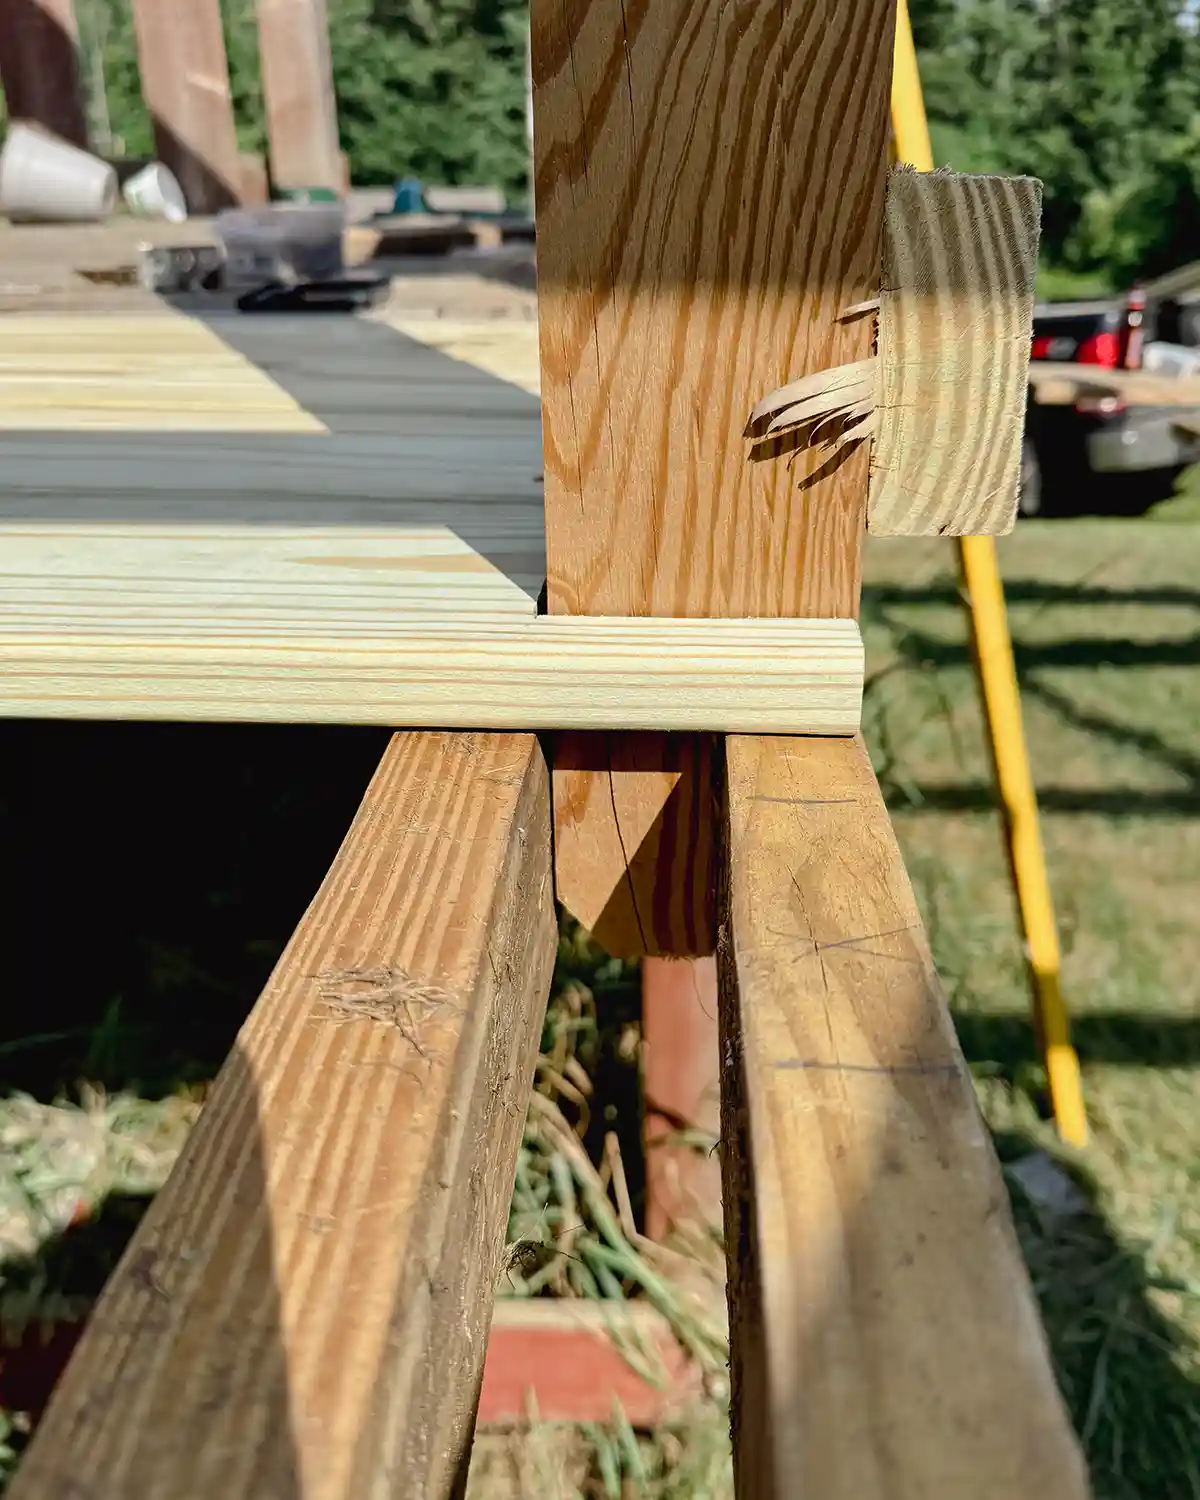
Keep measuring and installing the decking boards one at a time until the whole thing is decked. For all subsequent boards, you don’t need to worry about leaving a gap between the boards. Butt them up to each other loosely. They naturally shrink leaving a small gap between each board.
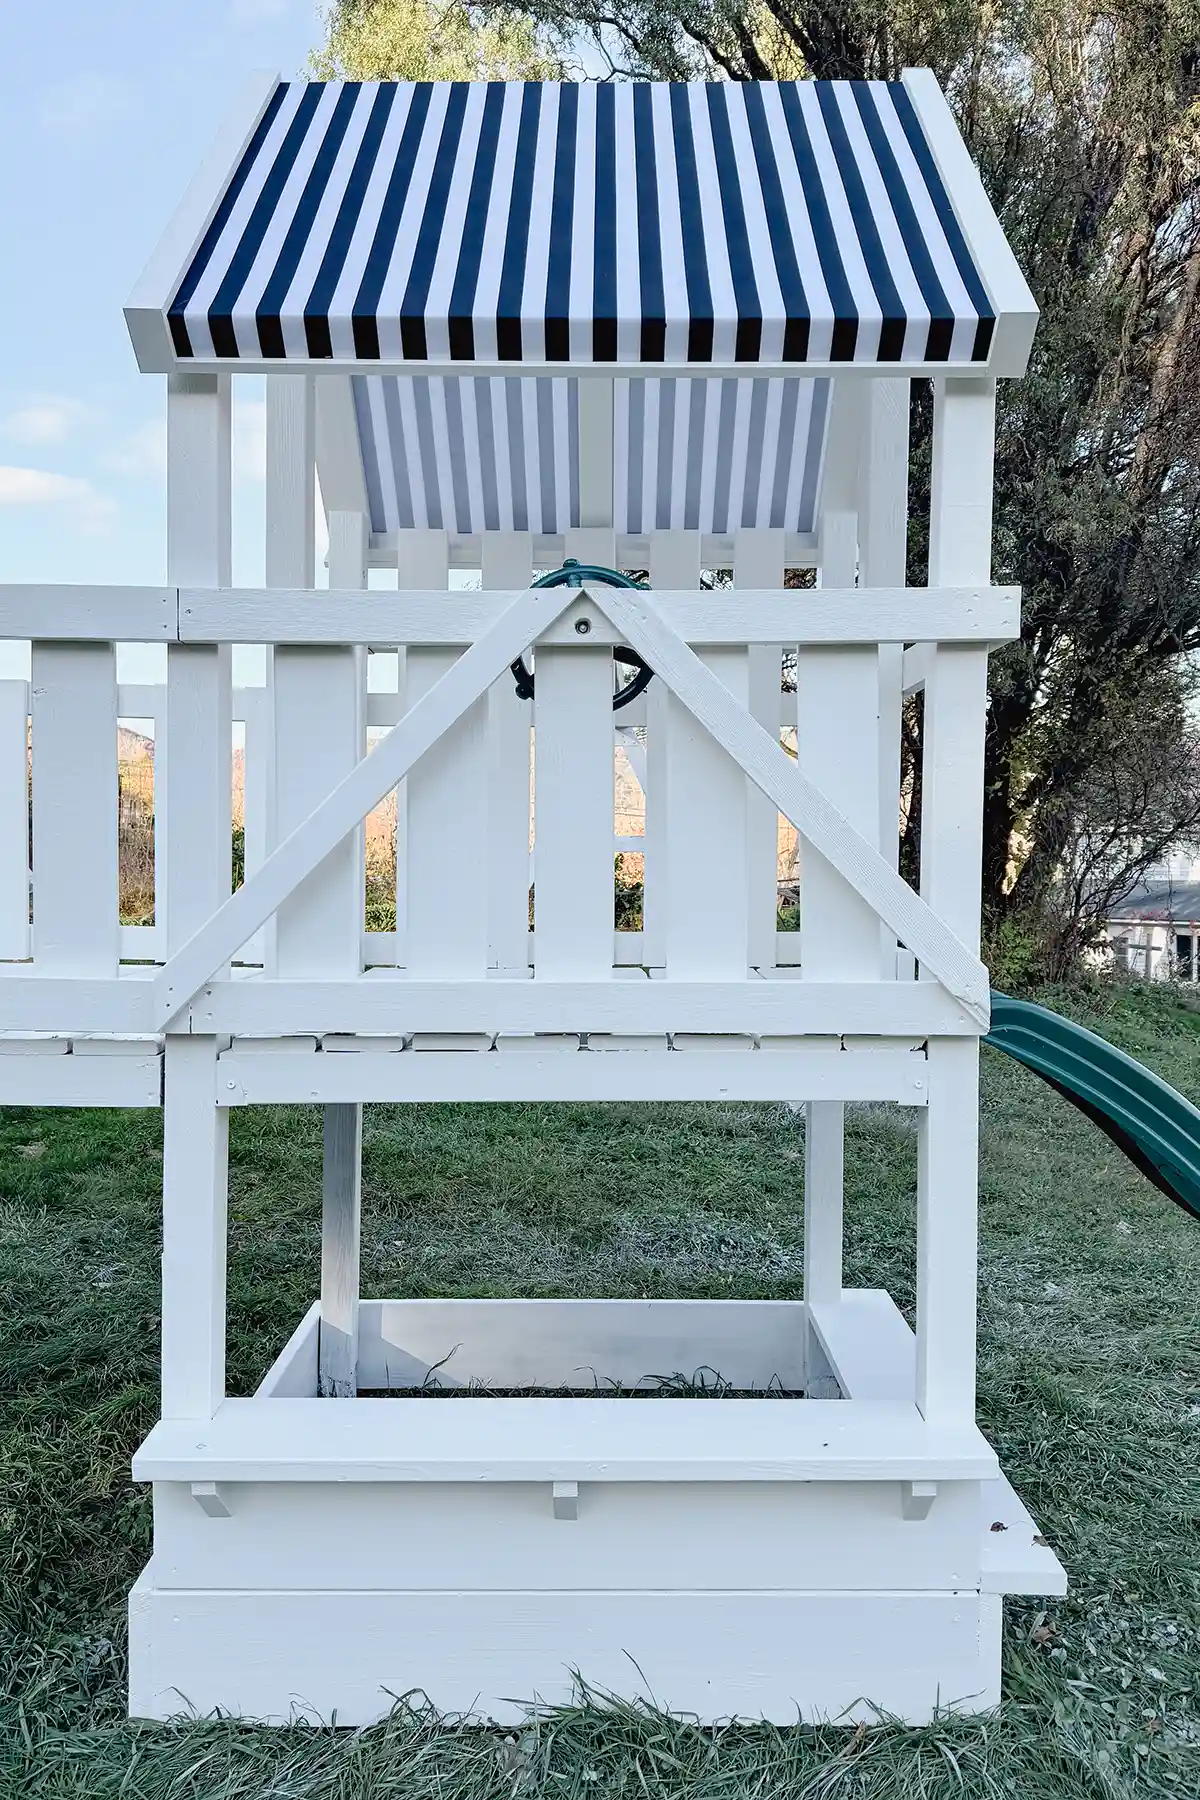
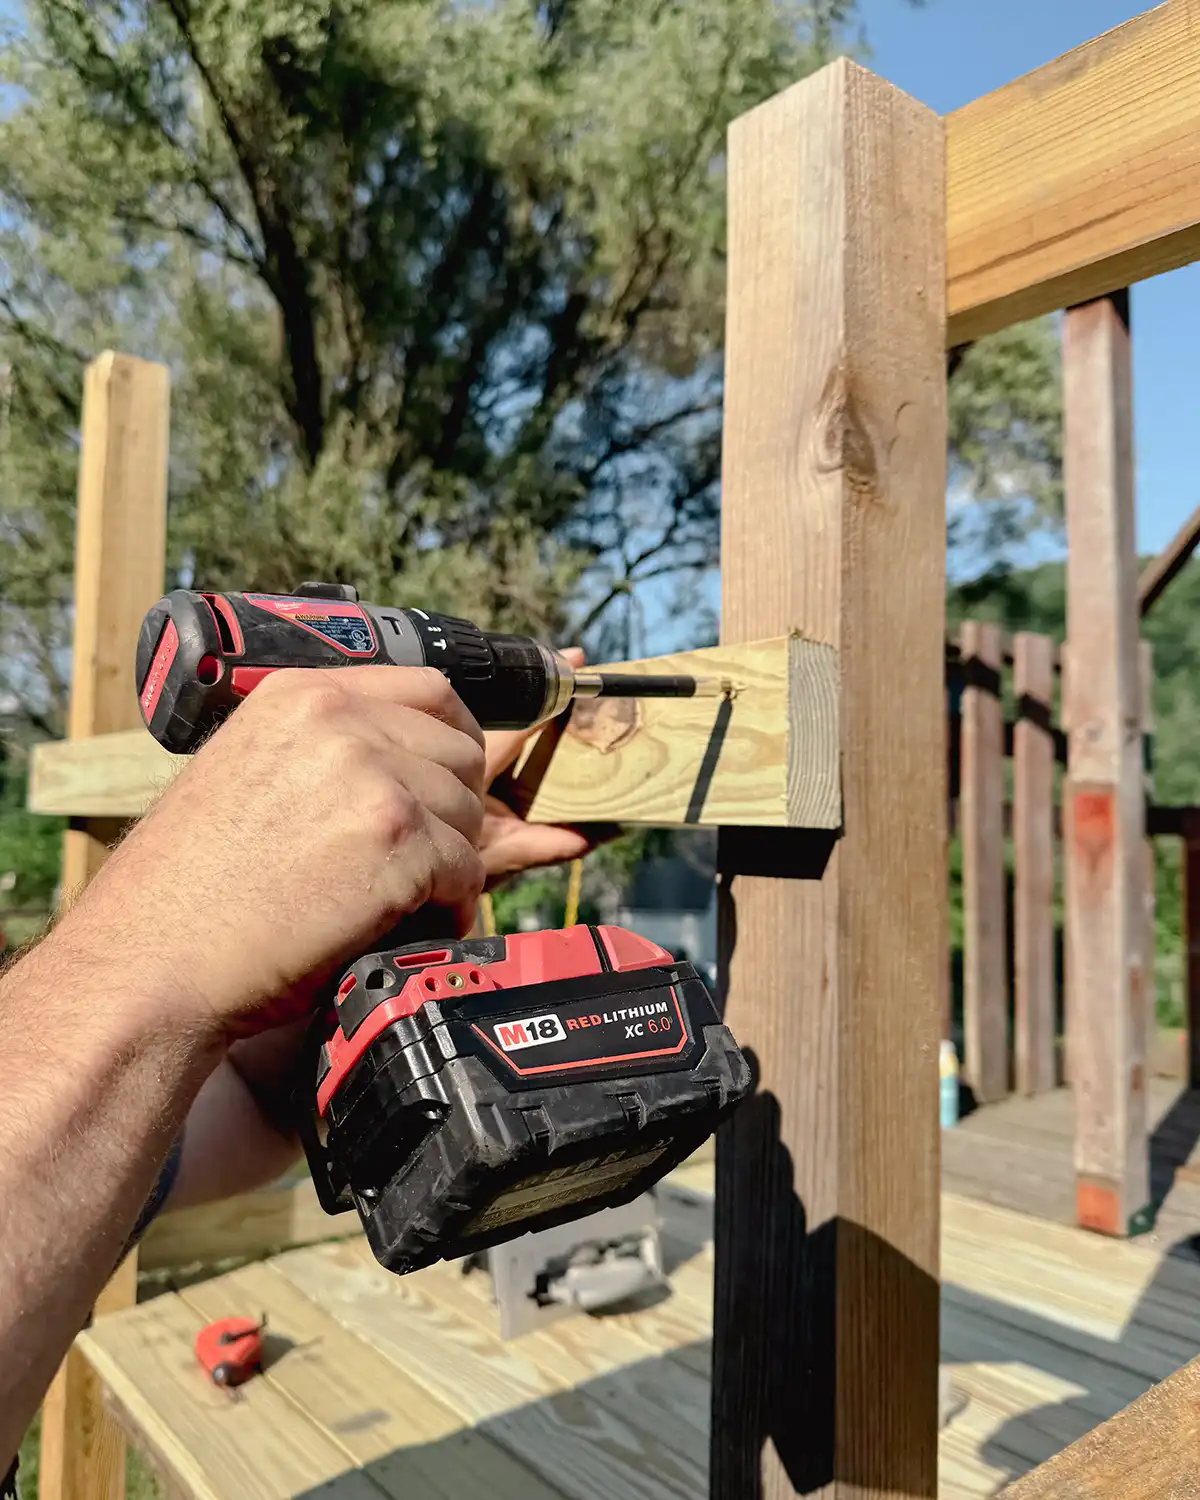
Step Eight: Attach Deck Railings And Balusters
The next step was to build some railings to attach the balusters. Depending on your deck’s height, size, location you live, or other factors, there are different requirements for the height of deck railings. Be sure to do your research for where you live.
For us, deciding the height of deck railings and balusters was simple because we have no local building codes where we live and opted to continue the same pattern of railings and balusters from the existing playground.
First, we installed both the upper and lower railings using 2 x 4s. We measured and cut boards to fit each side, screwing the railings into each post with at least two screws to prevent twisting and ensure stability. The railings should be flush with the edges of the posts.
For the balusters, we used new deck boards and some repurposed deck boards from the old rock wall we originally removed from the structure. Huzzah for repurposing and saving money! We measured and cut each board so the top would sit flush with the railing and the bottom would hover just above the decking. This matched the original structure.
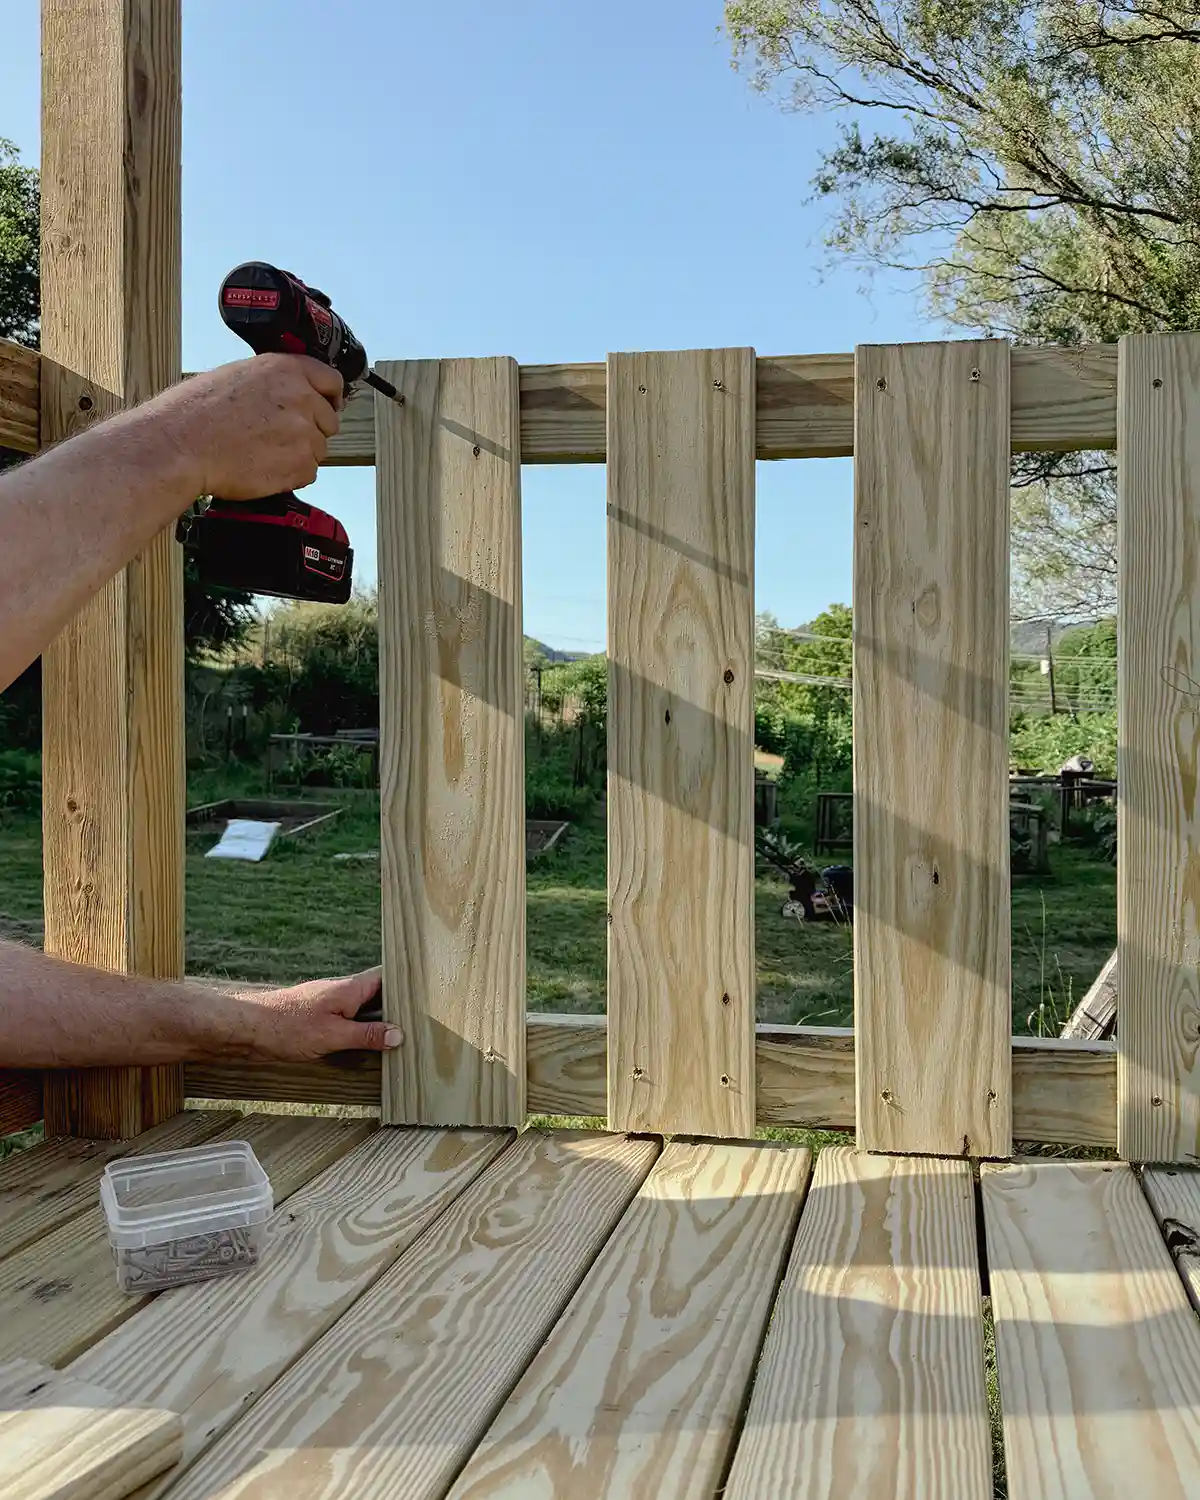
The general rule of thumb for installing balusters is to place them no more than 4″ apart. The reasoning is so kids don’t get their heads stuck between them. Ours are installed just under the 4″ gap so we could use only full boards and keep the spacing even across the width of the deck.
Screw each baluster into the railing using two screws at the top and two screws at the bottom. Drive your screws straight in, located about 1″ from each edge of the baluster.
Step Nine: The Finish Work
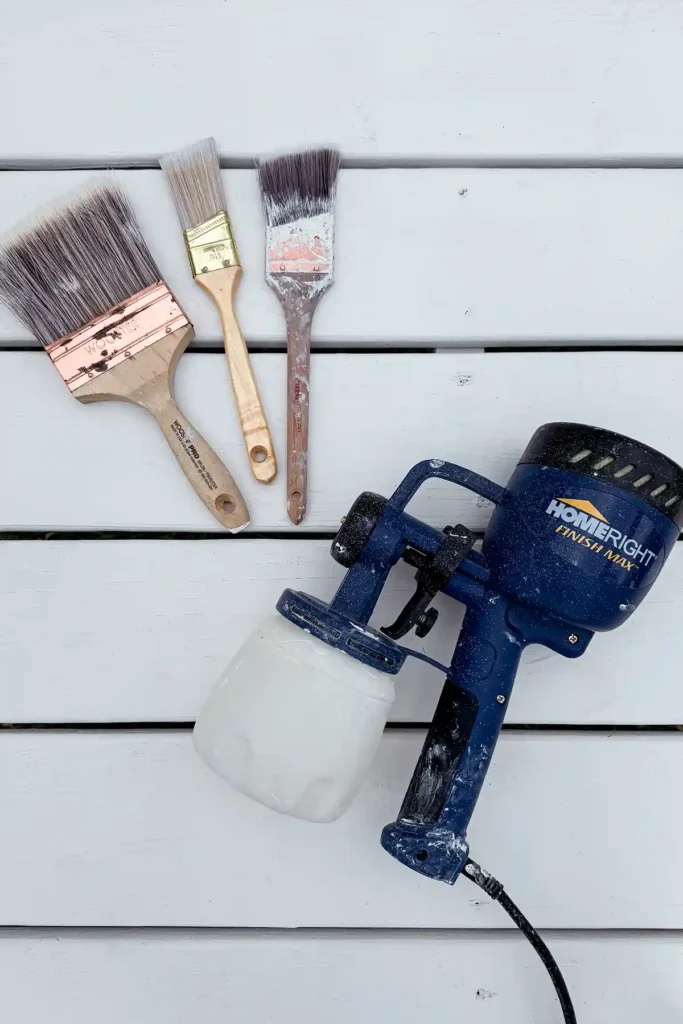
Now that the last step of the playground deck-building process is behind you, it’s time to clean up and start finishing. Fill those holes, stain, paint, poly or even just leave it as is.
Since we were incorporating an existing playground structure into the new DIY playground parts, using both old and new wood, I preferred to paint the entire thing white, the same color as our house. It helped protect the old wood, gave it new life, and helped tie the playground sections together seamlessly.
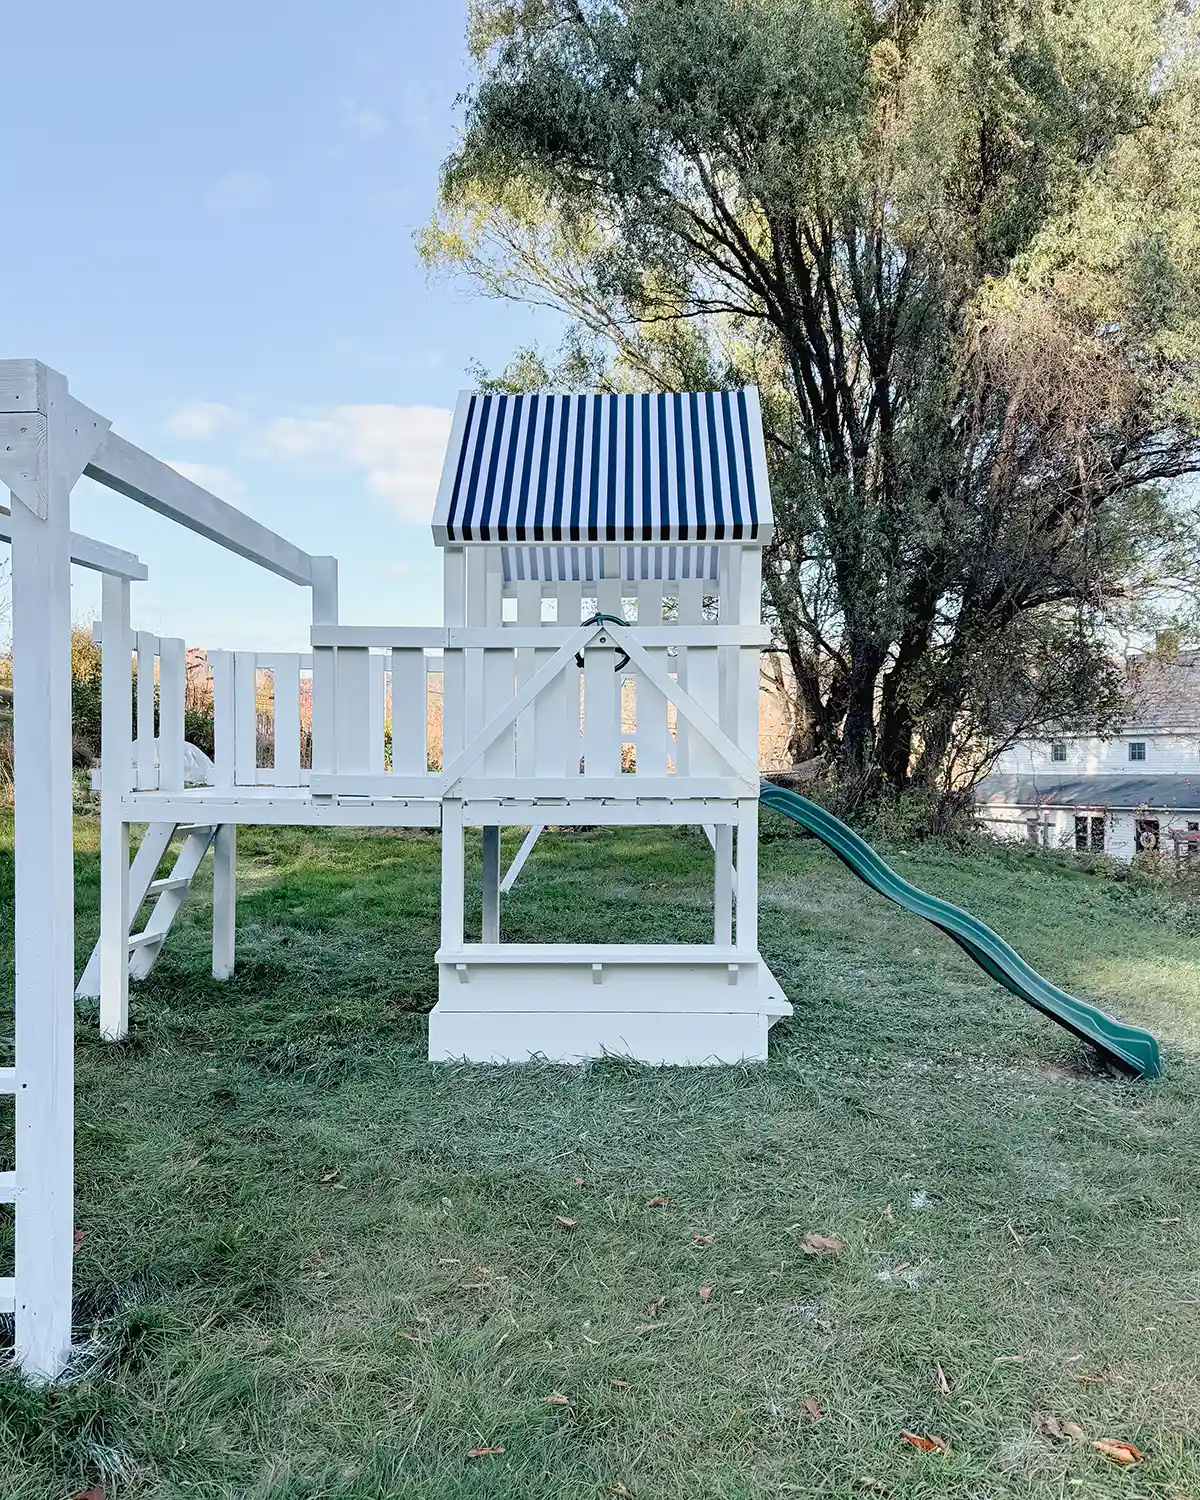
I love how the project turned out, as do the kids. They love having different play areas, especially a covered deck by the wave slide and an uncovered part to play behind it. It’s almost like having an upper deck and lower deck combo but all at a reasonable level.
We still have quite a bit of work to do to finish our DIY playground renovation, which will happen once the snow melts. Things like giving it one more coat of paint, building a sandbox, etc. But we did hang the swings and attach the monkey bars this fall so the structure is fully operational over the winter.
Next week, on our DIY backyard playground tutorial tour, is how to build the deck ladder. Happy building all!
Pssst…hot tip for anyone looking for an old, in need of some love playground to renovate, add a deck, or modify. I highly suggest using Facebook Marketplace. We scored ours as a hand-me-down from cousins but there are tons of playgrounds just like ours for cheap or free. No need to buy all new materials when you can start with a free base and modify.
Psssssst…and if you have any questions on how to build a playground deck or something about our diy playground deck is confusing, please feel free to leave a comment. It’s the easiest way for me to clarify posts.