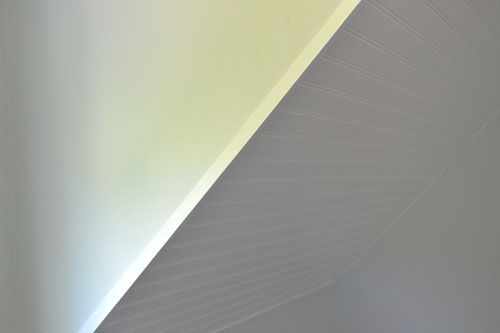
I want some more of it. I tried…so hard…I can’t rise above it. Don’t know what it is but those little gals love it. I like it. I love it. I want some more of it. Bead board, that is. Now that the Tim McGraw intro is over. Now that song is stuck in your head isn’t it?! But yes, it seems that I can’t get enough bead board these days. It’s in our bathroom, on the staircase risers, in the kitchen coat closet, and now it is in our master bedroom. Voila:
We couldn’t resist. We had those slanty ceiling sections, loved the way bead board looks installed on said slanty ceiling sections, and opted to install a few sheets in lieu of simply painting them. And installation was relatively simple…emphasis on relatively. It could have been much simpler if our house wasn’t so gosh darn unlevel. But anyway…here’s the install instructions. First up, measuring and marking a level line where the sheet seams will fall.
One sheet of bead board wasn’t enough for this project. So to make sure that the bead board stays level, Colby used the chalk line to mark a level line on the wall. Normally you could just start installing the bead board from either the ceiling end or the wall end but because our house isn’t level and nothing is square (gotta love an early 1900s house), we opted to start near the middle so either end wouldn’t look too wonky and out of level.
Then it was our usual bead board installation process of first caulking the wall to adhere the bead board sheets to it.
Having a little fun with the caulking:
That’s the date we installed it. See…I told you we had some serious catching up to do in the bedroom! That’s what he said! Haha…sorry mom. Then we tacked up the bead board using the Paslode nail gun.
But in the end, as expected, we had some gappages going on. The gap in the bottom was large enough that we had to add another small slice of bead board to fill it in.
So Colby cut a small piece of bead board and glued and nailed it into place like he did with the larger sheets.
Can you see how much the bead board tapers?! Crazy town! I told you our house ins’t square! So then we were left with a pair bead boarded ceilings.
Then we did our usual song and dance of punching and filling the nail holes, sanding, and priming.
And painting…can’t forget the painting. We went with our usual trim color, Betsy’s Linen by Valspar in a high gloss, enamel finish.
But after painting all the bead board, we still had some problems. A few problem children in corners and seams. This is one of the gaps between the bead board and the ceiling.
And then here is the corner gap. You could almost lose a small child…or a Goose…in one of those gaps or crevices.
Even before we installed our first sheet of bead board, we had anticipated needing to utilize some trim pieces to cover up the crookedness and unevenness that was inevitable with this project. To cover the corners, Colby made some trim pieces out 1 x 4 pieces of scrap pine that had been lurking in his workshop. Hooray for free trim! He just milled it…essentially cutting out the inside corner until it would fit over the 90 degree seam.
Then he also installed some homemade trim pieces at the top and bottom of the bead board ceiling. These pieces were also made from scrap 1 x 4 pine that he cut down into very thin strips.
Here’s a closeup of the two different trim pieces.
Then it was time for some nail hole punching, trim hole filling, sanding, priming and painting. Throw in a couple dives off the later (yes…I have been miss accident prone these last few weeks and have taken two…count ’em…two nose dives off the ladder working in this room…this project is cursed), and we have ourselves some finished bead board ceiling slants in our master bedroom.
Aren’t they purdy?! I think it adds a little bit of dimension to the room and some architectural interest. That and I’m just madly in love with bead board. It just keeps whispering sweet nothings in my ear. Not gonna lie…I kind of want to make out with it. Earmuffs Colby….earmuffs.
Here’s a closeup of what the trim pieces look like all finished and painted up.
And then the view from afar. Can’t you just see the window trim in this room now?! I can and it’s dreamy! Wait…you’ll be able to see it too if you can hold on for one more day. I’ll be back tomorrow with a little trim post.
And in real time the room is ready for moving into. But in blog time we’ve got a little catching up to do until then. Like window trim, door installation, floor painting and baseboards. Oh my! That’s music to my ears.
Pssst…Guess what?! Only 25 more days until our wedding! Woot woot! Sorry…couldn’t help myself. It’s so exciting!


