Do you wanna build a bookshelf? Sing it with me…to the tune of “Do You Wanna Build A Snowman.” Bring the lumber down the haaaalllllllll. Sorry. We are full-on in our Frozen era over here, and I just could not unhear it. And now you can’t unhear it either! But seriously, do you want to build a bookshelf? Specifically, a DIY low bookshelf? If so, today’s post covers the free plans, a materials list, and a tutorial for how to build a long, low bookcase.
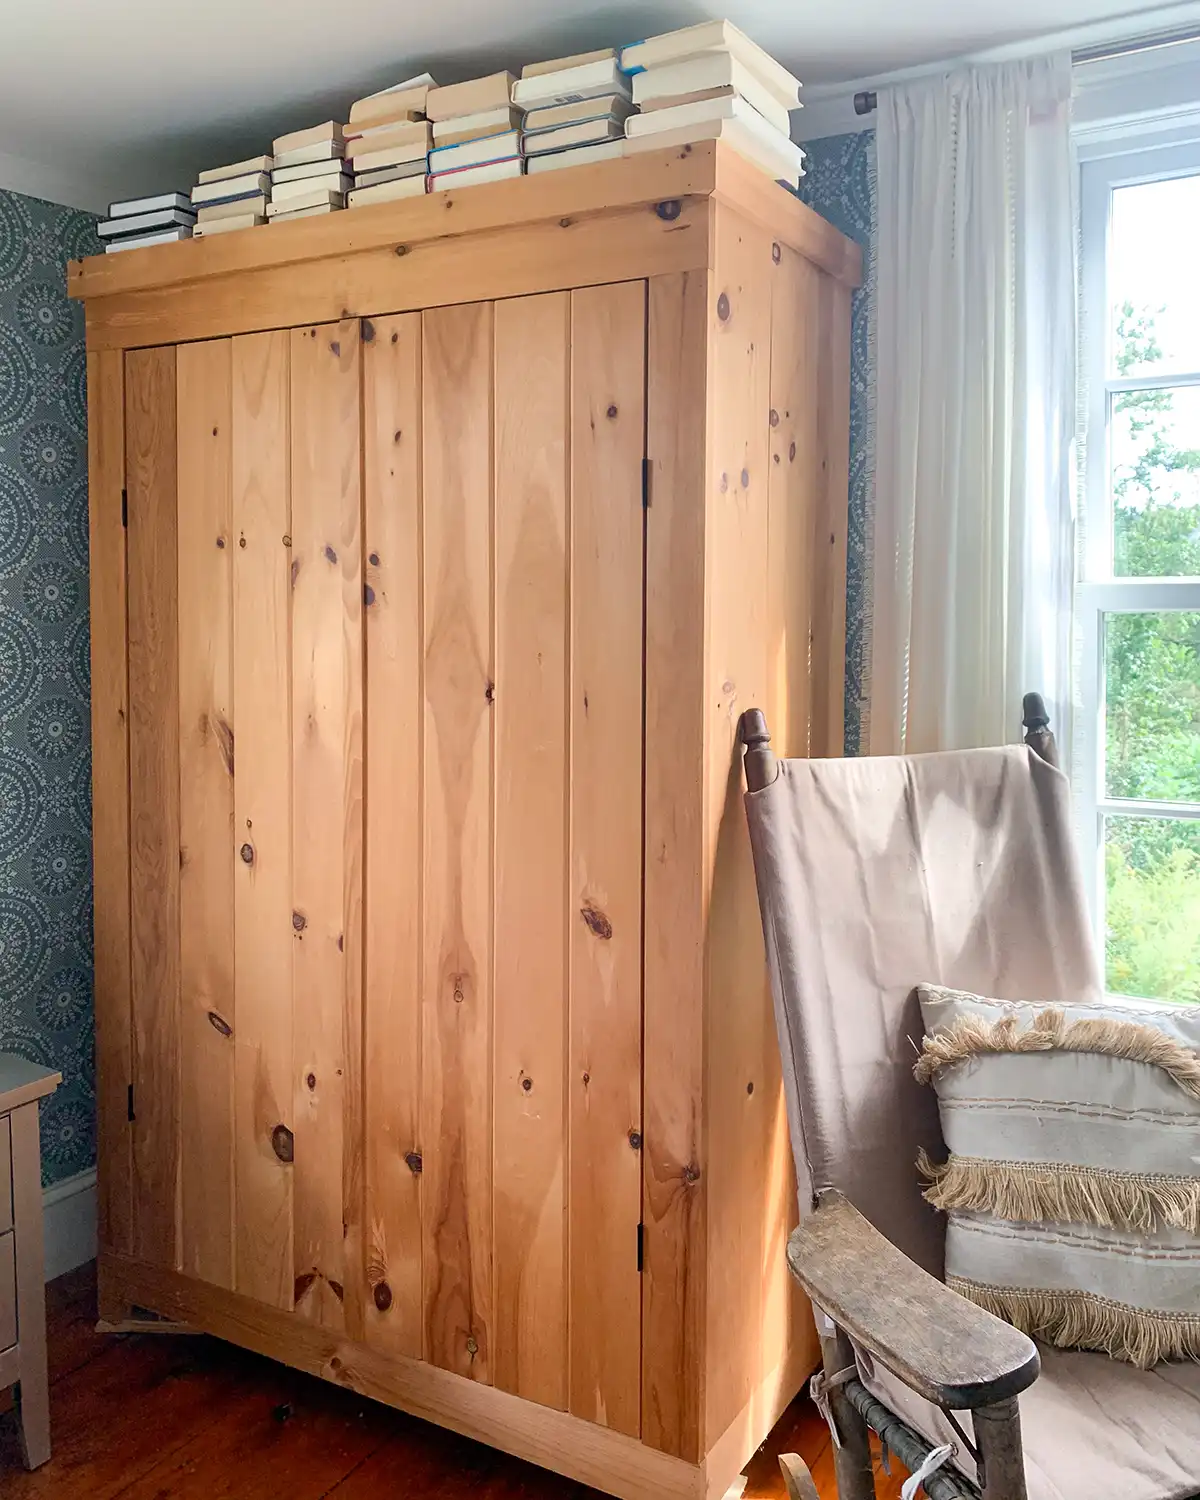
To preface this post, the skill level required to build it is medium-low, especially since we’re using chunky, solid wood framing lumber for a rustic, heavy-duty bookcase suitable for kitchen storage. But I’m confident you can do it. All skill levels are welcome here! If you can use a drill and a saw and are moderately accurate with a tape measure, you can build these shelves. The plans are so forgiving that when we made one of the built-in shelves just a little too short, we opted just to leave it as is to save on buying more wood. The rustic look is forgiving, and it looks fine, especially once we stained it dark.
Also, this is how we decided to build the shelves. There are many different ways to construct DIY shelves, but this tutorial is how we chose to do it. The decision was for aesthetics and for what we planned to store on the shelves.
Let’s dive in.
Free Bookcase Plan
First up, the SketchUp plans for the low bookcase. We knew we needed a custom design to specifically fit the space in the kitchen. So if you need your overall design a little bit bigger or smaller, adjust the shelf plan as needed.
Also, I’m still not 100% confident in my SketchUp skills, so if you notice anything weird, please let me know. Leave a comment or shoot me an email.

The simple design took into consideration optimizing lumber costs. The current design is 14″ deep, but we originally wanted it to be 18″. We modified it because the store didn’t have 2″ x 10″ x 8′ framing lumber, the ideal size for our project. They did have 12′ boards, but we couldn’t fit those in the truck without a rack, plus we would be wasting alot of material and adding additional cost. To save money, we adjusted the plans. A little bit of creativity and value engineering never hurts!
DIY Bookshelves Tutorial
Now for the building part: let’s build our DIY bookshelf! We’ll start with overall dimensions, a list of materials and tools, and then the step-by-step instructions.
Overall Dimensions
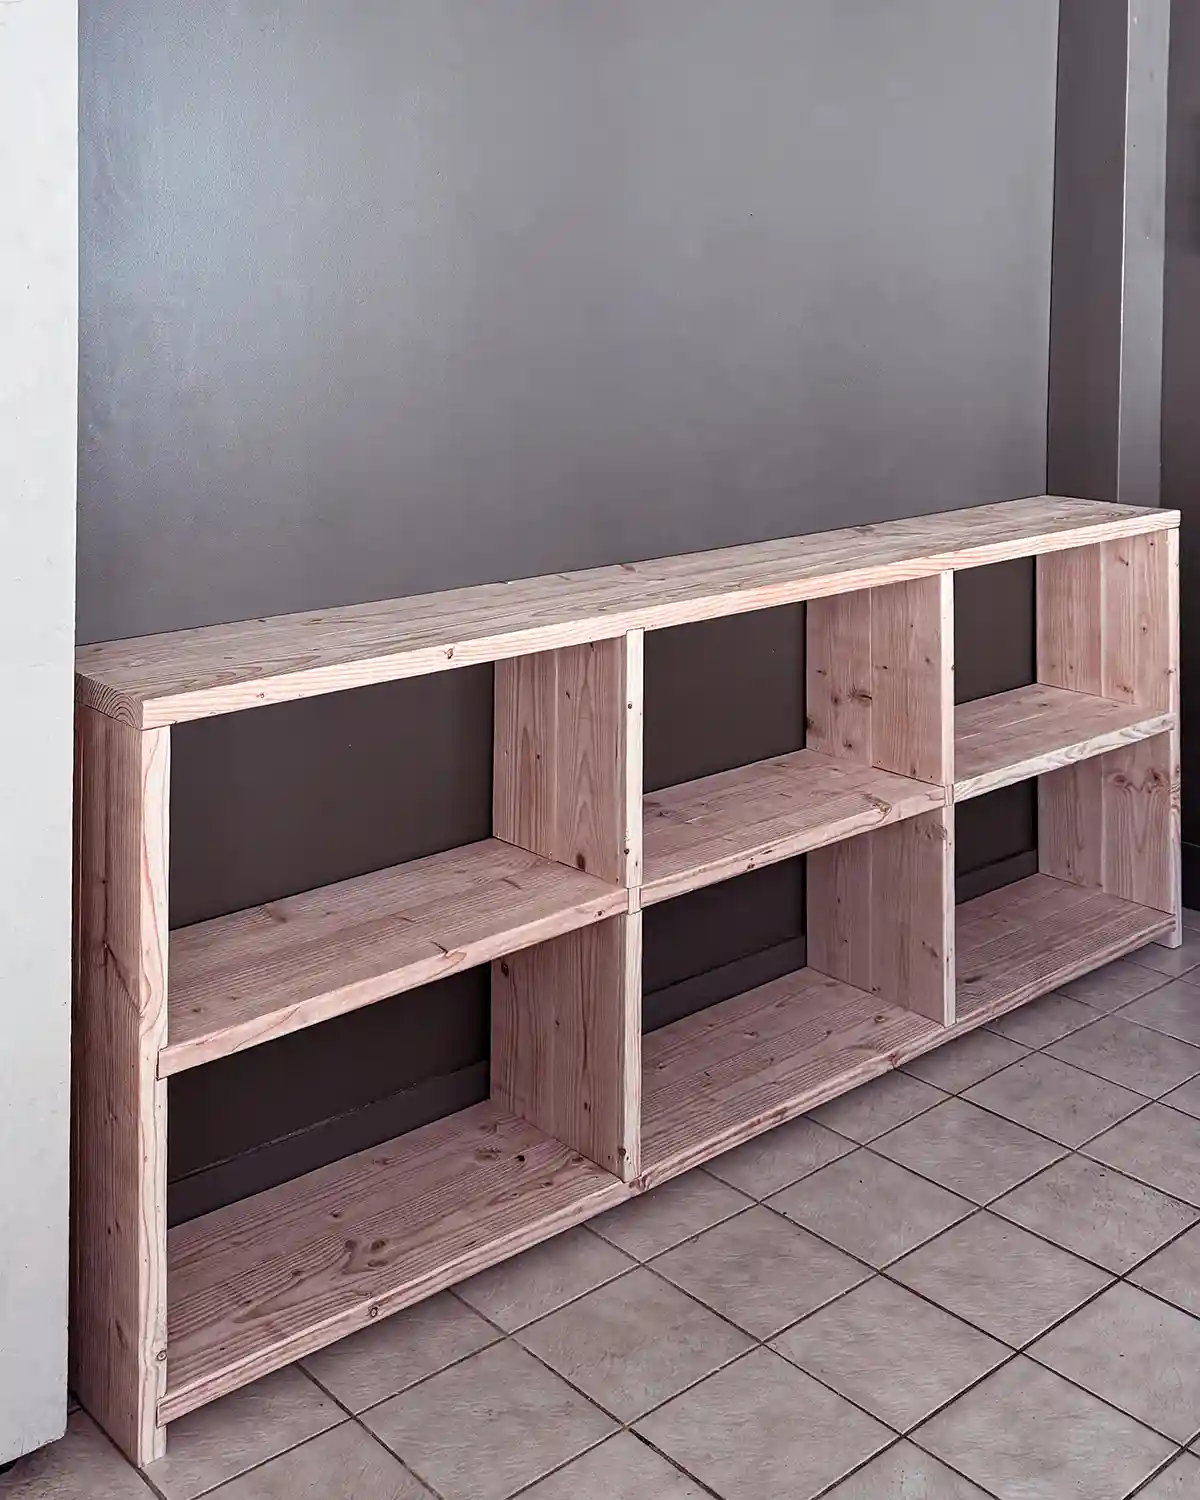
To give some perspective and help you adjust the plans to fit your space, the overall dimensions of our finished product are 8′ long by 38″ high by 14″ deep. Each of the six shelf openings measures 30″ x 16″. There is no back panel to the shelves, so there’s a little leeway in the size of items it can hold.
Supplies
- (10) 2″ x 8″ x 8′ Fir Framing Lumber Boards (Home Depot)
- 1-1/4″ Pocket Screws (Home Depot)
- 2-1/2″ Trim Head Screws (Home Depot)
- Wood Glue (Home Depot)
- 80-Grit, 120-Grit, and 220-Grit Orbital Sanding Discs (Home Depot)
- Stainable Wood Filler (Home Depot)
- Pre-Stain Wood Conditioner (Aubuchon)
- Interior Wood Stain (Aubuchon)
- Finishing Top Coat (Aubuchon)
Tools
A note on cutting and saw selection, because the right power tools make for an easier job. If you have a table saw and a miter saw, which this tutorial uses, cutting the boards is much easier. If you only have a circular saw, you can still build this project. We use a table saw to make a long, straight cut, ripping down one edge of a board. There are various ways to use a circular saw to cut long boards, and you’ll find many tutorials for it on YouTube.
- Circular Saw or Table Saw (Home Depot)
- Miter Saw (Home Depot)
- Cordless Drill (Home Depot)
- Kreg Jig Pocket Hole System (Home Depot)
- Screwdriver Bits (Home Depot)
- Orbital Sander (Home Depot)
- Wood Chisel (Home Depot)
- Large Wood Clamps (Home Depot)
- Rubber Mallet (Home Depot)
- Small Paint Brush or Foam Brush for Glue (Home Depot)
- Small Paint Brush for Stain and Poly (Home Depot)
Step-By-Step Instructions
With your lumber and tools on hand, it’s time to build this wooden bookshelf!
Step One: Rip The Boards
Every part of the bookshelf is made by attaching two boards together. The top of the bookshelf, the sides of the bookshelf, and even the shelf pieces. Ideally, we would use one solid piece of wood, but a board of that size is expensive, so we’re using two smaller ones and joining them together.
Since we’re using framing lumber, which has rounded edges, the first step is to rip one side of each board down. This way, when we butt the two boards together, they will sit square and flush. Table saws are great for this, but if you don’t have one, there are ways to make a circular saw work.
Set the guide of the table saw so you’re just barely shaving off the edge of the board. You want to cut just the rounded edge off the board. Then run one side of the board through the table saw, ripping off that edge.

Step Two: Make All The Cuts
This project goes fast if you start by cutting all the boards first. Here’s the cut list:
- (2) 8′ boards (top)
- (2) 94″ boards (bottom)
- (4) 36″ boards (ends)
- (4) 34″ boards (middle vertical)
- (2) 30-1/2″ boards (middle, middle shelf)
- (4) 30-3/4″ boards (left and right, middle shelves)
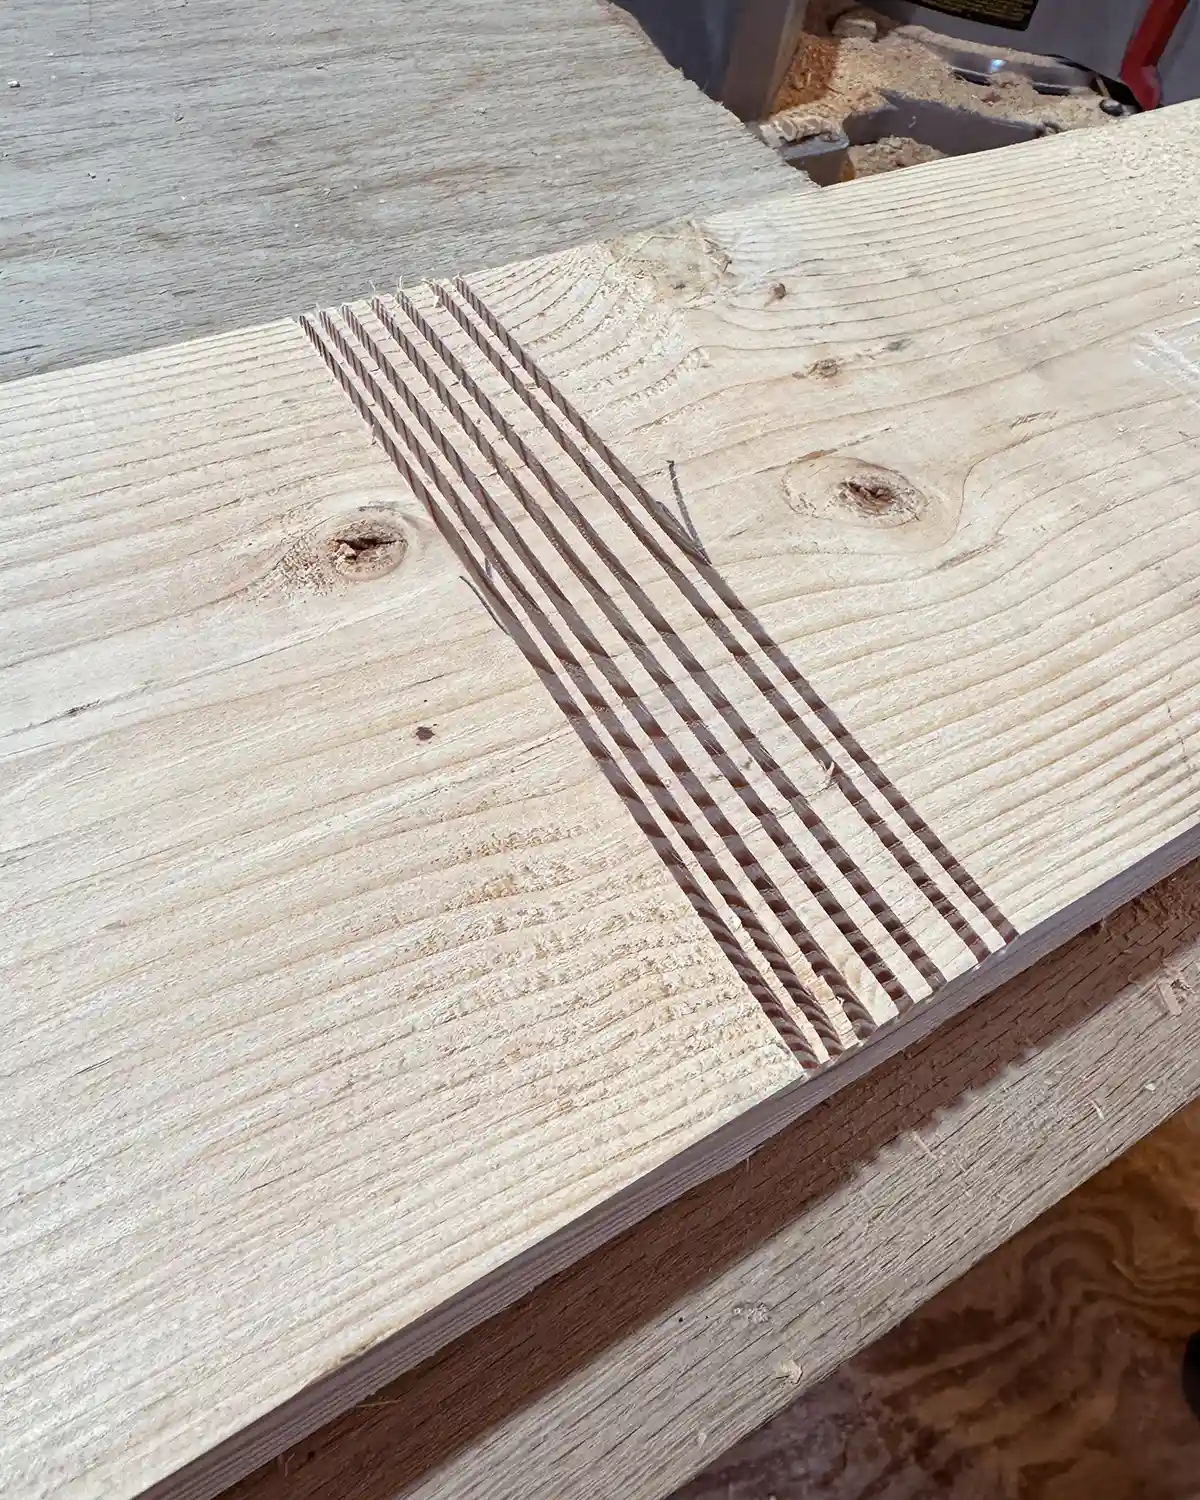
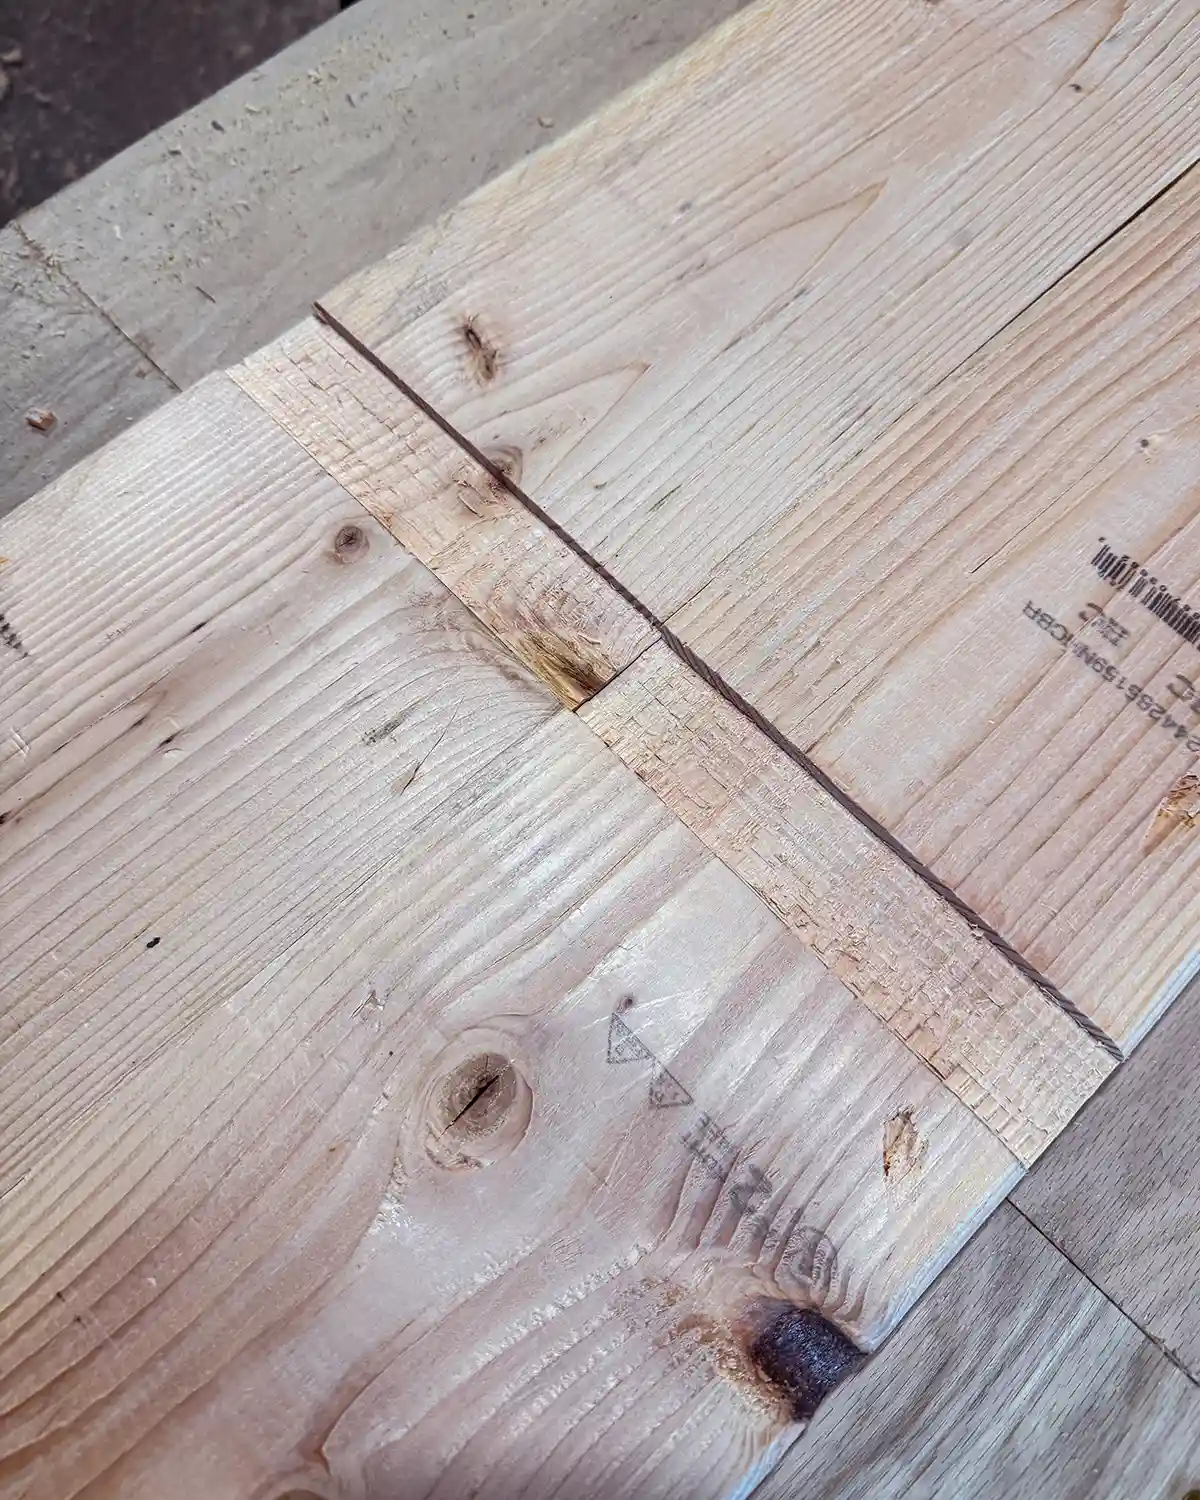
Step Three: Make Grooves In The Boards
The way we constructed the bookcase meant we needed grooves in the boards where the shelves would slide into. This type of assembly is more technically called making dado joints.
The boards we cut grooves into included the top and bottom boards (for the middle two vertical boards), the left and right vertical ends (for the bottom and middle shelves), and the middle vertical boards (for the middle shelves).
To make the grooves for where the boards would slide together to form a joint, Colby started by measuring and marking every board that needed to be cut.
Then he made a series of 1/4″ deep cuts using the miter saw, making sure the first and last cuts allowed for an opening wide enough for the width of another board to settle into. Here’s how to make the cuts with the saw.

Seven cuts were the sweet spot. Like so.
Then, using a wood chisel, chipped out the wood to create the groove. Here’s the chiseling process.
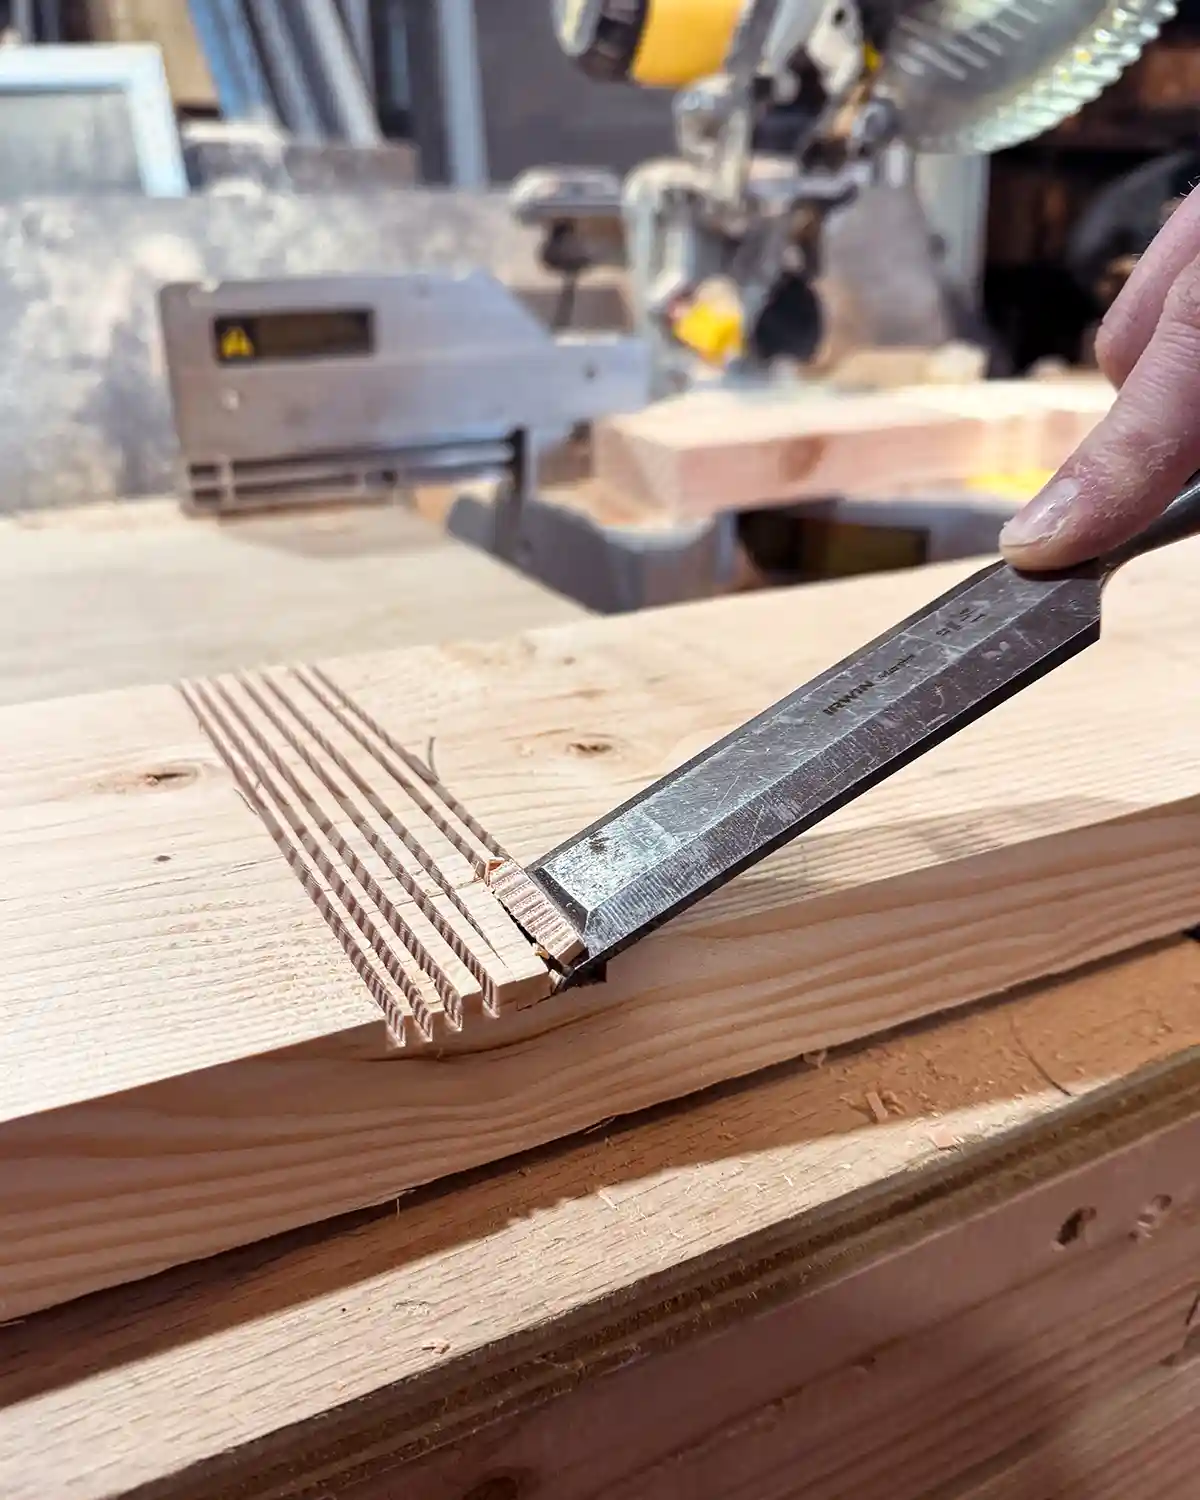
And here is the result after chiseling out the big pieces. To get the best results, keep chiseling a little here and there until the groove is nice and smooth and even. Here’s a progress shot before fine-tuning the chisel work.
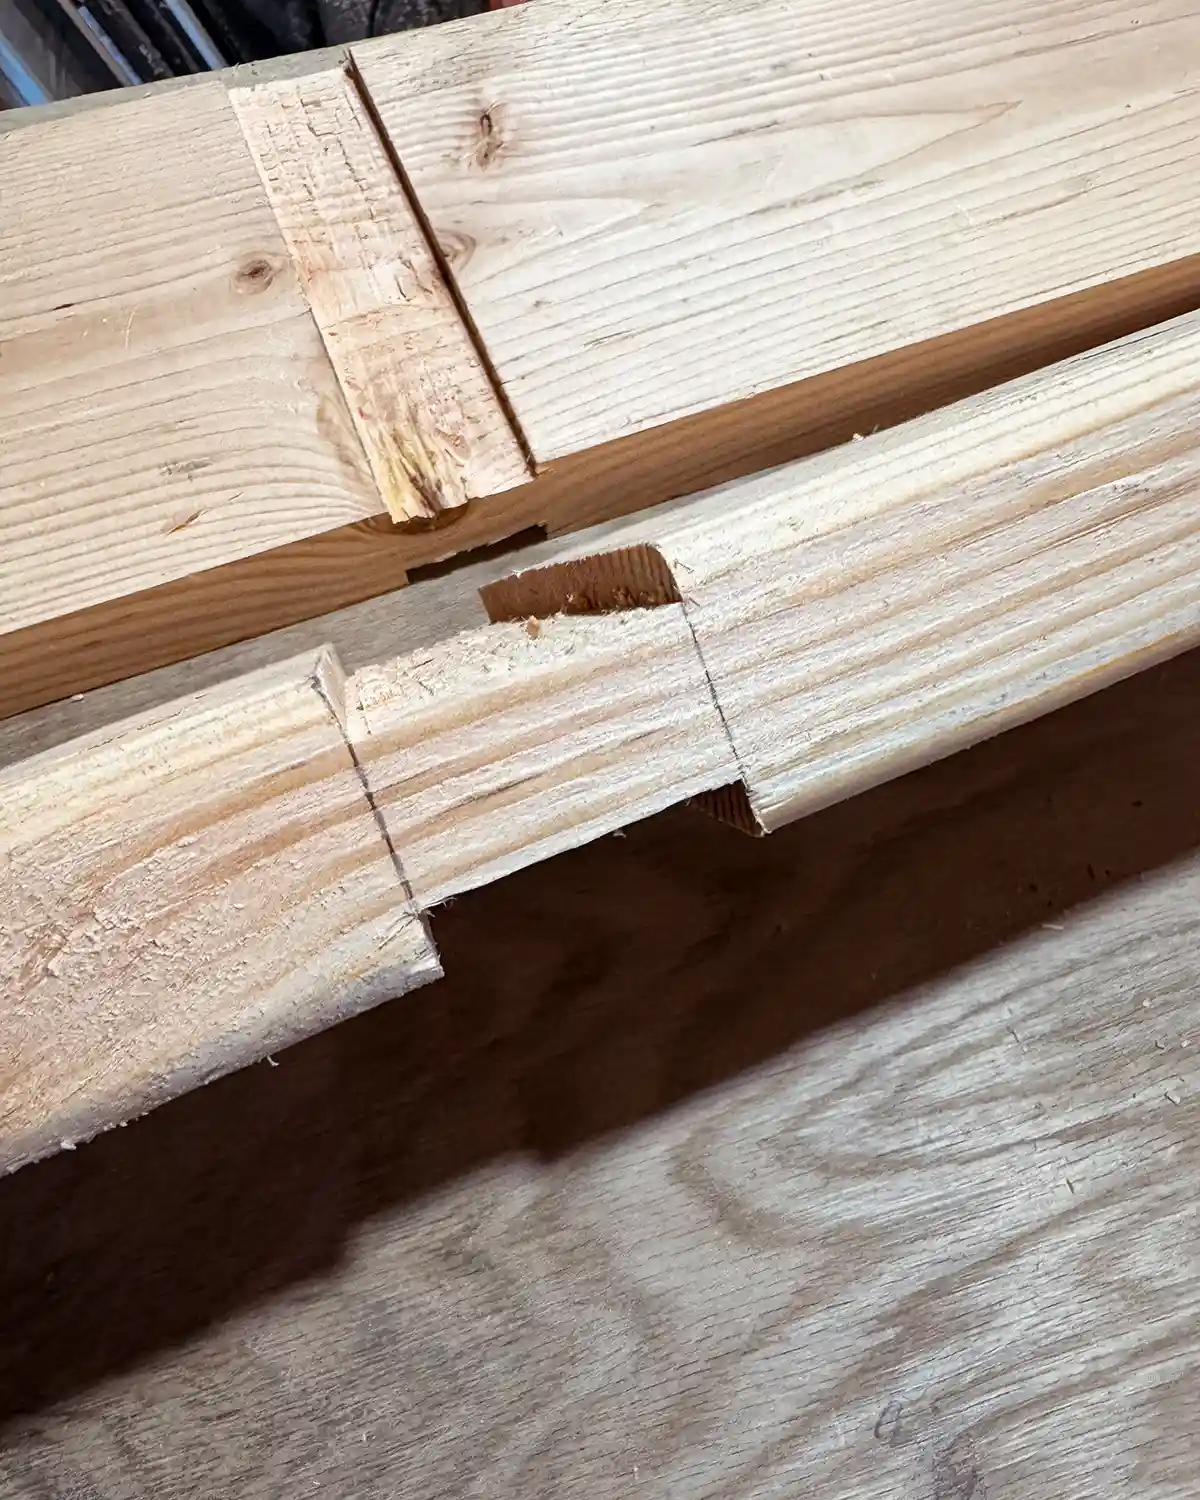
Here’s a visual of the assembled shelving unit so you can see where the dado joints are. It’s one of those a-picture-is-worth-a-thousand-words type of situations.
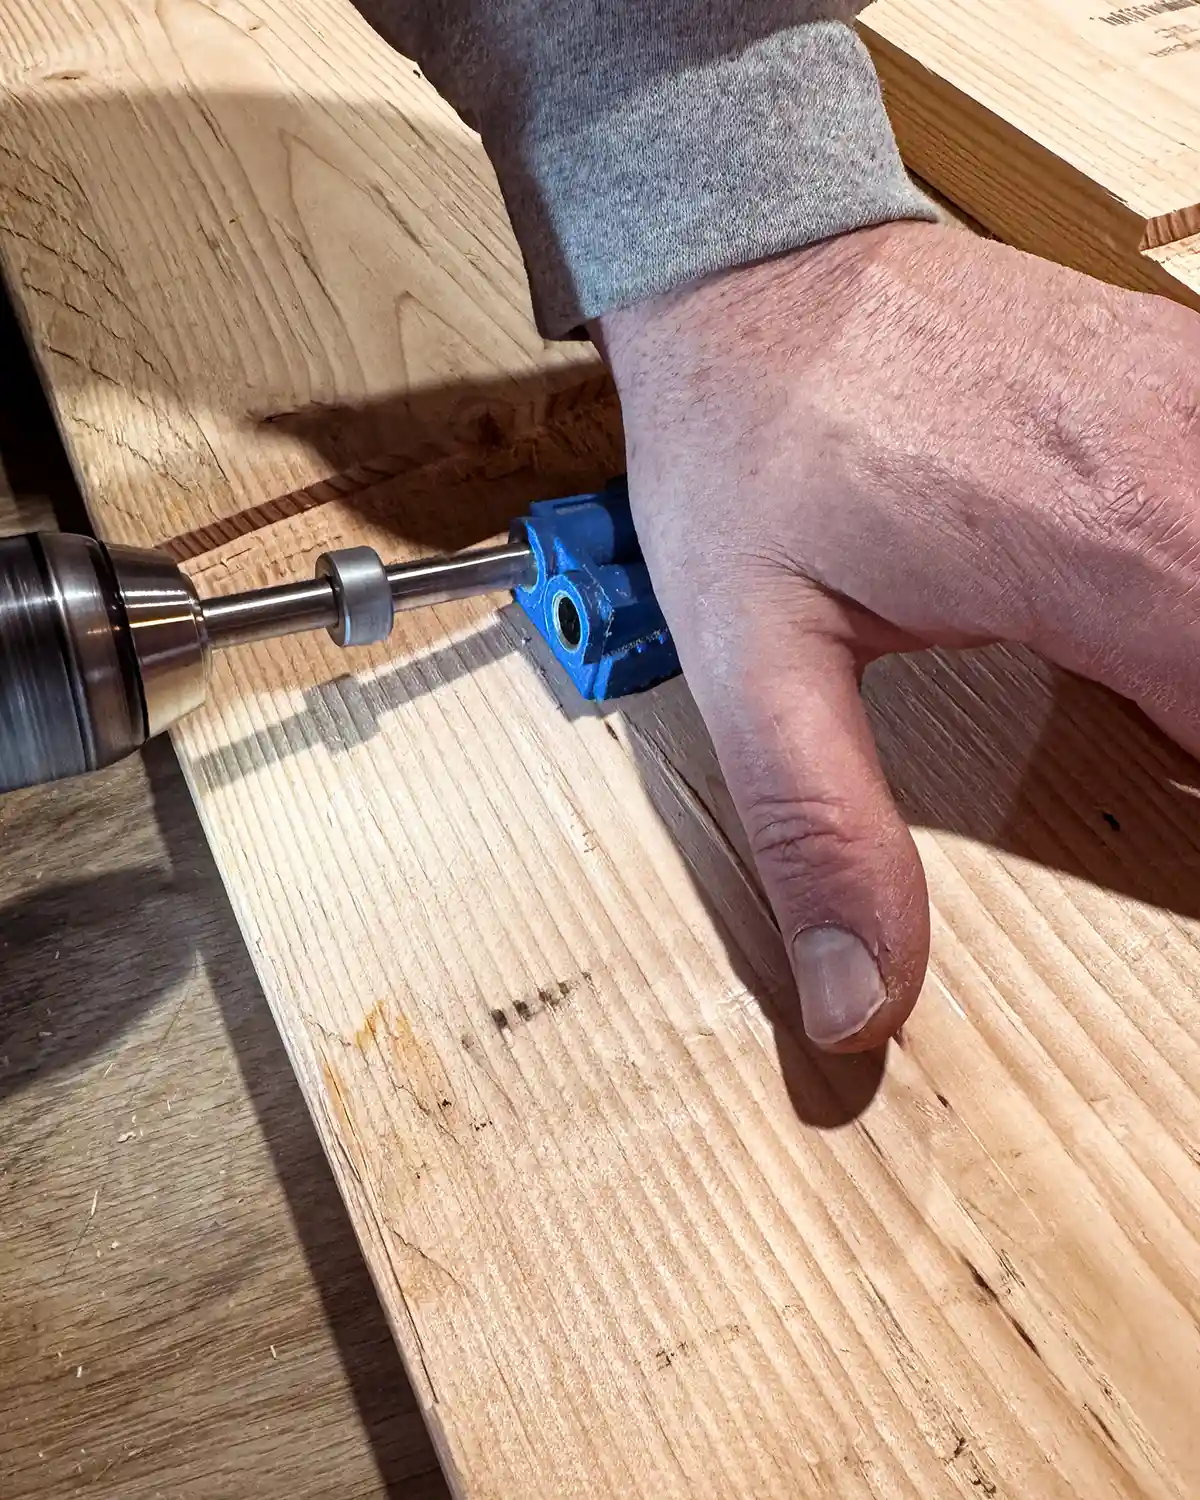
Step Four: Attach The Shelf Boards
Up until this point, we’ve been working with each board individually. But each shelf is made up of two boards to get the bookshelf depth we were looking for. So with this step, we’ll be joining two boards together using pocket holes to form each shelf.
First, we laid two identical boards onto the workbench and lined up the grooves. This is a great time to check if you made all your cuts correctly.
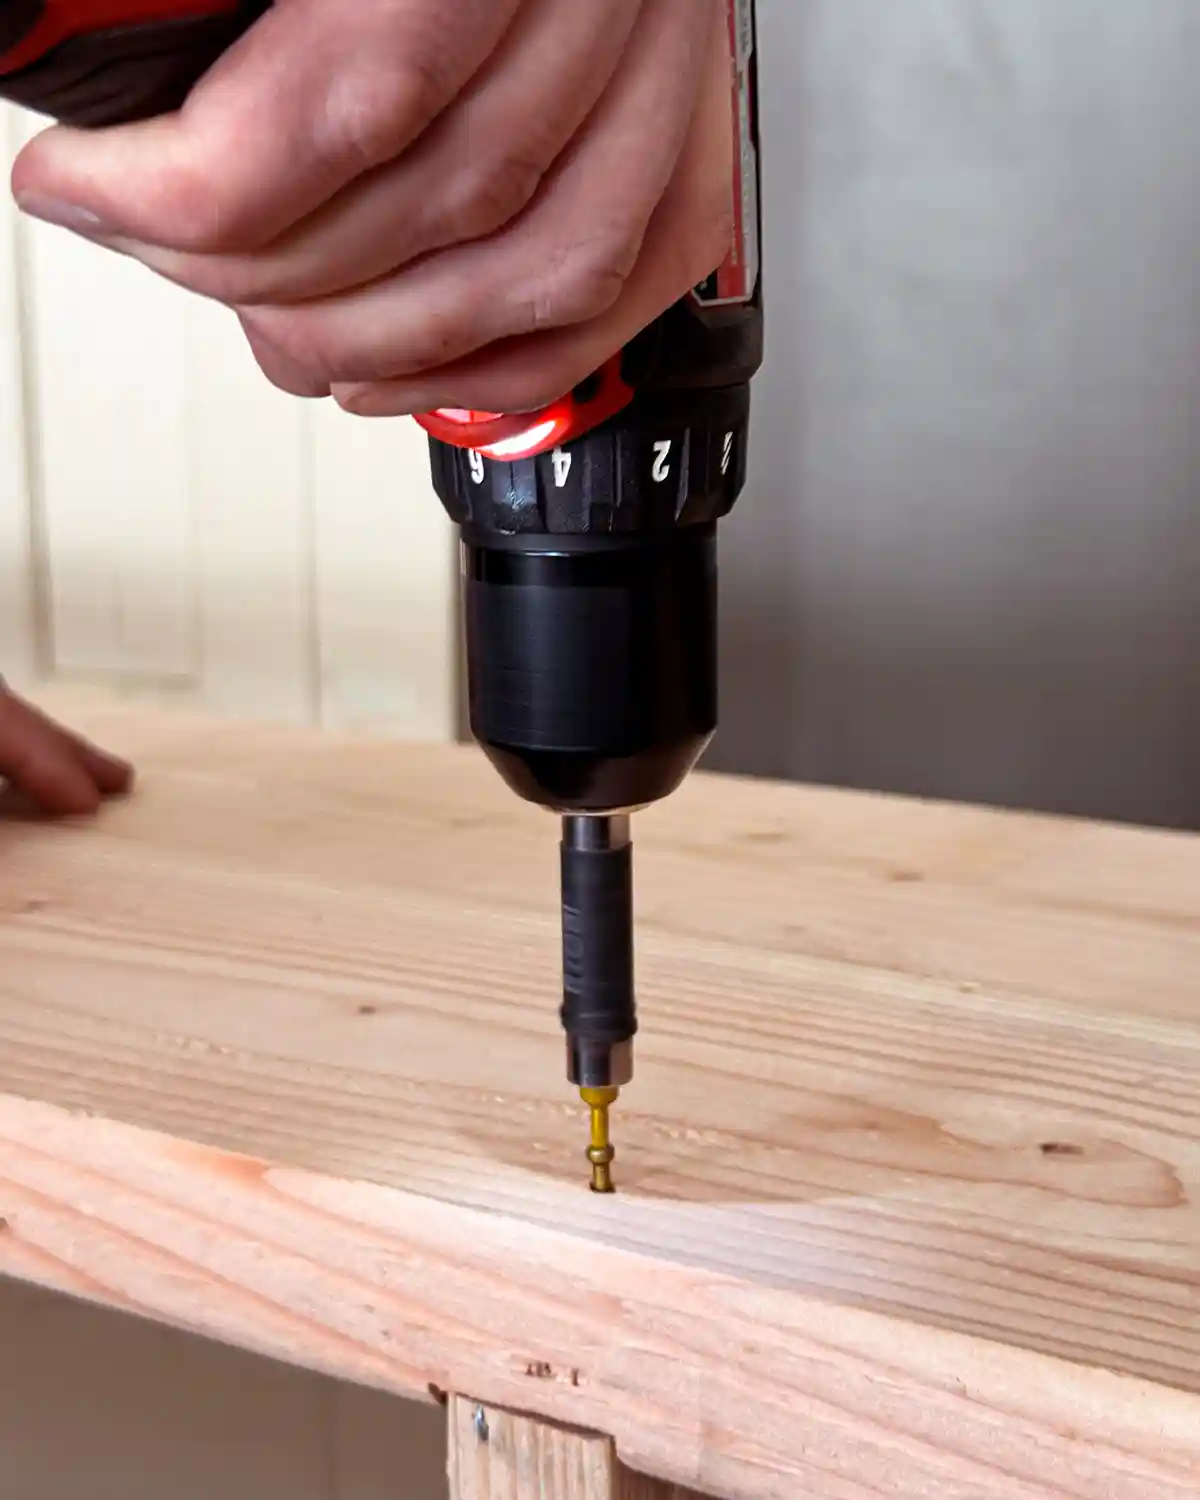
Then, using a Kreg jig and a cordless drill, made all of the pocket holes. We went with one pocket hole every 12 inches or so, making sure there was one adjacent to each of the grooves that will form the shelf joints. There are also pocket holes on each non-visible end. More specifically, on the ends of boards that would be inserted into the groove. If you want more structural stability, add more pocket holes.
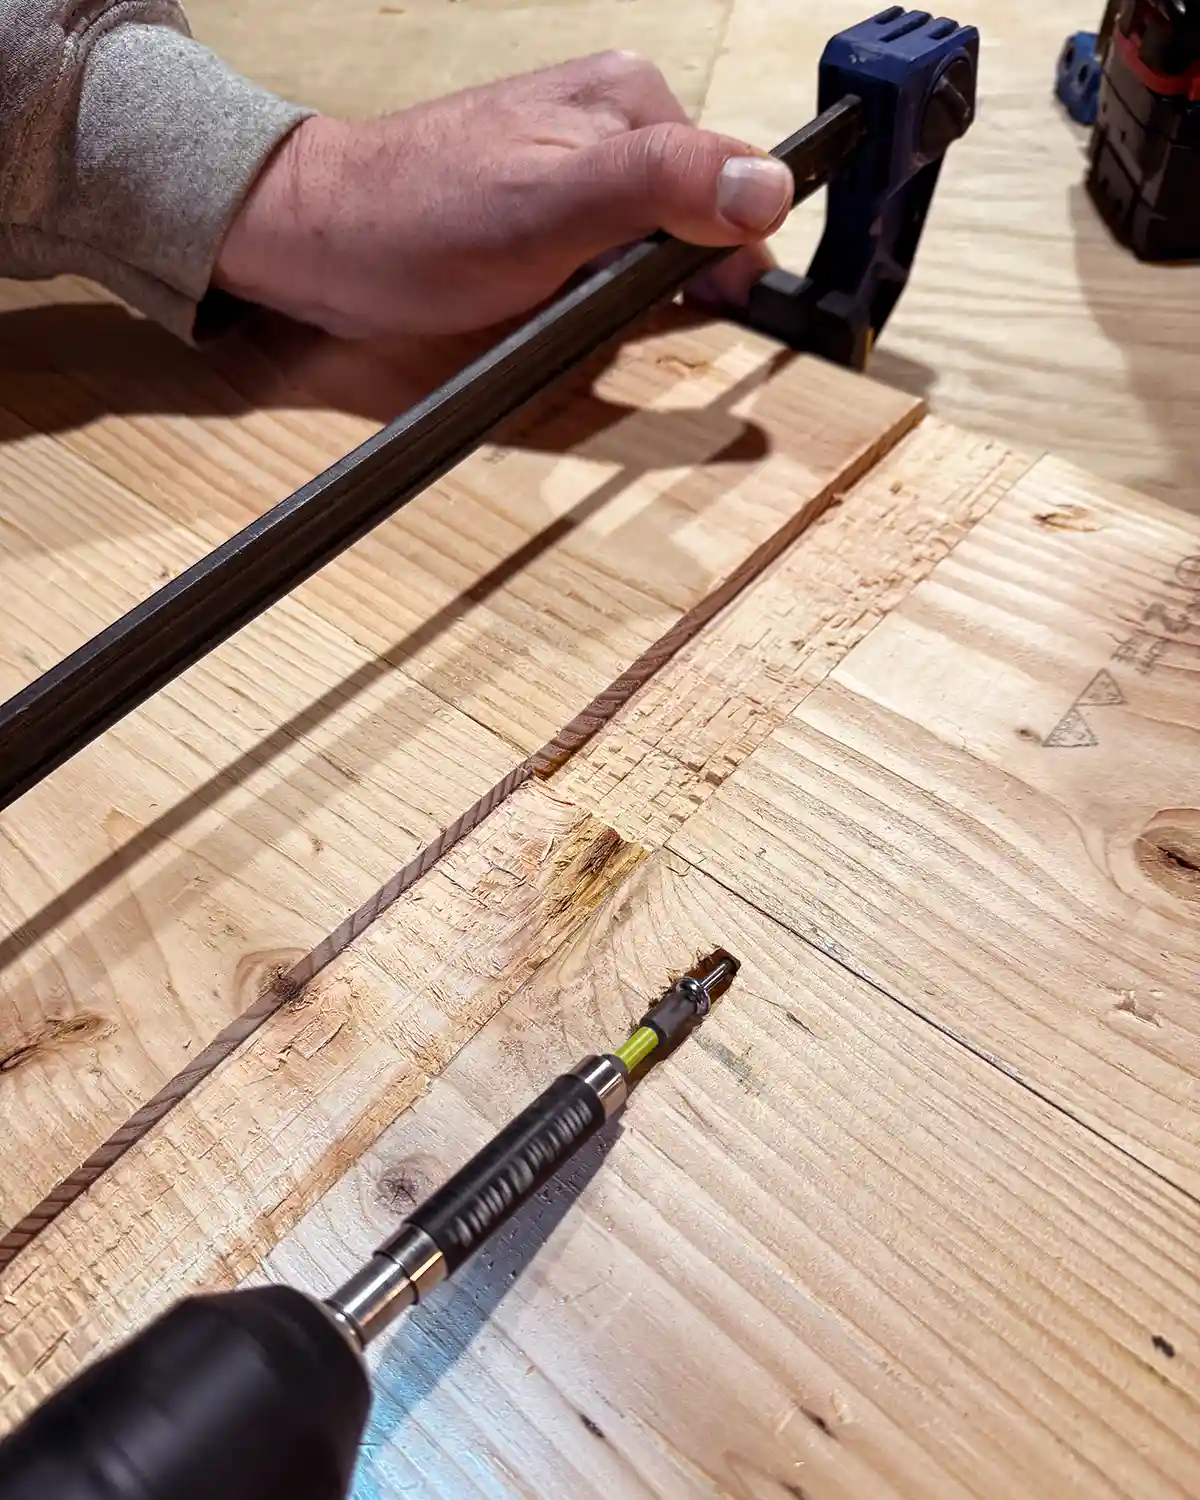
Then, using a small brush, apply some wood glue on one of the shelf edges that will be attached to the other shelf board. You could also apply a bead of wood glue along the middle, but I prefer the brush method since I’m less likely to overglue. Make sure you use enough glue, but not so much that the glue will ooze out between the boards after clamping.
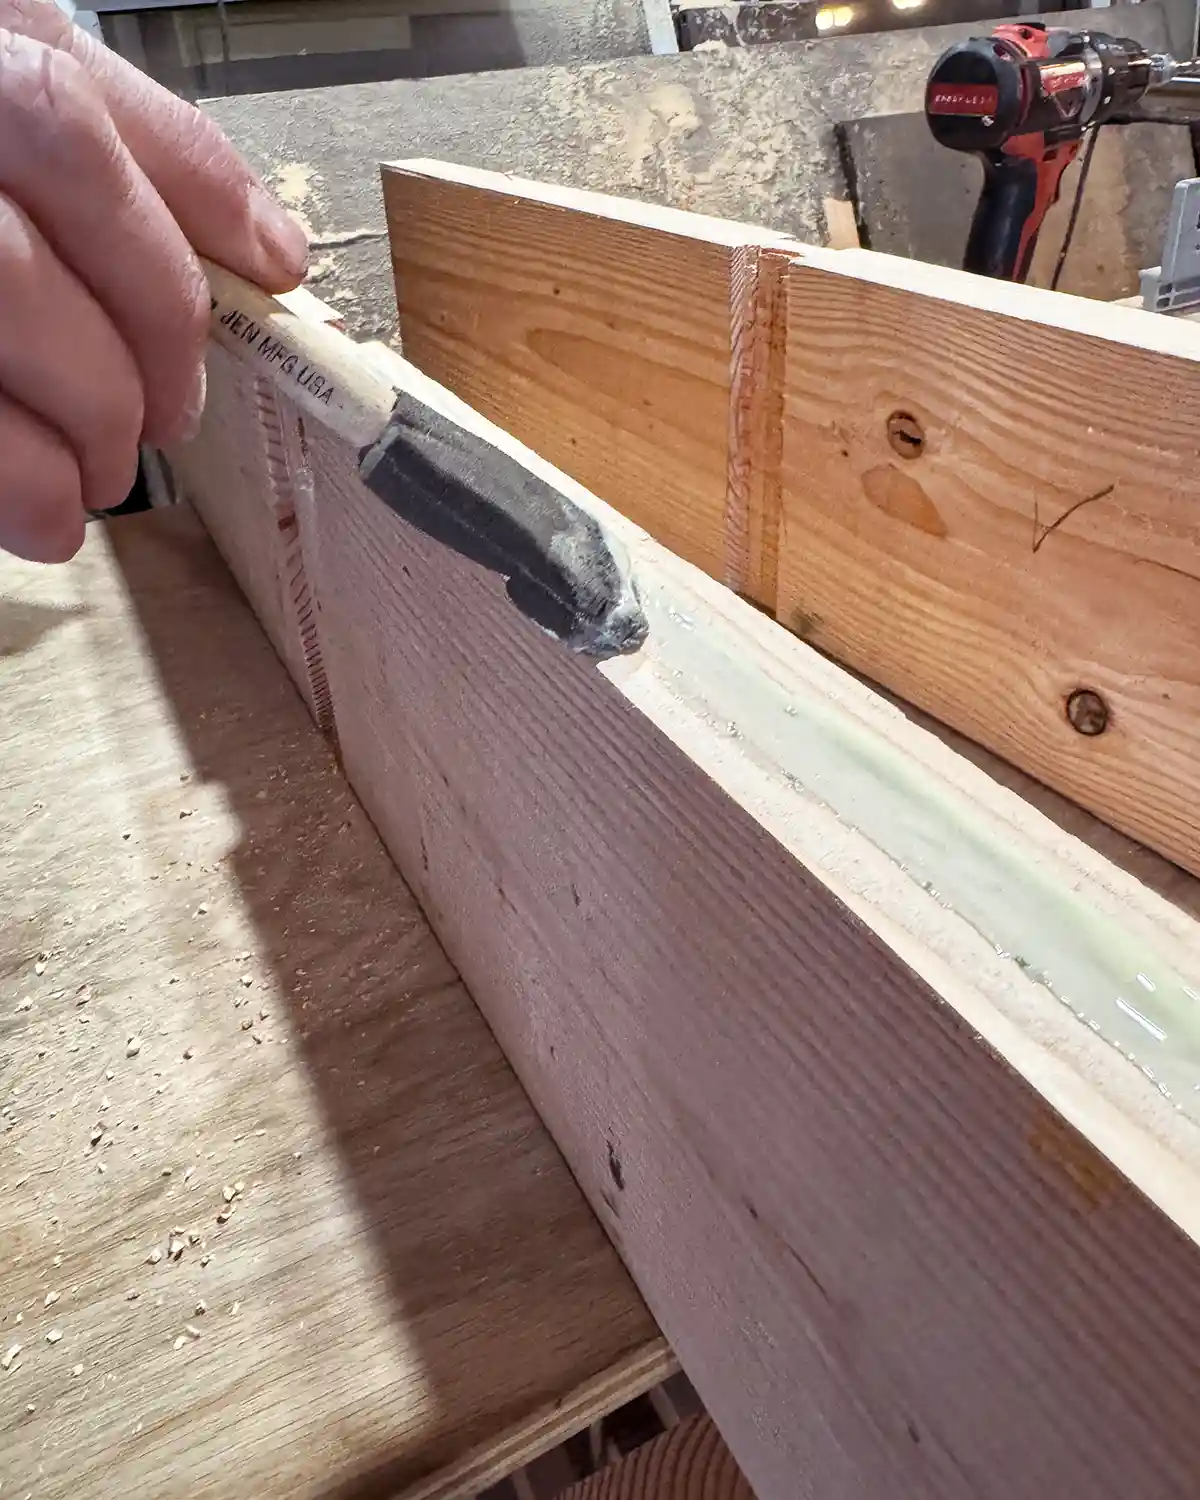
Next, we lined the boards back up and clamped them together using wood trigger clamps. If any glue does seep out from between the boards, now is a great time to wipe it up.
Then, screwed 1-1/4″ pocket hole screws into each pocket hole to join the two boards together. Lather, rinse, repeat for all of the shelf boards.
At this point, we let the glue dry for a couple of days before removing the clamps. Twenty-four hours would have been sufficient, but we gave them another day since we weren’t quite ready to assemble.
Step Five: Sand The Boards
Once the glue is dry, give the boards a really good sanding using an orbital sander. Since we used framing lumber, it wasn’t the smoothest surface. We did an initial sanding with 80-grit sandpaper where the boards were roughest. After smoothing down the rough edges, we sanded the entirety of the boards with 120-grit sandpaper. And then a final sand with 220-grit sandpaper. At that point, I was happy with the smooth finish.
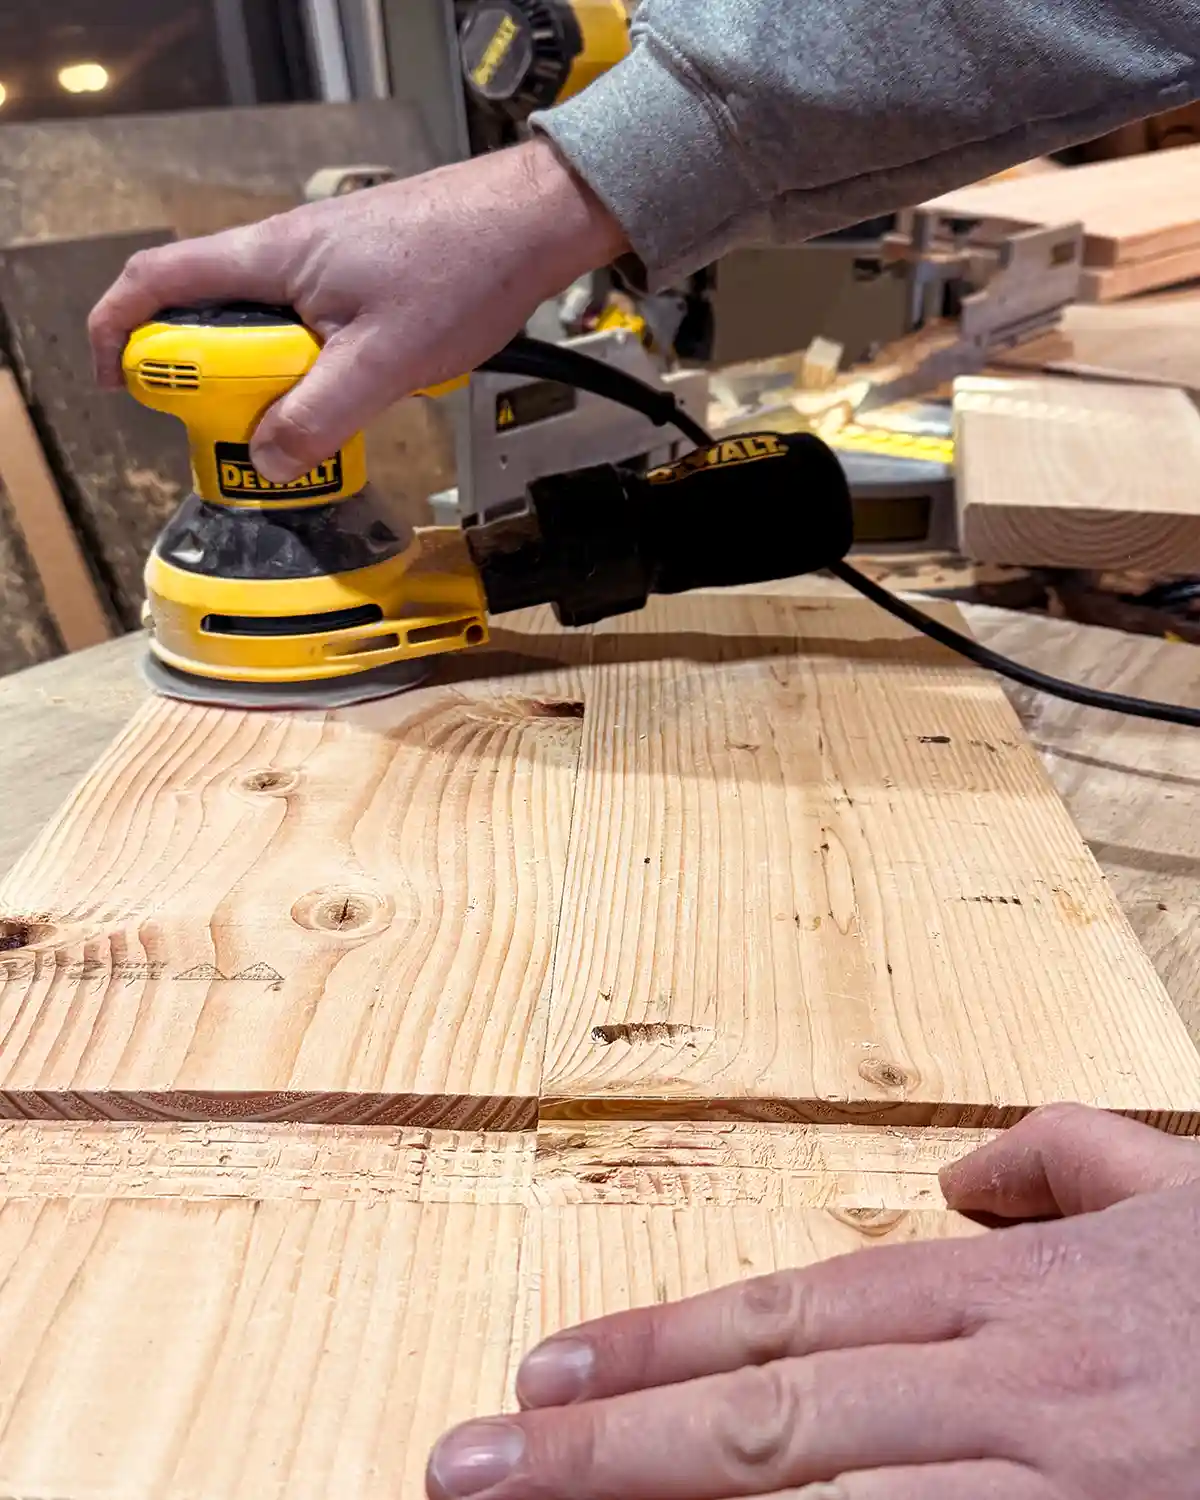
When sanding, pay special attention to where the two boards come together to form the shelf. Often, one board is just slightly uneven with the other. The lower grit sandpaper (80-grit) can be especially helpful for sanding this seam and getting both boards even and smooth.
You can also do all the sanding after assembling the shelves. In my personal opinion, after building many furniture pieces over the years, the easiest and best way is to sand before assembling the pieces.
Step Six: Assemble The Bookshelf
Since this bookcase was so large and so heavy, we treated assembly of the piece like we would a built-in bookcase, opting to assemble it in place. So first up was cleaning out the kitchen area where the pantry shelves would go. We even opted to wipe down the entire wall behind it, giving the space a deep clean since we knew cleaning later would be difficult.
Then we brought all the pieces into our kitchen, where the shelf would go, organized the pieces, and began assembling. It was easiest to lay each board on its side, starting with the top and bottom shelves, attaching them to the middle shelves. Next, we attached each of the side panels. Finally, each second shelf was slid into place.
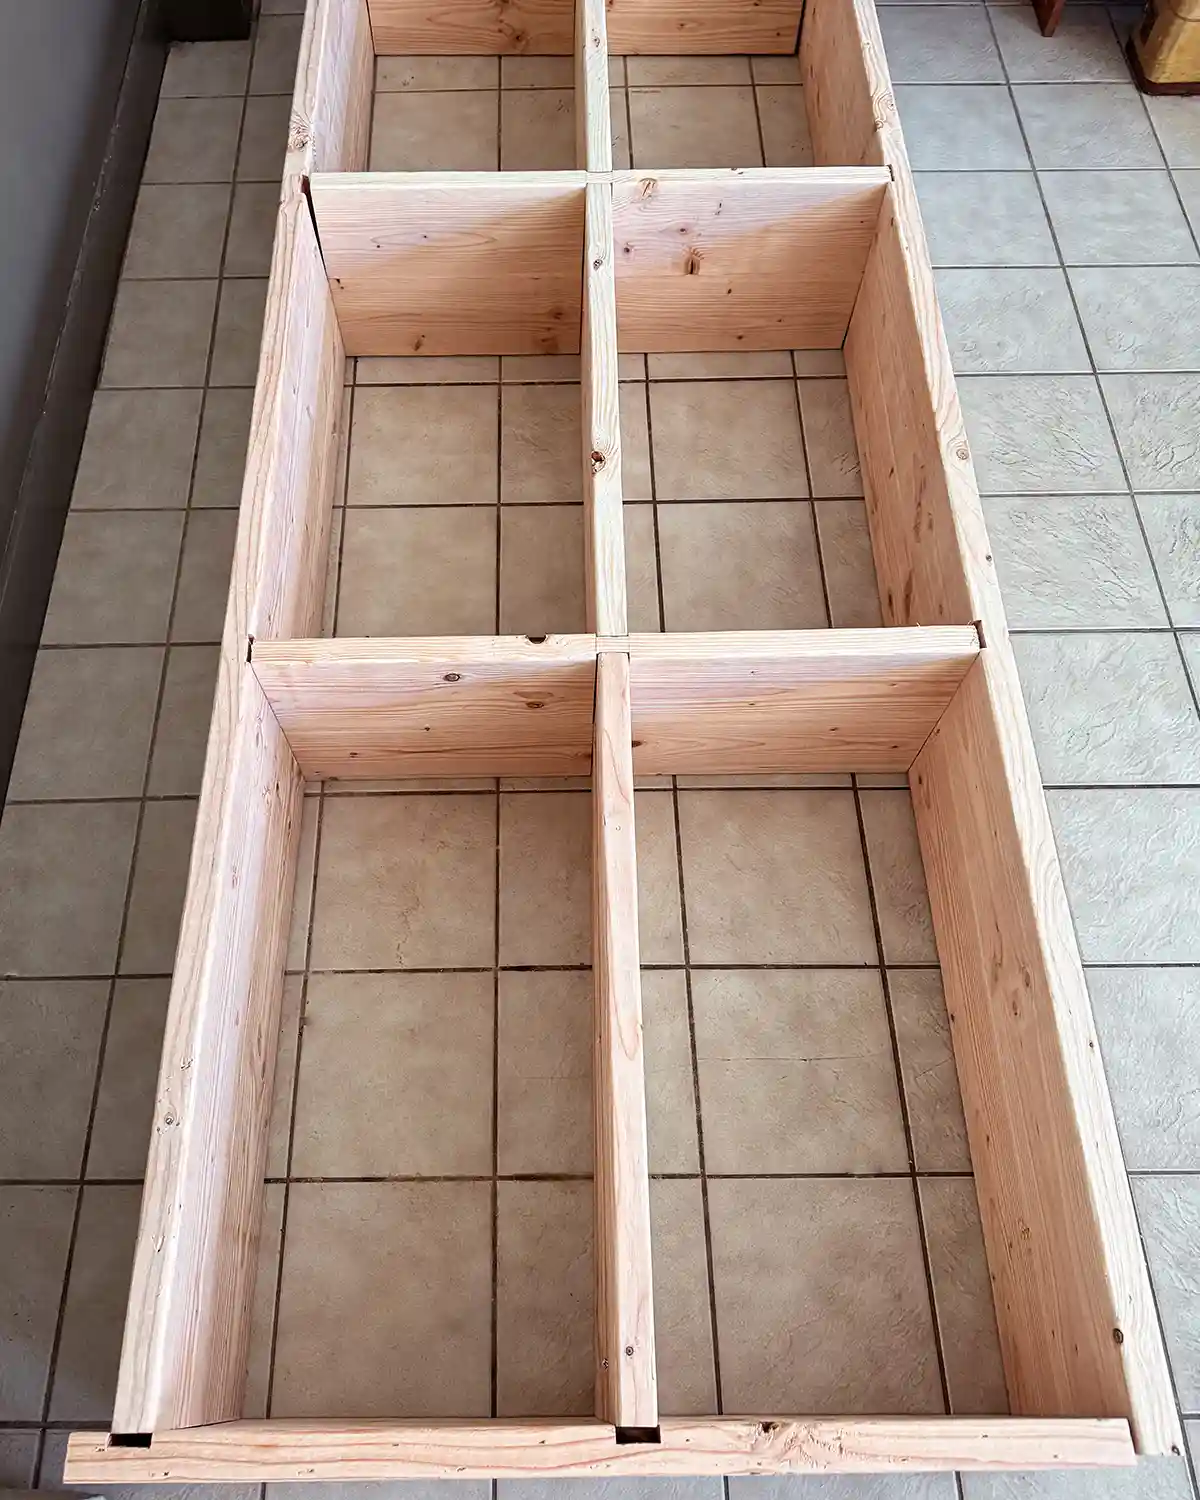
At this point, we didn’t worry about having a tight fit, just getting each part into place. Once the basic bookshelf was assembled, we used a rubber mallet to tap the bottom shelf until the joints tightened up gently. Repeat with the top of your bookshelf and each side piece. Keep tapping until every joint tightens up and each shelf sits tight in the grooves.
This is when we realized we had cut one shelf just a smidge too short. If we were being perfectionists about it, we could have taken out the offending shelf board and remade it. But knowing this was a simple, DIY bookshelf with a rustic feel, chose not to rebuild. I also knew that once I stained it dark, the small gap in the joint wouldn’t be so noticeable.
The final step of the construction process is to screw all the boards together using 2-1/2″ trim head screws. Basically, clamp the bookshelves tight and screw the boards together.
Fill any holes with stainable wood putty, let it dry, and sand it down to complete the building process. I usually skip filling the pocket holes since we strategically place them in the least noticeable locations.
Step Seven: Apply A Finish
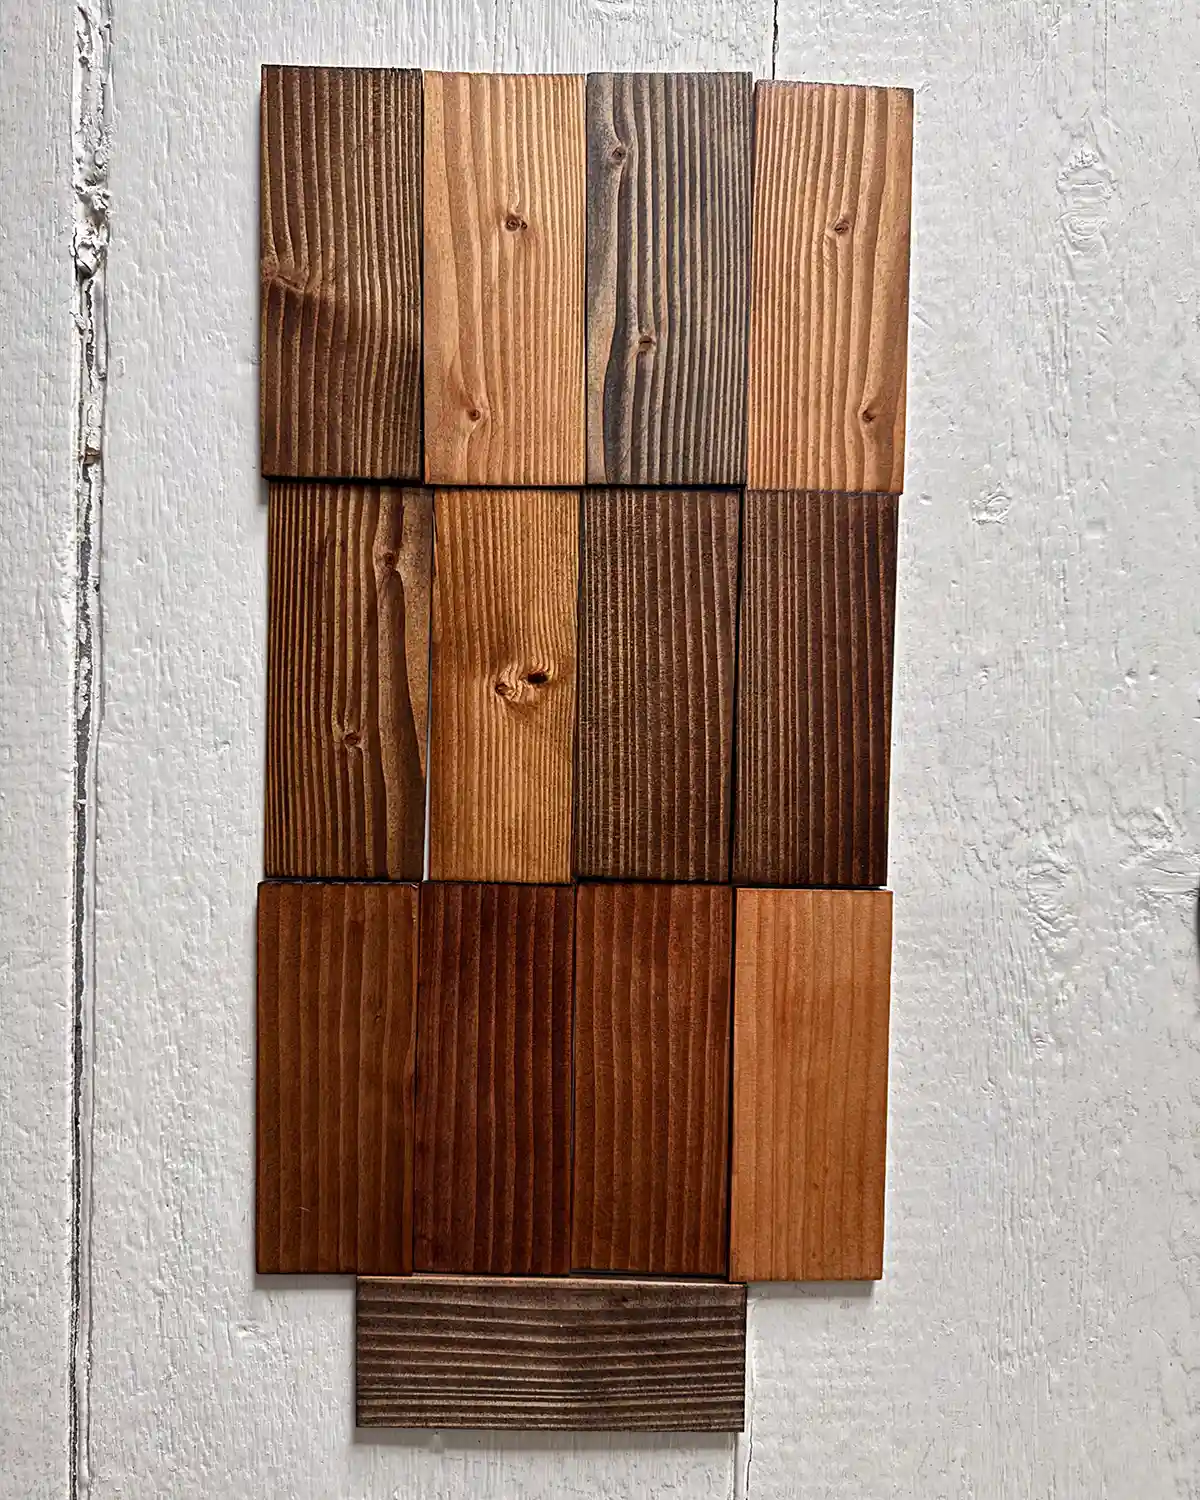
The final step of this project was to finish the whole thing. We debated staining vs painting, as we usually do, and ultimately decided to stain the piece. We could always apply a coat of paint later if we didn’t love the stain. After testing out some dark stains on fir, we went with Minwax Espresso.
I’ll share more details soon about how to stain unfinished wood furniture, but the basic process was to clean the shelf, apply a pre-stain wood conditioner, and then use the wood stain. Let the stain dry completely before applying two coats of polyurethane. We typically use a water-based option to be a little less toxic, but it is less durable than the oil-based alternatives. And c’est fini!
Step Eight: Organizing And Styling
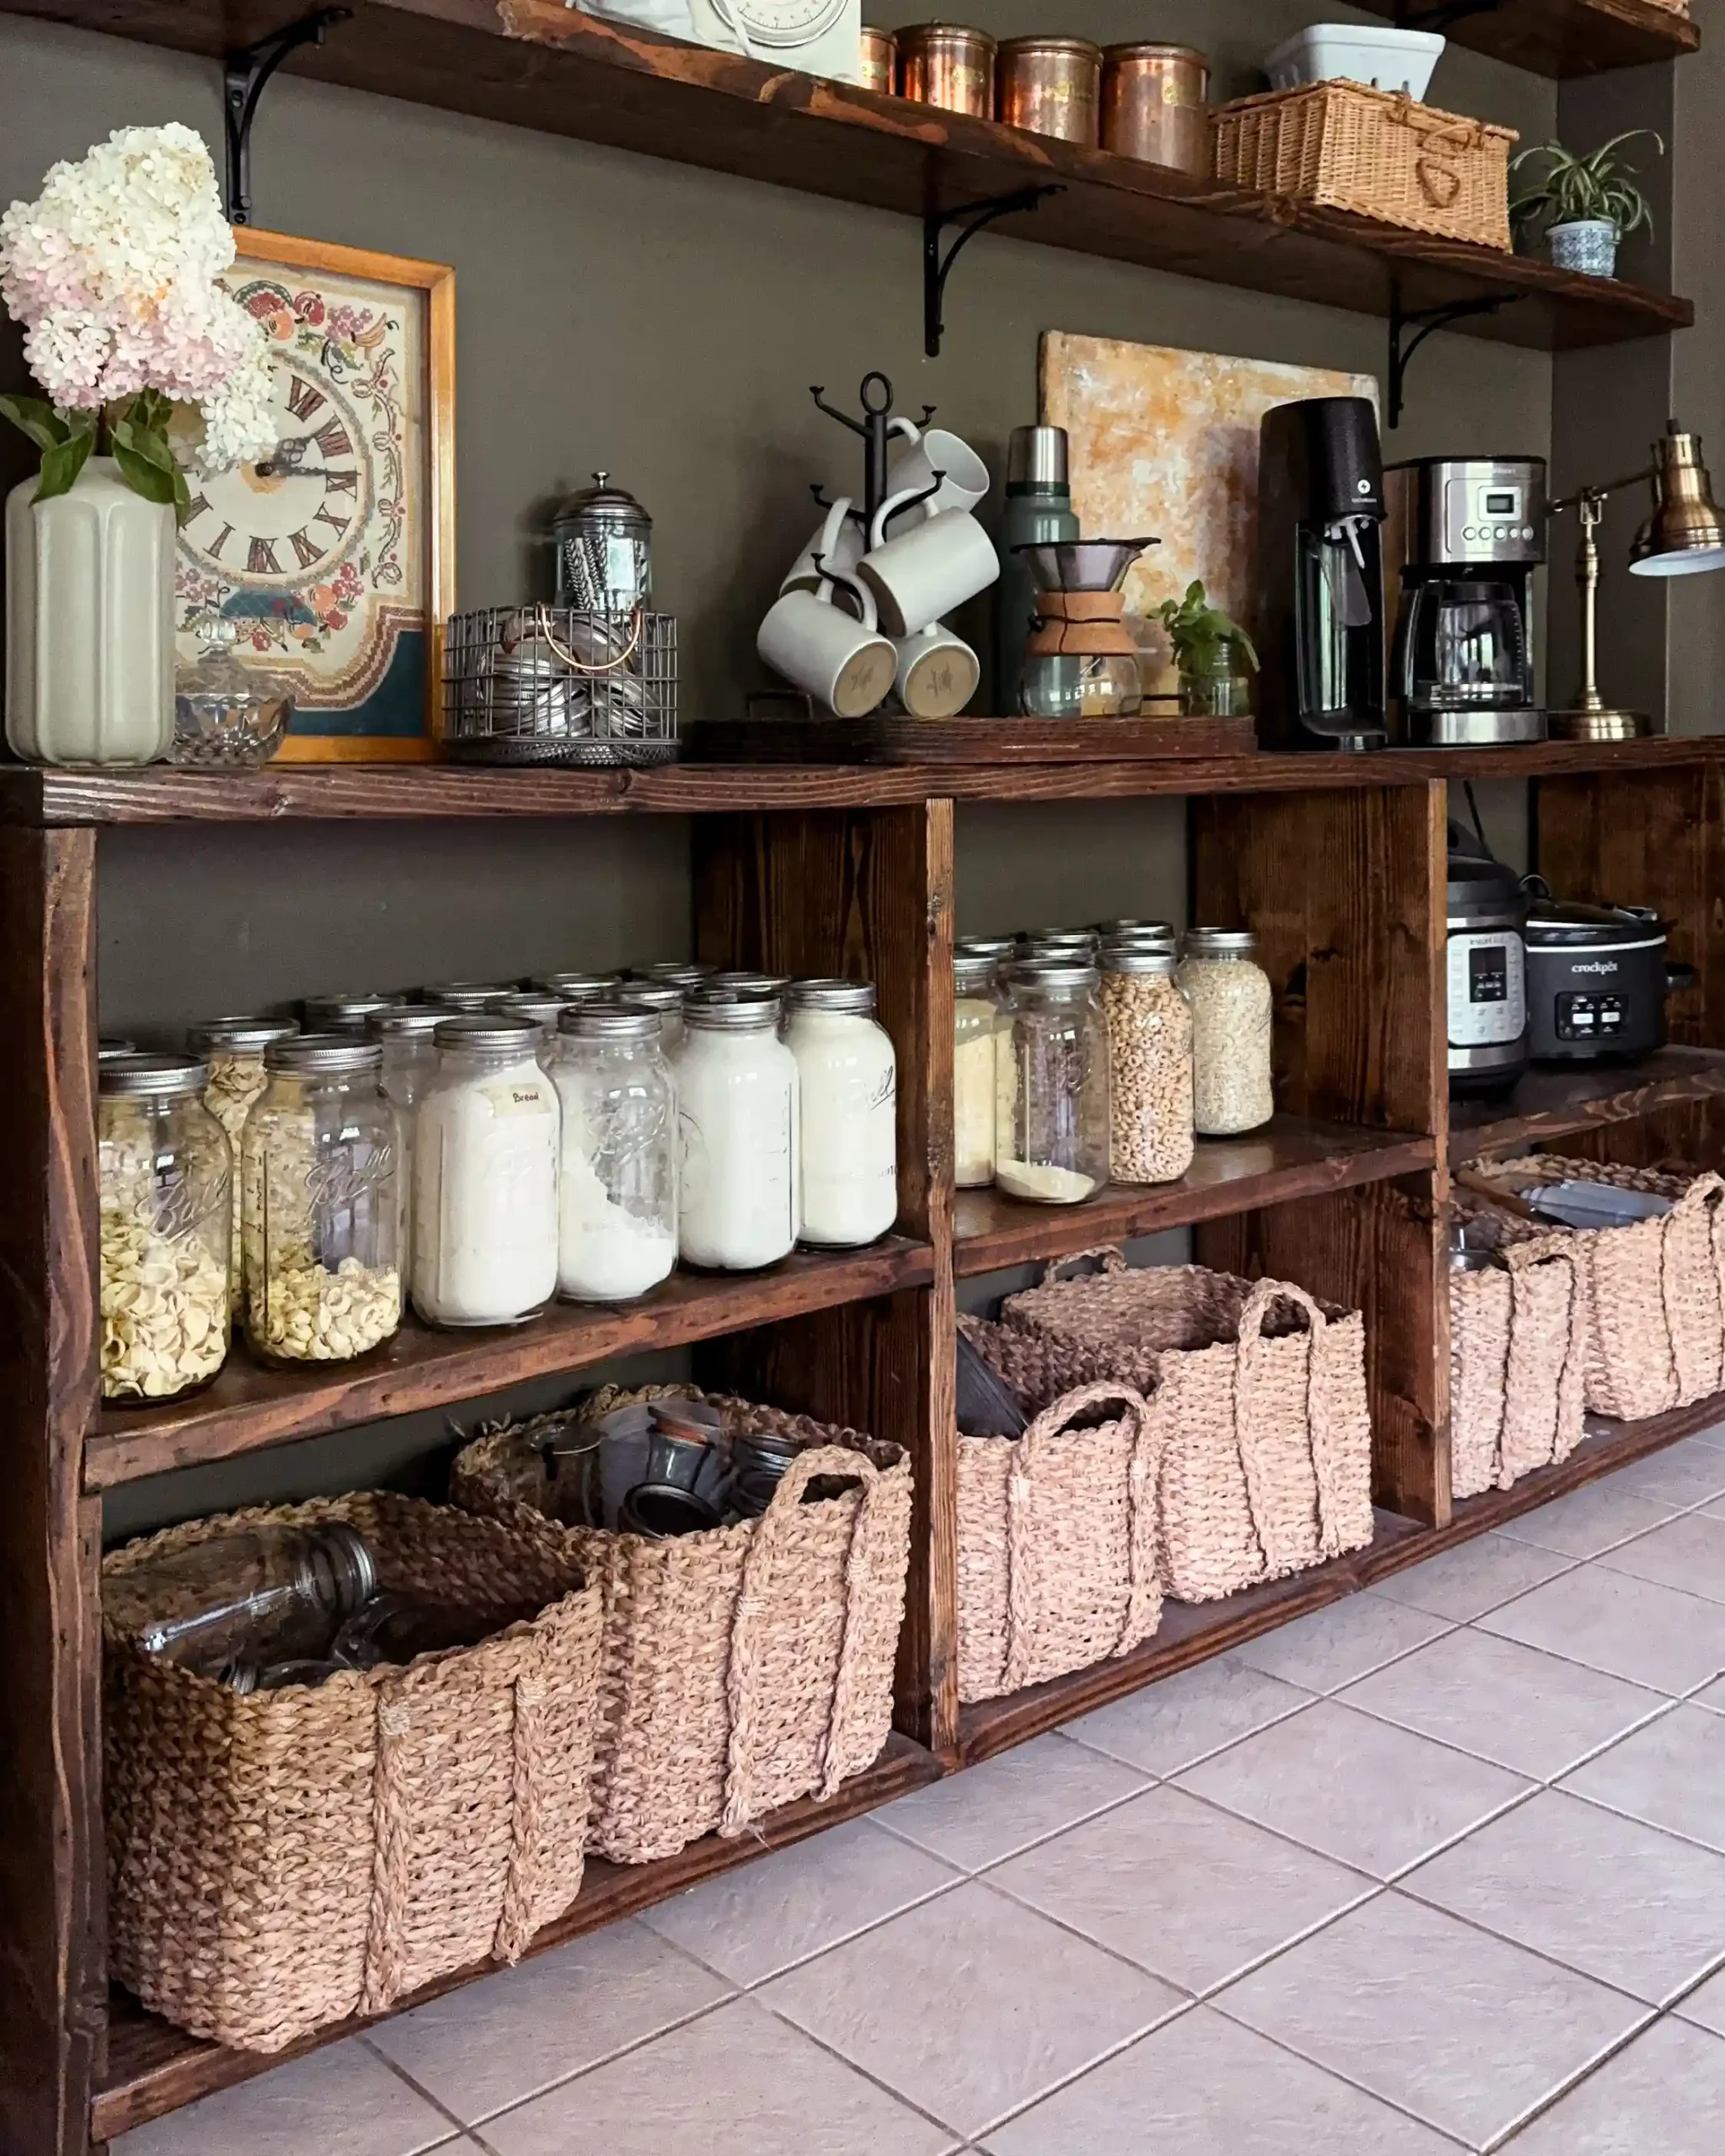
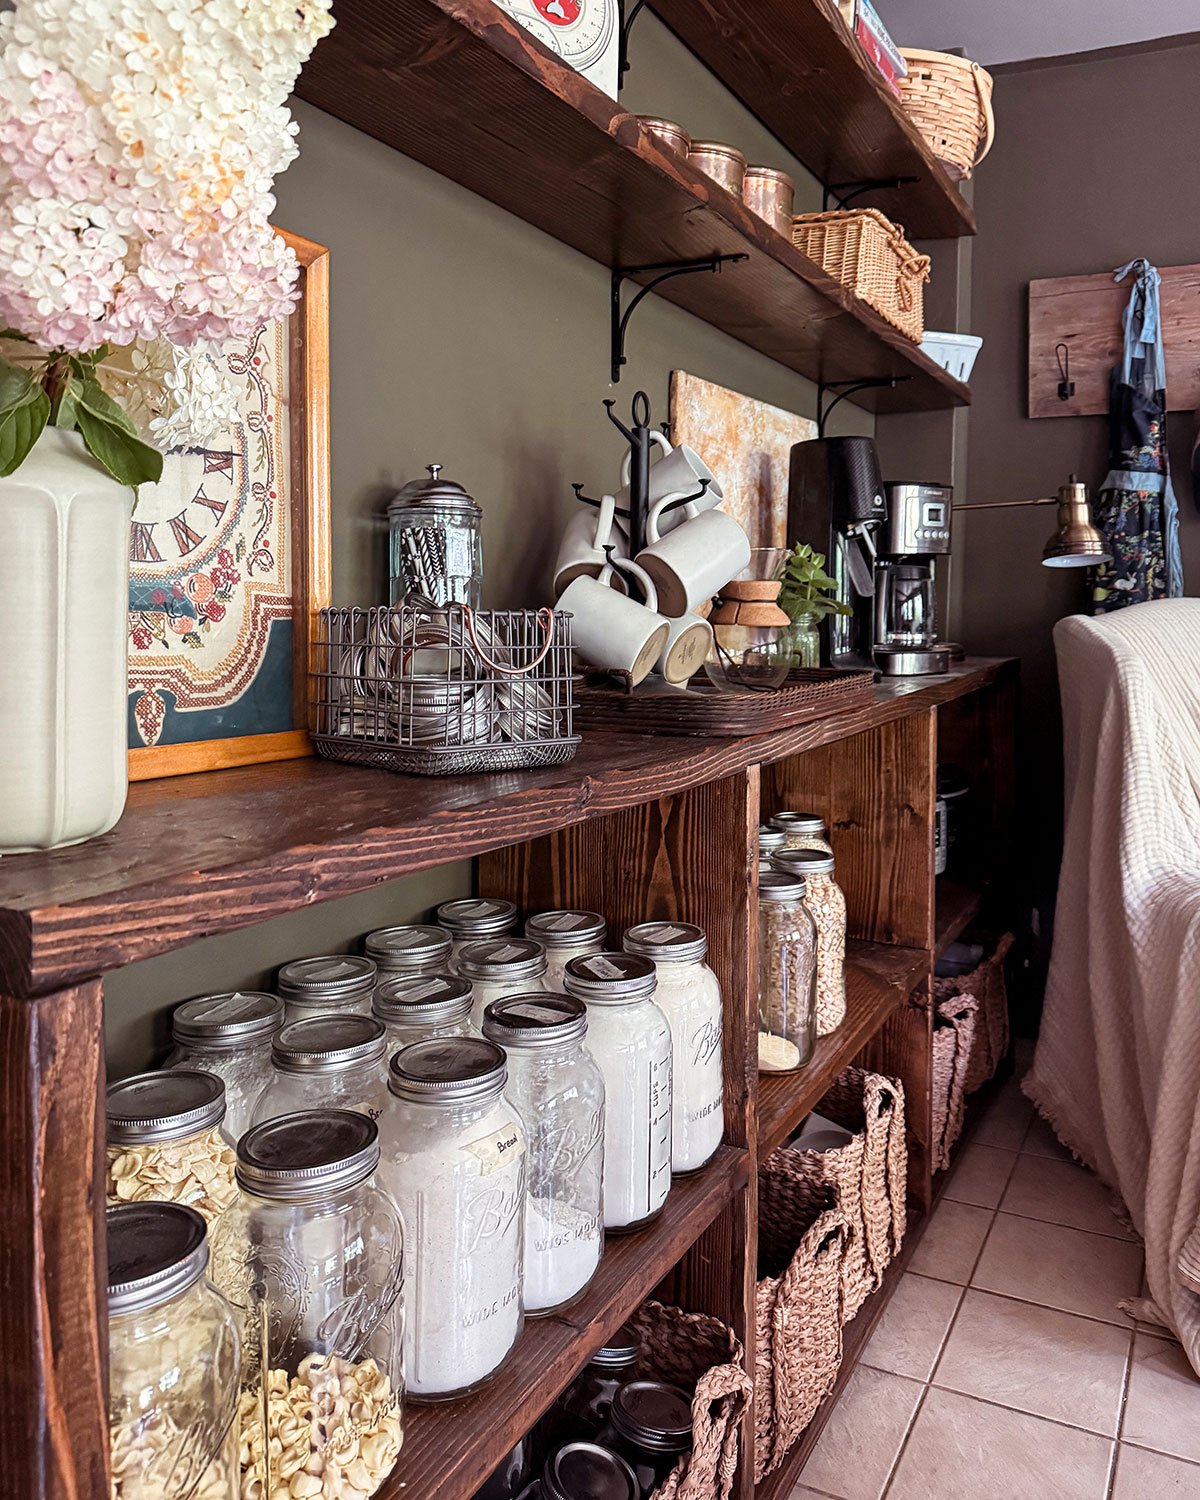
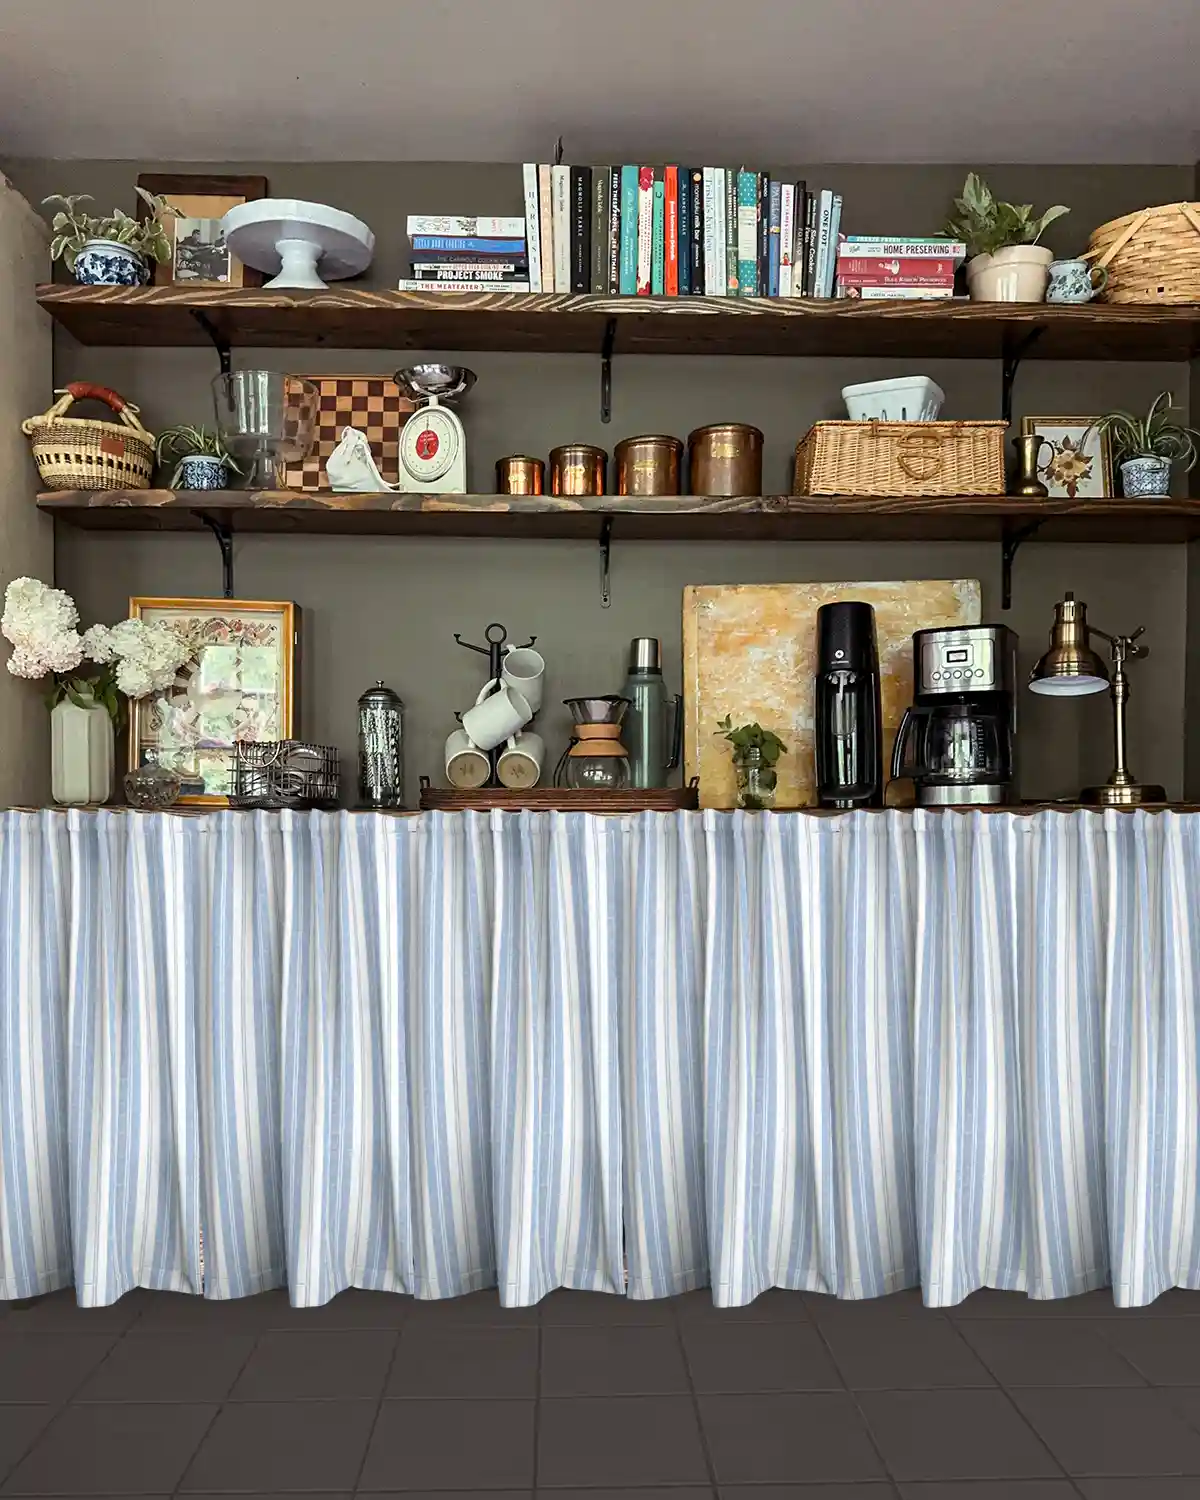
And my favorite step of this DIY bookcase project, load up those shelves, organize them, and style them up! The finished look:

And one more shot:
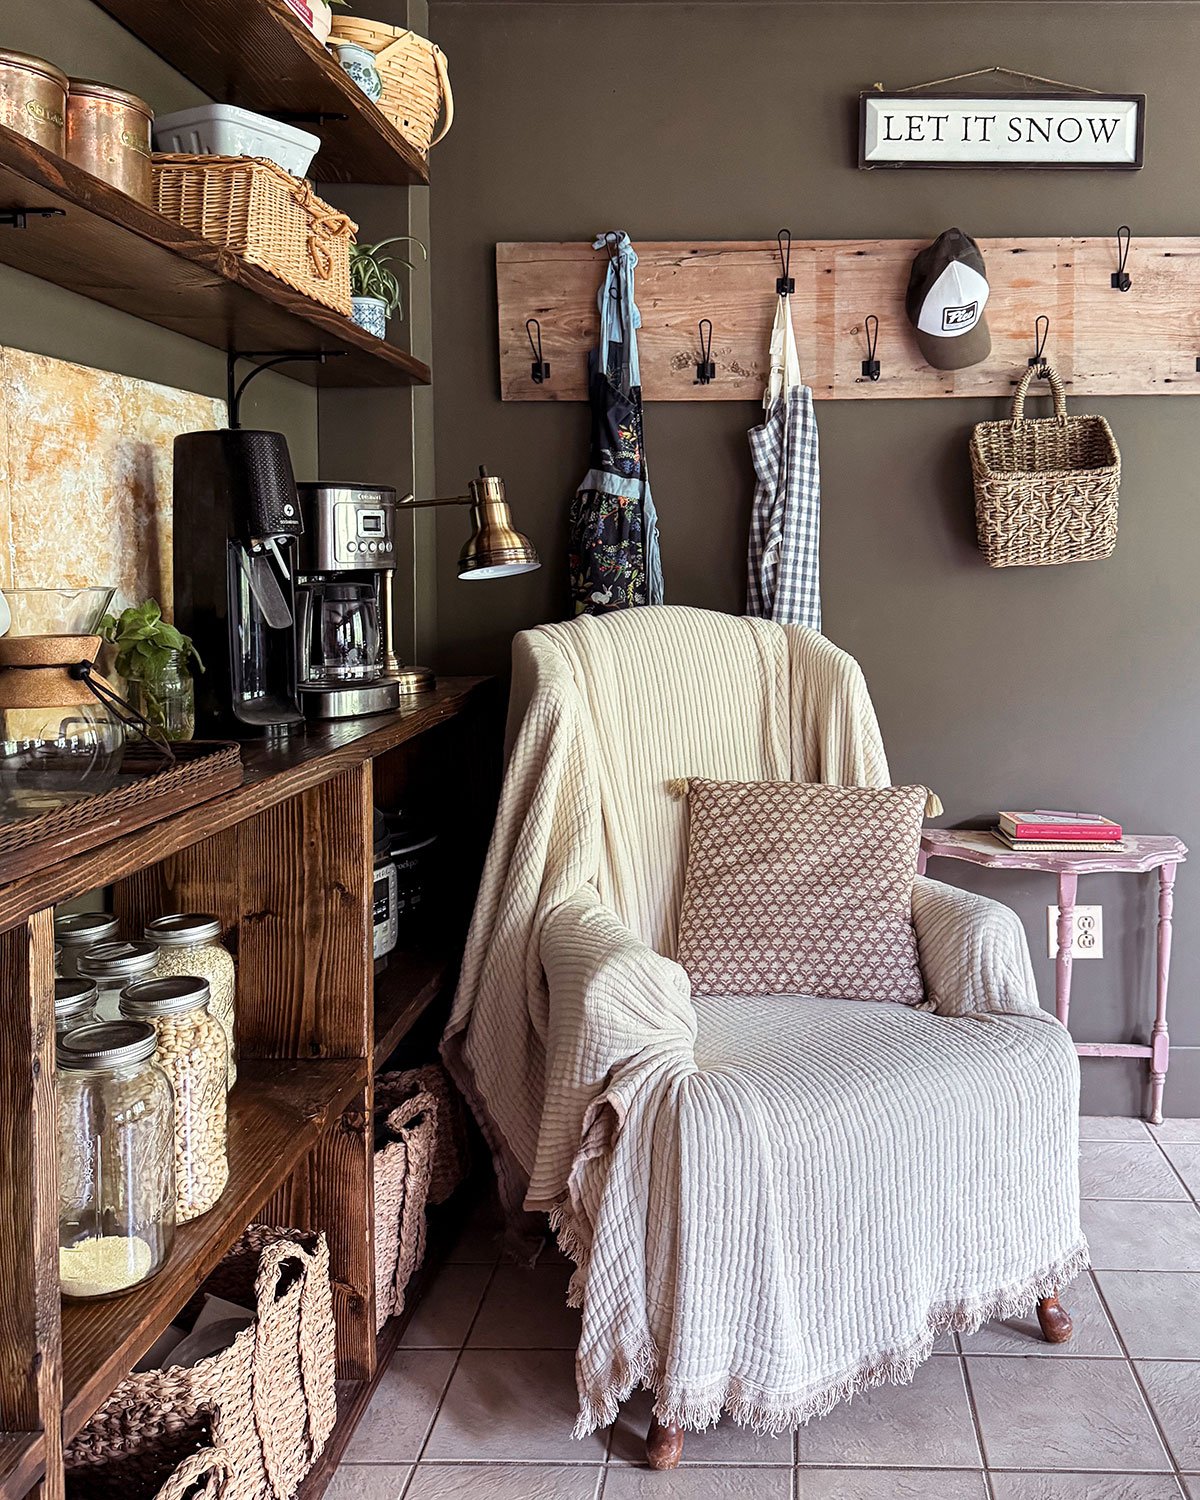
Choosing the right materials for this project meant that the shelves could support a heavy load, more so than if we had used more common boards. The shelves can easily support pantry jars or heavy books, making it a super functional piece of furniture. Plus, custom building meant we could make the shelf length fit our old house perfectly.
I absolutely love how this project turned out. We finished it in the spring and haven’t changed a thing yet. We designed the height of the shelves to perfectly hold our pantry items in large 64 oz Ball canning jars (Target), and it has proved so handy. Who knew a simple bookcase build would improve the functionality of our kitchen as much as it did! The entire setup was a great way to improve kitchen storage. Do you remember the before?! Big upgrade!
So thank you for stopping by for our simple bookcase plan and step-by-step instructions for building a DIY long, low bookcase. Happy building, everyone!
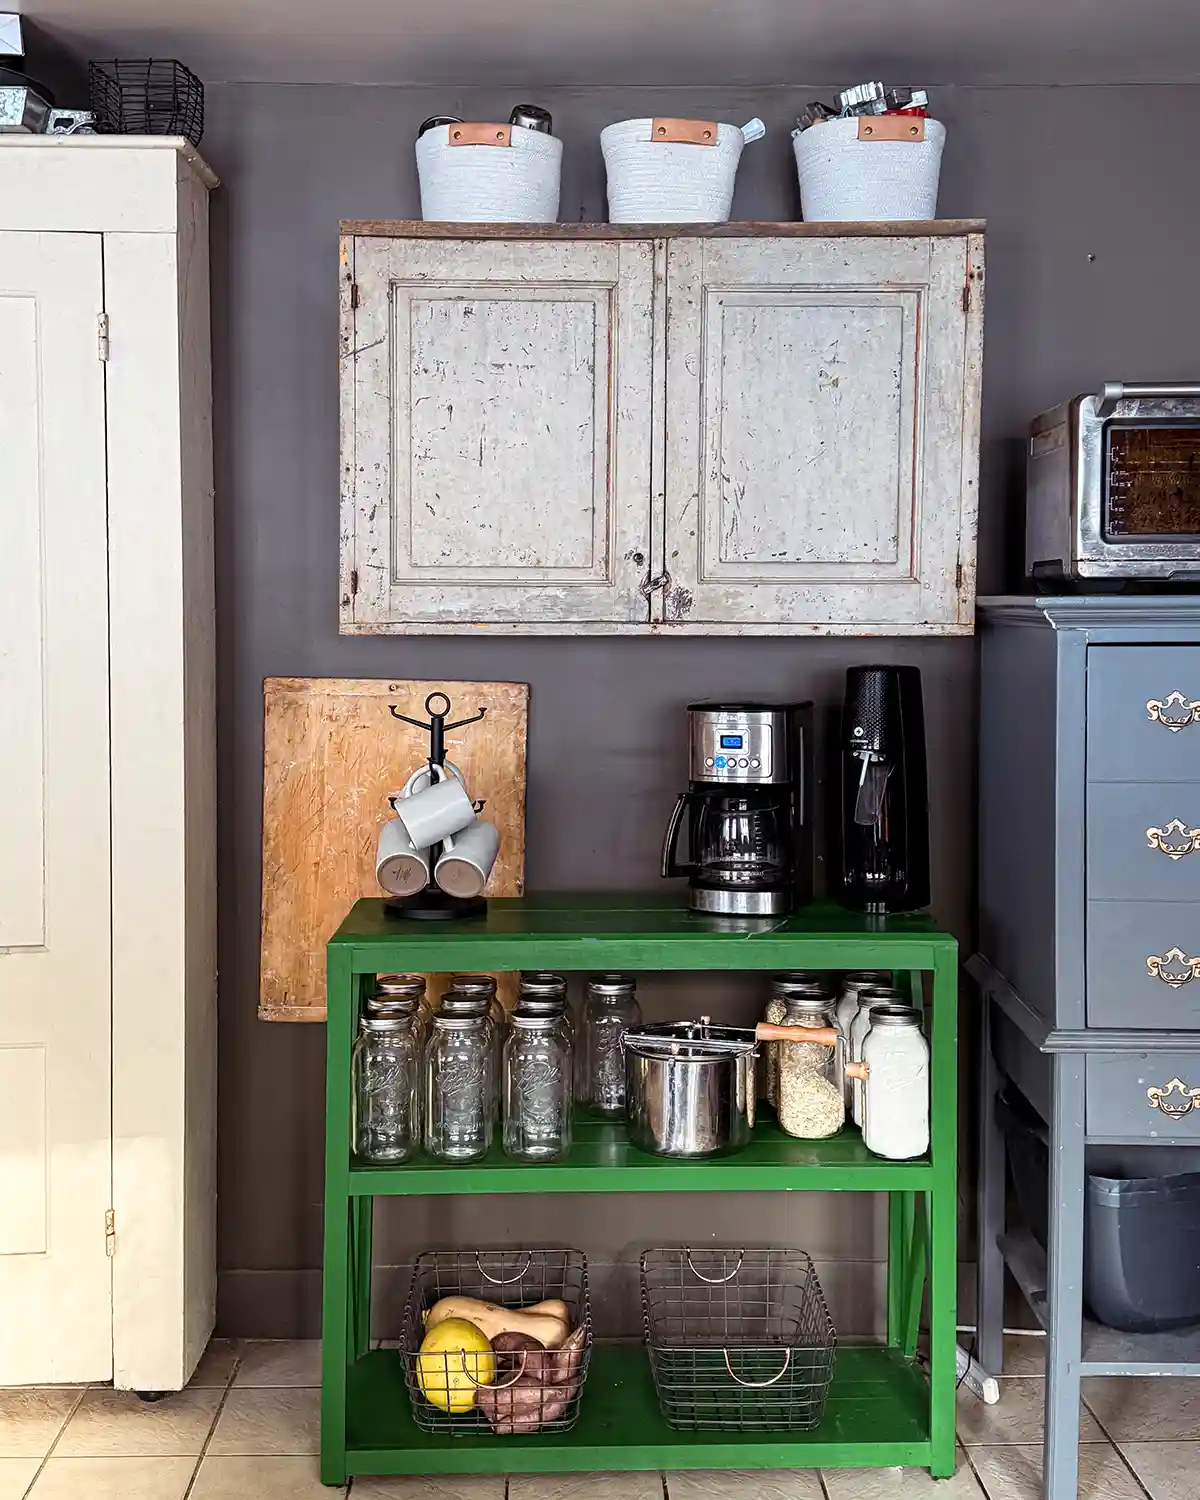
Pssst…Stay tuned for more details on this new pantry zone in our kitchen, including how we built the display shelves above. Now if only I could decide on curtains vs. no curtains. I honestly change my mind every other day. Today, I’m leaning toward no curtains.


Gorgeous! Love it. Thanks for the detailed instructions, and happy October!
You’re welcome!!!