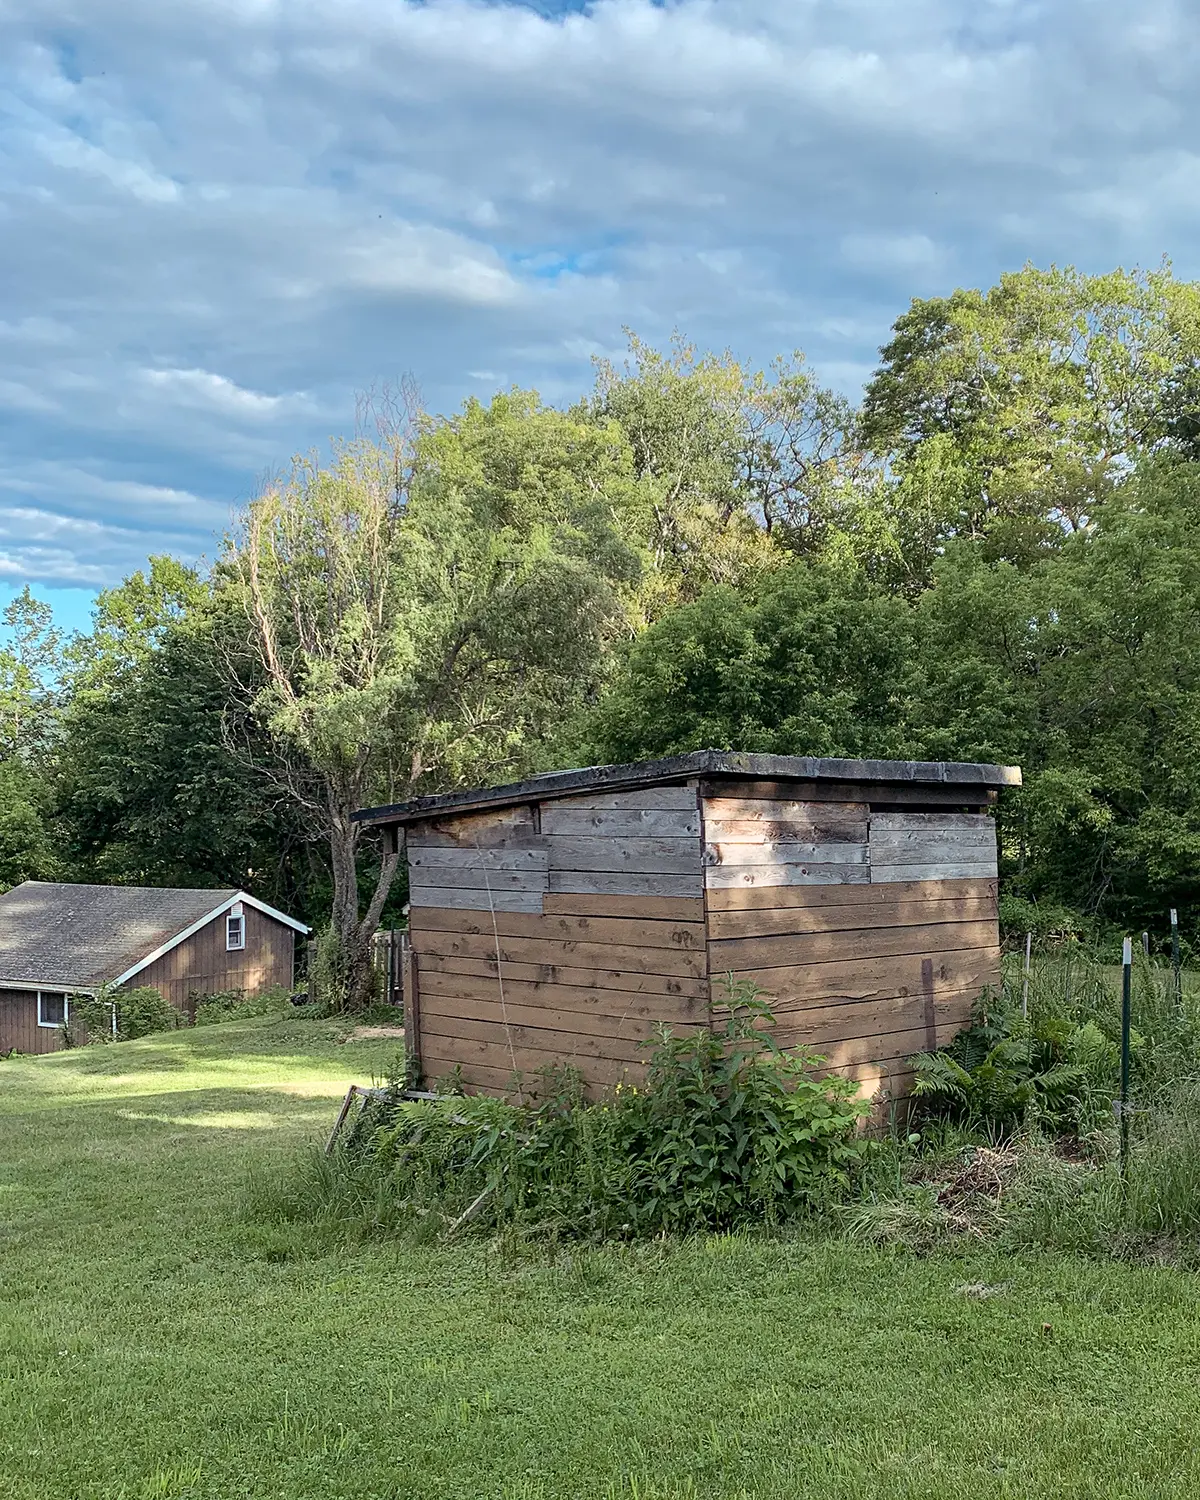
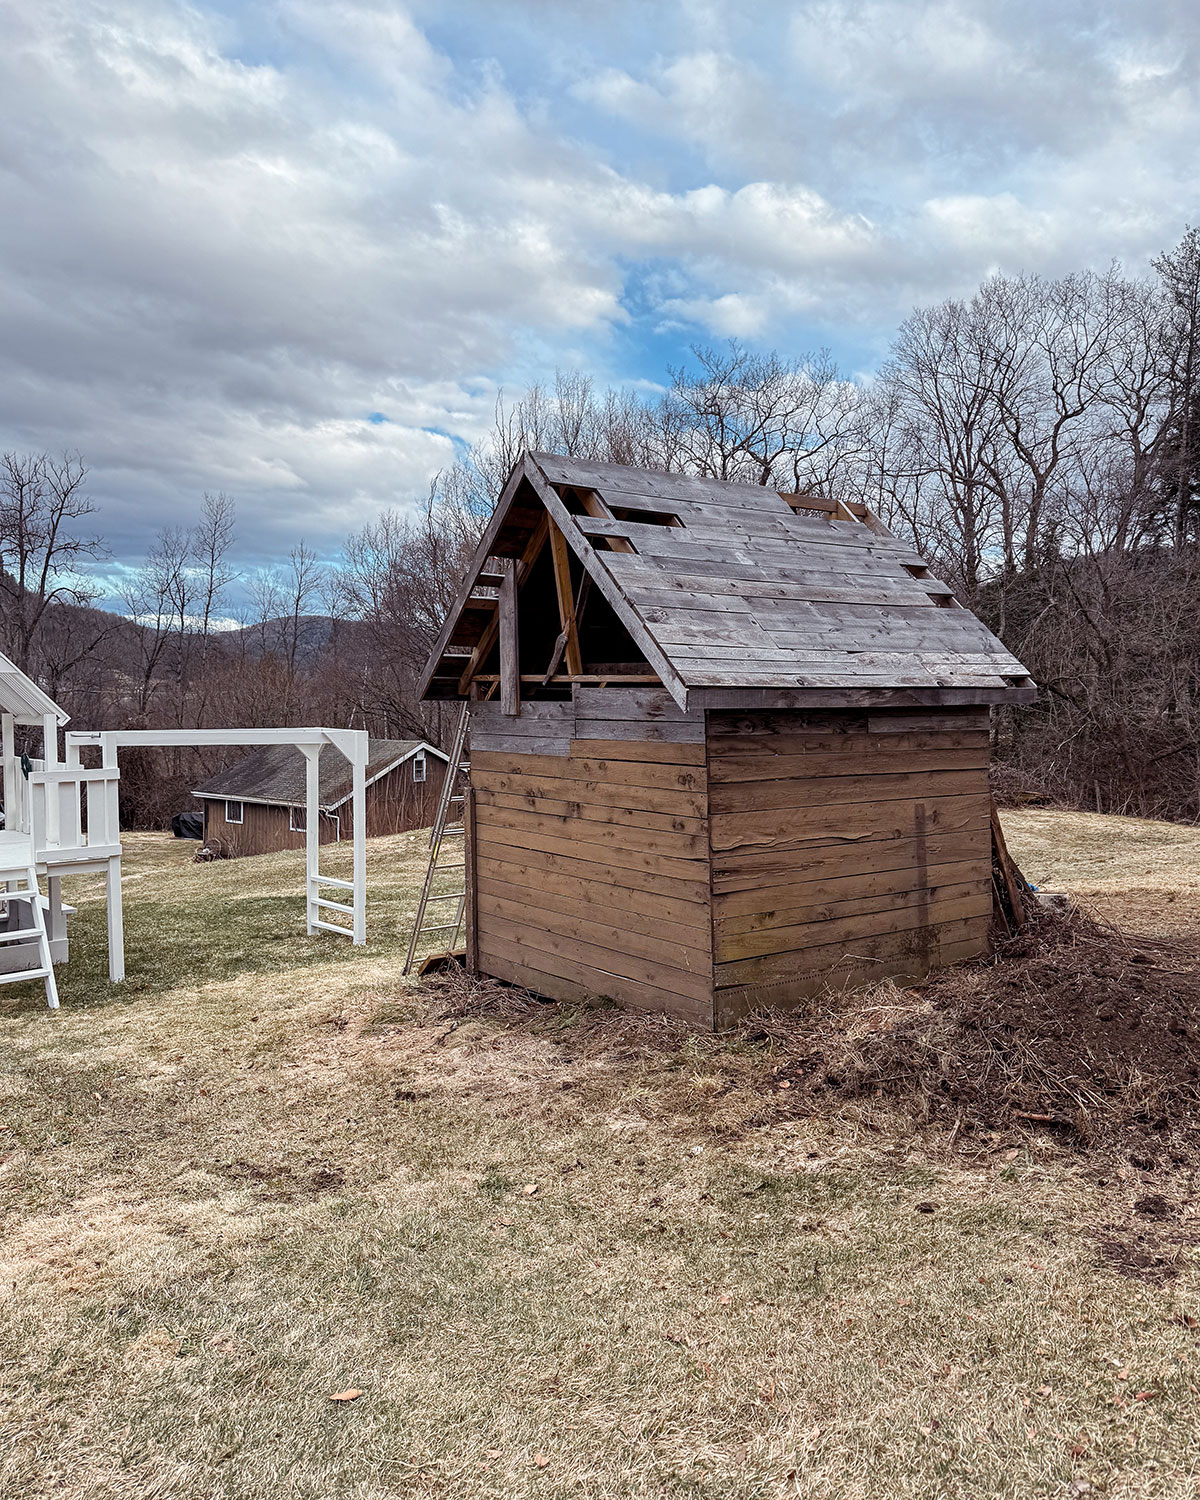
After putting off this project for too long, finishing our shed-to-playhouse conversion is top on the projects list. We came up with the shed playhouse plans, detailed below, almost two years ago but have hit roadblocks in making it happen. I vow that this is the year we finish! In this post, we’ll look at the high-level plans. More detailed instructions will come in future posts as we build through it. But first, here’s a shot of the dilapidated shed before we started.
Why The Project Delay?
Before we dive in, how about a little backstory on why we started this project two years ago but never finished it? Let’s just say, my garden compost pile has lived in the space right beside this shed, dating back to the before kids’ times.
When we started this project in the spring of 2023, I knew we needed to move the compost pile. But I didn’t get to it until the most beautiful baby blue hubbard squash plants volunteered in the compost pile. By mid-summer, they had overtaken the shed and I couldn’t bring myself to pull them.
Fast forward to 2024. Again, I had good intentions of finishing this project BUT the same thing happened. Except this time with pumpkins. I clearly have a soft spot in my heart for volunteer gourds. Needless to say, as soon as I could I moved the compost and vowed that this is the year of the children’s playhouse.

Before Tour Of Our Shed
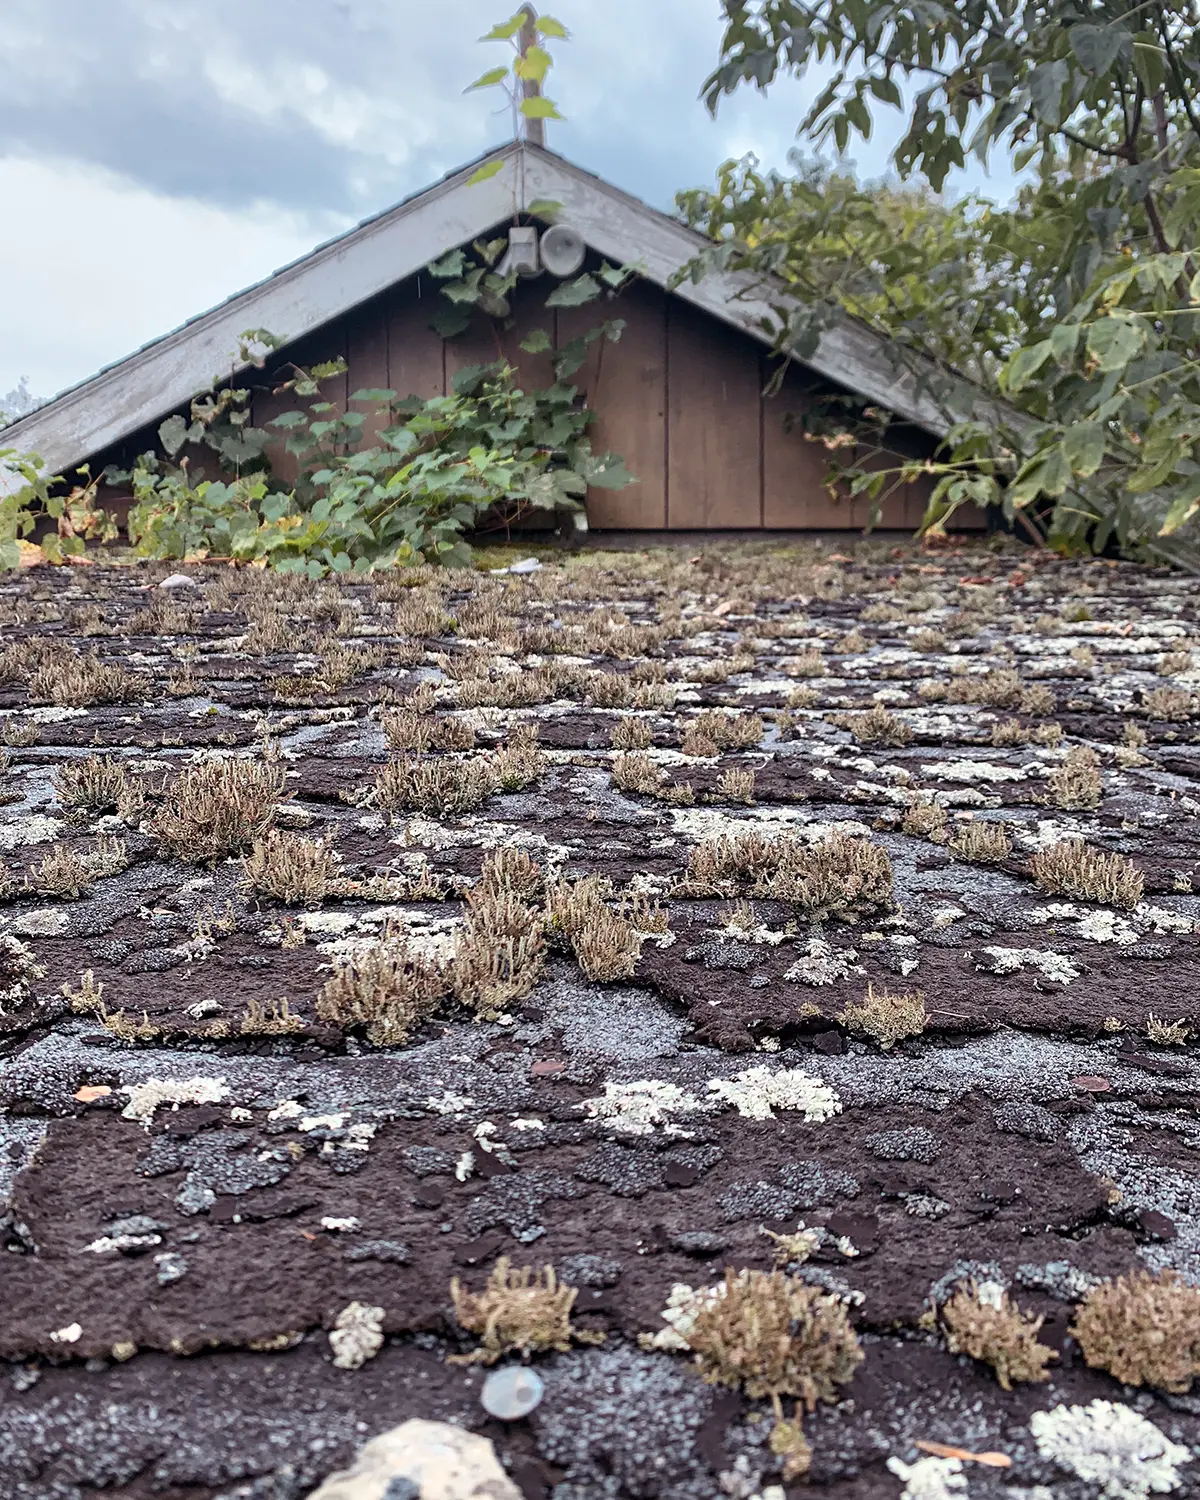
Our property was an old sheep farm that hadn’t been operational for many years. When one buys an old sheep farm, one also has copious amounts of outbuildings. On closing day, there were 12 outbuildings in various stages of disrepair. Many we’ve torn down, several we’ve worked on, and a few we just don’t know what to do with. Like this shed, right behind the kids’ playground.
It’s in a pretty sorry state of disrepair. Nine years ago, Colby raised the roof on it so we could use it as storage space. Like leftover construction materials for our old house. Needless to say, most of the contents of the shed could get tossed.

Converting A Storage Shed To A Simple Playhouse
For us to convert this shed, it isn’t as simple as cleaning it out, adding some playhouse windows, throwing in a play kitchen, and painting it all pretty. I wish it was that easy. I would LOVE to skip to the decorating part! Rotten roof…psshhh!
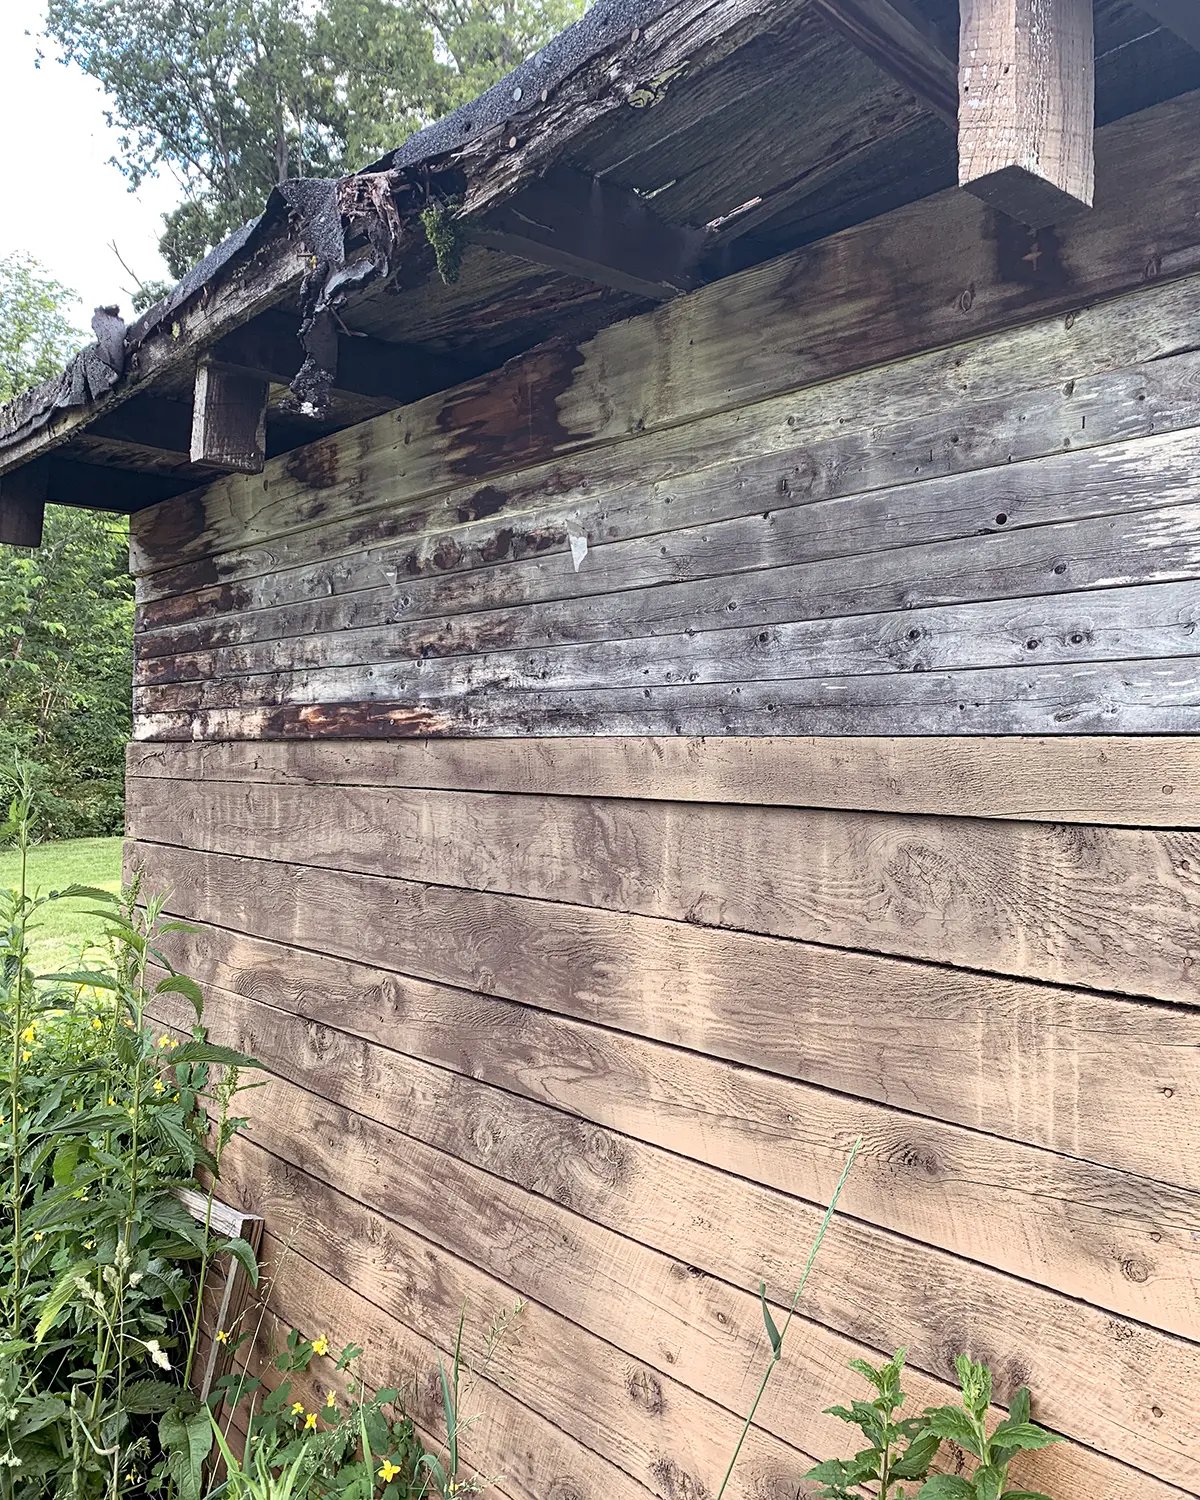
Our shed is in ROUGH shape. I’m talking about a falling down, old dilapidated shed. I’m very aware of how much easier it would be to just tear it down and build a new structure from scratch. Have you seen some of the kids playhouse plans from Ana White?! If that’s your jam, I’m sure you can find the right free playhouse plan for you.
But for us, we like to salvage as much as possible. We build and DIY on a tight budget so if we can reuse materials or put in extra time to work with what we have, we will. So for us, tearing down the shed was not an option. The walls are good, it just needs a new roof, structural reinforcements, and a floor.
I’ll share more detailed instructions after we tackle the project, but today is all about the project plan.
Construction Steps
Here are the step-by-step instructions we’re currently working through to save this old shed and construct a DIY wooden playhouse:
- Step 1: Clean Out The Shed
- Step 2: Tear Down The Old Roof
- Step 3: Add More Structural Support
- Step 4: Add A Gable Roof
- Step 5: Build A New Floor
- Step 6: Build A Loft
- Step 7: Add Siding
- Step 8: Install Doors And Windows
- Step 9: Build A Deck Or Front Porch
- Step 10: Choose Color Palette
- Step 11: Paint
- Step 12: Decorate
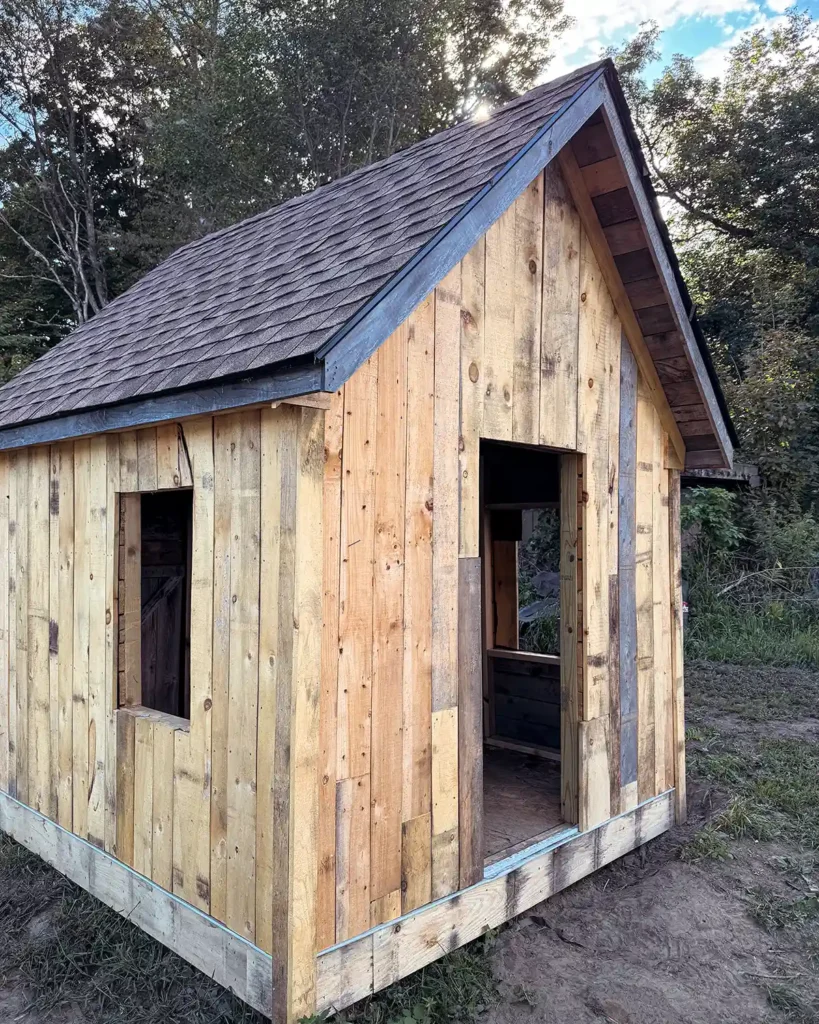
We’re currently in the step 3/step 4 stages of this project. During a day off from work, Colby was able to clean out the shed and take down the old roof (armed with a Sawzall…although I thought I heard rumblings of a chainsaw…don’t tell OSHA). He also worked on the structural support for the playhouse frame, added roof supports and a roof frame, and started putting up the roof sheathing.
Not too shabby for one day’s work. I’ll share much more about the deconstruction/construction process as we go along, but today let’s focus on our own playhouse plans.

Design Plans
I sat down with Rowan and my trusty partner Pinterest to come up with a really unique design for the play house. Be sure to check out my kids outdoor play board on Pinterest (shameless plug) which is full of DIY playhouse ideas.
I really wanted to design the space in tandem with Rowan. She’s eight and has some serious ideas on what she wants. We poured over many finished play house designs and she picked out her favorite features. Our youngest, Bea, is three and could care less about the design.
The features we landed on:
- Various play areas or zones inside and outside
- Moving in her play kitchen to the
- Building a loft and creating a cozy rest space
- Operational windows to “serve ice cream”
- A hanging chair for reading
- Table and chairs for tea parties
- Front porch
- Replicating a “little house”
- Lots of fairy lights
- Curtains
I loved how into picking the design features she was! Some of the comments were hilarious. How she didn’t like one playhouse because it was too bright (as in sunny). Or that “my friends don’t really like the color dusty rose so maybe not that.” Or my favorite, “I like this one but where does the dog sleep?” Which reminds me. Another requested feature: places for her stuffed dogs to take a nap.

So let’s dive into the details of the plans.
Playhouse Floor Plan
Here’s the floor plan we landed on.
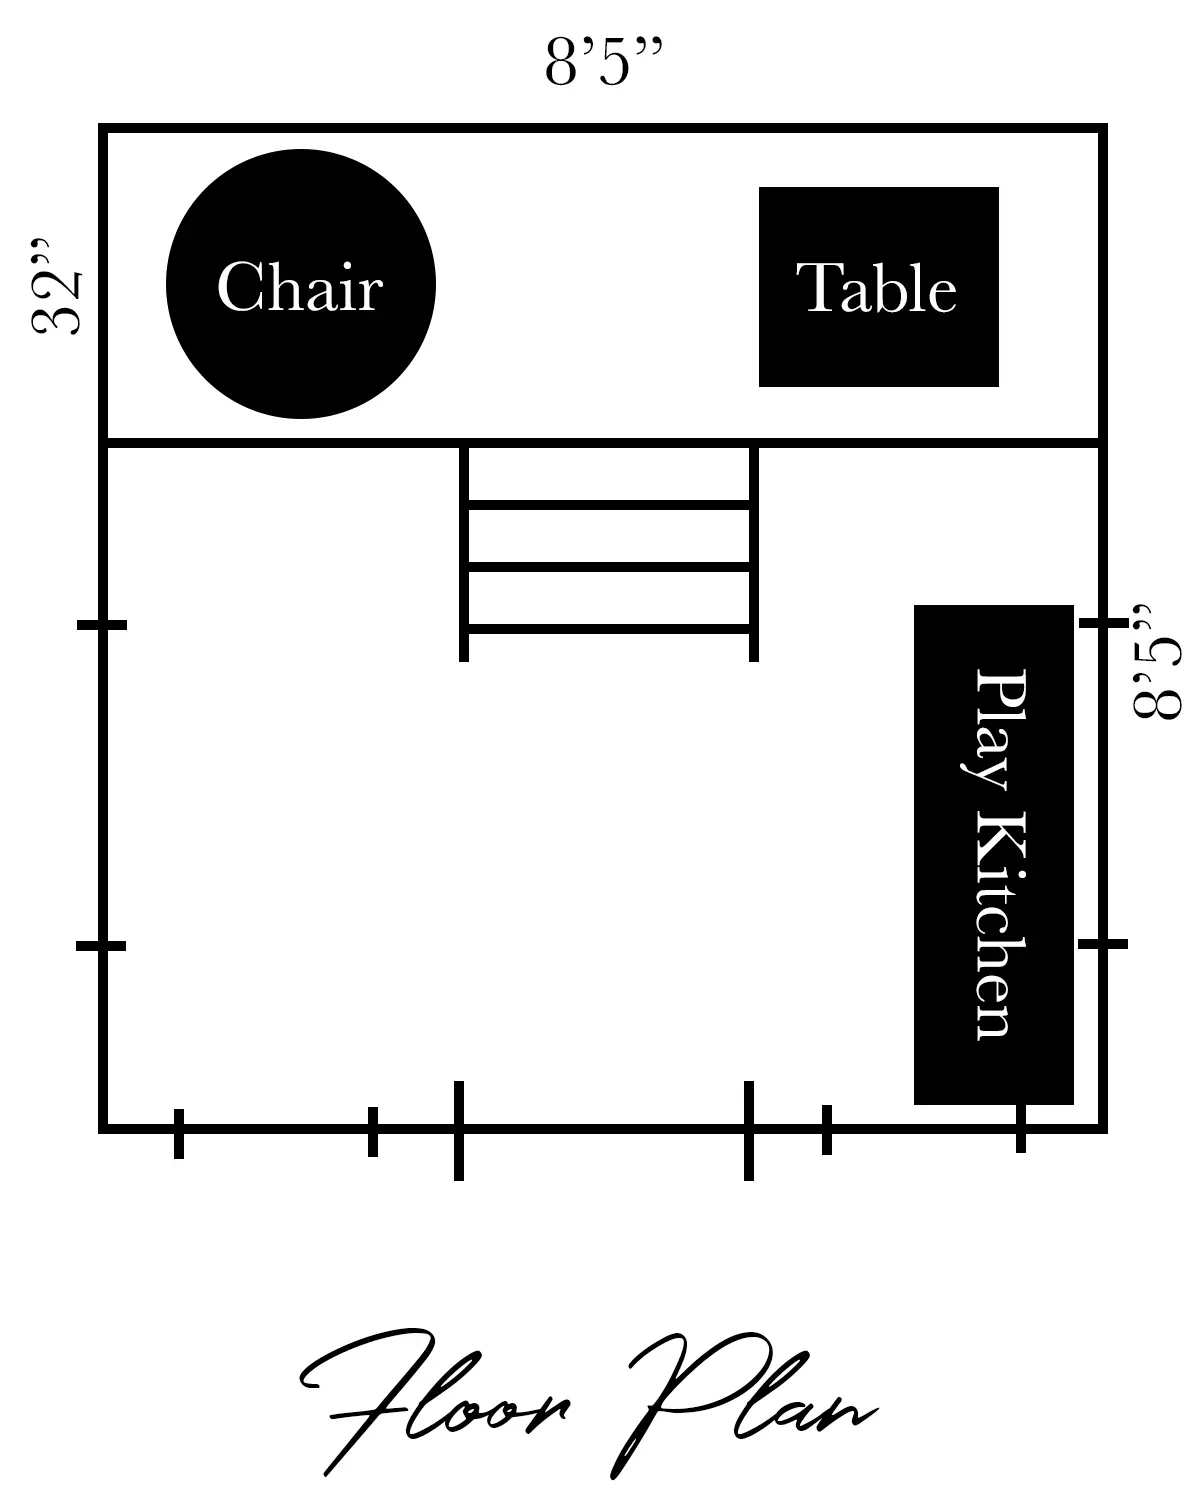
Taking measurements of each item we wanted to put in the space and sketching up the floor plan to scale was super helpful in determining structural elements, like door and window placement.
Rowan has a play kitchen that we intend to move to the shed playhouse. She also has my childhood table and chairs that can move up there to create the “little house” she was looking for. The kids don’t play with either one much in the house now so maybe those items will become more special in the play space.
The hanging chair is a new item we’re looking to add. The loft is a great place to hang a chair from. I’m leaning toward ordering this macrame hanging chair for kids from Amazon.
The biggest addition is adding a loft, inspired by this finished playhouse on the Dear Lillie Studio blog, which will sit above the hanging chair and table.
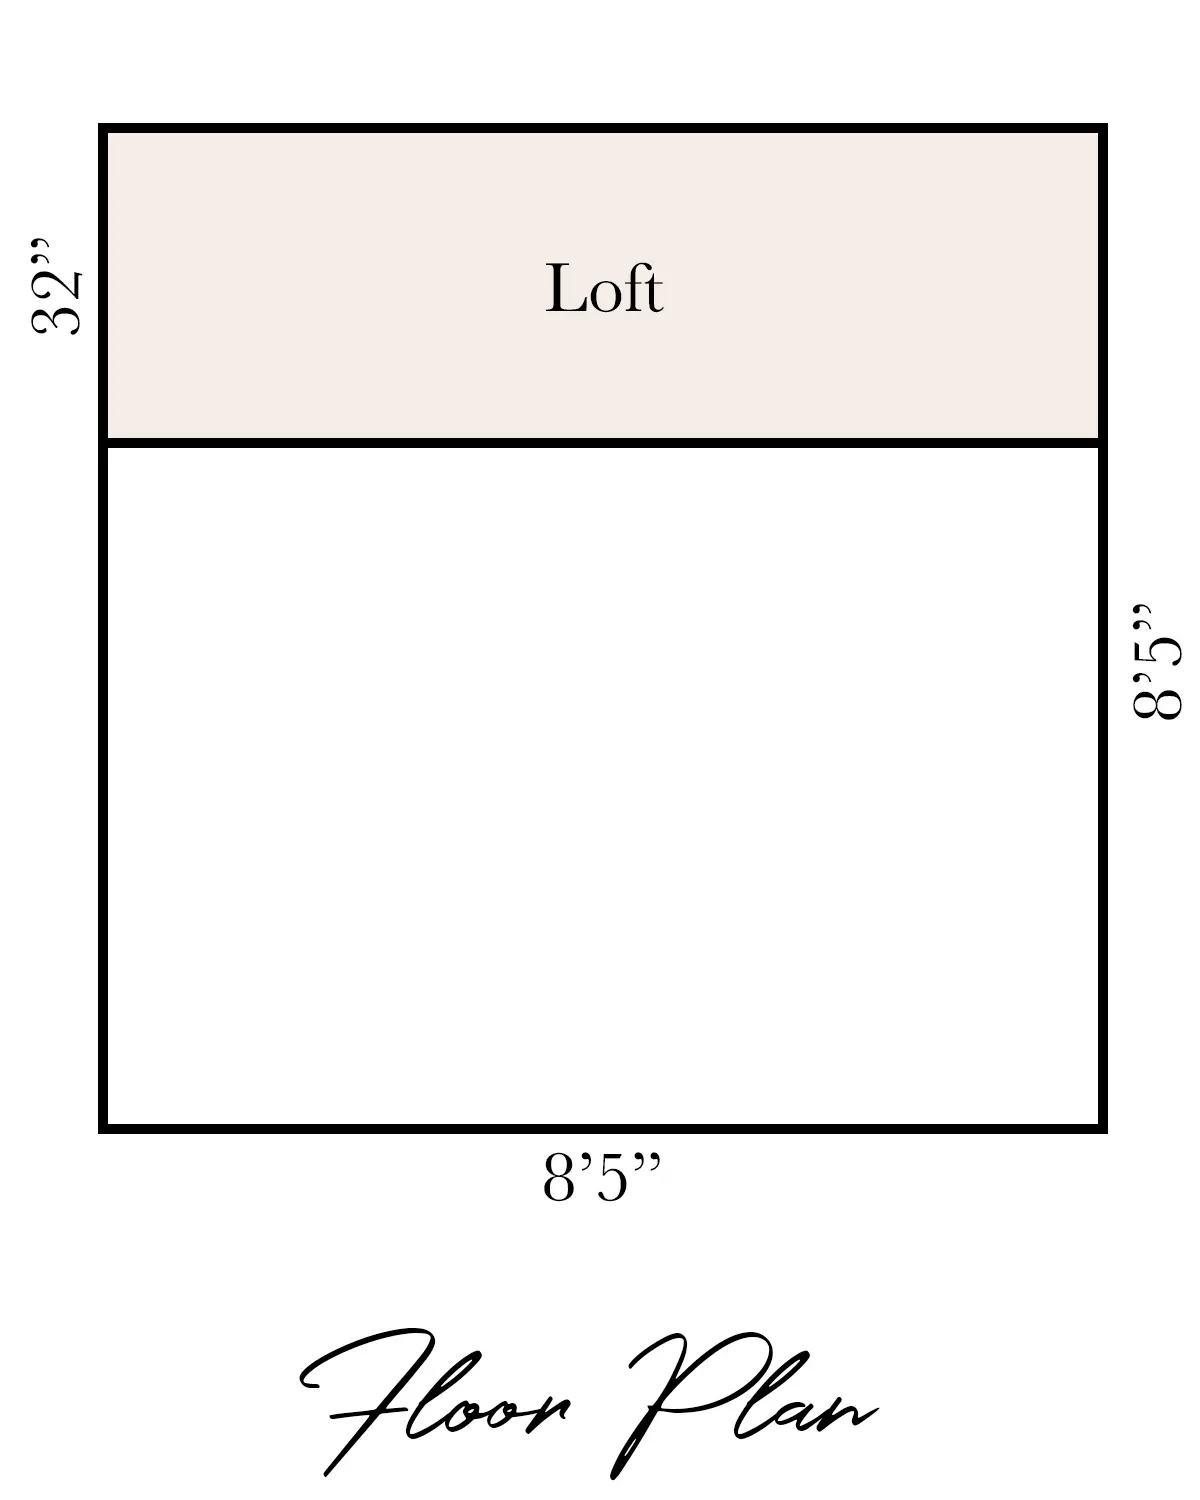
Knowing the placement of these items also helped determine the front door and window placement. With the loft, we wanted the ladder in the middle since that’s the spot with the most headroom. I also liked the idea of lining up the door opening with the ladder. This helped determine the size and placement of the front windows.
Playhouse Elevation Sketches
I really wanted to nail down the right playhouse plan before we got too far in renovating the old garden shed. To do this, I created some shed plan elevation sketches in Photoshop and scaled them to help determine the size and placement of structural elements.
Front Wall Sketch
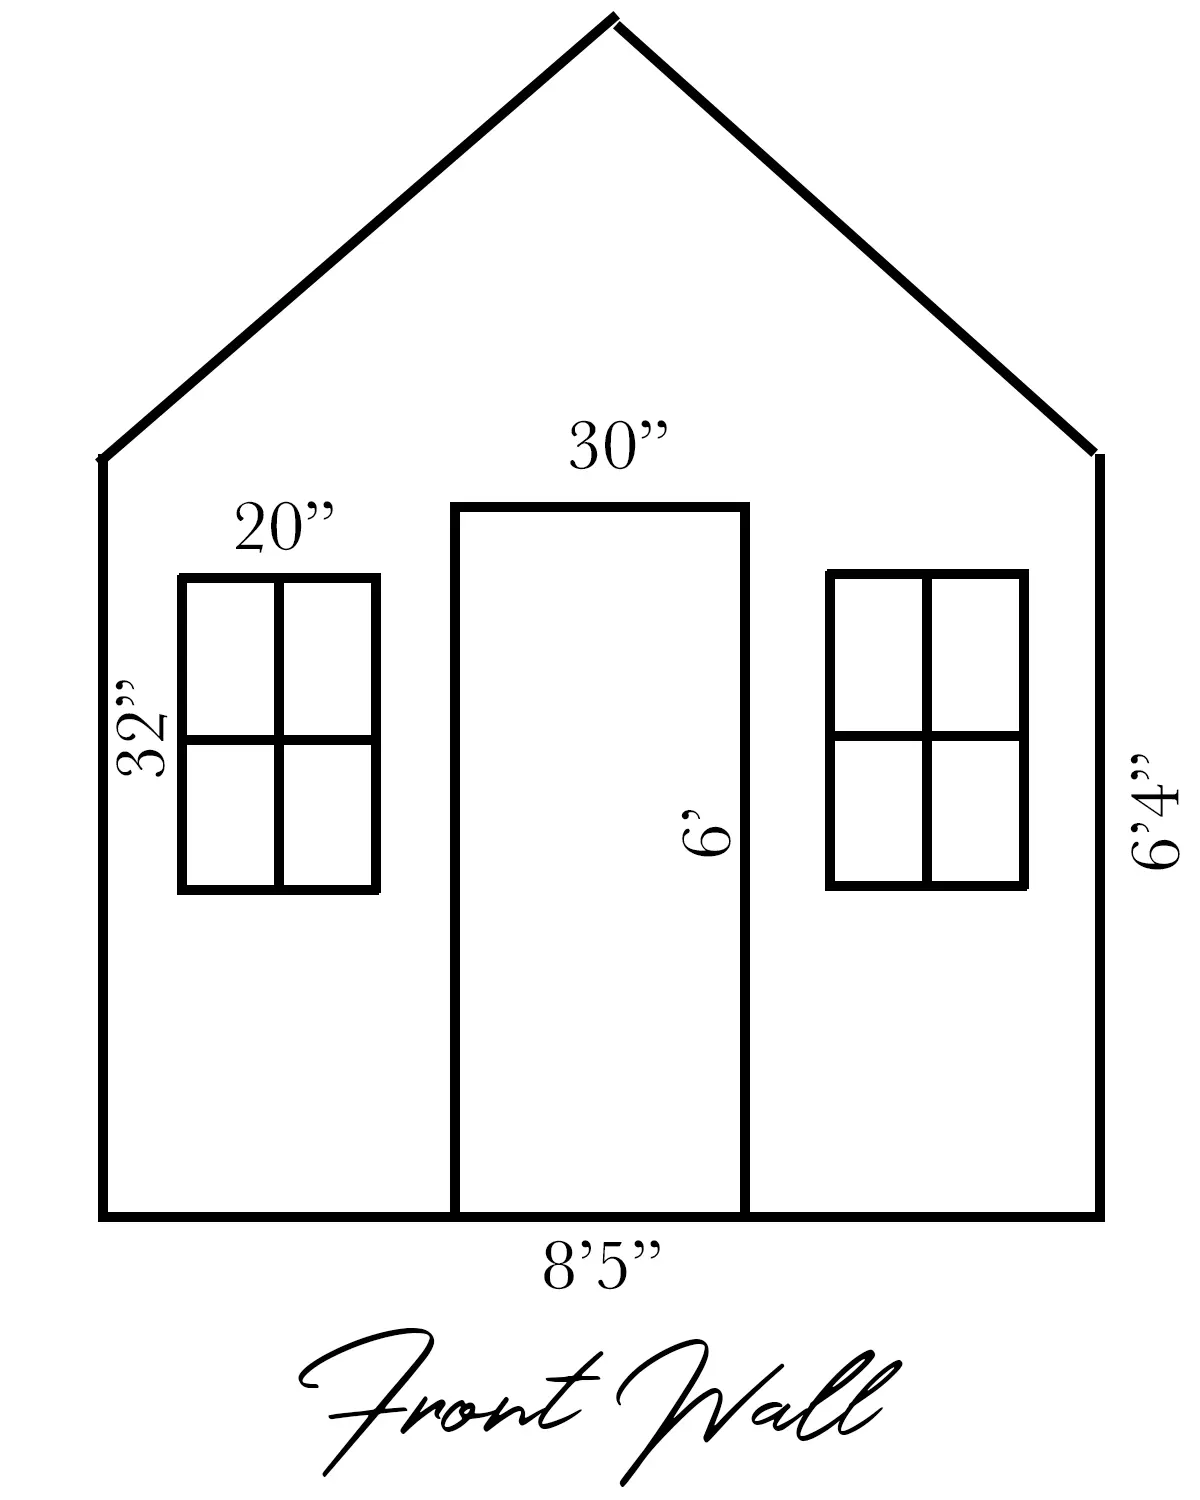
Currently, the door opening to the shed is on the back wall of these sketches. We decided to move the door so it faces the garden and is right next to the playground.
I have big hopes that this playhouse will be so exceptionally awesome that our children will play away on their own, requiring minimal parent involvement while I toil away in the garden on those summer fun days. Ahhhh…isn’t that a beautiful image?! I hear you parents, laughing at me over there in the back.
I thought if the door (perhaps a Dutch door?!) was garden adjacent it would be easier to keep track of the girls while they play and I garden. Maybe I can squeeze in four minutes of weeding before Bea chases after a chicken.
We’re also thinking about putting a front porch (like this simple deck) on the side along with a garden for the kids and some window boxes for flowers (love these flower boxes). Again, we’re going after Rowan’s “little house” idea.
Back Wall Sketch
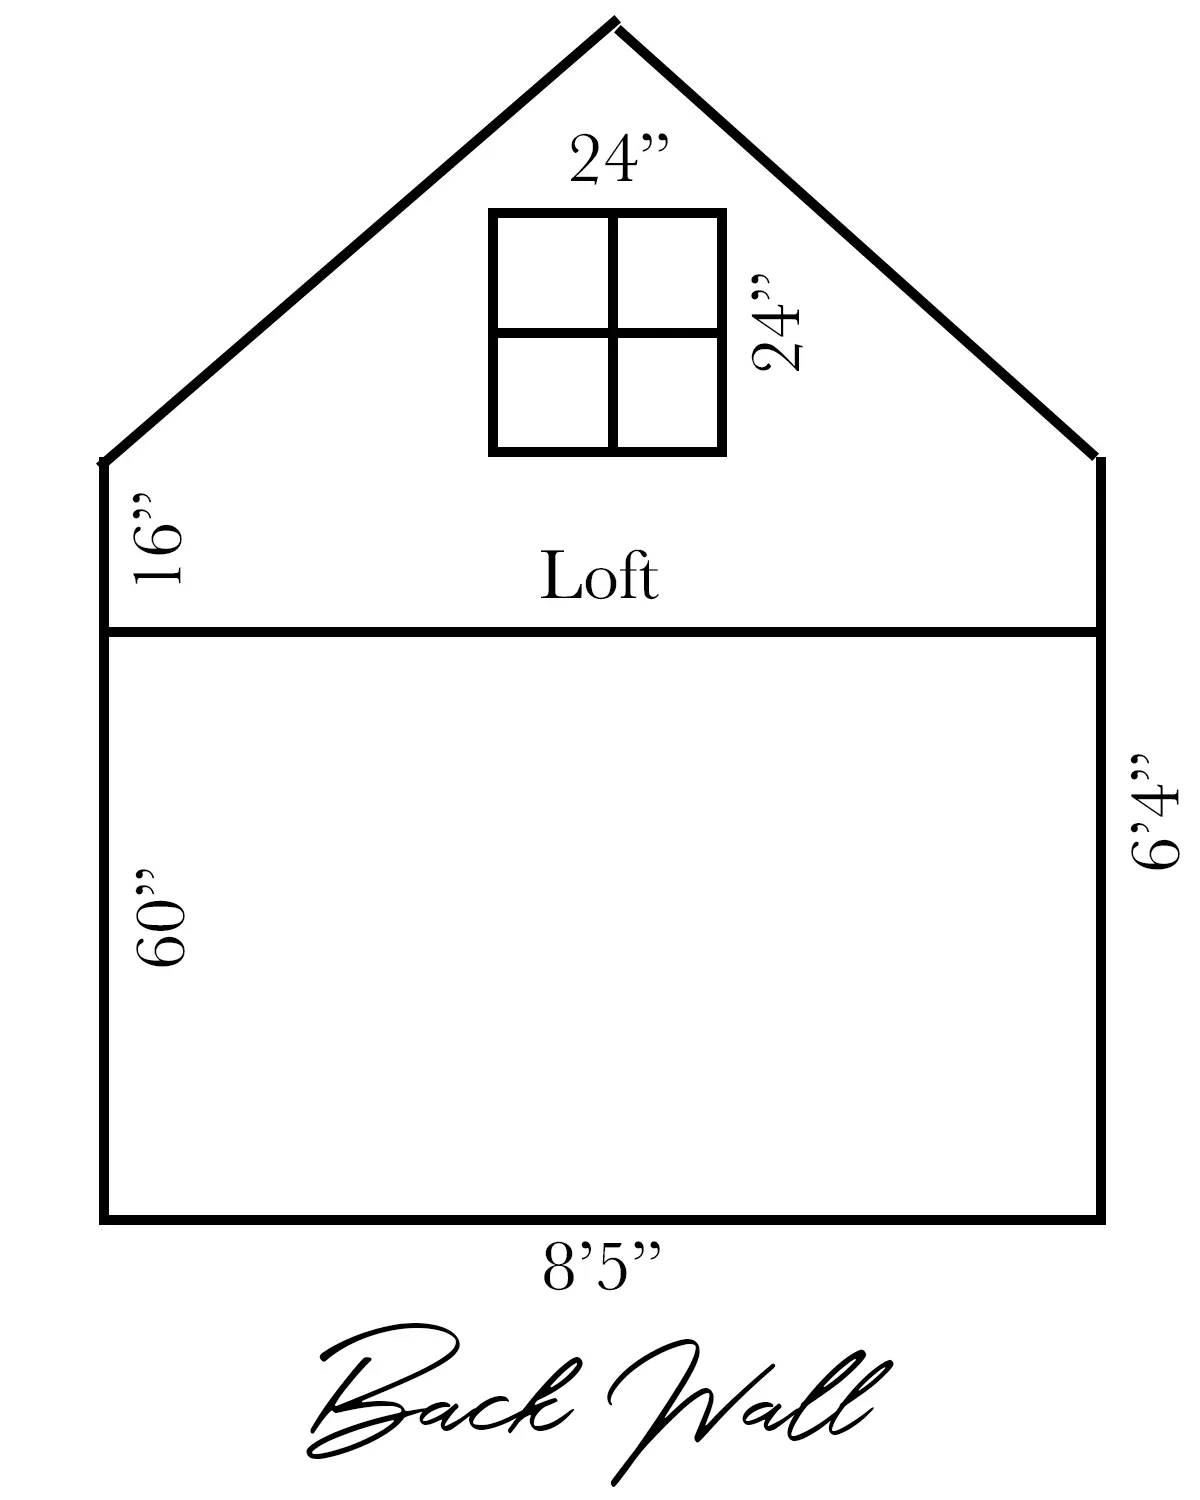
On the back wall, the wall where the door currently is will be where the loft area will go. We’re making it about 32″ deep and 60″ (5′) tall. We like that it’s not too high and that we can see the kids in the loft without having to climb up.
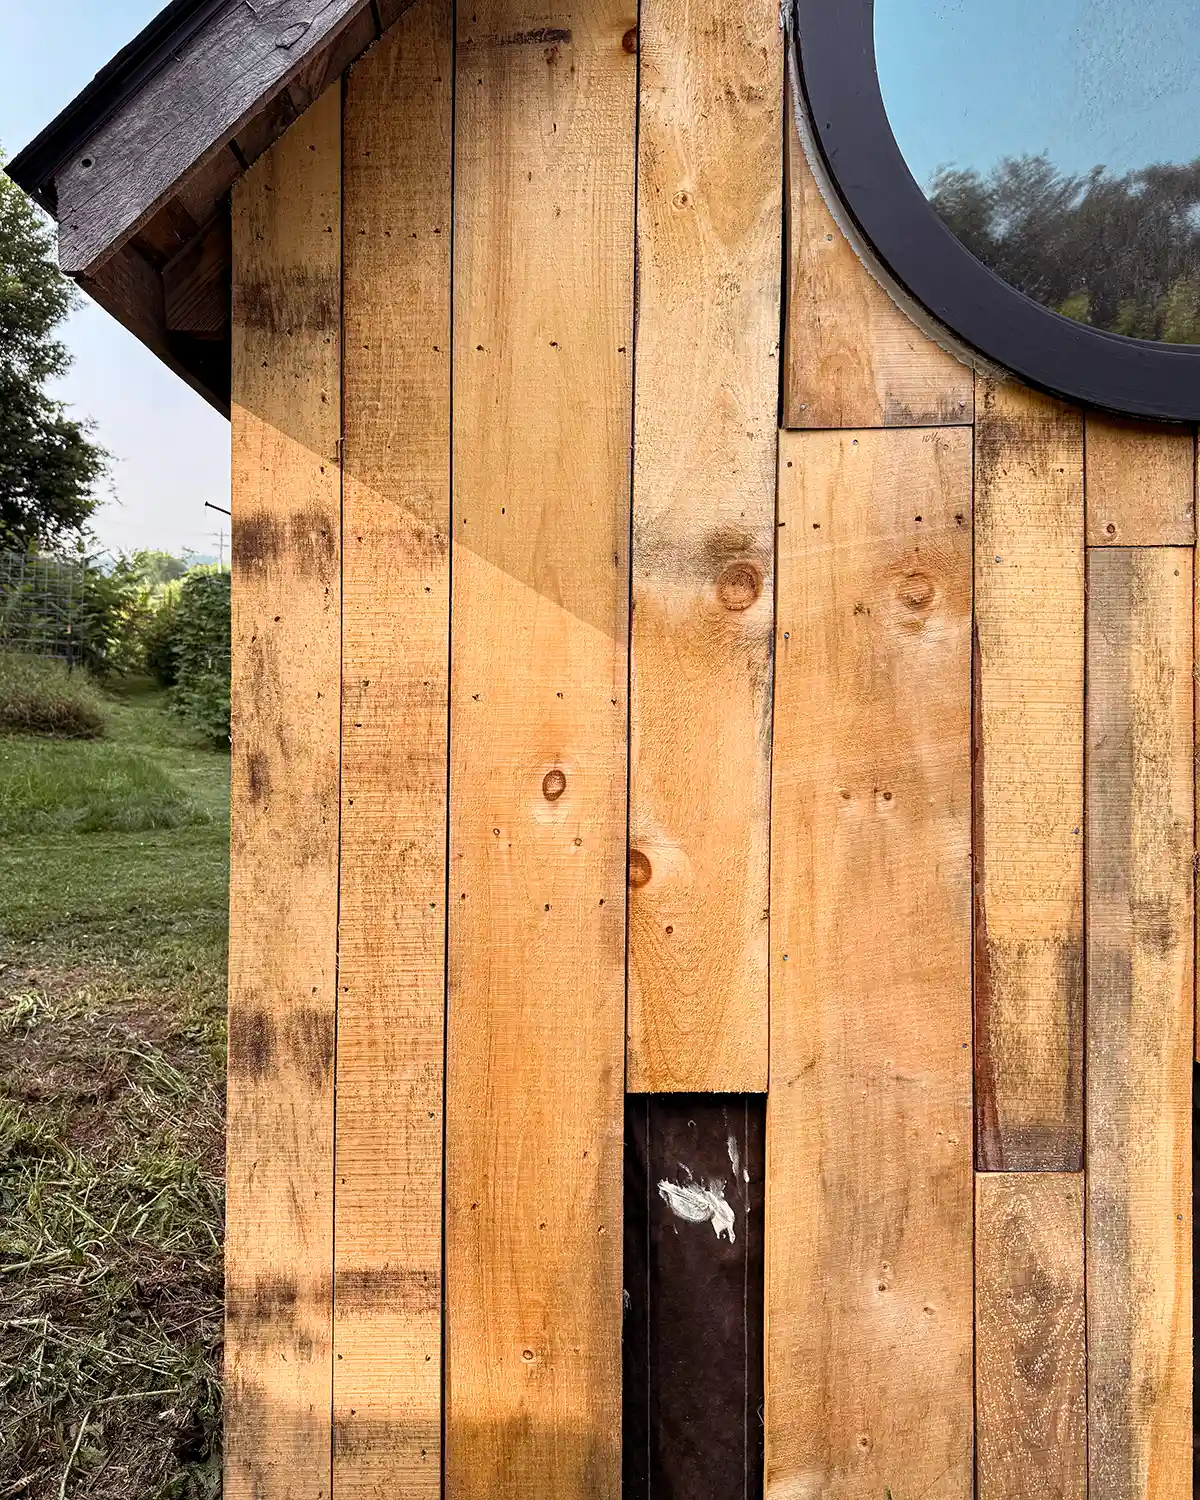
We did put a window in the loft. Colby, who sells doors and windows, was able to source a free, round window which we want to install here. Doesn’t that sound magical?!
Height-wise in the loft, it is a little short on the ends at only 16″. The total height at the peak is 10′, floor to ceiling. So there will be roughly 5′ of height in the middle of the loft.
Left Wall Sketch
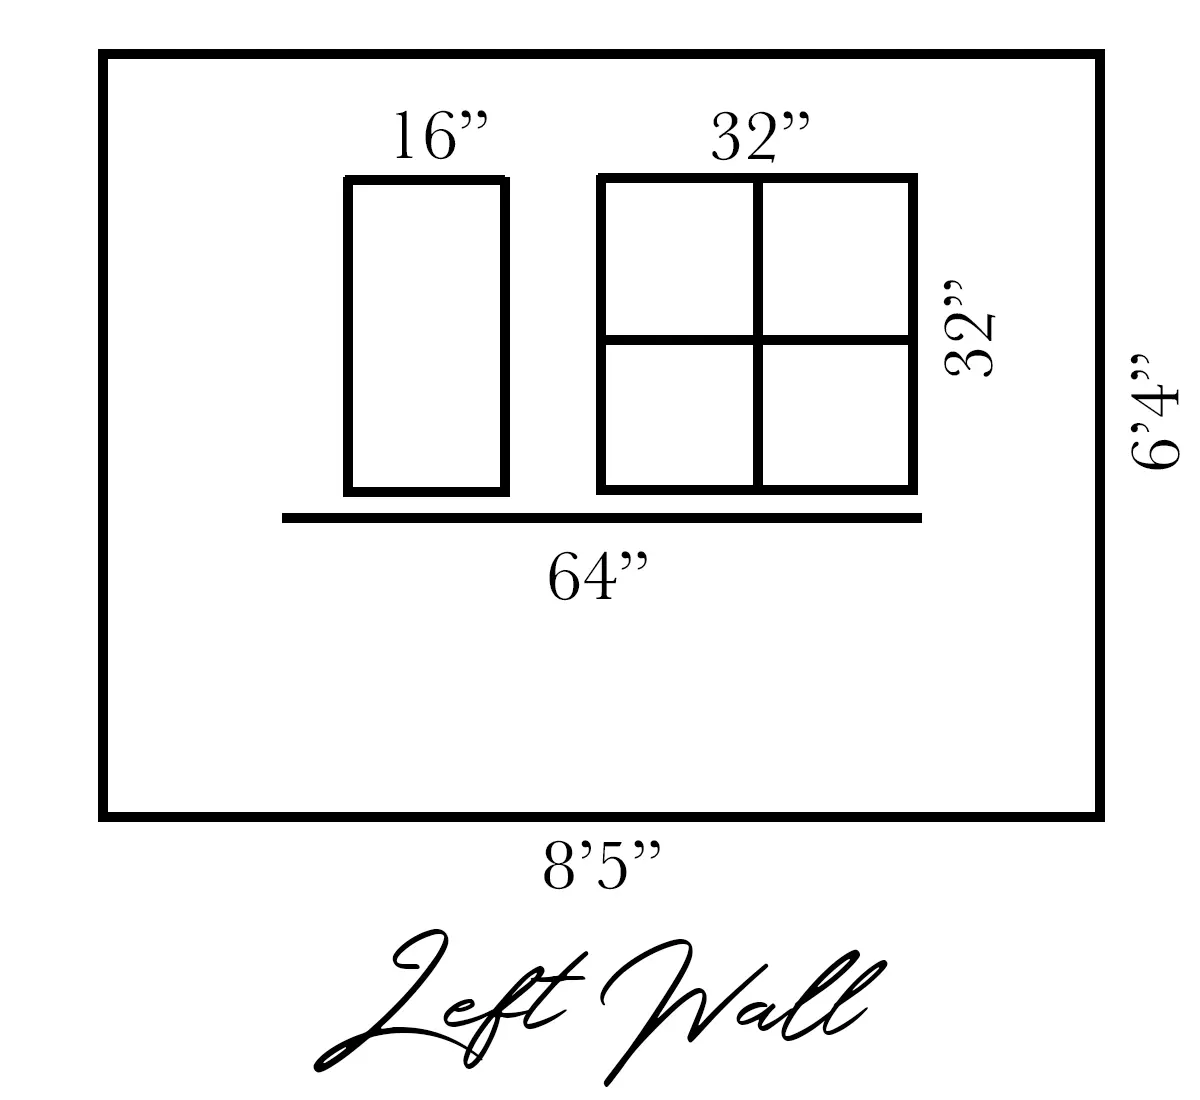
The left wall is the wall that faces the playground. On this wall, we’re building an outswing window above a play shelf. Here’s the Pinterest inspiration for the windows.
I hated that we couldn’t center the window on this wall because it didn’t quite fit with the loft. So to balance out the window, we’re building a big shelf underneath it. Think ice cream serving window. Then balance it out with either a chalkboard or a sign on the outside.
Per the windows, we do intend to build them ourselves. We still haven’t decided if we’re making glass windows or plexiglass windows. I lean towards glass because it’s authentic but we’ve also had a baseball through-the-window situation in our home so maybe plexi glass it is!
Right Wall Sketch
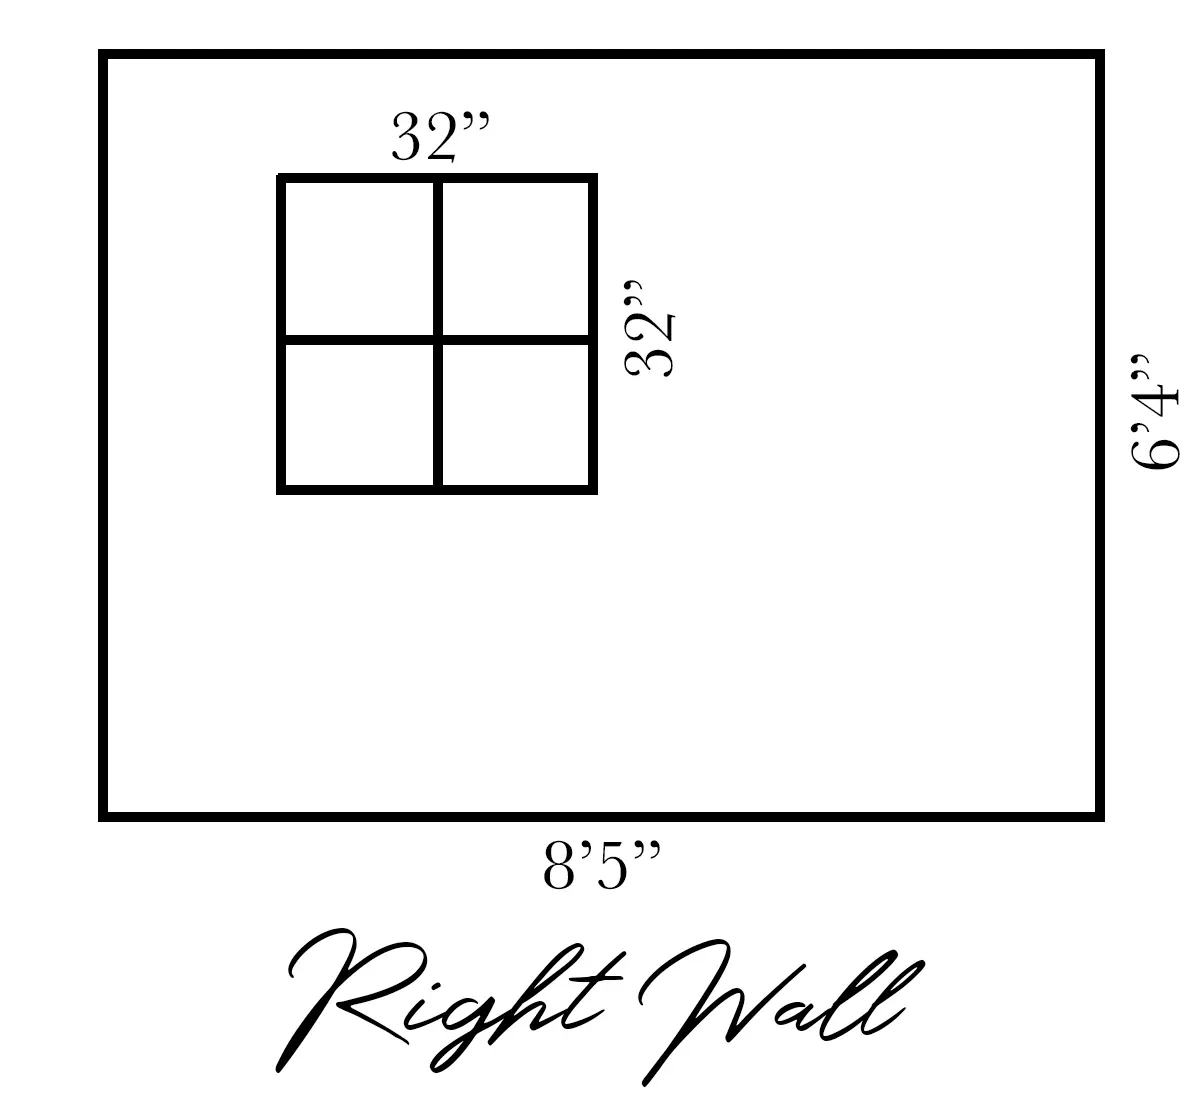
The right wall is the wall where our compost pile has lived. The plan on this wall is to add a simple outswing window. We may put a deck, but more likely a patio and garden. Both of the girls love gardening with me and have been heavily vested in fairy gardens last summer. It would be so sweet to make them their own flower garden space here.
Project Next Steps
Now that we have a plan and a new home for the compost, you’ll find us installing the floor frame, building floor joists, creating a loft, and going through the other step-by-step instructions.
Rowan seems to think she’ll be playing in here by Thursday (four days from now). Oh, Rowan! She’s so anxious to have a tiny house to call her own! I’m also anxious to finish the project as I’m anticipating both kids having so much fun in this space.
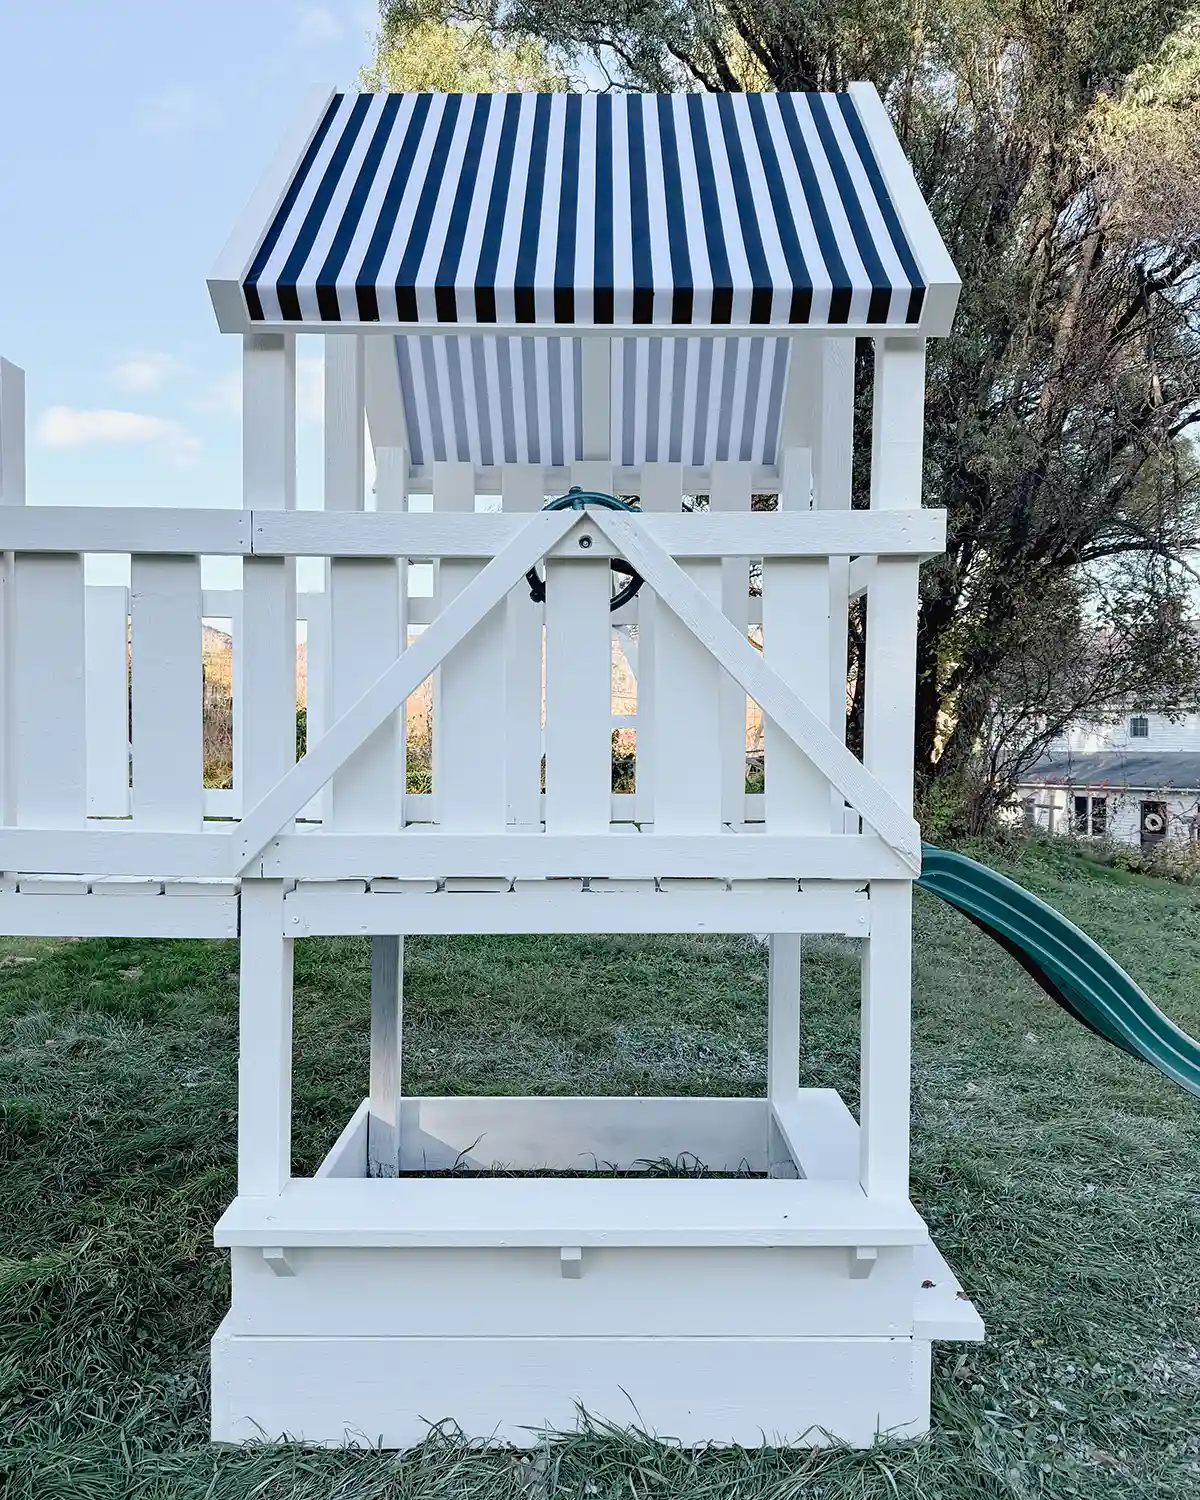
We’ve made some progress on this project. It currently looks like this:
The roof is going on and the goal is to get it finished by the end of the weekend.
Stay tuned as I’ll be sharing all of the progress on how we’re converting a shed into a playhouse. I’ll be breaking down the project into bite-sized components as we go. Just writing out this post was a little overwhelming. Baby steps.
Pssst….Check out the progress we made in the first playhouse update post! Note the $8,000 round window we salvaged from a dumpster, which is now in the playhouse loft! LOVE it!